

TL;DR: Learn how to export HTML tables to Excel in C# using Syncfusion Excel Library (XlsIO) with simple steps, preserving table formatting and supporting features like formulas, charts, and pivot tables.
Many web pages and applications present data in the form of HTML tables. Often, users need a way to export these HTML tables to Excel for further analysis, reporting, or sharing. Manual copying is tedious and error-prone, especially for large or multiple tables. Automated export not only accelerates the process but also preserves table formatting, leading to professional-looking Excel files. Syncfusion Excel Library (XlsIO) eliminates the need to copy table data manually and provides a one-click export option that instantly converts HTML tables to Excel workbooks while retaining the styles and structure.
The Syncfusion® Excel Library, also known as Essential XlsIO, is a robust tool that facilitates the smooth creation, reading, and editing of Excel documents using C#. It supports the creation of Excel documents from scratch, modification of existing Excel documents, import and export of data, Excel formulas, conditional formats, data validations, charts, sparklines, tables, pivot tables, pivot charts, template markers, and much more.
Let’s see how to export HTML tables from a webpage to Excel worksheets in C# using XlsIO.
Steps to export HTML table to Excel using C#
Step 1: Create an ASP.NET Core project.
Step 2: Install Syncfusion.XlsIO.Net.Core NuGet package.
Step 3: Add a view file and name it ExportHtmlTables.cshtml. And then add the following code to create a simple web page.
@{Html.BeginForm("ImportHtmlTable", "ImportHtmlTable", FormMethod.Post);
{
<div class="Common">
<div class="tablediv">
<div class="rowdiv">
<p>
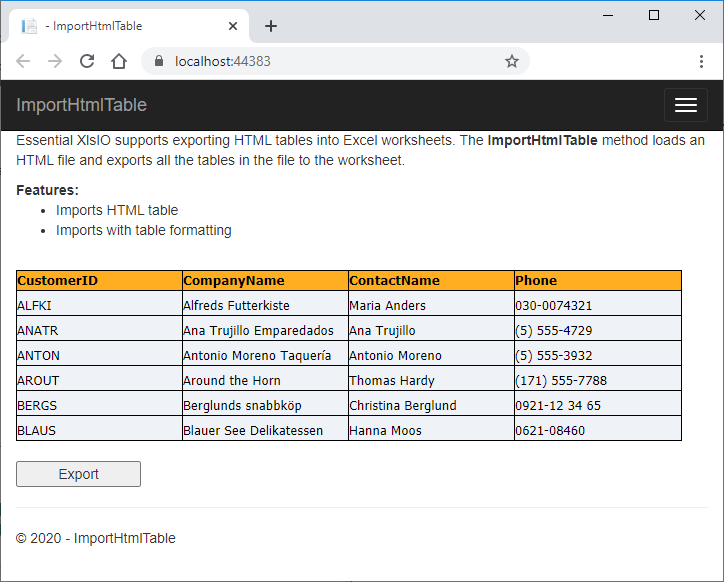
Essential XlsIO supports exporting HTML tables into Excel worksheets. The <b>ImportHtmlTable</b> method loads an HTML file and exports all the tables in the file to the worksheet.
</p>
<b>Features:</b>
<br />
<ul>
<li>Imports HTML table</li>
<li>Imports with table formatting </li>
</ul>
<br />
<div id="cssStyle">
<style type="text/css">
th {
color:rgb(0,0,0);
font-family:Tahoma, sans-serif;
font-size:10pt;
white-space:nowrap;
background-color:rgb(255,174,33);
border-top:solid;
border-top-width: thin;
border-bottom:solid;
border-bottom-width:thin;
border-left:solid;
border-left-width:thin;
border-right:solid;
border-right-width:thin;
border-top-color:rgb(0,0,0);
border-bottom-color:rgb(0,0,0);
border-left-color:rgb(0,0,0);
border-right-color:rgb(0,0,0);
font-weight:bold;
vertical-align:bottom;
}
td {
color:rgb(0,0,0);
font-family:Tahoma, sans-serif;
font-size:10pt;
white-space:nowrap;
background-color:rgb(239,243,247);
border-left:solid;
border-left-width:thin;
border-right:solid;
border-right-width:thin;
border-top-color:rgb(0,0,0);
border-bottom-color:rgb(0,0,0);
border-bottom:solid;
border-bottom-width:thin;
border-left-color:rgb(0,0,0);
border-right-color:rgb(0,0,0);
vertical-align:bottom;
}
</style>
</div>
<div id="Grid">
<table cellspacing="0" width="500" style="table-layout:fixed;border-collapse:collapse;width:500pt">
<tr>
<th class="X64" style="text-align:left;">
<span>CustomerID</span>
</th>
<th class="X64" style="text-align:left;">
<span>CompanyName</span>
</th>
<th class="X64" style="text-align:left;">
<span>ContactName</span>
</th>
<th class="X64" style="text-align:left;">
<span>Phone</span>
</th>
</tr>
<tr height="25">
<td class="X65" style="text-align:left;">
<span>ALFKI</span>
</td>
<td class="X65" style="text-align:left;">
<span>Alfreds Futterkiste</span>
</td>
<td class="X65" style="text-align:left;">
<span>Maria Anders</span>
</td>
<td class="X65" style="text-align:left;">
<span>030-0074321</span>
</td>
</tr>
<tr height="25">
<td class="X65" style="text-align:left;">
<span>ANATR</span>
</td>
<td class="X65" style="text-align:left;">
<span>Ana Trujillo Emparedados</span>
</td>
<td class="X65" style="text-align:left;">
<span>Ana Trujillo</span>
</td>
<td class="X65" style="text-align:left;">
<span>(5) 555-4729</span>
</td>
</tr>
<tr height="25">
<td class="X65" style="text-align:left;">
<span>ANTON</span>
</td>
<td class="X65" style="text-align:left;">
<span>Antonio Moreno Taquería</span>
</td>
<td class="X65" style="text-align:left;">
<span>Antonio Moreno</span>
</td>
<td class="X65" style="text-align:left;">
<span>(5) 555-3932</span>
</td>
</tr>
<tr height="25">
<td class="X65" style="text-align:left;">
<span>AROUT</span>
</td>
<td class="X65" style="text-align:left;">
<span>Around the Horn</span>
</td>
<td class="X65" style="text-align:left;">
<span>Thomas Hardy</span>
</td>
<td class="X65" style="text-align:left;">
<span>(171) 555-7788</span>
</td>
</tr>
<tr height="25">
<td class="X65" style="text-align:left;">
<span>BERGS</span>
</td>
<td class="X65" style="text-align:left;">
<span>Berglunds snabbköp</span>
</td>
<td class="X65" style="text-align:left;">
<span>Christina Berglund</span>
</td>
<td class="X65" style="text-align:left;">
<span>0921-12 34 65</span>
</td>
</tr>
<tr height="25">
<td class="X65" style="text-align:left;">
<span>BLAUS</span>
</td>
<td class="X65" style="text-align:left;">
<span>Blauer See Delikatessen</span>
</td>
<td class="X65" style="text-align:left;">
<span>Hanna Moos</span>
</td>
<td class="X65" style="text-align:left;">
<span>0621-08460</span>
</td>
</tr>
</table>
</div>
</div>
<br />
<input name="tableHTML" id="tbl" hidden="hidden"/>
<div class="rowdiv">
<div class="celldiv">
<input id="ExportTbl" class="buttonStyle" type="submit" name="button" value="Export" onclick="exportHTML()" style="width:125px;" />
</div>
</div>
</div>
</div>
Html.EndForm();
}
}
<script type="text/javascript">
function exportHTML() {
let value = "<html>" + document.getElementById("cssStyle").innerHTML + "<body>" + document.getElementById("Grid").innerHTML + "</body></html>";
value = value.replace("<tbody>", "");
value = value.replace("</tbody>", "");
document.getElementById("tbl").setAttribute("value", value);
}
</script>This code will create the webpage shown in the following screenshot.
Step 4: Create an Excel document in the controller class ExportHtmlTableController.cs.
Step 5: The HTML string parsed into the hidden field is now passed to the click event. Then, convert the HTML string into a stream and load it using the ImportHtmlTable method, then export it to an Excel worksheet. The start row and column must be specified while exporting them. After exporting to a worksheet, auto fit the rows and columns and save the output Excel file.
The following code example shows how to export a webpage with an HTML table to an Excel worksheet in C# using XlsIO.
public ActionResult ImportHtmlTable(string button, string tableHTML)
{
    if (button == null)
        return View();

    MemoryStream ms = new MemoryStream();

    // The instantiation process consists of two steps.
    // Step 1: Instantiate the spreadsheet creation engine.
    using (ExcelEngine excelEngine = new ExcelEngine())
    {
        // Step 2 : Instantiate the Excel application object.
        IApplication application = excelEngine.Excel;
        application.DefaultVersion = ExcelVersion.ExcelVersion.Xlsx;

        // A workbook is created.
        IWorkbook workbook = application.Workbooks.Create(1);

        // The first worksheet object in the worksheets collection is accessed.
        IWorksheet worksheet = workbook.Worksheets[0];

        byte[] byteArray = Encoding.UTF8.GetBytes(tableHTML);

        MemoryStream file = new MemoryStream(byteArray);

        // Imports HTML table into the worksheet from first row and first column.
        worksheet.ImportHtmlTable(file, 1, 1);

        worksheet.UsedRange.AutofitColumns();
        worksheet.UsedRange.AutofitRows();

        workbook.SaveAs(ms);
        ms.Position = 0;
    }

    return File(ms, "Application/vnd.openxmlformats-officedocument.spreadsheetml.sheet", "Export-HTML-Table.xlsx");
}
Export formulas from HTML table
You can also use this ImportHtmlTable method to load an HTML file containing Excel formulas. For that, you need to specify the HtmlImportOptions as DetectFormulas. It will automatically detect the formulas from the HTML document and set them as formulas in the worksheet cells. By default, the formulas from the HTML table are preserved as text in the Excel document.
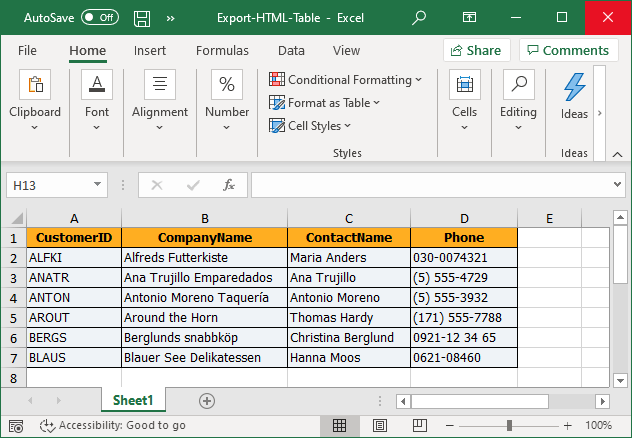
    //Exports HTML tables to the worksheet from first row and first column with formulas.
    worksheet.ImportHtmlTable(file, 1, 1, HtmlImportOptions.DetectFormulas);
The following screenshot is the output of the Excel file exported from the webpage with the HTML table.
GitHub samples
You can download the example of exporting HTML tables to Excel worksheets in C# on this GitHub demo. Also, please check out the online demo of exporting HTML table to Excel.
Wrapping up
As you can see, Syncfusion® Excel (XlsIO) Library provides support for exporting HTML tables to Excel to use the data from web pages. Take a moment to peruse the documentation, where you’ll find other options and features, all with accompanying code samples. Using the library, you can also export or write Excel data to PDFs, images, data tables, CSV, TSV, HTML, collections of objects, ODS, JSON. For more insights, please refer to our online demos.
If you are new to our .NET Excel library, it is highly recommended that you follow our Getting Started guide.
Are you already a Syncfusion® user? You can download the product setup here. If you’re not yet a Syncfusion® user, you can download a free, 30-day trial here.
If you have any questions or require clarification about these features, please let us know in the comments below. You can also contact us through our support forums, support portal, or feedback portal. We are happy to assist you!
Related Blogs
- How to Export Data from SQL Server to Excel Table in C#
- 6 Easy Ways to Export Data to Excel in C#
- How to Export Data from SQL Server to Excel Table in C#
- Export Data from Collection to Excel and Group It in C#
- Export Data to a Predefined Excel Template in C#
- Seamlessly Import and Export CSV Data in Excel Using C#
 No spam, just valuable updates.
Comments (11)
where do we import File???
Hi Gagan,
Your query is not clear. Are you asking how to import an HTML file to an Excel worksheet? If that is your query then it is not supported. Only the tables in an HTML file can be imported into an Excel worksheet.
If you can explain your query clearly, we can assist you.
Regards,
Johnson
hello , i want some selected columns export from table ….
Hi Kranti,
There is no option to export specific columns from HTML table to Excel. But you can achieve your requirement by deleting the unwanted columns after exporting to Excel worksheet.
You can refer the following links to delete columns from Excel worksheet using XlsIO.
1. https://www.syncfusion.com/kb/1918/delete-excel-rows-and-columns-in-c-vb-net
2. https://www.syncfusion.com/kb/1918/delete-excel-rows-and-columns-in-c-vb-net
Regards,
Mohan.
Hi Kranti,
There is another option is there. u can directly use MVC action methods and directly get data from the database. u can add additional or remove unwanted columns. then export to .xlsx
using FileStreamResult action method in MVC
The Best way u can store data in the session. then when clicking the download excel button. That time u can restore data from the session object and export it to excel.
Best Regards,
Avinash
Hello Johnson and Avinash,
I am trying to export table in html to excel but when i generate i get empty excel. unable to convert html table to excel.
I am using asp.net mvc
C# code i am using in same as above.
I have used nuget package for installing dll.
I have registered license key.
I haven’t used essestial file format studio. hence didnt used unlock keys.
I have connected with ben spears to reach you out faster.
Expecting your prompt reply.
Hi Harsh,
We have fixed a similar issue in our 2022 Volume 2 release v20.2.0.36. We suggest you to update to the latest version and check whether the issue fixed at your end. Please update us whether if you are still facing any issue.
Regards,
Mohan.
Hi,
You have used style classes like these – <td class="X65"…. Is it possible to share some samples on what styles are set using these?
Thank you!
Hi Sunil,
There is a mistake in the code snippet. X64 and X65 refer to the CSS class style which is used in the HTML table. Instead of this, we have used the names with “th” and “tr”. It will be modified and republished.
Regards,
Mohan.
hi
is there any way of importing into excel an HTML table, with additional data carrying over to cells comments ? (you know, the ones with the small red triangle in the upper left corner)
thank you
Johnny
Hi Johnny
Currently, there are no options to import comments from the HTML table to Excel. But you can add comments to Excel cells after importing the table to the worksheet. Please refer to the below documentation to know how to add comments in Excel.
https://help.syncfusion.com/file-formats/xlsio/working-with-drawing-objects#comments
Regards,
Mohan.