
In development, maintaining the release and deployment workflow is one of the most critical areas of a project. Therefore, many teams like to create an automated deployment workflow to manage their releases and production. Maintaining an automated deployment workflow can be complex, but it will save the team time and effort.
Azure DevOps is one of the best platforms to create an automated CI/CD pipeline for an application, making this job easy. This article will discuss the steps to deploy a .NET Core application in Azure Kubernetes using the Azure DevOps Starter.
Prerequisites
What Are Containers and Container Orchestration?
To understand the functionality of Kubernetes, you must first understand the concepts of containers and container orchestration.
Containers are a form of the virtualized operating system. A container contains all essential executables, binary code, dependencies, and configuration files. A single container can execute anything from a microservice or software process to a considerably large application.
Containers seem to be very scalable since they can be produced as needed. But the complexity increases when you must maintain hundreds or thousands of containers, and it becomes impossible to manage all their lifecycles. This is the situation in which container orchestration comes to the rescue.
Containers’ maintenance, deployment, scaling, and networking can be automated using a container orchestration system. In addition, you can deploy the same application across multiple environments using container orchestration rather than having to redevelop or redesign it.
What Is Kubernetes?
Kubernetes, also known as K8s, is a well-known open-source container management (orchestration) technology for automating applications’ deployment, scaling, and administration.
The Kubernetes orchestration features allow the development of application services that span across many containers, the scheduling of containers in a cluster, the deployment of those containers, and control of the status of the containers over time.

What Is Azure Kubernetes Service?
Developed on top of the open-source Kubernetes technology, Azure Kubernetes Service (AKS) is a managed container orchestration service. You can use AKS to administer your hosted Kubernetes environment and easily launch, scale, and manage containerized apps.
Through on-demand resource provisioning, updating, and scaling, AKS simplifies Kubernetes deployment and operation. It enables you to execute your applications in the cloud while eliminating the complexity and operational burden of Kubernetes management.
In addition, your development and operations teams can collaborate on a single platform using AKS to build and deploy applications more efficiently.
How to Deploy a .NET Core Application in Azure Kubernetes
Step 1: Create an Azure DevOps starter project.
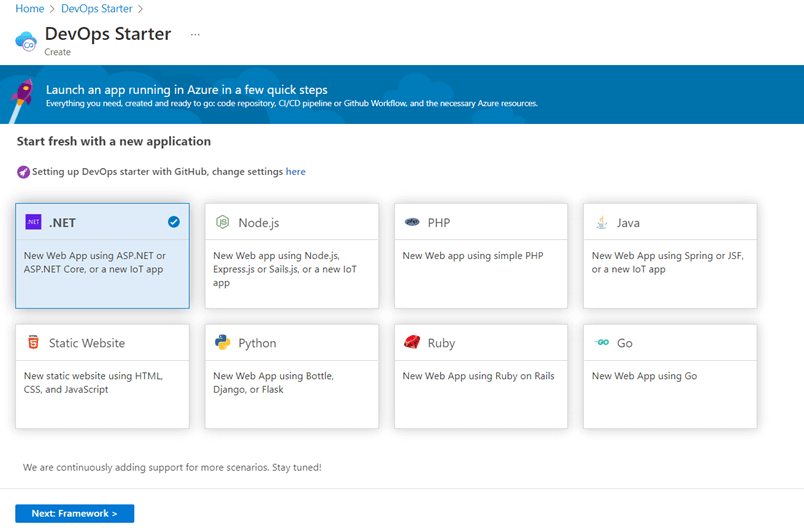
Sign in to your Azure portal, click the Create a resource option, and select DevOps Starter. Then, you’ll be navigated to where you can create the DevOps Starter project. You have to complete four main steps to create the project.
a. Choose the runtime.
Select the .NET runtime, as shown in the following figure, to run the ASP.NET Core application
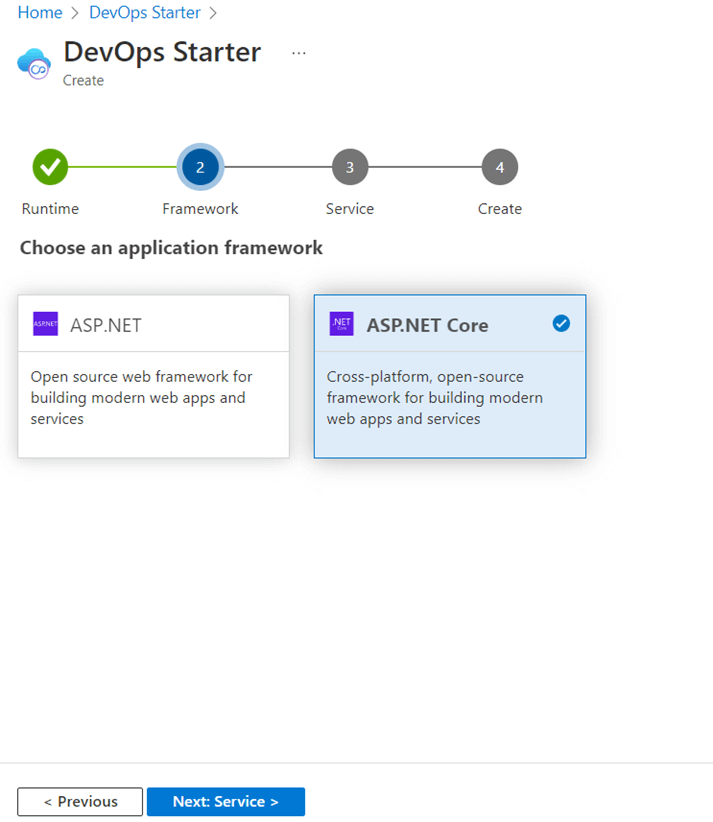
b. Choose the framework.
Select ASP.NET Core as the framework for the runtime, as shown in the following figure.
c. Choose the service.
Then, select Kubernetes as the Azure service to deploy this application.

d. Create the project with the necessary configurations.
Now, configure the Azure subscription and settings for the Kubernetes cluster. I will explain these configurations in the upcoming step.
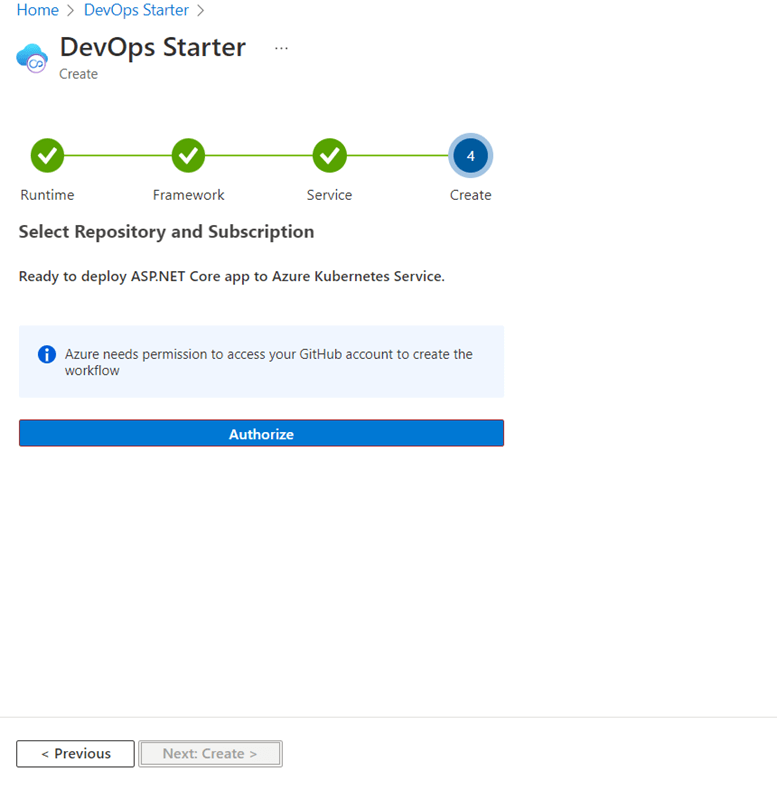
Step 2: Configure the subscription and Azure Kubernetes service.
We need to do a few configurations in the fourth part of creating the DevOps Starter project. We’ll use GitHub to create a repository for this project. As shown in the following figure, you need to authorize access to Azure for your GitHub personal account.
There are some other configurations to be done after authorizing the GitHub account. First, select the organization. Here, selects your GitHub account as a personal account. There is a field named Repository in the next figure: use it to add the name of the repository to be created in the GitHub account. This repository will be used to deploy the Azure Kubernetes service. Then, select the subscription for the DevOps Starter project. I will be using the Azure for Students subscription for this demonstration.
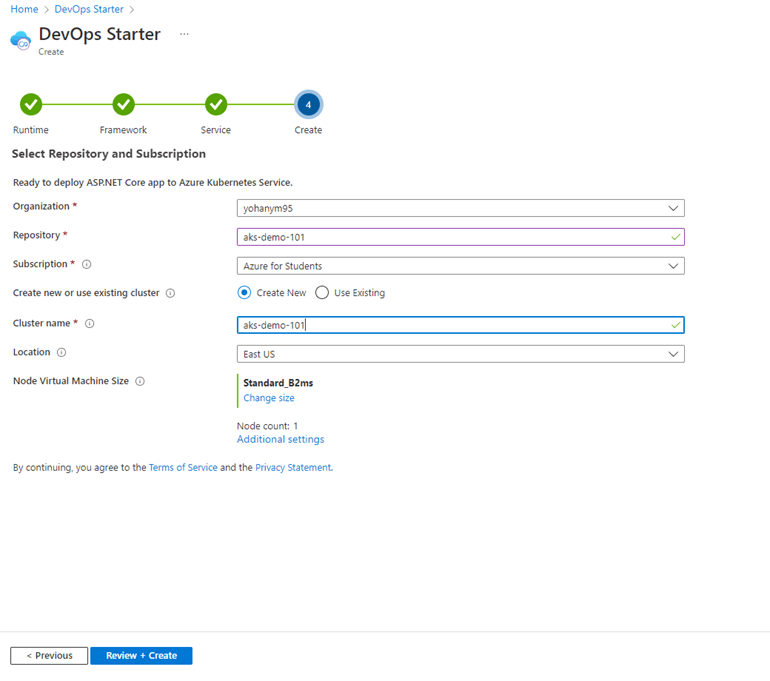
Then, create a new cluster or use one you have already created.
If you are going to create a new cluster for this project, first add a name for the cluster. Then, select the location in which to create this service. After, select Standard_B2ms, based on the B-series burstable VMs, as the virtual machine size. Use this VM to create the service for testing and demonstration purposes.
Add additional settings if you need them according to your requirements or subscription plan. For example, if you are using a student subscription, you can adjust the settings as shown in the following image.
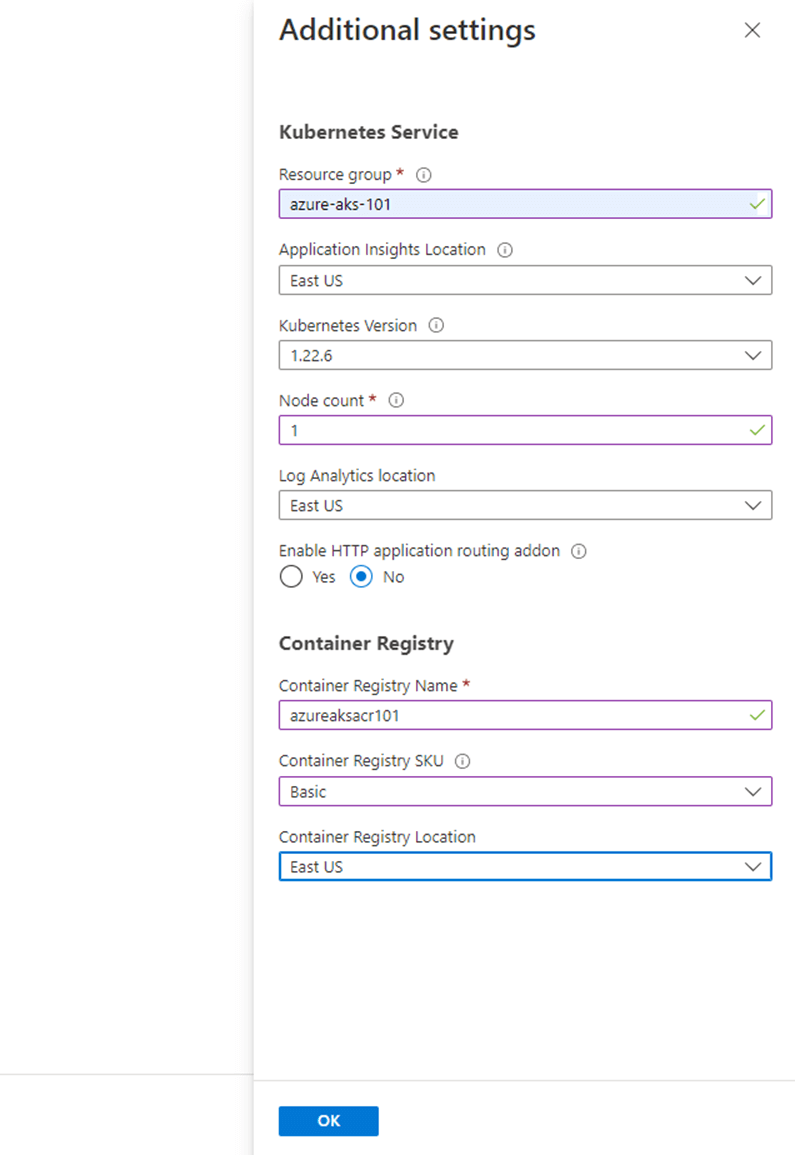
The student subscription has some limitations. You have to set the node count to 1 and choose the Basic service tier for the Container Registry SKU, as it is a cost-optimized tier suitable for learning and testing purposes.
Finally, click Review+Create to create the Azure DevOps Starter project, which will deploy the ASP.NET Core application in the Azure Kubernetes service. It will take a few minutes to create the project.
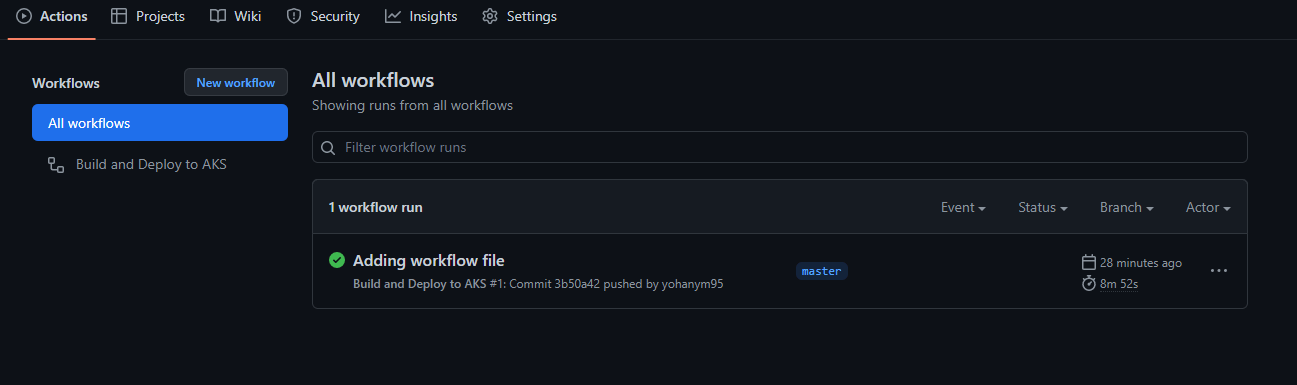
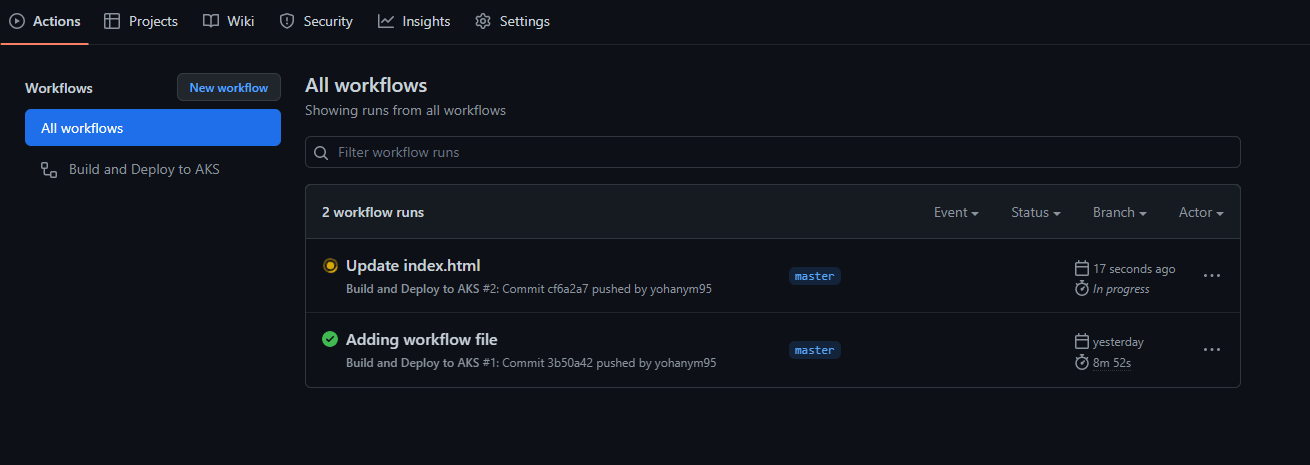
After a few minutes, check your GitHub repository to make sure a new repository was created with the name you provided. You can see the workflow that has been automatically created for the GitHub action. It will be used to automate the CI/CD pipeline. You can also customize it if needed.
 The Azure resources and the status of the GitHub workflow will also be visible in the Azure portal after deploying it to the Kubernetes service, as shown in the following image.
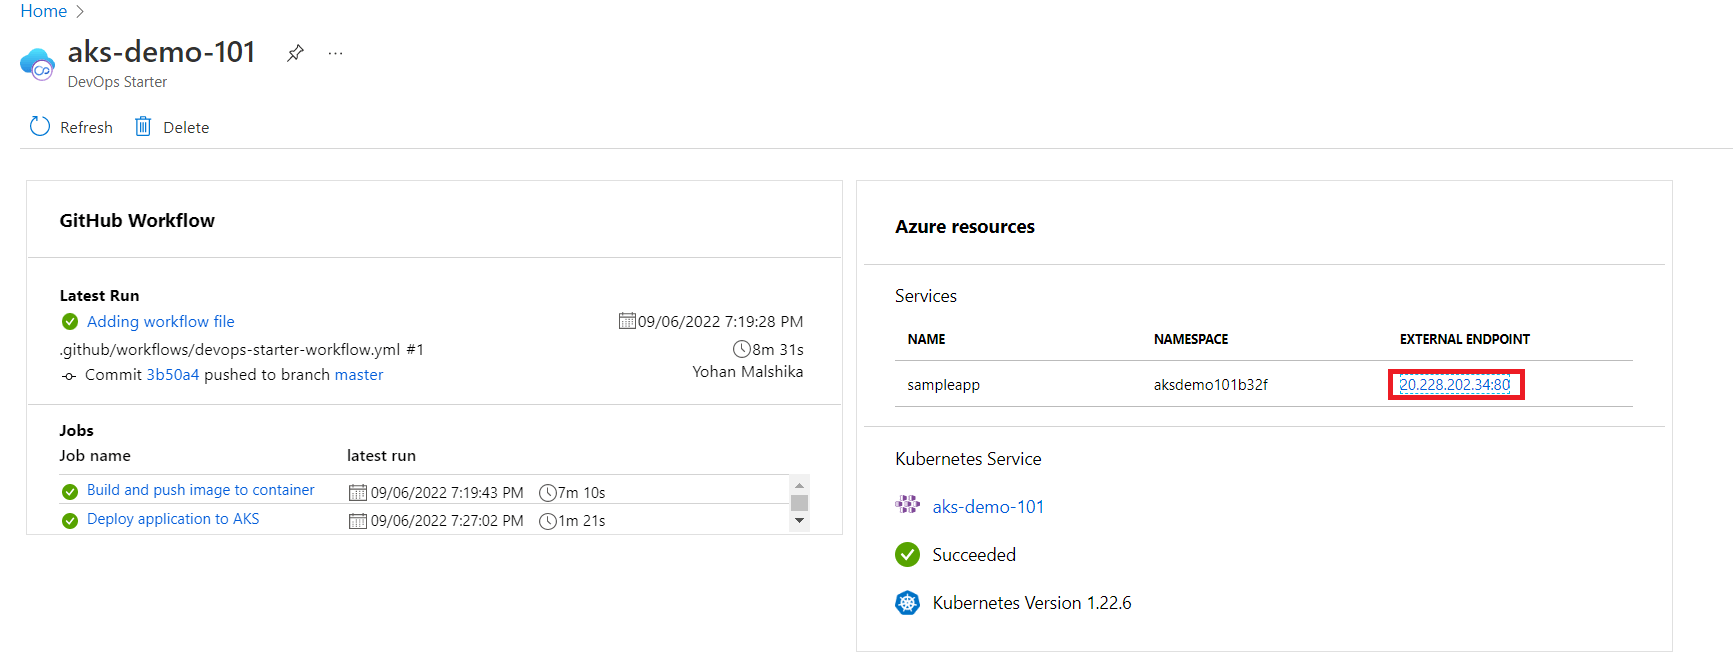
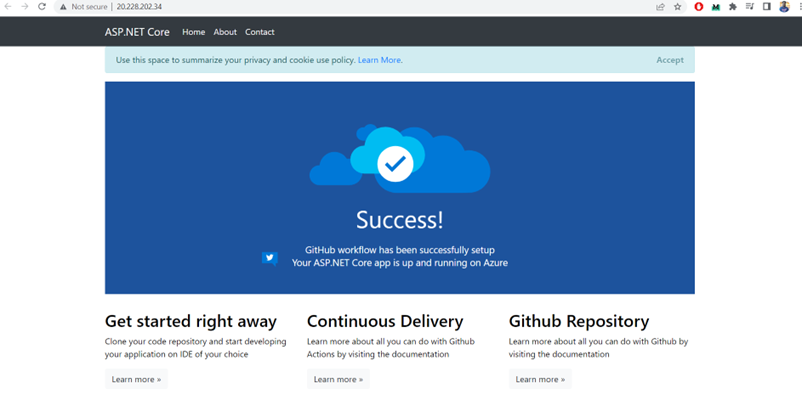
Furthermore, you can access the ASP.NET Core application using the external endpoint. There, you will see the application as shown in the following figure.
Step 3: Check the CI/CD pipeline.
Now, check the CI/CD pipeline you created using the Azure DevOps Starter by cloning the ASP.NET Core project to your local machine with the help of the following git command.
git clone {git-repo-link}.git
For the ease of viewing and editing files, let’s use Visual Studio Code 2022 to open the cloned application. Then, open the file named index.html inside the Pages folder.
Then, you can edit it as you need. To demonstrate how the changes will activate the CI/CD pipeline, let’s change the <div class= “content-body”> div element as shown in the following code snippet.
<div class="content-body">
   <div class="success-text">Success!</div>
   <div class="description line-1">GitHub workflow has been successfully setup</div>
   <div class="description line-2">Deploying DotNet Core Application In Azure Kubernetes</div>
</div>
Then, run and check it locally. After that, push the latest changes with a commit. First, add the changes to the staging area.
git add .
Second, commit the changes with an appropriate commit message into the local repository.
git commit -m "Update index.html"
Third, push the commits to the GitHub repository.
git push -u origin main
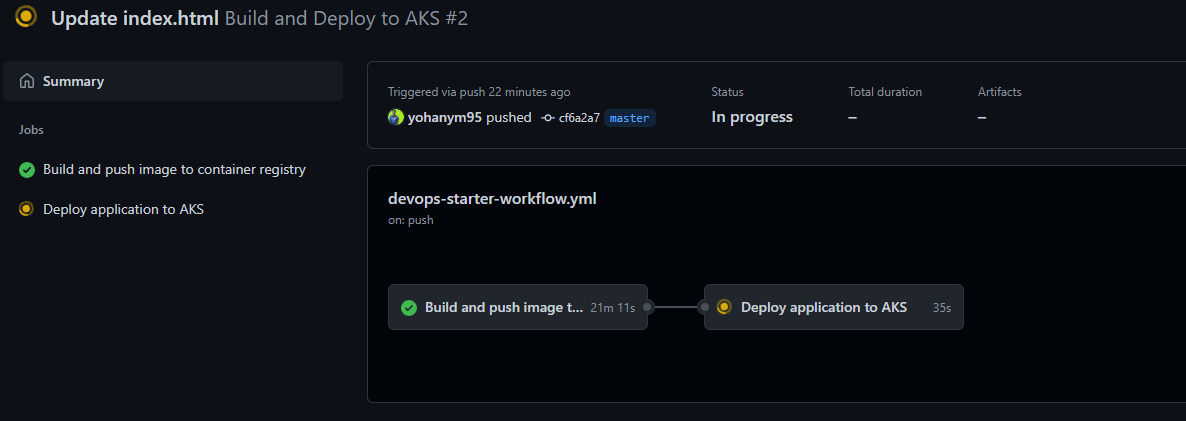
The GitHub action will trigger the build pipeline after successfully pushing the commits.
 After completing the build process, it will deploy the application to the Azure Kubernetes service.
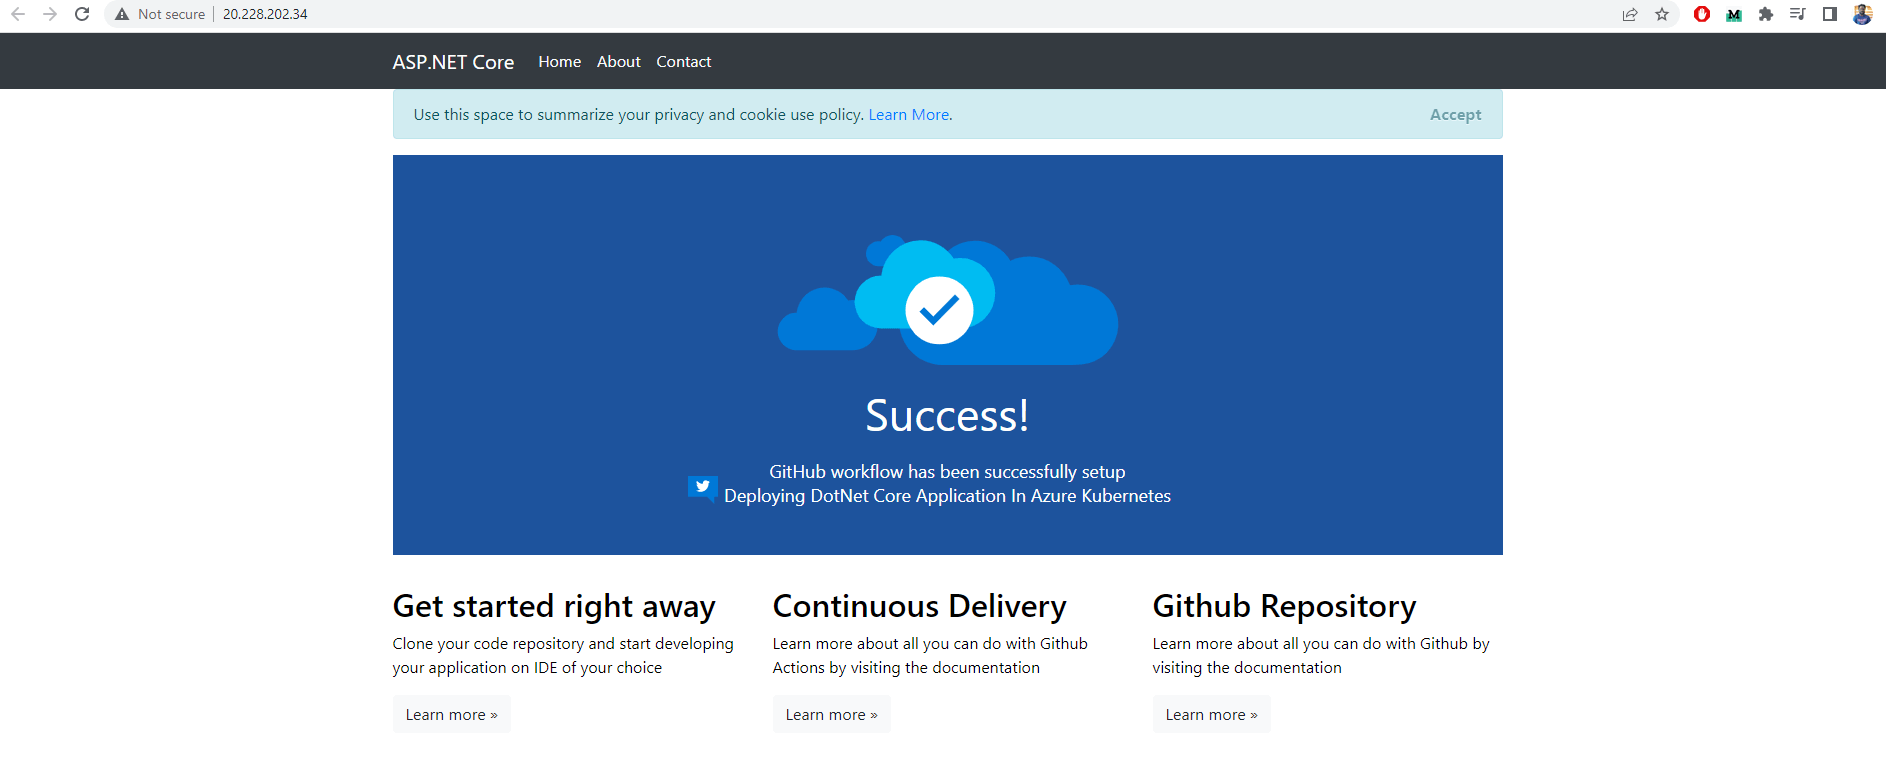
 You can check your Azure Kubernetes service after deploying the application to it by clicking the external endpoint, as shown in the following figure.
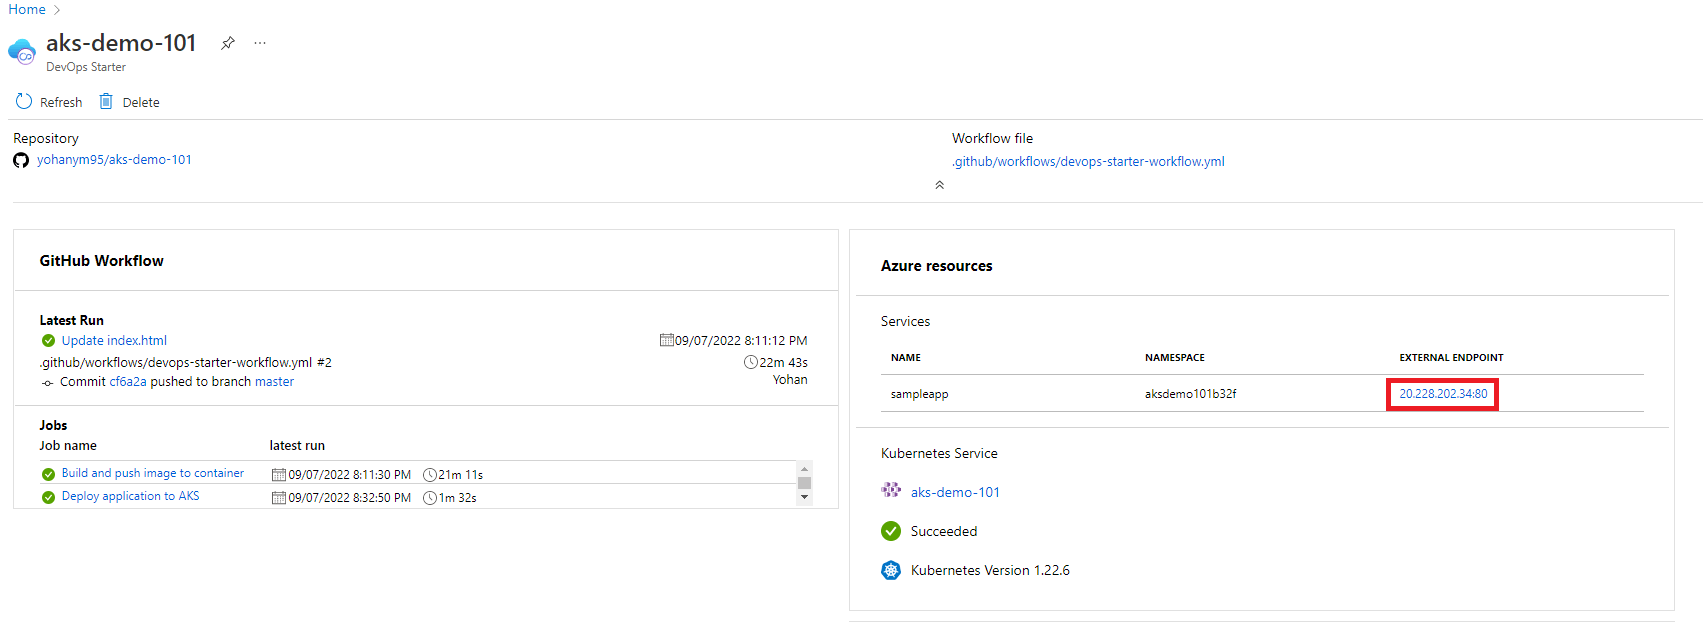
Here, you see that the latest version of the application was deployed successfully to the Azure Kubernetes service.
Conclusion
This article discussed how to deploy an ASP.NET Core app to the Azure Kubernetes service using the Azure DevOps Starter, with the help of GitHub actions, to create an automated CI/CD pipeline for the app. This process eliminates the complexity of the deployment process significantly.
I hope this article will help you in your next project.
The Syncfusion ASP.NET Core UI control library, powered by Essential JS 2, is the only suite you will ever need to build an app. It contains over 70 high-performance, lightweight, modular, and responsive UI controls in a single package. Use them to build stunning web apps!
If you’re already a Syncfusion user, you can download the product setup . If not, you can download a free 30-day trial to evaluate our products.
You can contact us through our support forum, support portal, or feedback portal. As always, we are happy to assist you!
Thank you for reading!
 No spam, just valuable updates.