
TL;DR: Build an AI-assisted content creation app in Blazor using Syncfusion AI AssistView as the chat surface. Add Blog/KB modes with different system instructions, suggestions, and output templates, then layer in file attachments, speech-to-text, and text-to-speech via JS interop.
If you’ve ever tried to use a single “write me content” prompt for everything, you’ve seen the problem: blog drafts turn into support docs, and KB articles start reading like marketing copy. The UI is fine, the instructions and structure are what break down.
In this walkthrough, you’ll build a small Blazor Web App (.NET 10) that uses the Syncfusion® Blazor AI AssistView component as the chat surface and routes requests through a mode-aware prompt builder so your output stays Blog or Knowledge Base consistently.
Before getting started with this implementation, make sure you’re familiar with the baseline setup (Syncfusion packages and AssistView rendering) described in the official documentation.
What’s new in the content creation app
Here’s what we’re adding on top of the getting-started baseline:
1. Blog vs KB modes
Blogs and KB articles have different success criteria. The mode switch lets you make those differences explicit, so the model stops guessing.
2. Mode-aware prompting
Instead of sending args.Prompt directly, we’ll build a final prompt that includes:
- shared rules (markdown, accuracy, etc.)
- a mode-specific output template
This is the part that typically improves consistency the most.
3. Real workflow features
- Attachments: bring your own reference doc/log/draft.
- Speech-to-text: capture ideas faster.
- Text-to-speech: review long output hands-free.
- Clear prompts: reset and start a fresh session.
How it works (architecture in one minute)
The pattern is simple and scales well:
- UI (
AI AssistView) collects the user prompt. - A mode selector (Blog vs KB) chooses a configuration:
- system instruction (high-level role + constraints)
- prompt suggestions (starter prompts that match the mode)
- output template (the structure you want back)
- Your PromptRequested handler builds a final prompt:
- shared rules (Markdown, accuracy)
- mode template (Blog vs KB outline)
- user request
- You call Gemini (or any model) and return the response via UpdateResponseAsync.
This is a practical midpoint between raw chat and a full workflow engine.

That gives you a working AssistView UI. But if you keep one generic instruction and one mixed-suggestion list, users will get an inconsistent output structure. The rest of this post is about fixing that by making mode a first-class concept.
Prerequisites
- .NET 10 SDK (or your target SDK)
- A Blazor Web App with Syncfusion Blazor configured
- Google.GenAI configured with an API key (Gemini)
- Browser permission for microphone + speech synthesis (for voice features)
With the groundwork in place, let’s dive into the step‑by‑step implementation
Step 1: Add a Blog/KB mode model
Create a mode enum and a config object:
public enum ContentMode
{
    Blog,
    KnowledgeBase
}

public sealed class ModeConfig
{
    public required string DisplayName { get; init; }
    public required string SystemInstruction { get; init; }
    public required List<string> Suggestions { get; init; }
}
Then define your mode configs:
private ContentMode mode = ContentMode.Blog;

private readonly Dictionary<ContentMode, ModeConfig> modes = new()
{
    [ContentMode.Blog] = new ModeConfig
    {
        DisplayName = "Blog",
        SystemInstruction = @"You are an expert content creator. Generate a developer blog post with clear headings, short paragraphs, and actionable steps. End with 8 FAQs.",
        Suggestions = new List<string>
        {
            "Generate a blog post outline on sustainable energy.",
            "Create a draft blog introduction about Blazor development.",
            "Suggest SEO keywords for a tech blog on AI.",
            "Rewrite this section to be more concise."
        }
    },
    [ContentMode.KnowledgeBase] = new ModeConfig
    {
        DisplayName = "KB",
        SystemInstruction = @"You are an expert support writer. Generate a developer knowledge base article with Summary, Environment, Symptoms, Resolution steps, and Troubleshooting. End with 8 FAQs.",
        Suggestions = new List<string>
        {
            "Write a KB article on troubleshooting network issues.",
            "Draft a KB: 'App fails to start' with resolution steps.",
            "Create a troubleshooting checklist for intermittent timeouts.",
            "Summarize the likely root causes and next diagnostics."
        }
    }
};

private ModeConfig CurrentMode => modes[mode];
Step 2: Wire mode suggestions into AI AssistView
Point AssistView at the current mode’s prompt suggestion list:
<SfAIAssistView @ref="assistView"
PromptSuggestions="CurrentMode.Suggestions"
PromptRequested="@PromptRequest">
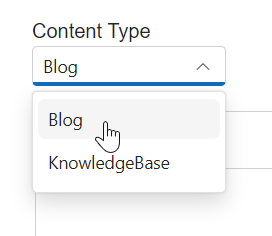
</SfAIAssistView>Step 3: Add a simple mode selector (and clear chat on switch)
The key detail here: clear prompts when switching modes. Otherwise, the previous tone/structure can leak into the next request.
<div style="width:155px; padding-bottom:20px; margin-left:34px">
    <label for="contentType">Content Type</label>
    <SfDropDownList TValue="string"
                    ID="contentType"
                    TItem="ContentType"
                    Placeholder="Select a content type"
                    DataSource="@ContentTypes"
                    @bind-Index="@selectedContentTypeIndex">
        <DropDownListFieldSettings Value="ID"
                                   Text="Text">
        </DropDownListFieldSettings>
        <DropDownListEvents TValue="string"
                            TItem="ContentType"
                            ValueChange="OnValueChange">
        </DropDownListEvents>
    </SfDropDownList>
</div>public class ContentType
{
public string? ID { get; set; }
public string? Text { get; set; }
}
private int? selectedContentTypeIndex{ get; set; } = 0;
List<ContentType> ContentTypes = Enum.GetValues(typeof(ContentMode))
.Cast<ContentMode>()
.Select(mode => new ContentType
{
ID = mode.ToString().ToLower(),
Text = mode.ToString()
})
.ToList();
public void OnValueChange(ChangeEventArgs<string, ContentType> args)
{
if (Enum.TryParse<ContentMode>(args.ItemData.Text, out var parsed))
{
mode = parsed;
// Prevent tone/structure “leakage” across modes
assistView?.Prompts?.Clear();
StateHasChanged();
}
}
Step 4: Make SystemInstruction mode-aware
In your PromptRequested handler, set SystemInstruction based on the mode:
GenerateContentConfig config = new GenerateContentConfig()
{
    SystemInstruction = new Content()
    {
        Parts = new List<Part>
        {
            new Part { Text = CurrentMode.SystemInstruction }
        }
    }
};
Step 5: Add a structured prompt builder (shared rules + mode template)
This is where output consistency really improves:
private string BuildUserPrompt(string rawPrompt)
{
    var sharedRules = """
        Use Markdown.
        Use headings and bullet points where helpful.
        Be accurate and avoid making up product behaviors.
        """;

    var modeTemplate = mode switch
    {
        ContentMode.Blog => """
            Output structure:
            - # Title
            - Intro (direct answer + bullets)
            - Main sections with H2/H3 headings
            - Common mistakes
            - Conclusion
            - FAQs (3)
            """,
        ContentMode.KnowledgeBase => """
            Output structure:
            - # Title
            - Summary
            - Environment / Applies to
            - Symptoms
            - Resolution (numbered steps)
            - Troubleshooting
            - FAQs (3)
            """,
        _ => ""
    };

    return $"""
        {sharedRules}
        {modeTemplate}
        User request:
        {rawPrompt}
        """;
}
Step 6: Call Gemini with the final prompt
Then call Gemini with the final prompt and update AssistView:
private async Task PromptRequest(AssistViewPromptRequestedEventArgs args)
{
    var config = new GenerateContentConfig
    {
        SystemInstruction = new Content
        {
            Parts = new List<Part> { new Part { Text = CurrentMode.SystemInstruction } }
        }
    };

    try
    {
        var finalPrompt = BuildUserPrompt(args.Prompt);

        var content = await client.Models.GenerateContentAsync(
            "gemini-2.5-flash",
            finalPrompt,
            config);

        var responseText = content.Candidates[0].Content.Parts[0].Text;

        await assistView.UpdateResponseAsync(responseText);
        args.Response = assistView.Prompts[^1].Response;
    }
    catch (Exception ex)
    {
        args.Response = $"Error: {ex.Message}";
    }
}
Notes for reliability:
BuildUserPrompt(...)is where you centralize formatting and guardrails.UpdateResponseAsync(…) pushes the model response back into the Syncfusion Blazor AI AssistView UI.
Optional features
Attachments
Attachments are how this becomes a real content workflow: users can drop in a draft, requirements, logs, or reference notes.
<SfAIAssistView AttachmentSettings="@attachmentSettings"
                PromptRequested="@PromptRequest"
                PromptSuggestions="CurrentMode.Suggestions" />
private AssistViewAttachmentSettings attachmentSettings = new()
{
    Enable = true,
    SaveUrl = "https://blazor.syncfusion.com/services/production/api/FileUploader/Save",
    RemoveUrl = "https://blazor.syncfusion.com/services/production/api/FileUploader/Remove"
};
Note: In production, use your own endpoints and validate file type/size server-side.
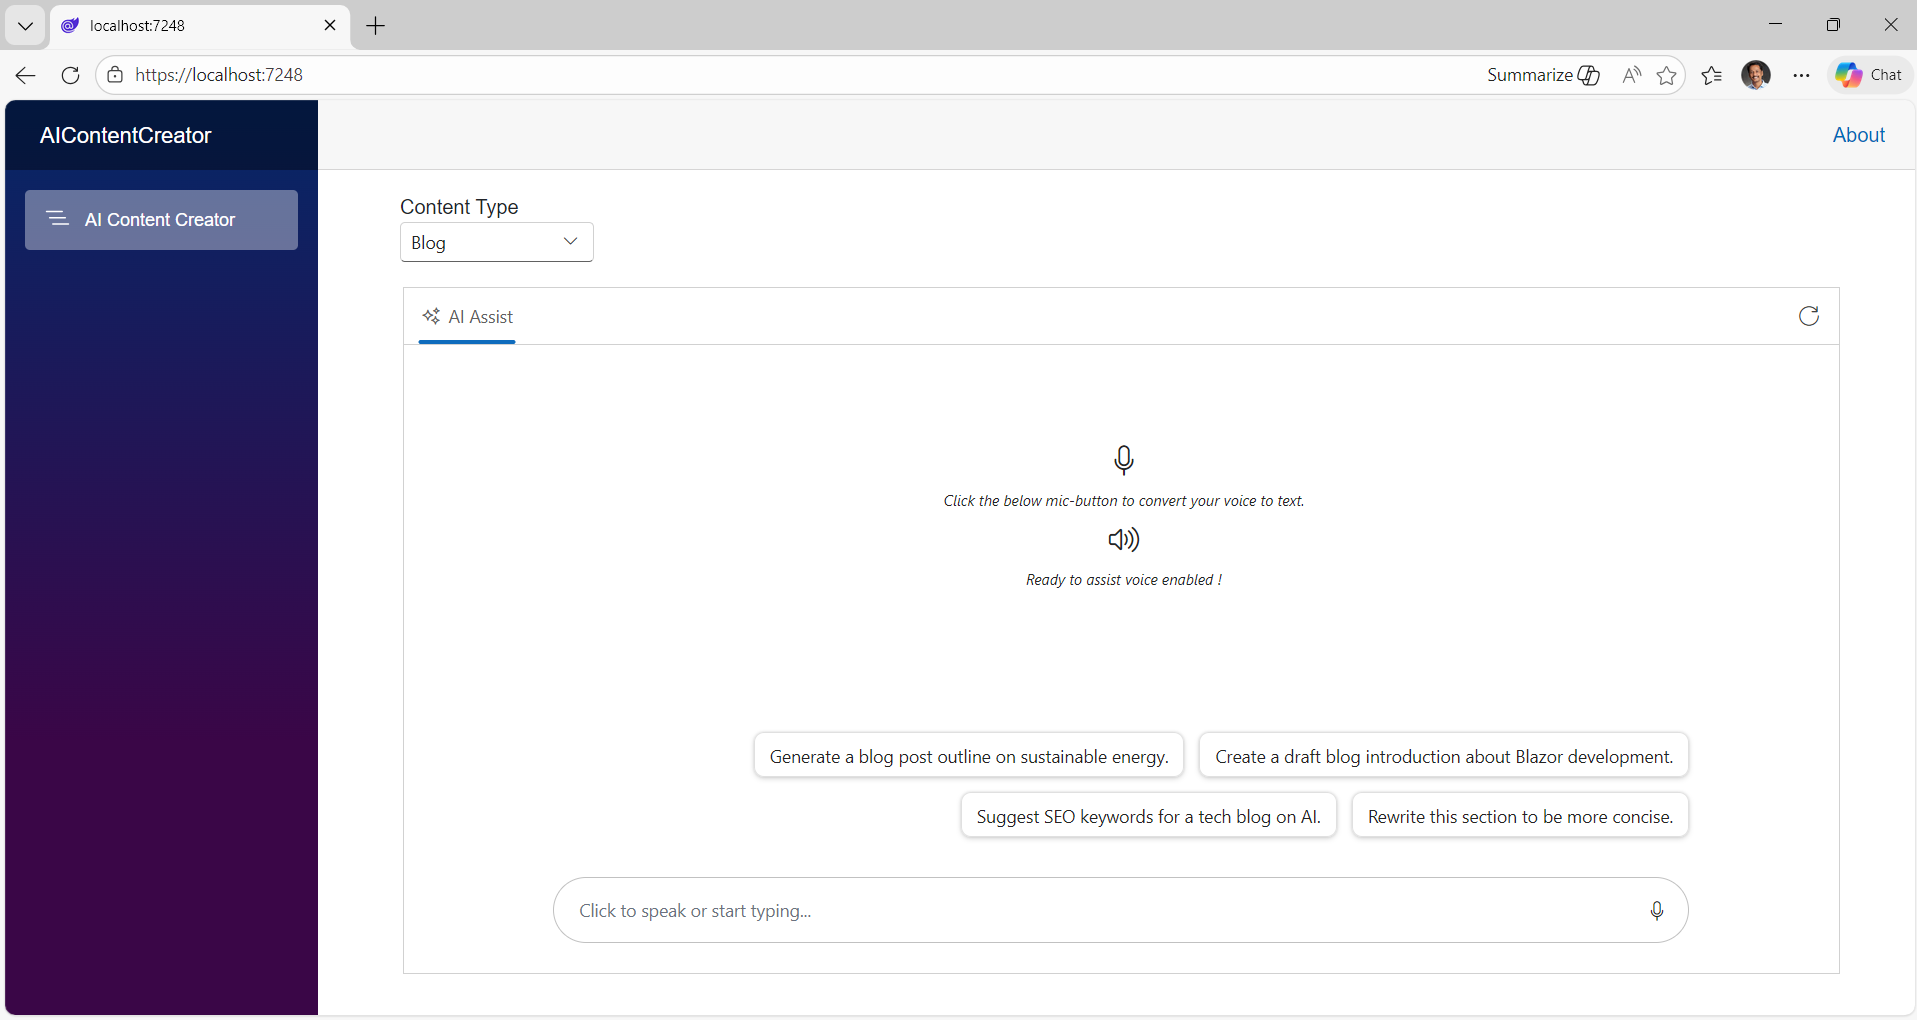
Speech-to-text
If you’re brainstorming out loud (or you’re building for accessibility), speech-to-text is a big win. You can wire it using Syncfusion’s speech components plus a small JS helper to write into a content-editable footer.
Here’s how you can do it in code:
<div class="integration-section">
    <SfAIAssistView @ref="assistView"
                    PromptSuggestions="CurrentMode.Suggestions"
                    PromptRequested="@PromptRequest"
                    AttachmentSettings="@attachmentSettings">
        <AssistViews>
            <AssistView>
                <BannerTemplate>
                    <div class="banner-content">
                        <div class="e-icons e-listen-icon"></div>
                        <i>Click the below mic-button to convert your voice to text.</i>
                    </div>
                </BannerTemplate>
                <FooterTemplate>
                    <div class="e-footer-wrapper">
                        <div id="assistview-footer"
                             class="content-editor"
                             contenteditable="true"
                             placeholder="Click to speak or start typing..."
                             @ref="@EditableDiv"
                             @oninput="@UpdateContent"
                             @onkeydown="@OnKeyDown">
                             @AssistViewFooterValue
                         </div>
                         <div class="option-container">
                             <SfSpeechToText ID="speechToText"
                                             TranscriptChanging="@OnTranscriptChange"
                                             SpeechRecognitionStopped="@HandleStopRecognition"
                                             CssClass="@($"e-flat {SpeechToTextCssClass}")">
                             </SfSpeechToText>
                             <SfButton ID="assistview-sendButton"
                                       IconCss="e-assist-send e-icons"
                                       CssClass="@ButtonCssClass"
                                       @onclick="SendButtonClicked">
                             </SfButton>
                         </div>
                     </div>
                 </FooterTemplate>
             </AssistView>
         </AssistViews>
    </SfAIAssistView>
</div>
In the code part,
private ElementReference EditableDiv;
private string AssistViewFooterValue = String.Empty;
private string FooterContent = String.Empty;
private string ButtonCssClass = String.Empty;
private string SpeechToTextCssClass = "visible";

private async Task UpdateContent()
{
    FooterContent = await JSRuntime.InvokeAsync<String>("isFooterContainsValue", EditableDiv);
    ToggleVisibility();
}
private void ToggleVisibility()
{
    ButtonCssClass = string.IsNullOrWhiteSpace(FooterContent) ? "" : "visible";
    SpeechToTextCssClass = string.IsNullOrWhiteSpace(FooterContent) ? "visible" : "";
}
private async Task OnKeyDown(KeyboardEventArgs e)
{
    if (e.Key == "Enter" && !e.ShiftKey)
    {
        await SendButtonClicked();
    }
}
private async Task SendButtonClicked()
{
    await assistView.ExecutePromptAsync(FooterContent);
}
private async void OnTranscriptChange(TranscriptChangeEventArgs args)
{
    AssistViewFooterValue = args.Transcript;
    await JSRuntime.InvokeVoidAsync("updateContentEditableDiv", EditableDiv, AssistViewFooterValue);
    await InvokeAsync(StateHasChanged);
}
private async Task HandleStopRecognition()
{
    FooterContent = AssistViewFooterValue;
    ToggleVisibility();
    await InvokeAsync(StateHasChanged);
}
Add a new JavaScript file named speech.js and add the following code in it,
/* Speech to Text JavaScript functions - starts*/
// Checks if the content editable element contains meaningful text and cleans up.
function isFooterContainsValue(elementref) {
    if (!elementref.innerText.trim() !== '') {
        if ((elementref.innerHTML === '<br>' || elementref.innerHTML.trim() === '')) {
            elementref.innerHTML = '';
        }
    }
    return elementref.innerText || "";
}
// Clears the text content of a content editable element.
function emptyFooterValue(elementref) {
    if (elementref) {
        elementref.innerHTML = "";
    }
}
// Updates the text content of a content editable element with a specified value.
function updateContentEditableDiv(element, value) {
    if (element) {
        element.innerText = value;
    }
}
/* Speech to text JavaScript functions - ends */
Reference the script in App.razor.
<body>
    <script src="@Assets["speech.js"]"></script>
    …
</body>
In the aicontentcreator.css file, add the following CSS styles,
/* Speech to Text section - starts*/
.integration-section .e-view-container {
    margin: auto;
}

.integration-section #assistview-sendButton {
    width: 40px;
    height: 40px;
    font-size: 20px;
    border: none;
    background: none;
    cursor: pointer;
}

.integration-section #speechToText.visible,
.integration-section #assistview-sendButton.visible {
    display: inline-block;
}

.integration-section #speechToText,
.integration-section #assistview-sendButton {
    display: none;
}

.integration-section .e-footer-wrapper {
    display: flex;
    border: 1px solid #c1c1c1;
    padding: 5px 5px 5px 10px;
    margin: 5px 5px 0 5px;
    border-radius: 30px;
}

.integration-section .content-editor {
    width: 100%;
    overflow-y: auto;
    font-size: 14px;
    min-height: 25px;
    max-height: 200px;
    padding: 10px;
}

.integration-section .content-editor[contentEditable=true]:empty:before {
    content: attr(placeholder);
    color: #6b7280;
}

.integration-section .option-container {
    align-self: flex-end;
}

.integration-section .e-view-container {
    margin: auto;
}

.integration-section .banner-content .e-audio:before {
    font-size: 25px;
}

.integration-section .banner-content {
    display: flex;
    flex-direction: column;
    gap: 10px;
    text-align: center;
    padding-top: 80px;
}

.integration-section .banner-content .e-listen-icon:before {
    font-size: 25px;
}

@media only screen and (max-width: 750px) {
    .integration-section {
        width: 100%;
    }
}
/* speech to text section - ends*/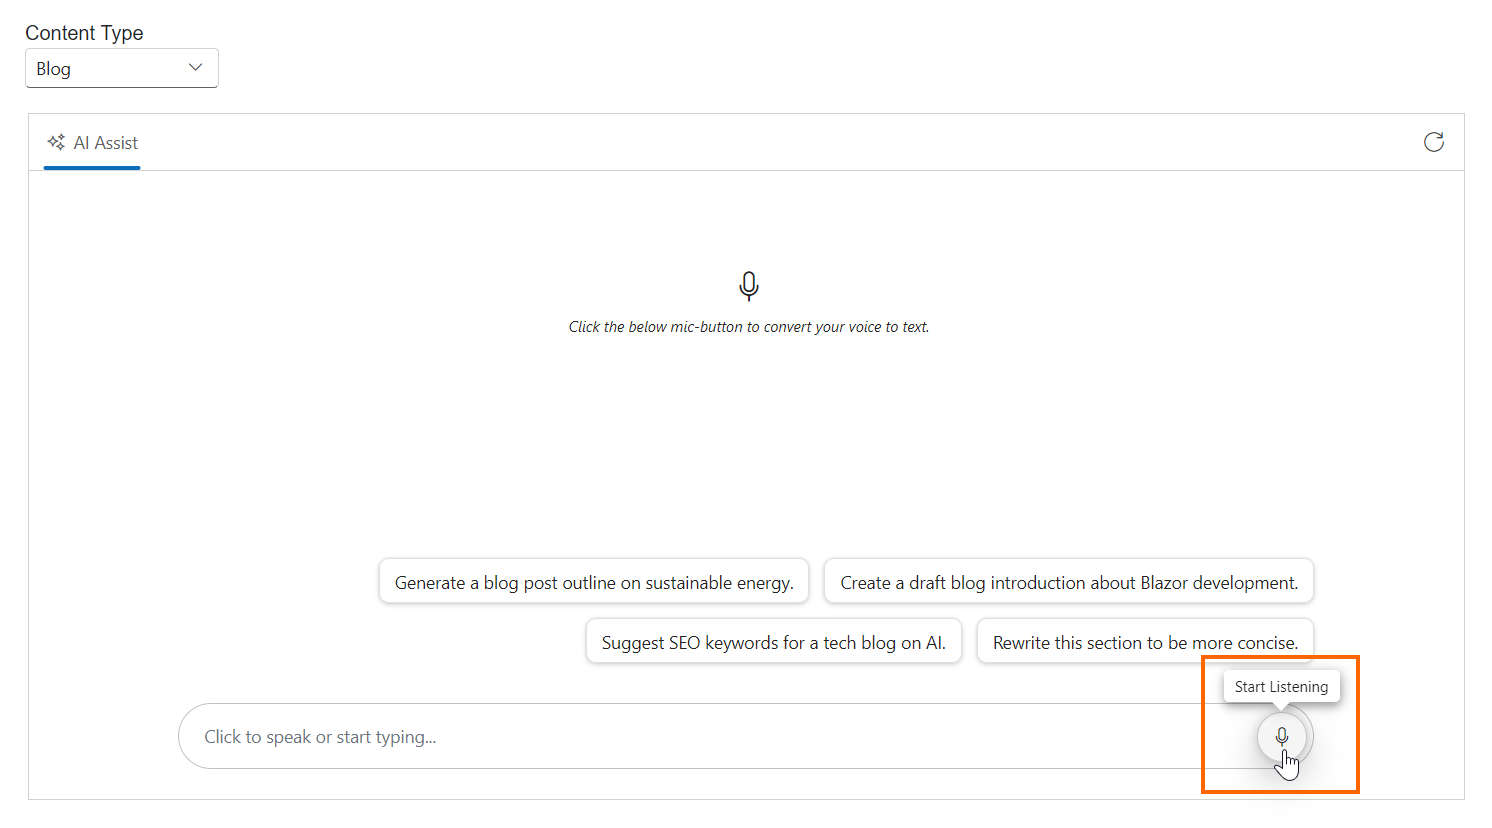
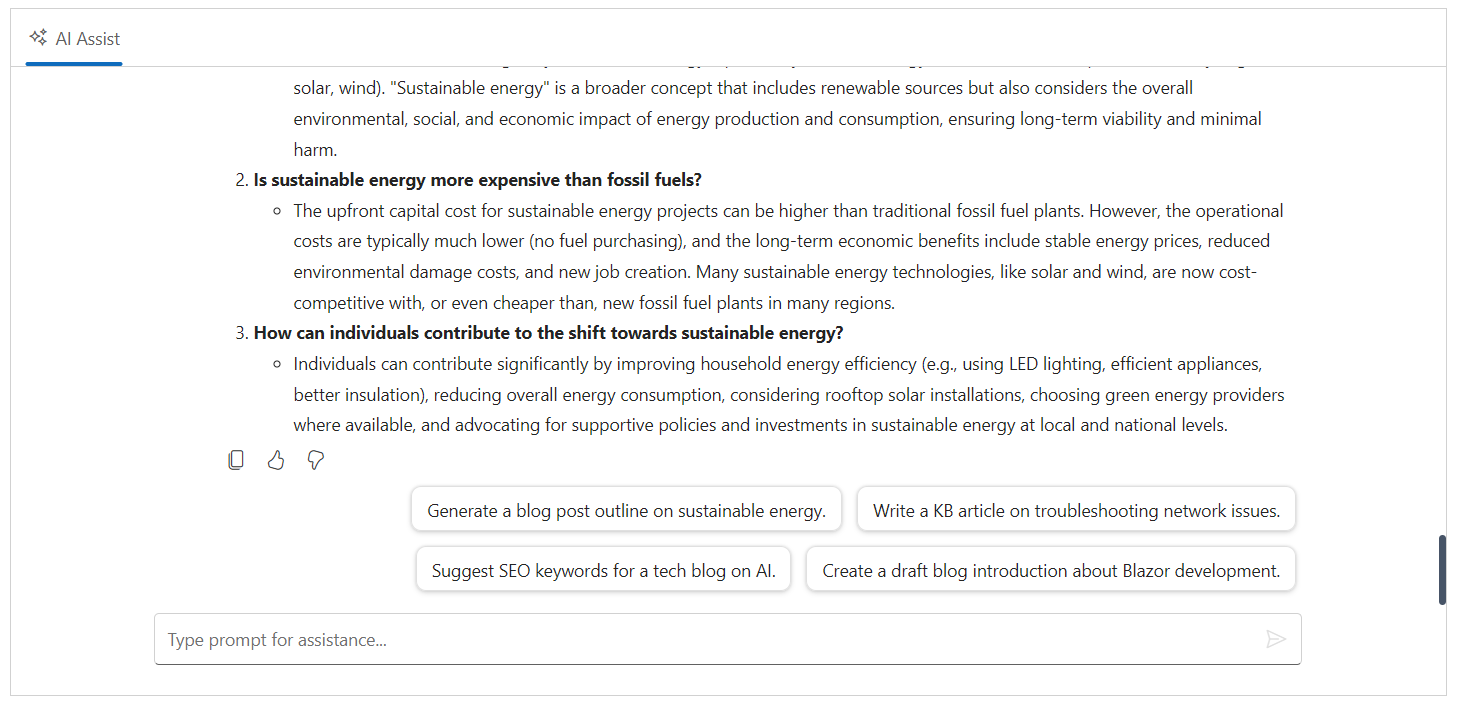
Text-to-speech
Text-to-speech is ideal for reviewing long drafts. Add a toolbar button that:
- Extracts plain text from the response HTML.
- Calls
speechSynthesis.speak(...)via JS interop. - Toggles to a stop button while speaking.
<SfAIAssistView>
…
    <BannerTemplate>
        <div class="banner-content">
        …
            <div class="e-icons e-audio"></div>
            <i>Ready to assist voice enabled !</i>
        </div>
    </BannerTemplate>

    <ResponseToolbar ItemClicked="ResponseToolbarItemClicked">
        <ResponseToolbarItem IconCss="e-icons e-assist-copy" Tooltip="Copy"></ResponseToolbarItem>
        <ResponseToolbarItem IconCss="@audioIconCss" Tooltip="@audioTooltip"></ResponseToolbarItem>
        <ResponseToolbarItem IconCss="e-icons e-assist-like" Tooltip="Like"></ResponseToolbarItem>
        <ResponseToolbarItem IconCss="e-icons e-assist-dislike" Tooltip="Need Improvement" </ResponseToolbarItem>
    </ResponseToolbar>
</SfAIAssistView>
In the code part,
private bool IsSpeaking = false;
private string audioIconCss = "e-icons e-audio";
private string audioTooltip = "Read Aloud";
private DotNetObjectReference<AIContentCreator>? dotNetRef;

protected override void OnInitialized()
{
    dotNetRef = DotNetObjectReference.Create(this);
}

// Handles toolbar item clicks to toggle text-to-speech functionality for AI responses
private async void ResponseToolbarItemClicked(AssistViewToolbarItemClickedEventArgs args)
{
    var prompts = assistView.Prompts;
    if (prompts.Count > args.DataIndex && prompts[args.DataIndex].Response != null)
    {
        string responseHtml = prompts[args.DataIndex].Response;
        string text = await JSRuntime.InvokeAsync<string>("extractTextFromHtml", responseHtml);

        if (args.Item.IconCss == "e-icons e-audio" || args.Item.IconCss == "e-icons e-assist-stop")
        {
            if (IsSpeaking)
            {
                await JSRuntime.InvokeVoidAsync("cancel");
                IsSpeaking = false;
                audioIconCss = "e-icons e-audio";
                audioTooltip = "Read Aloud";
            }
            else if (!string.IsNullOrEmpty(text))
            {
                IsSpeaking = await JSRuntime.InvokeAsync<bool>("speak", text, dotNetRef);
                if (IsSpeaking)
                {
                    audioIconCss = "e-icons e-assist-stop";
                    audioTooltip = "Stop";
                }
                else
                {
                    await JSRuntime.InvokeVoidAsync("console.warn", "Failed to start speech synthesis.");
                }
            }
            await InvokeAsync(StateHasChanged);
        }
    }
}

[JSInvokable]
public void OnSpeechEnd()
{
    IsSpeaking = false;
    audioIconCss = "e-icons e-audio";
    audioTooltip = "Read Aloud";
    StateHasChanged();
}

public void Dispose()
{
    dotNetRef?.Dispose();
    dotNetRef = null;
}
In the speech.js file, add the following Text to Speech (TTS) functions code.
/* Text to Speech JavaScript functions - starts*/

// Initialize the speechSynthesisInterop object to store speech-related data if it doesn't exist.
window.speechSynthesisInterop = window.speechSynthesisInterop || {};

// Converts HTML content to plain text by stripping HTML tags.
function extractTextFromHtml(html) {
    const tempDiv = document.createElement('div');
    tempDiv.innerHTML = html;
    return (tempDiv.textContent || tempDiv.innerText || '').trim();
}

// Initiates text-to-speech synthesis to read the provided text aloud.
function speak(text, dotNetRef) {
    // Check if the browser supports the Web Speech API
    if ('speechSynthesis' in window) {
        // Create a new speech synthesis utterance with the provided text
        const utterance = new SpeechSynthesisUtterance(text);
        // Call the Blazor OnSpeechEnd method when speech ends
        utterance.onend = () => {
            dotNetRef.invokeMethodAsync('OnSpeechEnd');
        };
        utterance.onerror = (event) => {
            console.error('Speech synthesis error:', event);
            dotNetRef.invokeMethodAsync('OnSpeechEnd');
        };
        // Start speaking the utterance
        window.speechSynthesis.speak(utterance);
        // Store the utterance in the global interop object for cancellation
        window.speechSynthesisInterop.currentUtterance = utterance;
        return Promise.resolve(true);
    } else {
        console.warn('Web Speech API is not supported.');
        return Promise.resolve(false);
    }
}

// Cancels any ongoing speech synthesis.
function cancel() {
    if ('speechSynthesis' in window) {
        // Stop any active speech synthesis
        window.speechSynthesis.cancel();
        // Clear the stored utterance reference
        window.speechSynthesisInterop.currentUtterance = null;
    }
}
/* Text to Speech JavaScript functions - ends */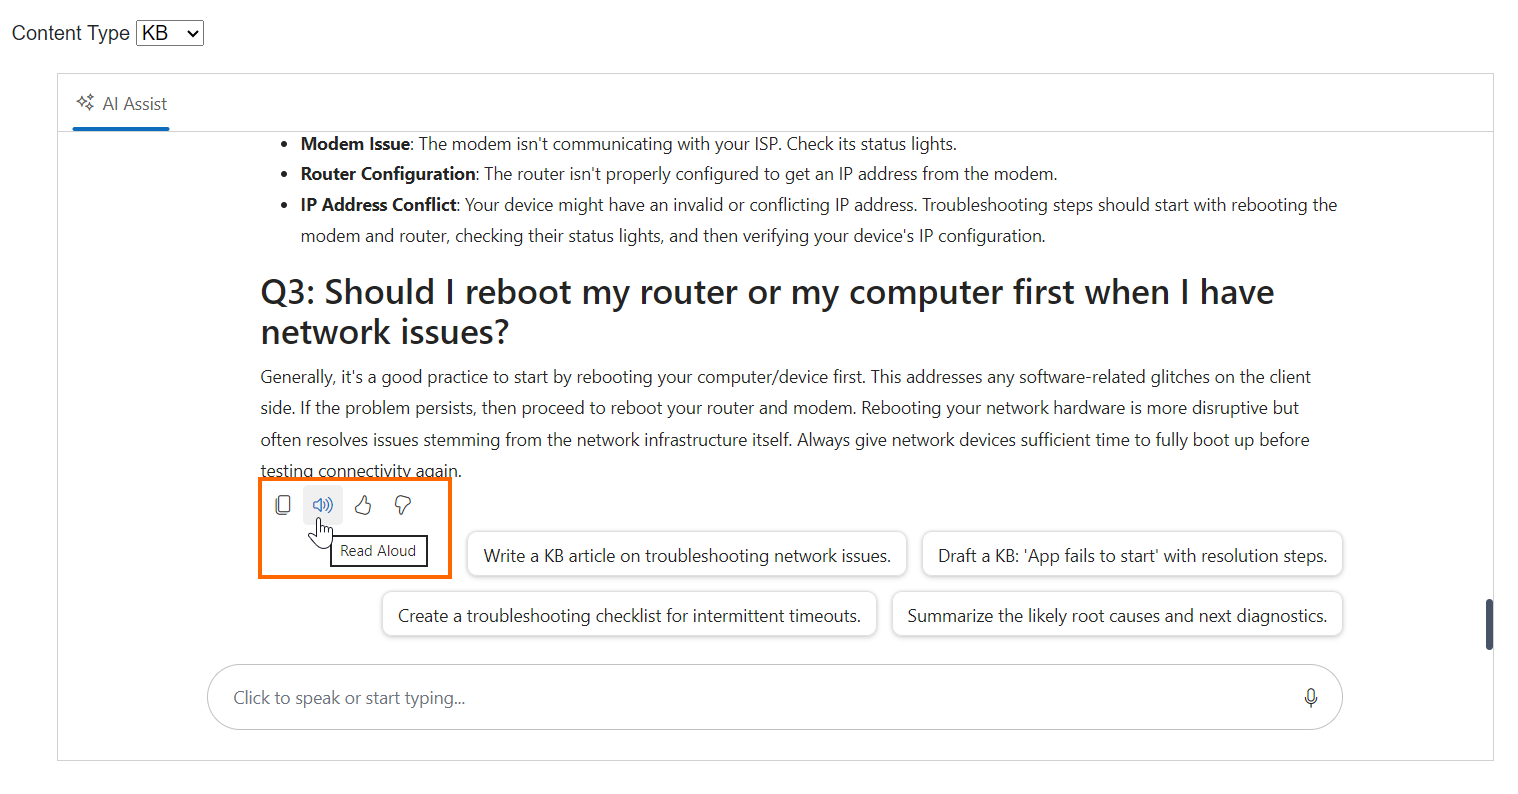
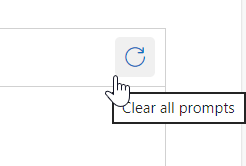
Clear prompts
Add a header toolbar item in the AI AssistView to clear the chat:
@using Syncfusion.Blazor.Navigations
<AssistViewToolbar ItemClicked="ToolbarItemClicked">
    <AssistViewToolbarItem Type="ItemType.Spacer"></AssistViewToolbarItem>
    <AssistViewToolbarItem IconCss="e-icons e-refresh" Tooltip="Clear all prompts"></AssistViewToolbarItem>
</AssistViewToolbar>
In the code part,
private void ToolbarItemClicked(AssistViewToolbarItemClickedEventArgs args)
{
    if (args.Item.IconCss == "e-icons e-refresh")
    {
        assistView.Prompts.Clear();
    }
}
Next steps
- Start from the Syncfusion “getting started” baseline
- Add Blog/KB mode and the structured prompt builder from this post
- Then pick one production hardening step:
- Replace demo attachment endpoints with your own.
- Add model/provider abstraction to switch between Gemini/OpenAI/Azure.
- Log prompts/responses for evaluation (and to improve your templates.
Frequently Asked Questions
Use a Blog/KB mode selector and change How do I make the app generate Blogs and KB articles reliably?
systemInstruction, suggestion prompts, and the output template per mode.
Use JS interop to call speech synthesis cancel.How do I stop text-to-speech once it starts reading a response?
Usually, no. Clearing prompts on mode switch helps prevent the previous mode’s structure/tone from leaking into the new draft.Should I keep chat history when switching Blog to KB?
Yes, keep AI calls behind an abstraction and drive the model selection from configuration. You can refer here for use case examples.Can I support multiple models/providers with the same UI?
The AI AssistView now supports the markdown content rendering support (How do I ensure responses are rendered nicely with headings and lists?
v33.1.44) when used via UpdateResponseAsync method.
Conclusion
Thanks for reading! By combining Syncfusion Blazor AI AssistView with a mode-aware prompt builder, you can deliver an AI writing experience in Blazor that feels purpose-built for both Blog creation and Knowledge Base documentation. The key is treating “mode” as a first-class concept: swap system instructions, suggestions, and output templates so the model consistently produces the right structure. From there, attachments, speech-to-text, and read-aloud features turn a basic chat into a practical content workflow, fast to use, easier to review, and ready to extend for production scenarios.
Try our Blazor component by downloading a free 30-day trial or from our NuGet package. Feel free to have a look at our online examples and documentation to explore other available features.
If you have any questions, please let us know in the comments section below. You can also contact us through our support forum, support portal, or feedback portal. We are always happy to assist you!


 No spam, just valuable updates.