
TL;DR: Learn how to add stamps to PDFs using C# in three practical methods with the .NET PDF Library. Add approval stamps, logos, or custom text, and see how to flatten or remove stamps to streamline workflows, improve compliance, and enhance document branding.
Stamps in PDF documents are more than simple visual markers; they’re essential tools for approval processes, branding, and workflow automation. Whether you need to mark a file as Approved, apply a company logo, or insert custom metadata, stamps help clearly communicate status and ownership.
In this guide, you’ll explore three practical ways for stamping PDF files using C#. With the Syncfusion® .NET PDF library, you can easily insert built-in icons, dynamic text, or images. You’ll also learn how to flatten or remove stamps, giving you complete control over document presentation and compliance.
What is a PDF stamp?
A PDF stamp is a visual overlay placed on top of a PDF page to display status, branding, or metadata. Similar to a digital rubber stamp, it may include labels such as Approved, Draft, or time/date information. Stamps are stored as PDF annotations, which means they can be added, styled, removed, or flattened programmatically.
Difference between Stamp and Watermark
A stamp sits above the page content in the annotation layer and is commonly used for workflow indicators, approvals, or review actions.
By contrast, a watermark becomes part of the page’s main content layer. Watermarks are usually semi‑transparent and appear behind text or images. They’re typically used for branding, copyright, or subtle identifiers such as Confidential.
Add stamps to PDFs using C#
Before diving into examples, ensure your C# project references a PDF library that supports stamping. If starting fresh, create a .NET application and install the Syncfusion.PDF.NET.Core NuGet package as described in Syncfusion’s documentation.
Note: Register your Syncfusion PDF Library license key at application startup to enable full functionality in production environments.
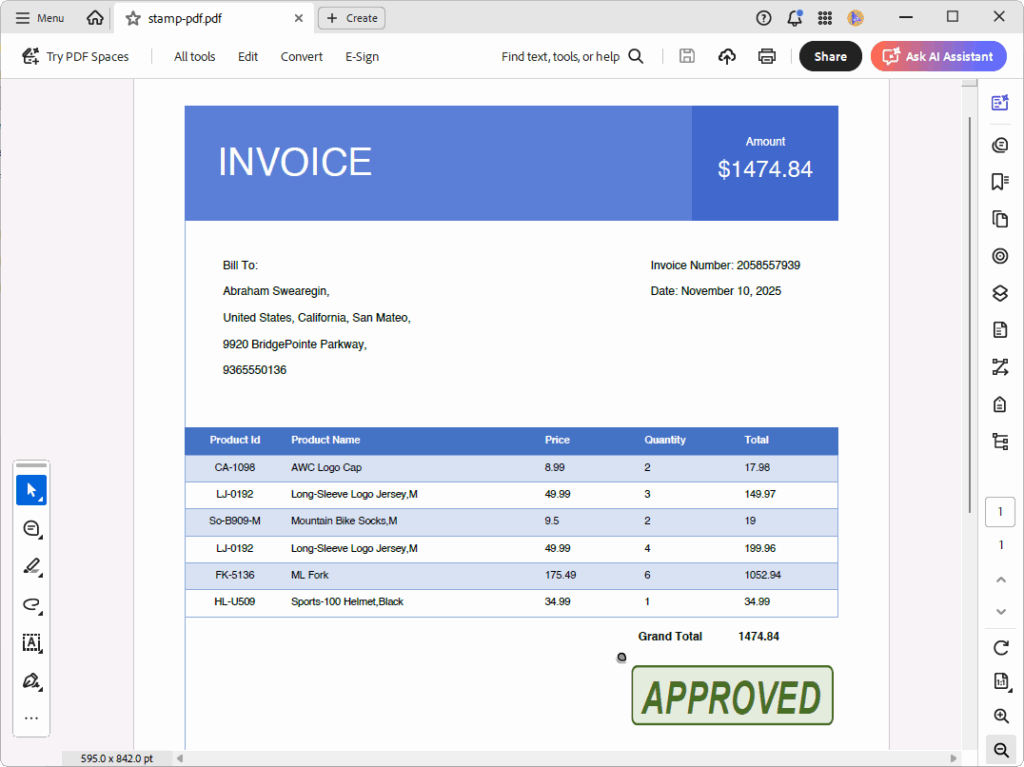
Create a stamp with a standard icon
Syncfusion provides several built-in stamp appearances, such as Approved, Draft, and Confidential. These pre-made icons save time because you can apply them directly without designing custom graphics. Just pick the icon that matches your workflow and apply it directly to the PDF.
Here’s how you can do it in code:
using Syncfusion.Drawing;
using Syncfusion.Pdf;
using Syncfusion.Pdf.Interactive;
using Syncfusion.Pdf.Parsing;

// Load the existing PDF document
using (PdfLoadedDocument doc = new PdfLoadedDocument("../../../../data/input.pdf"))
{
    // Get the first page of the document
    var page = (PdfLoadedPage)doc.Pages[0];

    // Create a rubber stamp annotation
    PdfRubberStampAnnotation rubberStamp = new PdfRubberStampAnnotation(
        new RectangleF(390, 480, 163, 49),
        "APPROVED"
    );

    // Set the standard stamp icon
    rubberStamp.Icon = PdfRubberStampAnnotationIcon.Approved;

    // Enable appearance visibility across PDF viewers
    rubberStamp.SetAppearance(true);

    // Add annotation to the page
    page.Annotations.Add(rubberStamp);

    // Save the document
    doc.Save("stamp-pdf.pdf");
}
The image below shows how the stamp looks in the PDF.
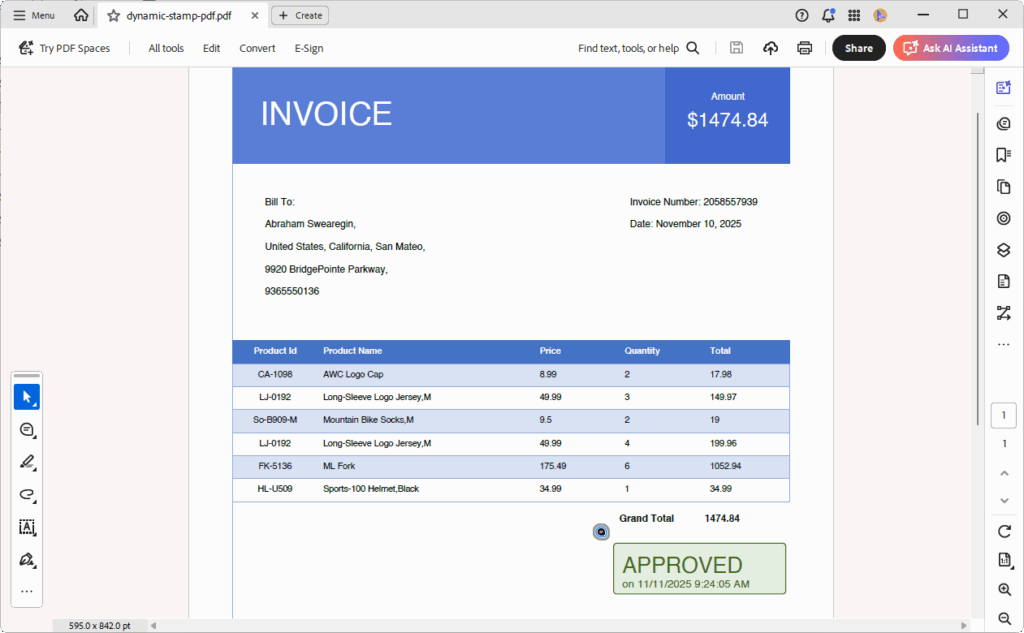
Creating stamps with dynamic content
You can also insert dynamic data, such as decisions, usernames, and timestamps, to improve auditability, accountability, and compliance in document workflows.
Below is the code you need:
// Load the existing PDF document
using (PdfLoadedDocument doc = new PdfLoadedDocument("../../../../data/input.pdf"))
{
    // Get the first page of the document
    var page = (PdfLoadedPage)doc.Pages[0];

    // Create a rubberstamp annotation
    PdfRubberStampAnnotation rubberStamp = new PdfRubberStampAnnotation(
        new RectangleF(390, 480, 163, 49),
        "dynamic-stamp"
    );

    // Draw the dynamic stamp content

    // Get the graphics of the stamp appearance
    PdfGraphics graphics = rubberStamp.Appearance.Normal.Graphics;

    // Create background brush and border pen
    PdfSolidBrush backgroundBrush = new PdfSolidBrush(new PdfColor(229, 239, 224));
    PdfPen borderPen = new PdfPen(new PdfColor(65, 106, 25));

    DrawRoundedCornerRectangle(
        new RectangleF(2, 1, 159, 47),
        graphics,
        3,
        backgroundBrush,
        borderPen
    );

    // Create font for stamp text
    PdfStandardFont font = new PdfStandardFont(PdfFontFamily.Helvetica, 20);

    // Create font for date
    PdfStandardFont dateFont = new PdfStandardFont(PdfFontFamily.Helvetica, 10);

    // Create brush for text
    PdfSolidBrush textBrush = new PdfSolidBrush(new PdfColor(65, 106, 25));

    // Draw the stamp text
    graphics.DrawString("APPROVED", font, textBrush, new PointF(10, 10));

    // Draw the date text
    graphics.DrawString("on " + System.DateTime.Now.ToString(), dateFont, textBrush, new PointF(10, 33));

    // Add annotation to the page
    page.Annotations.Add(rubberStamp);

    // Save the document
    doc.Save("dynamic-stamp-pdf.pdf");
}
You can also add the following code to draw a rounded-corner rectangle.
// Draw the rounded corner rectangle
void DrawRoundedCornerRectangle(
    RectangleF bounds,
    PdfGraphics graphics,
    int cornerRadius,
    PdfBrush brush,
    PdfPen borderPen)
{
    // Create the PdfPath
    int diameter = cornerRadius * 2;
    SizeF size = new SizeF(diameter, diameter);
    RectangleF arc = new RectangleF(bounds.Location, size);
    PdfPath path = new PdfPath();

    path.AddArc(arc, 180, 90);
    arc.X = bounds.Right - diameter;

    path.AddArc(arc, 270, 90);
    arc.Y = bounds.Bottom - diameter;

    path.AddArc(arc, 0, 90);
    arc.X = bounds.Left;

    path.AddArc(arc, 90, 90);

    path.CloseFigure();
    graphics.DrawPath(borderPen, brush, path);
}
Running the code above will produce the following PDF document with a stamp.
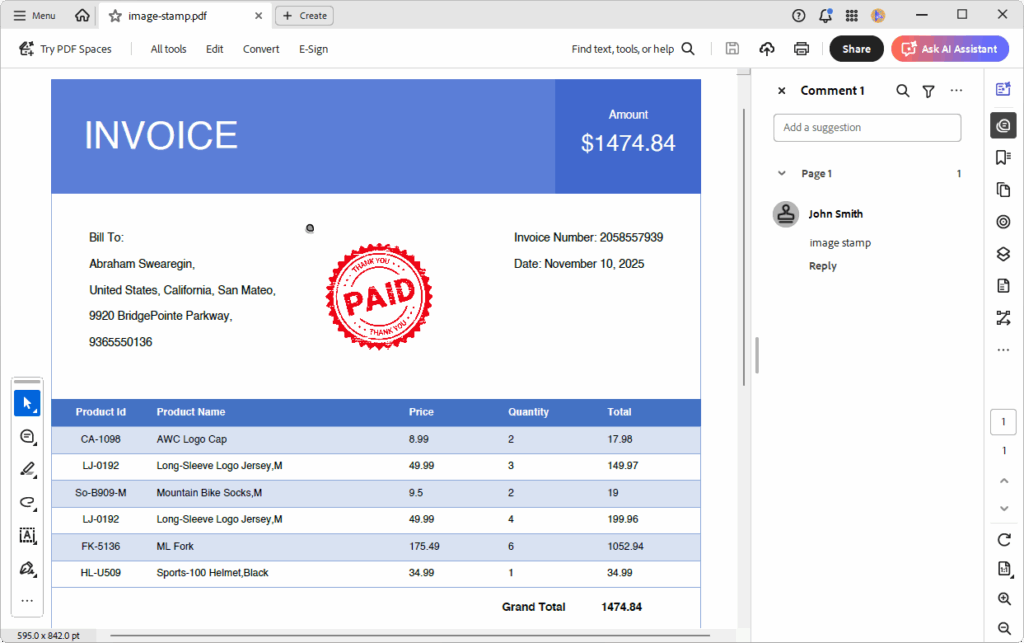
Creating a stamp with an image
Image stamps are ideal for adding visual identity to invoices, reports, or official documents, ensuring they stand out and remain recognizable across workflows. Use your logo or a pre-rendered badge as a stamp to reinforce branding and professionalism.
Here’s the code example:
//Load the existing PDF document
using (PdfLoadedDocument doc = new PdfLoadedDocument("../../../../data/input.pdf"))
{
    //Get the first page of the document
    var page = (PdfLoadedPage)doc.Pages[0];

    // Position/size (points). Adjust to your layout.
    RectangleF bounds = new RectangleF(250, 162, 100, 100);

    //Create rubber stamp annotation
    PdfRubberStampAnnotation stampAnnotation = new PdfRubberStampAnnotation(bounds, "image stamp");

    //Set author
    stampAnnotation.Author = "John Smith";

    //Get the appearance graphics of the stamp annotation
    PdfGraphics graphics = stampAnnotation.Appearance.Normal.Graphics;

    //Draw the image in the appearance graphics
    PdfBitmap stampImage = new PdfBitmap(new FileStream("../../../../data/stamp.png", FileMode.Open, FileAccess.Read));

    //Draw the image to the stamp appearance
    graphics.DrawImage(stampImage, new RectangleF(0, 0, bounds.Width, bounds.Height));

    //Add annotation to the page
    page.Annotations.Add(stampAnnotation);

    //Save the document
    doc.Save("image-stamp.pdf");
}
The image below shows how the image stamp looks in the PDF.
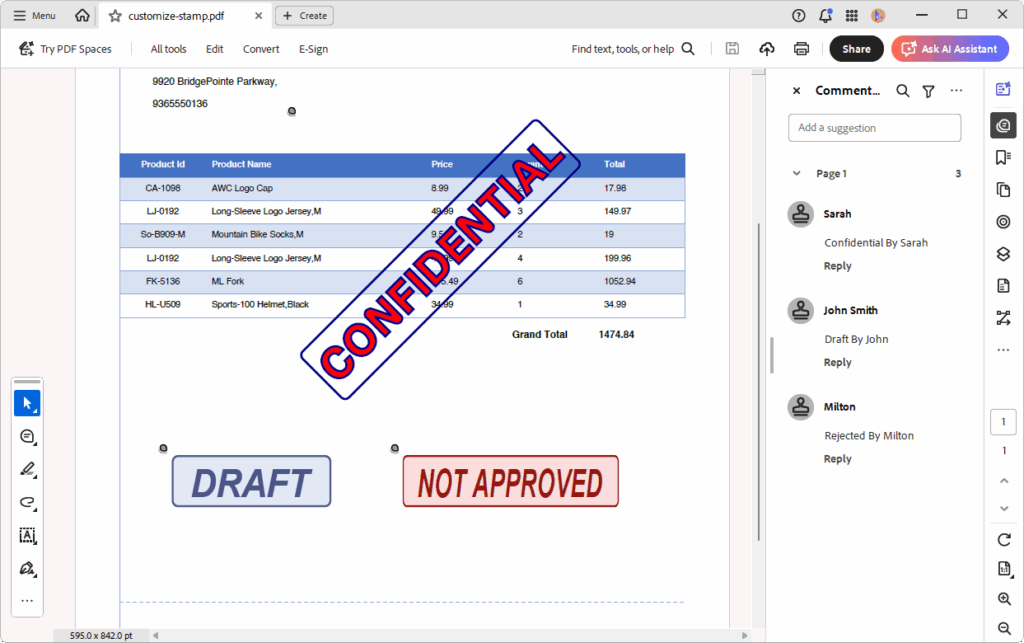
Customize stamp
You can fully style a PDF stamp (rubber stamp annotation) by drawing a custom appearance with fonts, colors, borders, rotation, and opacity. This allows you to create branded stamps such as APPROVED, PAID, or CONFIDENTIAL with a consistent visual identity.
Code example for quick integration:
//Load the existing PDF document
using (PdfLoadedDocument doc = new PdfLoadedDocument("../../../../data/input.pdf"))
{
    //Get the first page of the document
    var page = (PdfLoadedPage)doc.Pages[0];

    //Create a rubberstamp annotation
    PdfRubberStampAnnotation draftStamp = new PdfRubberStampAnnotation(new RectangleF(85, 567, 150, 49))
    {
        //Set the author name
        Author = "John Smith",
        //Set the subject
        Subject = "Document Approval",
        //Set the opacity
        Opacity = 0.75f,
        //Set the stamp text
        Text = "Draft By John",
        //Set the stamp icon
        Icon = PdfRubberStampAnnotationIcon.Draft
    };

    //Set the appearance as true to view the stamp icon across PDF viewers
    draftStamp.SetAppearance(true);

    //Add annotation to the page
    page.Annotations.Add(draftStamp);

    //Create a rubberstamp annotation
    PdfRubberStampAnnotation rejectedStamp = new PdfRubberStampAnnotation(new RectangleF(296, 567, 200, 49))
    {
        //Set the author name
        Author = "Milton",
        //Set the subject
        Subject = "Document Approval",
        //Set the stamp text
        Text = "Rejected By Milton",
        //Set the stamp icon
        Icon = PdfRubberStampAnnotationIcon.NotApproved
    };

    //Set the appearance as true to view the stamp icon across PDF viewers
    rejectedStamp.SetAppearance(true);

    //Add annotation to the page
    page.Annotations.Add(rejectedStamp);

    //Rotate the stamp annotation
    PdfRubberStampAnnotation confidentialStamp = new PdfRubberStampAnnotation(new RectangleF(202, 260, 260, 260))
    {
        //Set the author name
        Author = "Sarah",
        //Set the subject
        Subject = "Confidential",
        //Set the stamp text
        Text = "Confidential By Sarah",
    };

    //Get stamp appearance graphics
    PdfGraphics graphics = confidentialStamp.Appearance.Normal.Graphics;

    //Create a font
    PdfFont font = new PdfTrueTypeFont("../../../../data/MomoTrustDisplay-Regular.ttf", 38, PdfFontStyle.Regular);

    //Create a brush
    PdfBrush brush = new PdfSolidBrush(Color.Red);

    //Create a pen
    PdfPen pen = new PdfPen(Color.DarkBlue, 2);

    graphics.Save();

    //Move the graphics origin to the center of the stamp
    graphics.TranslateTransform(confidentialStamp.Bounds.Width / 2, confidentialStamp.Bounds.Height / 2);

    //Rotate the graphics
    graphics.RotateTransform(-45);

    //Measure the text size
    SizeF textSize = font.MeasureString("CONFIDENTIAL");

    PointF location = new PointF(-textSize.Width / 2, -textSize.Height / 2);

    //Draw the text
    graphics.DrawString("CONFIDENTIAL", font, pen, brush, location);

    //Draw a rounded corner rectangle
    DrawRoundedCornerRectangle(new RectangleF(location.X - 5, location.Y - 5, textSize.Width + 10, textSize.Height + 10), graphics, 5, pen);

    graphics.Restore();

    //Add annotation to the page
    page.Annotations.Add(confidentialStamp);

    //Save the document
    doc.Save("customize-stamp.pdf");
}
Here’s what the PDF with a custom stamp looks like:
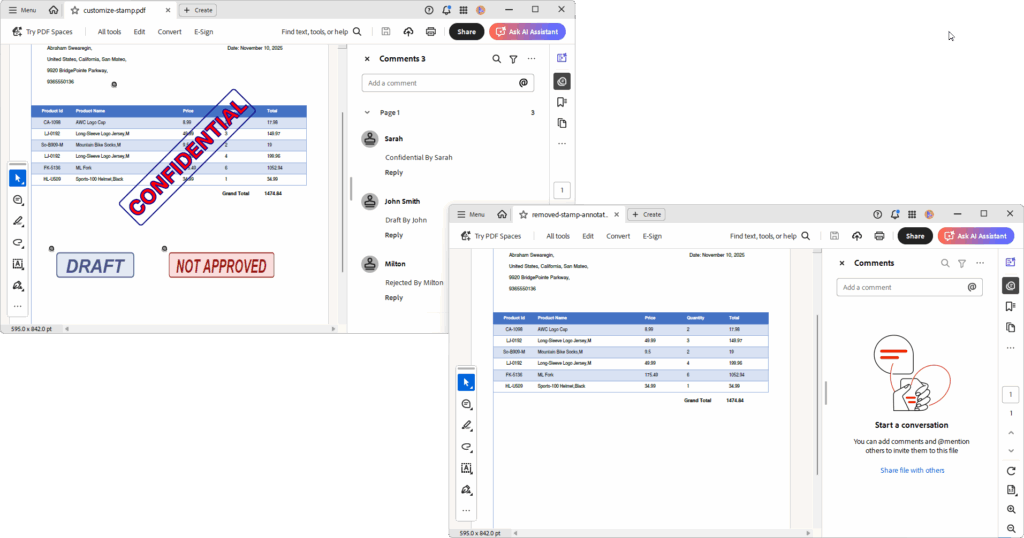
Remove stamps in PDF
Removing the stamp annotation is useful when updating document status or cleaning drafts. You can remove stamps by navigating page annotations.
Add this to your project:
//Load the existing PDF document
using (PdfLoadedDocument doc = new PdfLoadedDocument("../../../../data/customize-stamp.pdf"))
{
    //Get the first page of the document
    var page = (PdfLoadedPage)doc.Pages[0];

    //Iterate the annotations and get stamp annotations
    foreach (PdfLoadedAnnotation annotation in page.Annotations)
    {
        if (annotation is PdfLoadedRubberStampAnnotation stampAnnotation)
        {
            //Flatten the stamp annotation
            stampAnnotation.Flatten = true;
        }
    }

    //Save the document
    doc.Save("flattened-samp_-nnotation.pdf");
}
After running the code, you’ll see this:
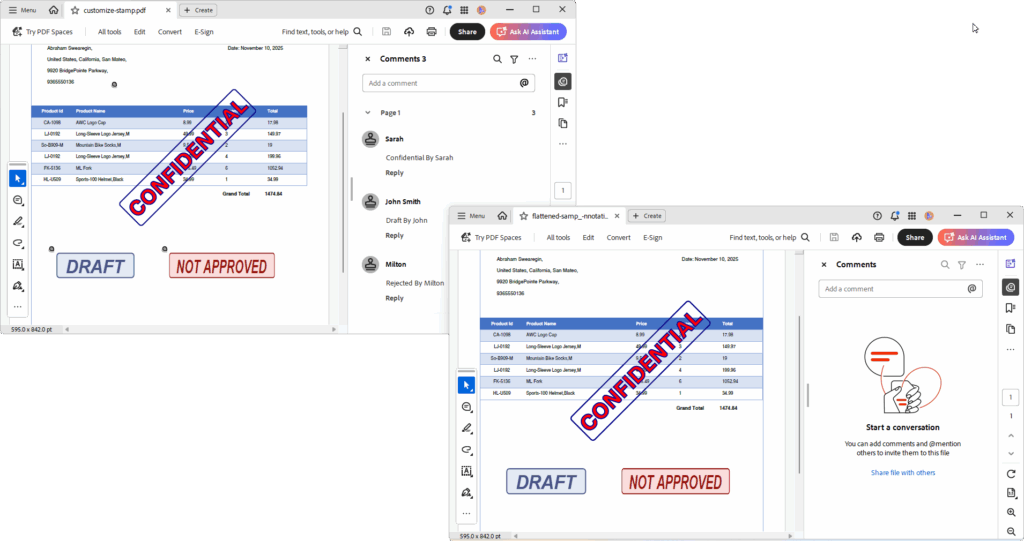
Flatten stamp
Flatten converts a stamp into static page content, making it permanent and non-editable. To flatten a stamp, render its appearance directly onto the page, then remove the original annotations.
Here’s how you can do it in code:
//Load the existing PDF document
using (PdfLoadedDocument doc = new PdfLoadedDocument("../../../../data/customize-stamp.pdf"))
{
    //Get the first page of the document
    var page = (PdfLoadedPage)doc.Pages[0];

    //Create a list to hold annotations to be removed
    List annotationsToRemove = new List();

    //Iterate the annotations and get stamp annotations
    foreach (PdfLoadedAnnotation annotation in page.Annotations)
    {
        if (annotation is PdfLoadedRubberStampAnnotation)
        {
            //Add the stamp annotation to the list for removal
            annotationsToRemove.Add(annotation);
        }
    }

    //Remove the stamp annotations from the page
    foreach (var annotation in annotationsToRemove)
    {
        page.Annotations.Remove(annotation);
    }

    //Save the document
    doc.Save("removed-stamp-annotation.pdf");
}
The following image shows the before‑and‑after results:
Real-world use cases for PDF stamps
Below are several practical scenarios that show how PDF stamping enhances automation, accuracy, and workflow clarity across different systems.
1. Automated approval stamping in a document management system
A company using a web‑based Document Management System (DMS) often needs to track internal approvals. When a manager reviews and approves a document, the system automatically applies an Approved stamp, complete with the reviewer’s name and timestamp, to the first page of the PDF before archiving it. This ensures every approved document enters the repository with clear, traceable metadata.
Workflow integration
Trigger: Manager clicks Approve in the DMS interface.
Backend process (using Syncfusion’s PDF library):
- Load the selected PDF.
- Create a rubber stamp annotation with dynamic content.
- Insert the reviewer’s name and timestamp.
- Save the stamped PDF to the archive folder.
Key benefits
- Provides complete auditability with reviewer identity and approval time.
- Eliminates manual stamping errors.
- Integrates smoothly with existing approval logic.
- Supports flattening for secure, long‑term archival.
2. Invoice status stamping in an accounting system
A logistics company creates PDF invoices for each shipment. To streamline financial communication, their backend accounting system automatically stamps each invoice with its current payment status, PAID, DUE, or OVERDUE, based on real‑time accounting data. The stamped invoice is then emailed directly to the client.
Workflow integration
Trigger: Payment status changes in the accounting database.
Backend process (using Syncfusion’s PDF library):
- Load the invoice PDF.
- Apply a color‑coded stamp (e.g., green for PAID, red for OVERDUE).
- Save the updated PDF and attach it to an automated email.
Key benefits
- Automates client communication about payment status.
- Reduces manual processing errors and improves transparency.
- Provides a clear visual cue for both internal teams and customers.
3. Legal filing status stamping in a case management system
A law firm relies on a backend case management system to generate, file, and store legal documents. When a document is filed, served, or marked confidential, the system automatically applies the appropriate status stamp, along with metadata such as case ID and filing date, before submission to the court or archival.
Workflow integration
Trigger: A case status changes or a new document is uploaded for filing.
Backend process (using Syncfusion’s PDF library):
- Load the legal document PDF.
- Add a stamp such as Filed, Served, or Confidential.
- Include case identifiers and filing dates for traceability.
- Save and archive the stamped document or submit it to the court portal.
Key benefits
- Ensures legal traceability and supports filing compliance.
- Automates labeling for court submissions.
- Reduces manual effort and increases operational efficiency.
GitHub reference
You can find the complete sample for adding stamps to a PDF using C# in our GitHub demo.
Frequently Asked Questions
Loop through the document pages and add the stamp only when the desired condition is met (for example, first page only, odd-numbered pages, or pages containing specific text).How do I stamp every page (or only specific pages)?
This keeps your stamping logic centralized, flexible, and predictable.
Use the page size to calculate positions dynamically. For example: x = page.Size.Width – stampWidth – margin and y = margin. This approach is especially important for PDFs with mixed page sizes.How do I position the stamp relative to the page (top-right, bottom-left) instead of using hardcoded coordinates?
Flatten the stamp so it becomes part of the page content.How can I make the stamp non-editable by end users?
If you leave it as an annotation, most PDF viewers will allow selecting, moving, or deleting it, depending on the PDF’s security permissions.
Assign a unique identifier, such as Author, Subject, or a distinctive Text value, when creating the stamp. Then filter the page annotations by that metadata when iterating through them.How do I remove only the stamps that I added (without deleting other annotations)?
Yes, as long as you have the correct password and the document’s security settings allow modifications. If annotation permissions are restricted, adding or removing stamps may be blocked.Can I add stamps to password-protected PDFs?
RectangleF coordinates and sizes use PDF points, where: 1 point = 1/72 inch. If you need physical alignment (e.g., a 1-inch margin), convert inches to points by multiplying the value by 72.What measurement units does RectangleF use for stamp bounds?
Conclusion
Thanks for reading! PDF stamps are more than just visual markers; they’re powerful tools for streamlining workflows, reinforcing brand identity, and ensuring auditability. Whether you’re adding standard icons, dynamic metadata, or image‑based logos, the Syncfusion .NET PDF library gives you flexible, developer‑friendly APIs to handle it all. By applying these methods, you can make your document workflows more professional, efficient, and reliable.
Explore our PDF library’s documentation to unlock advanced stamp features and best practices.
If you’re a Syncfusion user, you can download the setup from the license and downloads page. Otherwise, you can download a free 30-day trial.
You can also contact us through our support forum, feedback portal, or support portal for queries. We are always happy to assist you!


 No spam, just valuable updates.