
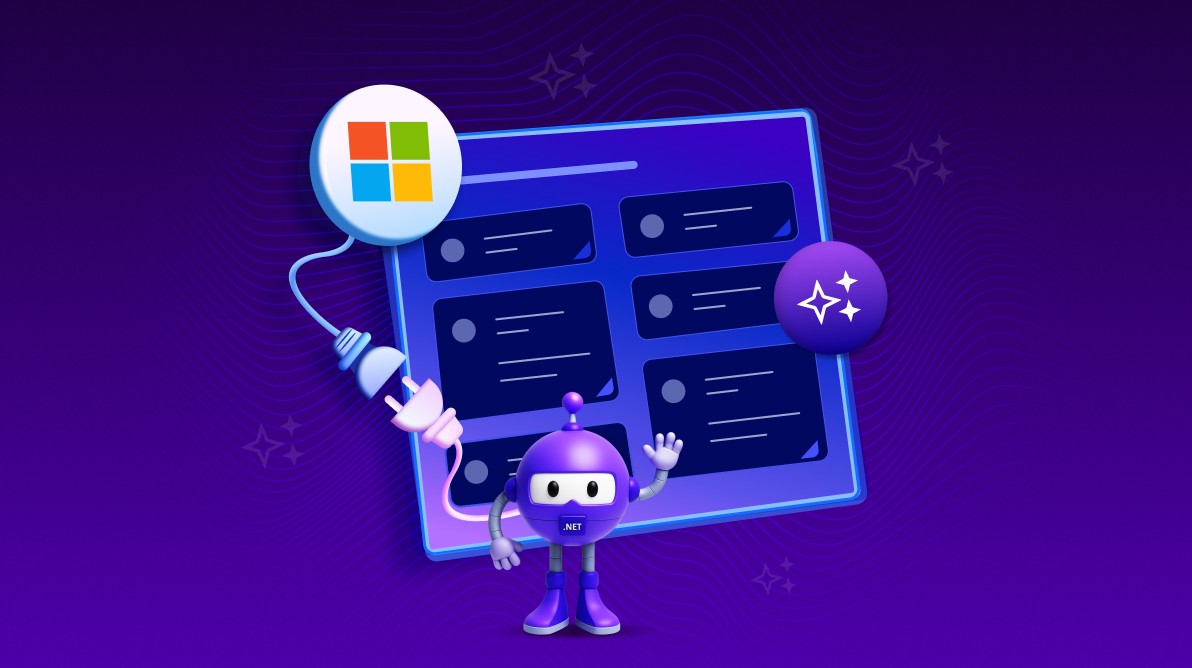
TL;DR: Manual task planning is slow and repetitive. This guide shows how to build an AI-powered Kanban board in .NET MAUI using Azure OpenAI and Microsoft Extensions to automate task generation and organize workflows visually for faster project planning.
Task planning is a key part of project management, but doing it manually takes time and effort. AI makes this process quick and easy. Users simply describe their project and specify the number of tasks they need. The system will generate relevant tasks and display them on the Kanban board.
In this guide, we’ll show you how to build an AI-powered Kanban board using Syncfusion®.NET MAUI Kanban control and Azure OpenAI. It covers everything from UI setup to task generation logic, along with practical use cases to show how this approach can simplify and speed up project planning.
Architecture overview
This application is built around three key components:
- Syncfusion .NET MAUI Kanban control, which provides an interactive interface for visual task management.
- Azure OpenAI service is responsible for generating intelligent and structured task suggestions.
- Behavior logic that links user input with AI‑driven responses, ensuring seamless flow and interaction.
Here’s how it works
To begin, users enter a project description and specify the number of tasks they want generated. Based on this input, Azure OpenAI creates structured task cards, which are automatically placed in the In Progress column of the Kanban board.
Meanwhile, the additional workflow columns To Do, Code Review, and Done are predefined to support the task lifecycle. However, they start empty until users update or move tasks through the process.
Build the User Interface
With the architecture in place, the next step is to construct a clean and intuitive user interface. The UI is organized into two primary sections: The AI task generation panel and the Kanban board that displays the generated tasks. Together, they create a smooth workflow that takes users from input to visual task management.
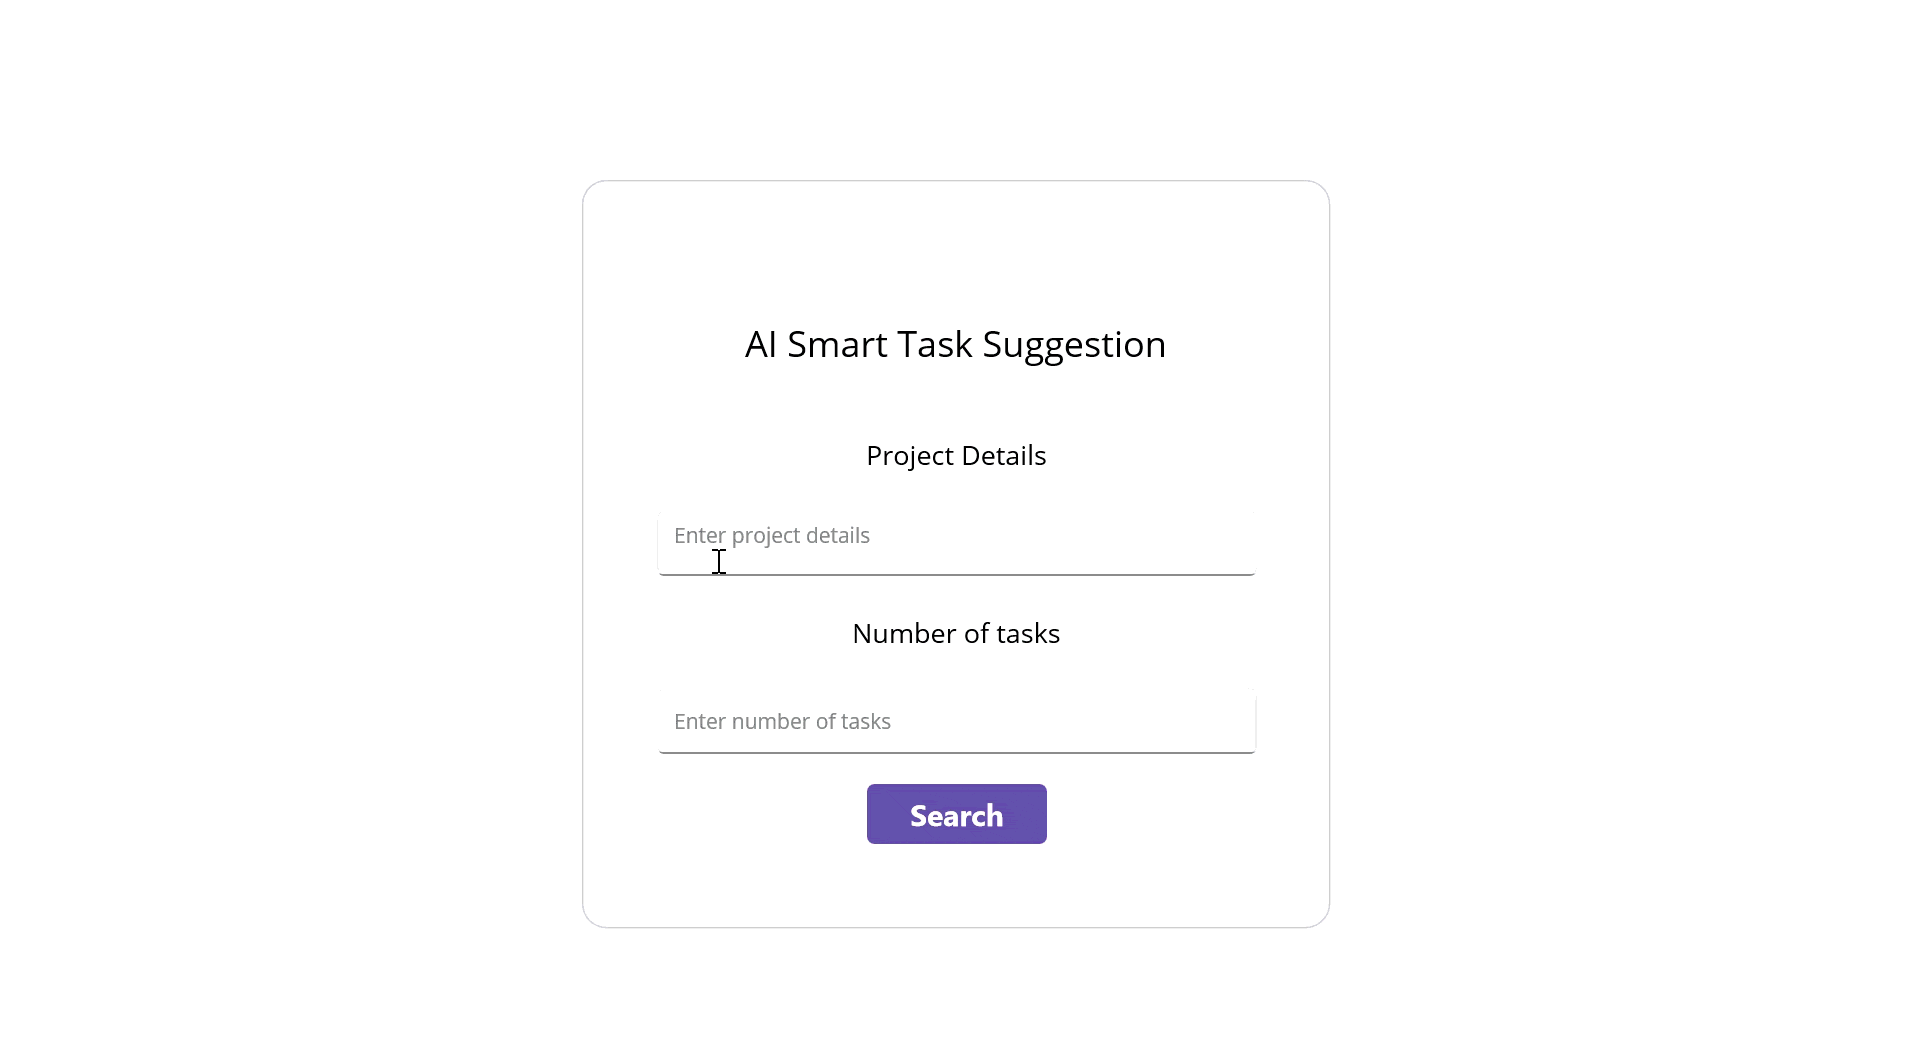
AI smart task suggestion
This section includes,
- An Editor for entering project details.
- An Entry field for specifying the number of tasks.
- A Button to trigger AI‑powered task generation.
- A Busy Indicator to show progress.
- A Feedback Label to guide the user
Kanban Board
After tasks are generated,
- The In Progress column displays AI-generated tasks.
- The board is built using Syncfusion’s SfKanban control.
- Additional workflow columns (To-Do, Code Review, Done) are included for structured.
Here’s how you can do it in code:
<Border
    Margin="0"
    Padding="0"
    BackgroundColor="Transparent"
    HeightRequest="500"
    WidthRequest="{OnPlatform WinUI= 500, MacCatalyst= 500, iOS= 350, Android= 350}"
    VerticalOptions="Center"
    HorizontalOptions="Center">
    <Border.StrokeShape>
        <RoundRectangle CornerRadius="16" />
    </Border.StrokeShape>
    <Grid>
        <!-- Overlayed Busy Indicator -->
        <core:SfBusyIndicator x:Name="busyIndicator"
                              AnimationType="Cupertino"
                              IsRunning="False"
                              IsVisible="False"
                              HorizontalOptions="Center"
                              VerticalOptions="Center"
                              HeightRequest="100"
                              WidthRequest="100"/>
        <!-- Main layout stack -->
        <VerticalStackLayout Padding="30" VerticalOptions="Center" Spacing="15">
            <Label Text="AI Smart Task Suggestion" FontSize="24"
                   HorizontalOptions="Center" Padding="0,20,0,20"/>
            <Label Text="Project Details" FontSize="18"
                   HorizontalOptions="Center" Padding="0,10"/>
            <Editor x:Name="projectDetailsEditor"
                    Placeholder="Enter project details"
                    PlaceholderColor="Gray"
                    HeightRequest="50"
                   WidthRequest="{OnPlatform WinUI= 400, MacCatalyst= 400, iOS= 300 , Android= 300}"
                    HorizontalOptions="Center"/>
            <Label Text="Number of tasks" FontSize="18"
                   HorizontalOptions="Center" Padding="0,10"/>
            <Entry x:Name="numberOfTasksEntry"
                   Placeholder="Enter number of tasks"
                   PlaceholderColor="Gray"
                   HeightRequest="50"
                   WidthRequest="{OnPlatform WinUI= 400, MacCatalyst= 400, iOS= 300 , Android= 300}"
                   HorizontalOptions="Center"
                   Keyboard="Numeric"/>
            <buttons:SfButton x:Name="searchButton"
                              Text="Search"
                              CornerRadius="5"
                              FontFamily="MauiSampleFontIcon"
                              FontSize="20"
                              FontAttributes="Bold"
                              WidthRequest="120"
                              HeightRequest="40"
                              Margin="0,5,0,0"
                              HorizontalOptions="Center"/>
            <Label x:Name="infoLabel"
                   Text="Enter project details and number of tasks, then press Search."
                   IsVisible="True"
                   HorizontalOptions="Center"
                   Padding="6"
                   FontSize="16"
                   TextColor="#495057"
                   />
       </VerticalStackLayout>
   </Grid>
</Border>
Kanban Board setup
After the tasks are generated, the app navigates the users to the Kanban board view. This board is created using Syncfusion’s SfKanban control and is structured into four essential workflow columns.
Note: For additional configuration details, refer to the official .NET MAUI Kanban control documentation.
Below is an example of how you can set up the board in your code:
<kanban:SfKanban x:Name="kanban" Grid.Row="1" ColumnWidth="305" AutoGenerateColumns="False" ItemsSource="{Binding Cards}">
    <kanban:KanbanColumn Title="To Do"
                                 Categories="Open,Postponed"
                                 MinimumLimit="5"
                                 MaximumLimit="15" >
        <kanban:KanbanColumn.ErrorBarSettings>
            <kanban:KanbanErrorBarSettings Fill="Green" MinValidationFill="Orange" MaxValidationFill="Red" Height="4"/>
        </kanban:KanbanColumn.ErrorBarSettings>
    </kanban:KanbanColumn>
    <kanban:KanbanColumn Title="In Progress"
                                 Categories="In Progress"
                                 MinimumLimit="3"
                                 MaximumLimit="8" />
    <kanban:KanbanColumn Title="Code Review"
                                 Categories="Code Review"
                                 MinimumLimit="5"
                                 MaximumLimit="10" />
    <kanban:KanbanColumn Title="Done"
                                 Categories="Closed,Closed No Changes,Won't Fix"
                                 MinimumLimit="8" />
</kanban:SfKanban>
Azure OpenAI integration
To enable AI-powered task generation, the AzureOpenAIBaseService class is responsible for validating credentials and establish communication with Azure OpenAI. Before implementing this service, install the required packages.
- Azure.AI.OpenAI,
- Azure.Identity,
- Microsoft.Extensions.AI.OpenAI.
Once the packages are in place, add the following class to your project:
internal class AzureOpenAIBaseService
{
    #region Fields

    /// <summary>
    /// The Azure OpenAI EndPoint
    /// </summary>
    private const string endpoint = "";

    /// <summary>
    /// The Deployment name
    /// </summary>
    private const string deploymentName = "";

    /// <summary>
    /// The API key
    /// </summary>
    private const string key = "";

    /// <summary>
    /// The OpenAI
    /// </summary>
    private IChatClient? client;

    /// <summary>
    /// The already credential validated field
    /// </summary>
    private bool isAlreadyValidated = false;

    /// <summary>
    /// The chat history
    /// </summary>
    private string? chatHistory;

    #endregion

    internal AzureOpenAIBaseService()
    {
        ValidateCredential();
    }

    #region Properties

    /// <summary>
    /// Gets/Set a value indicating whether credentials are valid or not.
    /// Returns <c>true</c> if the credentials are valid; otherwise, <c>false</c>.
    /// </summary>
    internal bool IsCredentialValid { get; set; }

    #endregion

    #region Methods

    /// <summary>
    /// Validate Azure Credentials
    /// </summary>
    private async void ValidateCredential()
    {
        #region Azure OpenAI
        // Use the below method for Azure OpenAI
        this.GetAzureOpenAIKernal();
        #endregion


        if (isAlreadyValidated)
        {
            return;
        }

        try
        {
            if (client != null)
            {
                await client!.CompleteAsync("Hello, Test Check");
                chatHistory = string.Empty;
                IsCredentialValid = true;
                isAlreadyValidated = true;
            }
        }
        catch (Exception)
        {
            return;
        }
    }
    /// <summary>
    /// To get the Azure OpenAI method
    /// </summary>
    private void GetAzureOpenAIKernal()
    {
        try
        {
            var client = new AzureOpenAIClient(new Uri(endpoint), new AzureKeyCredential(key)).AsChatClient(modelId: deploymentName);
                this.client = client;
        }
        catch (Exception)
        {
        }
    }

    /// <summary>
    /// Gets the AI response.
    /// </summary>
    /// <param name="userPrompt">The prompt.</param>
    /// <returns>The AI response.</returns>
    internal async Task<string> GetAIResponse(string userPrompt)
    {
        if (IsCredentialValid && client != null)
        {
            chatHistory = string.Empty;
            // Add the system message and user message to the options
            chatHistory = chatHistory + "You are a predictive analytics assistant.";
            chatHistory = chatHistory + userPrompt;
            try
            {
                var response = await client.CompleteAsync(chatHistory);
                return response.ToString();
            }
            catch
            {
                return string.Empty;
            }
        }
        return string.Empty;
    }

    #endregion
}
Within the GetDataFormFromAI method, a structured prompt is sent to the Azure OpenAI service requesting task details in JSON format based on the user’s input. The JSON response is then deserialized into Kanban model classes and assigned to the ItemsSource property of the .NET MAUI Kanban control, allowing the AI-generated task to appear instantly in the appropriate column.
/// <summary>
/// Gets data from Azure OpenAI service, validates input, handles result (including navigation and error feedback).
/// </summary>
/// <returns>A task representing the asynchronous operation.</returns>
private async System.Threading.Tasks.Task GetDataFormFromAI()
{
    try
    {
        if (!string.IsNullOrWhiteSpace(projectDetailsEntry?.Text) && !string.IsNullOrWhiteSpace(numberOfTasksEntry?.Text))
        {
            // Stricter project description validation
            var details = projectDetailsEntry.Text.Trim();
            var wordCount = details.Split(' ', StringSplitOptions.RemoveEmptyEntries).Length;

            if (details.Length < 5 || wordCount < 2)
            {
                if (busyIndicator != null) busyIndicator.IsRunning = false;
                if (busyIndicator != null) busyIndicator.IsVisible = false;
                if (button != null) button.IsEnabled = true;
                if (infoLabel != null)
                {
                    infoLabel.Text = "Please enter a meaningful project description (at least 5 characters and 2 words).";
                    infoLabel.TextColor = Color.FromArgb("#d35400");
                    infoLabel.IsVisible = true;
                }
                return;
            }

            string result = string.Empty;
            if (infoLabel != null)
            {
                infoLabel.Text = "Generating tasks...";
                infoLabel.TextColor = Color.FromArgb("#495057");
                infoLabel.IsVisible = true;
             }
             var description = $"Generate {numberOfTasksEntry?.Text} task recommendations for {projectDetailsEntry?.Text}. Each task should include the following fields:\r\n\r\nId (string)\r\nTitle (short string, maximum 3 words)\r\nCategory (string, always set to 'Open')\r\nDescription (string)\r\nColor (string, always set to 'black')\r\nTags (array of strings, with a maximum of 3 tags per task)\r\nReturn the data strictly in JSON array format with all fields correctly typed. No additional text or explanation—only the JSON array.";
             result = await this.azureOpenAIBaseService.GetAIResponse(description);
             string data = result.Replace("```json", "").Replace("```", "").Replace("\r", "").Replace("\n", "").Replace("\t", "").Trim();
             var modifiedData = JsonSerializer.Deserialize<ObservableCollection<KanbanModel>>(data);

             if (viewModel != null) viewModel.Cards.Clear();
             if (modifiedData != null && modifiedData.Count > 0 && this.viewModel != null && mainPage != null)
             {
                 //// Assign cards to ViewModel and navigate to KanbanPage
                 var list = new ObservableCollection<KanbanModel>();
                 foreach (var item in modifiedData)
                 {
                     if (item != null && item.Category != null)
                     {
                         var kanbanItem = new KanbanModel();
                         kanbanItem.Category = item.Category.ToString();
                         kanbanItem.ID = item.ID;
                         kanbanItem.Description = item.Description.ToString();
                         kanbanItem.Title = item.Title;
                         kanbanItem.Tags = item.Tags;
                         kanbanItem.IndicatorFill = Colors.Red;
                         list.Add(kanbanItem);
                     }
                 }

                 this.viewModel.Cards = list;
                 if (busyIndicator != null) busyIndicator.IsRunning = false;
                 if (busyIndicator != null) busyIndicator.IsVisible = false;
                 if (button != null) button.IsEnabled = true;
                 if (infoLabel != null) infoLabel.IsVisible = false;
                 // Navigate to KanbanPage
                 await mainPage.Navigation.PushAsync(new KanbanPage(this.viewModel));
             }
             else
             {
                 if (busyIndicator != null) busyIndicator.IsRunning = false;
                 if (busyIndicator != null) busyIndicator.IsVisible = false;
                 if (button != null) button.IsEnabled = true;
                 if (infoLabel != null)
                 {
                     infoLabel.Text = "No tasks found. Please modify your search and try again.";
                     infoLabel.TextColor = Color.FromArgb("#d35400");
                     infoLabel.IsVisible = true;
                 }
             }
         }
         else
         {
             if (busyIndicator != null) busyIndicator.IsRunning = false;
             if (busyIndicator != null) busyIndicator.IsVisible = false;
             if (button != null) button.IsEnabled = true;
             if (infoLabel != null)
             {
                 infoLabel.Text = "Please fill all fields before searching.";
                 infoLabel.TextColor = Color.FromArgb("#d35400");
                 infoLabel.IsVisible = true;
             }
         }
     }
     catch
     {
         if (busyIndicator != null) busyIndicator.IsRunning = false;
         if (busyIndicator != null) busyIndicator.IsVisible = false;
         if (button != null) button.IsEnabled = true;
         if (infoLabel != null)
         {
             infoLabel.Text = "An error occurred. Please try again.";
             infoLabel.TextColor = Color.FromArgb("#d35400");
             infoLabel.IsVisible = true;
         }
     }
 }
See the implementation in action below:
Frequently Asked Questions
What is an AI-powered Kanban board in .NET MAUI?
An AI-powered Kanban board in .NET MAUI is a Kanban-style task board where tasks can be generated automatically using AI from a project description, then displayed and managed visually using the Syncfusion SfKanban control.
How does Azure OpenAI generate tasks for the Kanban board?
The user enters project details and a task count. The app sends a prompt to Azure OpenAI asking for a strict JSON array containing task fields (Id, Title, Category, Description, Color, Tags). The JSON is then deserialized into Kanban card models and added to the board (initially in “In Progress”).
How can I customize the Kanban column width in Syncfusion SfKanban (.NET MAUI)?
You can control column sizing using MinimumColumnWidth and MaximumColumnWidth to set a range, or use ColumnWidth to enforce a fixed width for all columns in SfKanban.
How does SfKanban decide which column a card belongs to, and can I change it?
By default, SfKanban categorizes cards using the Category property of KanbanModel. If you want to categorize using a different KanbanModel property, set ColumnMappingPath (for example, mapping by ID).
GitHub reference
You can find the complete implementation on GitHub for AI-Powered Kanban in .NET MAUI.

Conclusion
Thank you for reading! Combining Syncfusion .NET MAUI Kanban control with Azure OpenAI offers developers a smart and efficient way to manage tasks. Automating task generation and organizing them visually simplifies project planning, boosting productivity across platforms, including iOS, Android, Windows, and macOS.
If you’re a Syncfusion user, you can download the setup from the license and downloads page. Otherwise, you can download a free 30-day trial.
You can also contact us through our support forum, support portal, or feedback portal for queries. We are always happy to assist you!


 No spam, just valuable updates.
Comments (1)
The github link gives a 404 error. Also – can you provide an example that does not use Azure?