

TL;DR: Agent Mode in Syncfusion Code Studio automates multi-step coding tasks using AI. It analyzes your prompt, plans changes, creates files, integrates components, runs builds, fixes errors, and verifies results, all with checkpoints for safety.
In today’s fast-paced development world, AI isn’t just a buzzword; it’s transforming how we build software. Syncfusion® Code Studio, launched in 2025, is a next-generation AI-powered IDE designed for enterprise teams. It delivers secure, scalable, and customizable AI assistance to supercharge productivity.
To achieve this, Code Studio offers four intelligent modes: Chat, Edit, Autocomplete, and Agent. Among these, Agent Mode truly stands out. Why? Because it works like an experienced developer, managing multi-step coding tasks for you. From analyzing your codebase to creating files, writing code, and testing changes, Agent Mode makes hands-free coding a reality.
This guide walks you through your first autonomous task using Agent Mode. We’ll start from scratch and build a simple app together. By the end, you’ll see how Agent Mode tackles real-world challenges, such as refactoring or adding new features, all while keeping you in control. No prior AI experience required.
Let’s dive in!
What is an autonomous agent in AI coding tools?
An autonomous agent goes beyond simple suggestions or chat responses. It independently handles complex, multi-step tasks by:
- Analyzing your prompt and codebase.
- Creating a step-by-step plan.
- Using built-in tools such as file editing, terminal commands, or searches to execute changes.
- Verifying results, fixing errors, and summarizing outcomes.
In tools like Syncfusion Code Studio, the agent acts like a senior developer, reasoning across files, making decisions, and completing end-to-end workflows with minimal intervention. It’s autonomous yet responsible: you approve major actions through checkpoints for safety.
What is Agent Mode in Syncfusion Code Studio?
Agent Mode is Code Studio’s autonomous coding agent. Activated in the chat panel, it transforms natural language descriptions into executed code across your project.
The key features include:
- Hands-free execution: Describe a feature; the agent plans, builds, and verifies it.
- Built-in tools: File creation/editing, terminal runs, codebase search, Git integration, image analysis, and more.
- Checkpoints and approvals: Auto-saves states for easy revert; pauses for your confirmation on major actions.
- Context-aware: The Agent scans your project files to understand dependencies and relationships.
Whether you’re starting from scratch or enhancing an existing project, Agent Mode handles multi-file tasks, refactors, or full app bootstrapping.
Why choose Code Studio’s Agent Mode?
Agent Mode isn’t just another AI feature. Here’s what makes it enterprise-ready:
- Governance and security: Maintain complete control over your data. Use your own API key (BYOK) for any AI model, including OpenAI or Anthropic. Set usage limits, track costs, and ensure data privacy with robust security measures.
- Full control: Stay in charge with approvals, checkpoints, and custom rules via AGENTS.md. Every major action requires your confirmation for safe execution.
- UI Builder: Need UI layouts fast? The AI-powered UI Builder analyzes your requirements and generates layouts using Syncfusion components (license required for production use). This context-aware approach delivers precise, platform-specific assistance instead of generic advice. Learn more on the UI Builder page.
- Productivity boost: Automates repetitive and multi-step workflows, generating over 30% of new code in Syncfusion’s internal development workflows.
It’s not only about speed, it’s about responsible AI that scales for real-world enterprise development.
Getting started: Quick setup
Before using Agent Mode, you will need to set up Syncfusion Code Studio. Here is how:
- Download and install the Syncfusion Code Studio by visiting the official website. The IDE is available for Windows, macOS, and Linux, and installation takes less than a minute.
- Next, sign in once the installation is complete, follow the instructions in the official documentation to log in.
- Then, configure AI Models. Code Studio supports multiple LLMs, including OpenAI’s GPT series, Anthropic’s Claude, and even local models. You can subscribe to Syncfusion Premium models or use your own API key (BYOK) for flexibility.
- Finally, create a workspace by starting a new empty project.
Common setup obstacles and fixes:
- Login issues: If authentication fails, check your internet connection or enterprise firewall settings.
- Model configuration: Use recommended models, and test with a simple query to confirm setup.
- System requirements: Ensure at least 8GB RAM. If you experience lag, close other applications.
With setup done, you’re ready to start building with Agent Model.
Building a Todo List app from scratch
For your first task, we’ll create a simple React Todo List app using Agent Mode. Why this example? It’s beginner-friendly, involves multiple files, and demonstrates true autonomy in action.
Step 1: Open an empty workspace
Start with a fresh workspace so the Agent can set up everything.
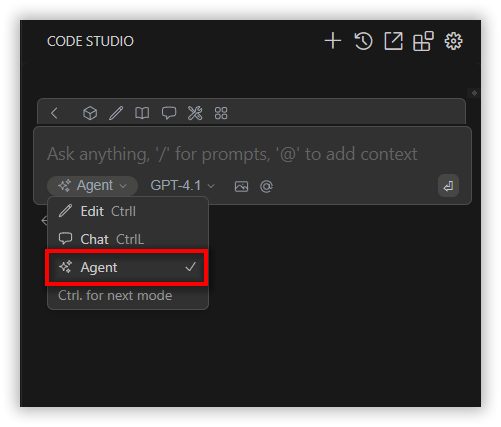
Step 2: Switch to Agent Mode
In the chat interface, select Agent Mode from the mode selector. This step gives the agent full access to tools for code creation, editing, and UI design.
Step 3: Craft your prompt
Now, it’s time to write your prompt. Be clear and detailed. The more context you provide, the better the output. Here’s an example prompt:
“Create a React Todo List using Syncfusion components with the following requirements:
Features: Add tasks, mark complete, delete, persist in localStorage. Use functional components with hooks.
Components: TodoApp (main), TodoForm (input), TodoList (display), TodoItem (single task)
UI: Header with title, input field, task list with checkboxes and delete buttons, and empty state messages.
Styling: Clean CSS, responsive design, strikethrough for completed tasks, and hover effects.”
Step 4: Understand request and plan changes
Once you submit your prompt, the Agent analyzes it and breaks the task into clear, sequential steps. This planning phase ensures accuracy and efficiency before any code is written.
Step 5: Request permission
Before executing changes, the Agent requests your approval for each tool action. You will see a confirmation button in the chat panel with two options.
- Continue: Approve the action and proceed.
- Cancel: Deny the action and prevent execution.

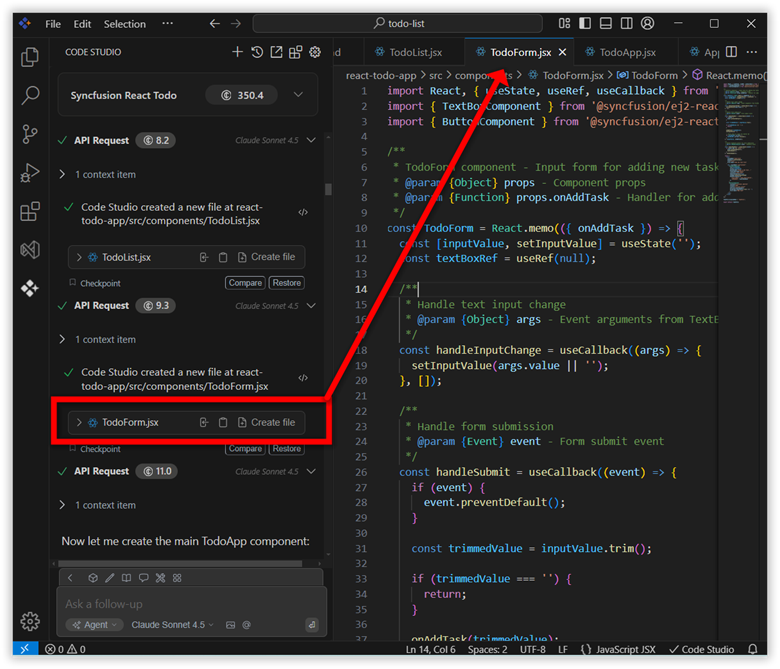
Step 6: Execute changes
Once approved, the Agent proceeds to:
- Creates a React project and installs Syncfusion dependencies.
- Generates component files.
- Integrate Syncfusion React components and applies CSS styling for the UI.
You will see real-time updates in the chat panel as files are created and code is written.
Step 7: Verify results
Next, the Agent verifies everything by building the app, checking for errors, and automatically fixing any issues. You’ll see progress updates in the chat panel, ensuring the app is ready to run without manual intervention.
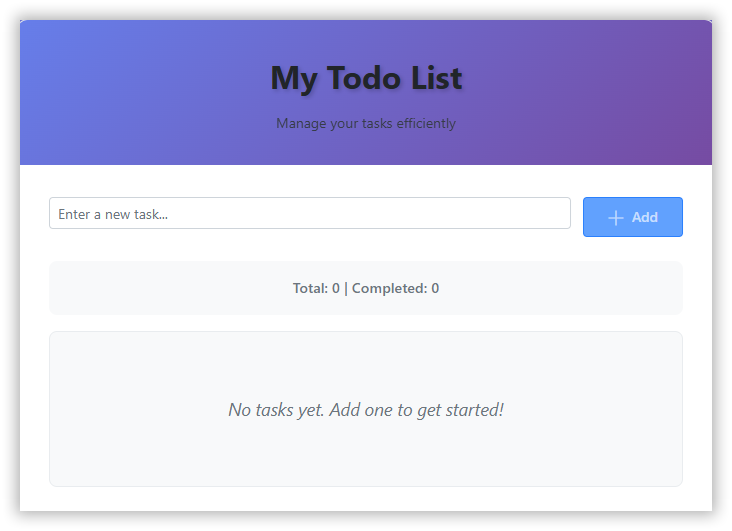
Step 8: Review and run
Finally, after verification, the Agent summarizes all changes. Review the summary, then watch as the development server will automatically launch your app at http://localhost:3000. No manual coding required!
This entire process takes minutes, not hours. If something goes wrong, say a syntax error, reply in chat:
Fix the error in line 10.
Common obstacles and how to overcome them
Even the best AI tools have limitations, and real-world development can present obstacles. Here’s how Code Studio helps you overcome them:
- Challenge: Vague prompts lead to incomplete results:
Solution: Be detailed, include tech stack, features, and constraints.
- Challenge: Vague prompts lead to incomplete results:
</ br>
- Challenge: Hallucinations or errors from weaker models:
Solution: Switch to stronger or premium LLMs. Always review plans before execution.
- Challenge: Hallucinations or errors from weaker models:
</ br>
- Challenge: Large codebases overwhelm context:
Solution: Break tasks into smaller steps. For example, check the main component first; then add the new feature.
- Challenge: Large codebases overwhelm context:
</ br>
Here are a few tips:
- Upload screenshots for UI tasks (e.g., “Build an app matching this screenshot”).
- Save successful prompts for reuse.
- Teams can enforce coding standards or security rules via custom configurations.
Level up: Modifying existing projects
Once you master building from scratch, try enhancing the existing projects. Clone a repo (e.g., via Git tool), then prompt:
“Refactor this code to use Redux for state management.” or “Add authentication with JWT and error handling.”
Why is Agent Mode great for complex work? It reasons across files, verifies integrations, and handles multi-step workflows. Start small:
“Optimize performance in this component.”
Best practices
To get the most out of Agent Mode, follow these proven strategies:
- Prompt like a pro: Clear, structured prompts yield the best results.
- Review everything: Always check summaries and diffs, AI isn’t infallible.
- Experiment with Models: Test different LLMs to find which works best for your workflow.
- Scale safely: Use checkpoints for larger tasks to maintain control.
Note: Follow these tips, and Agent Mode can accelerate development by 70% or more.
Conclusion
Thank you for following along! You’ve just completed your first autonomous task with Syncfusion Code Studio‘s Agent Mode, building a Todo List app from scratch. This mode isn’t about replacing developers; it’s about amplifying them, handling the grunt work so you focus on innovation.
Start small, iterate, and soon you will be ready to tackle enterprise-scale projects effortlessly. Download Code Studio today, try this task, and share your results in the comments. Happy coding!
You can also contact us through our support forum, support portal, or feedback portal for queries. We are always happy to assist you!


 No spam, just valuable updates.