This post is part of our ongoing how-to series about using the Syncfusion Dashboard Platform. In this post, we will demonstrate different ways to share dashboards in the Syncfusion Dashboard Server. To watch a full video on this topic, visit our YouTube page.
With the Dashboard Server installed, log in to enable the Publish module in the Dashboard Designer. This module allows you to publish a dashboard, data source, or widget directly to the Dashboard Server from the Dashboard Designer.
Load an existing dashboard into the Designer, and then click Server > Publish > Dashboard, or use the Ctrl+Shift+P keyboard shortcut. In the dialog that appears, you can modify settings like the dashboard category, name, description, version comments, and whether the dashboard is public. Set these options to your liking, and click Publish.
In the Dashboard Server, click the Dashboards module to view a list of all your dashboards. Locate your newly published dashboard in the list. Click the ellipsis icon to open the options for the dashboard, and select Manage Permissions. In the Manage Permissions module that opens, we can view the list of available users in the Dashboard Server and any user groups that have been defined in the drop-down menus at the top.
Using the Select Access drop-down, we can assign permissions to individual users, multiple users, a group, or multiple groups as we wish. As we assign permissions, they will be listed in the bottom half of the module. We can also remove permissions from users and groups in this screen.
Instead of providing permissions on a per-dashboard basis, we can also assign permissions to a specific dashboard category, which is defined prior to publishing a dashboard. Click the folder icon at the top of the list of dashboards in the Dashboard Server to view your dashboard categories. Click the Actions icon next to a category label, and select Manage Permissions. In the window that opens, we can assign and remove permissions for individual users and groups just as we did for the previous dashboard, only this time it applies to all dashboards that share this category.
Another way to share dashboards is to make them public, which makes them accessible to all users in the Dashboard Server. Back in the list of all dashboards in the Dashboard Server, click the ellipsis icon next to a dashboard you want to make public, and select Make Public. That’s it! It’s now available for all users.
The Syncfusion Dashboard Server also allows specific dashboard views to be shared. Let’s say you have a dashboard that you’ve manipulated through filters, drill-downs, and selections. After setting up a dashboard to the specific view you want to share, open the Filter Overview menu in the upper-right corner of the Dashboard Server, and click Save. Give the view a name and click Save. Now you can access this view any time you want by opening the Views panel on the right side of the Dashboard Server. In the Views panel, click the Share button next to a view name to select users and groups to share it with. You can even make it public to all users in the server.
Now let’s try out an advanced sharing feature, the user filter, which allows you to restrict the data available to the dashboard based on the logged in user.
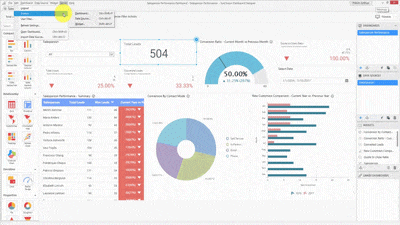
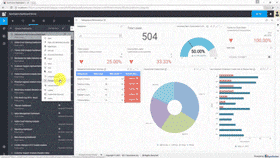
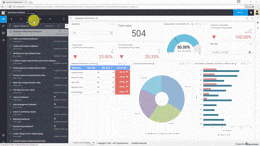
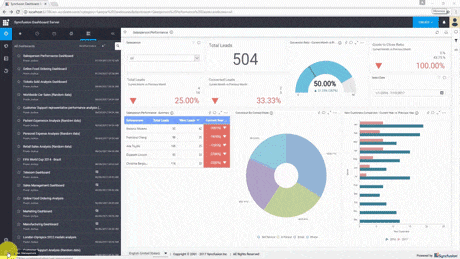
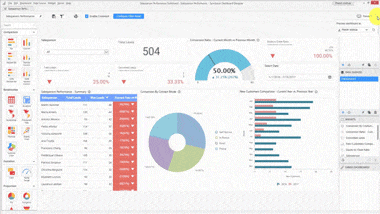
Let’s say we have a sales performance dashboard that lists all salespeople and their sales details. Whenever a salesperson logs in to this dashboard server, we only want to show the details for the logged-in user. If a manager opens this dashboard, we want to show all the salespeople details.
First, we need to define a list of all the salespeople and the manager in the user management settings of the Dashboard Server, accessible through the icon in the bottom-left corner of the screen. With a list defined, we can set up a user filter. Let us go back to the Dashboard Designer.
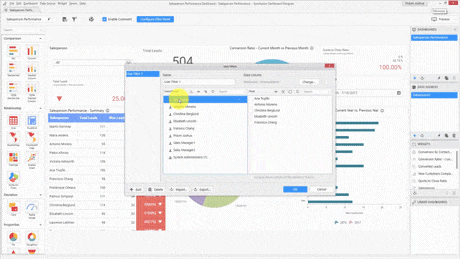
In the Server menu, select the User Filter item. In the window that opens, click Add, and then select the data source, which will be the field name we are going to base our filter on. Click Choose, and a list of available users will appear on the left side of the window, and a list of available fields will appear on the right. We configure the user filtering here by selecting a user from the list on the left, and then enabling the specific fields they are allowed to view by clicking the check boxes next to the fields on the right.
With the user filter set up, we can test out the dashboard from the viewpoint of a specific user by clicking the drop-down arrow next to the Preview button in the upper-right corner of the Dashboard Designer. Select a user and then click Preview. The dashboard will launch in the viewer and show only the details allowed for that user by the user filter.
For more information about the numerous Dashboard Platform features, see our documentation. If you have yet to use the Syncfusion Dashboard Platform, give it a shot with a free, 30-day trial. Happy dashboarding!
If you liked this post, we think you’ll love these free e-books:
BI Solutions Using SSAS Tabular Model Succinctly
MongoDB 3 Succinctly
Hadoop Succinctly
Power BI Succinctly
R Programming Succinctly


