

Syncfusion has provided a Blazor Template Studio in the 2020 Volume 1 release for creating Blazor apps that integrate Syncfusion components. The various features of this extension—installing NuGet packages, adding Syncfusion Blazor component sample code, and applying built-in templates to enhance the user experience—make it a useful tool. These features save developers significant time in creating and configuring projects.
In this blog, I am going to explain how to create a Syncfusion Blazor app using the Blazor Template Studio.
Prerequisites
The prerequisites for creating a Blazor app are:
- Visual Studio 2019
- .NET Core 3.0 SDK or Later (Download Link)
Installing the Syncfusion Blazor Template Studio extension
The Blazor Template Studio extension for Visual Studio is available in the Blazor setup of the Syncfusion Essential Studio® 2020 Volume 1 release. It is also available as an extension in the Visual Studio Marketplace, or you can directly install it from Visual Studio 2019 by navigating to Extensions > Manage Extensions > Online and searching for the Syncfusion Blazor Template Studio.
Refer to this blog to learn more about the extension and its installation.
Creating a Syncfusion Blazor app
The following are the steps to create a Syncfusion Blazor app:
- In Visual Studio 2019, select File > New > Project. This opens a dialog for creating a new project.
- In the dialog, either select the Syncfusion option in the templates or search for Syncfusion in the search box.
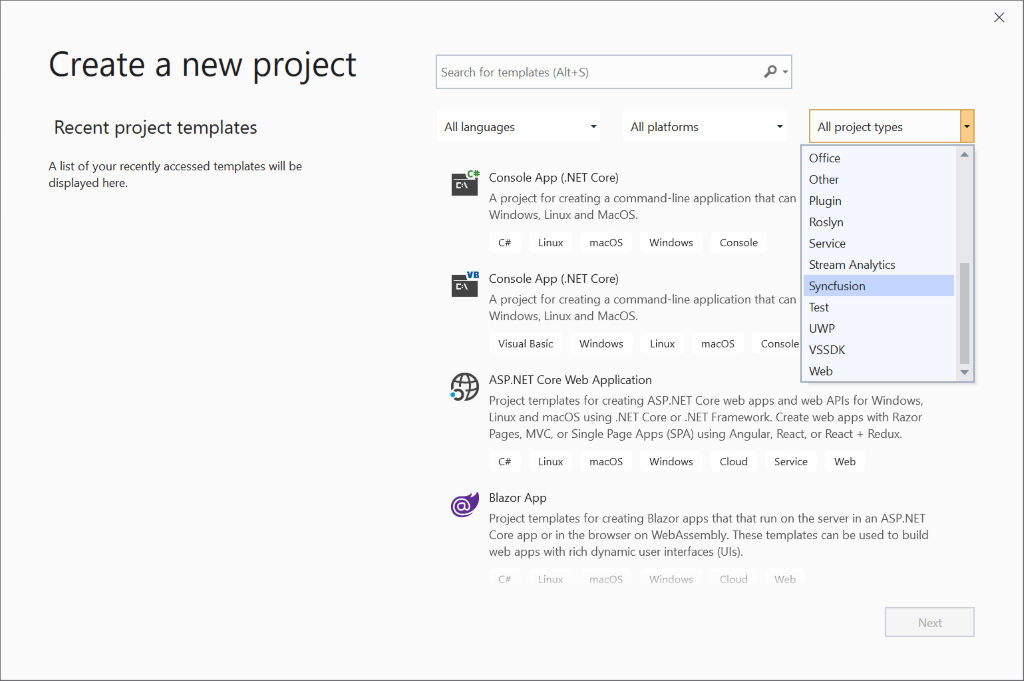
- Select Syncfusion Blazor Template Studio from the search results and click Next.
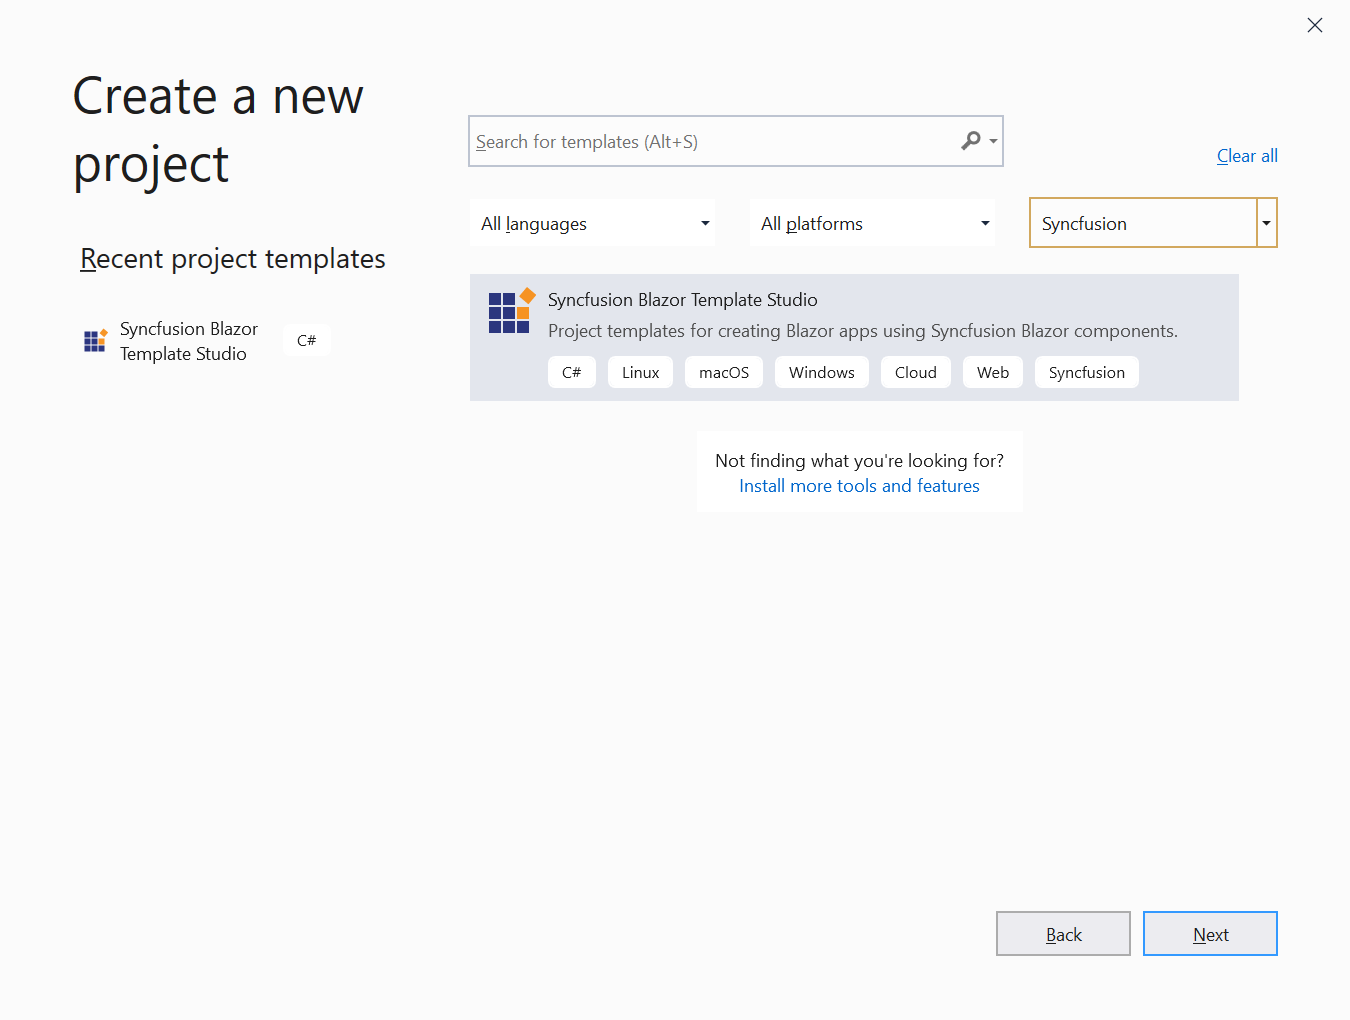
- Provide a name for the app.
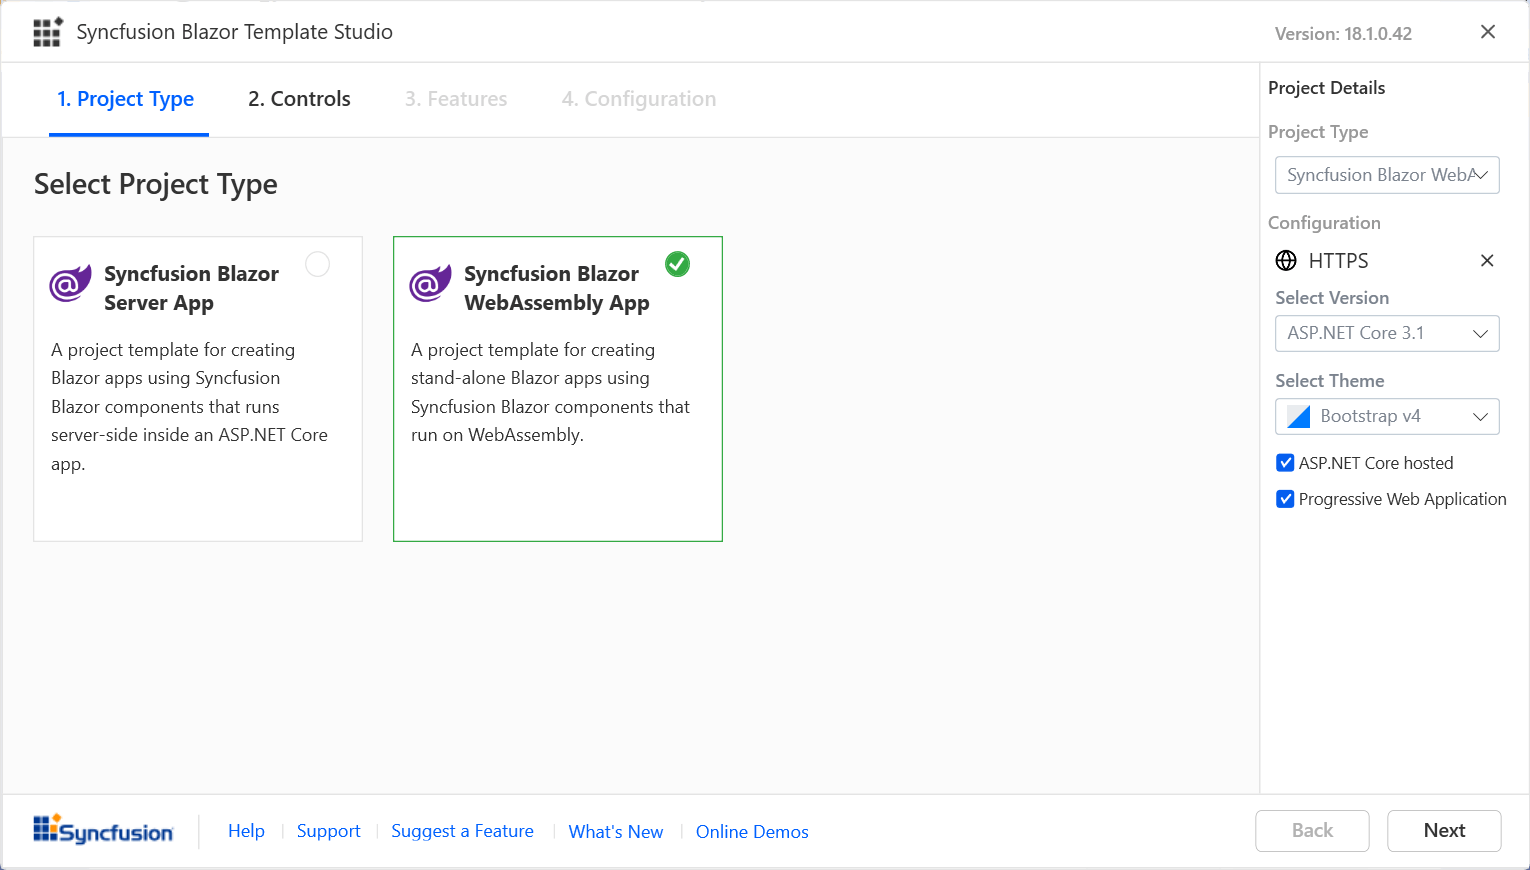
- Select the Blazor project type you need:
- Syncfusion Blazor Server App.
- Syncfusion Blazor WebAssembly App.
Note: In Syncfusion Blazor WebAssembly App project type, we can choose ASP.NET Core hosted, Progressive Web Application, or both.
 Note: The Progressive Web Application option will only be available if .NET Core SDK version 3.1.102 or newer is installed.
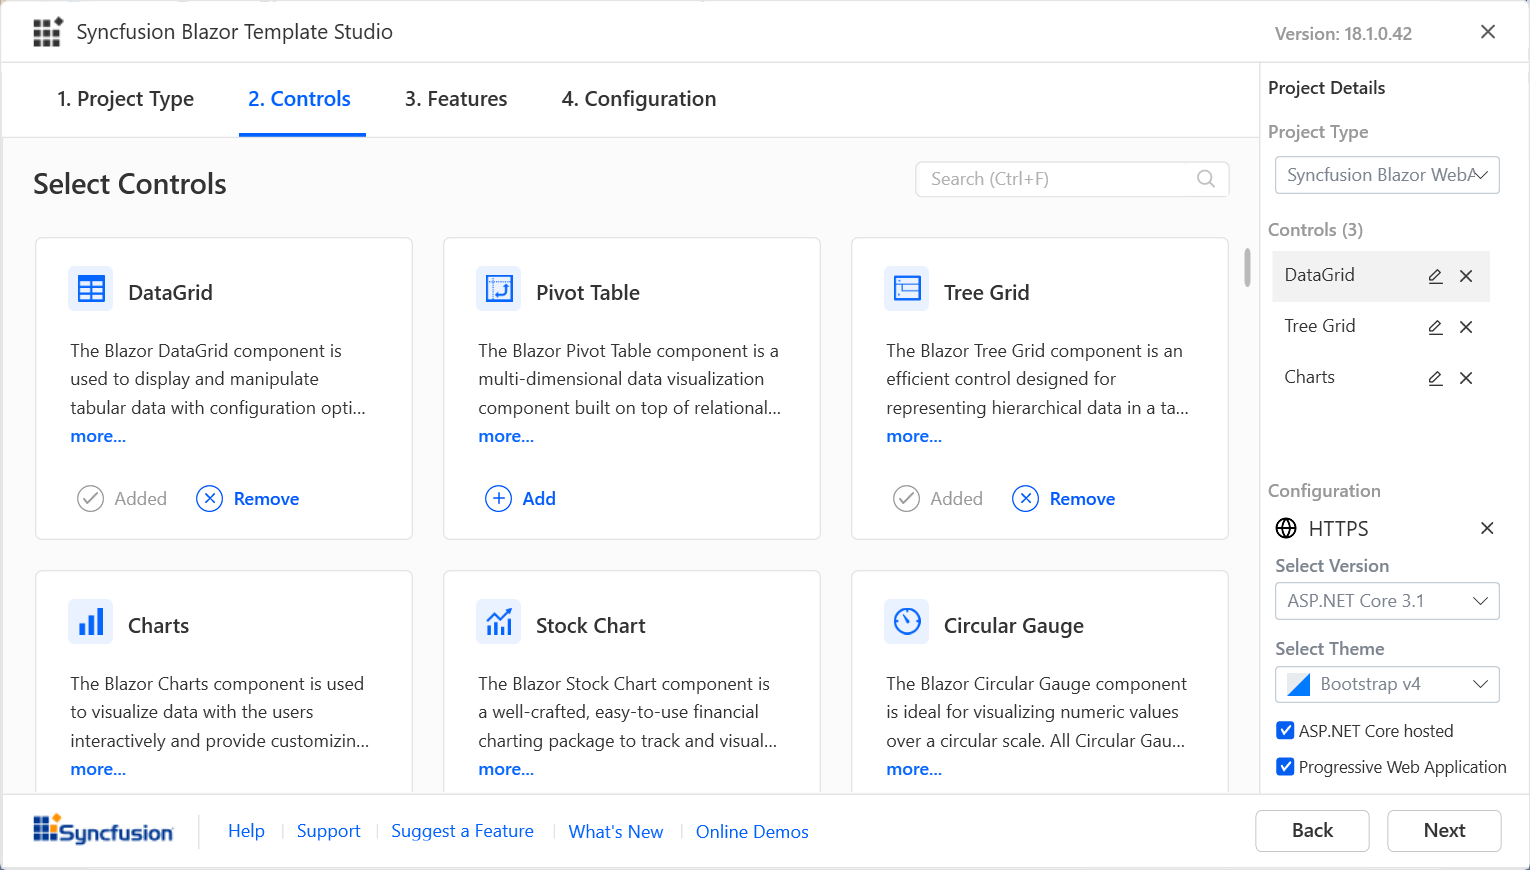
- Select the controls you need for your app by clicking the Add option in Controls
- In the Features tab, select the features you need for the selected Syncfusion controls.
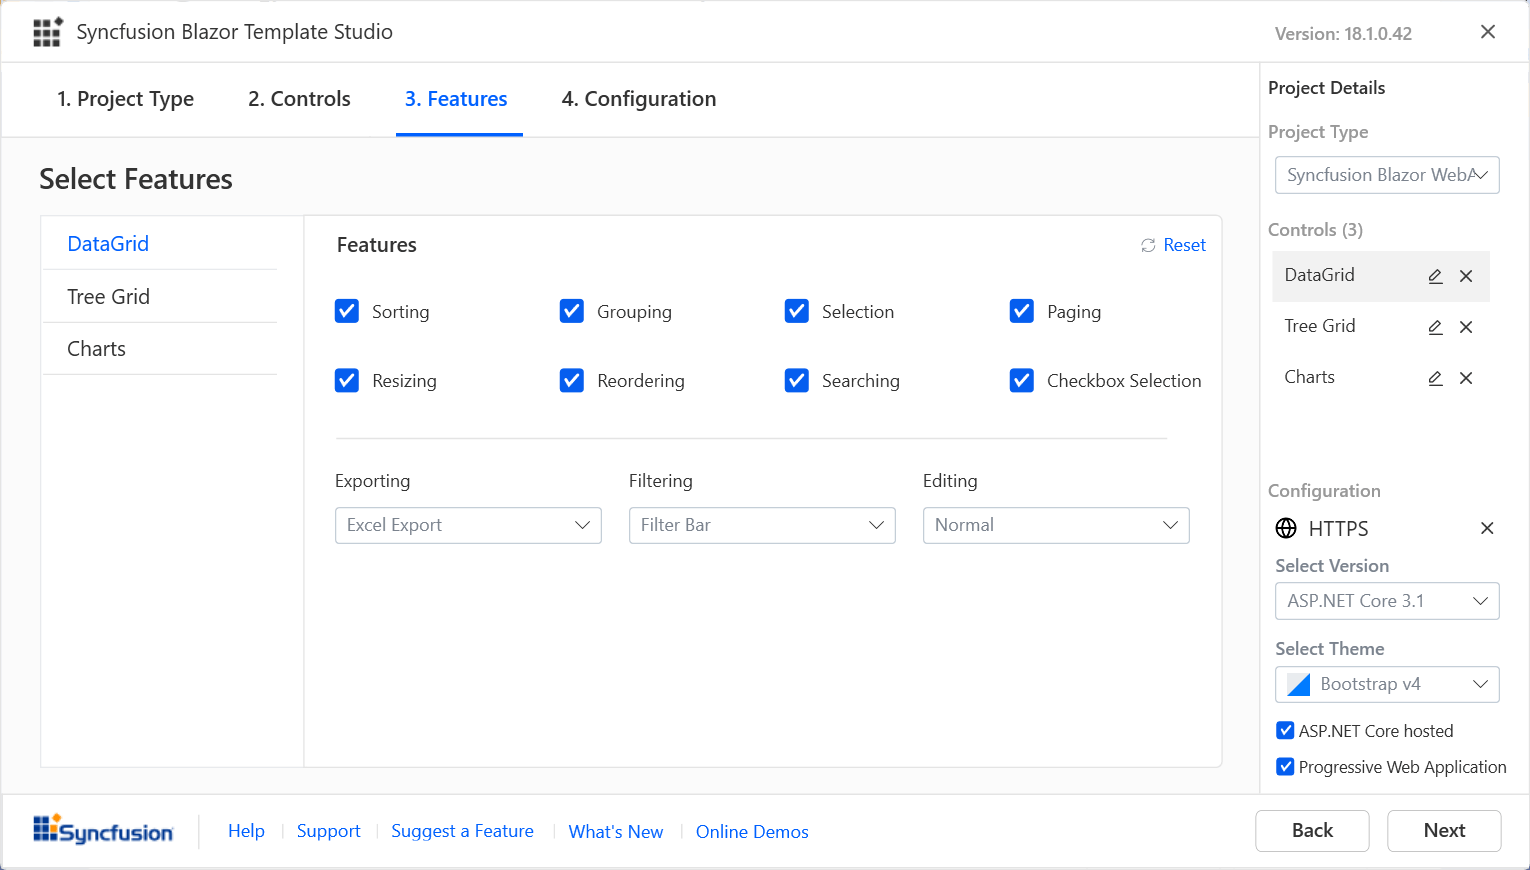
- In the Configuration tab, choose the .NET Core version and themes, and then click Create.

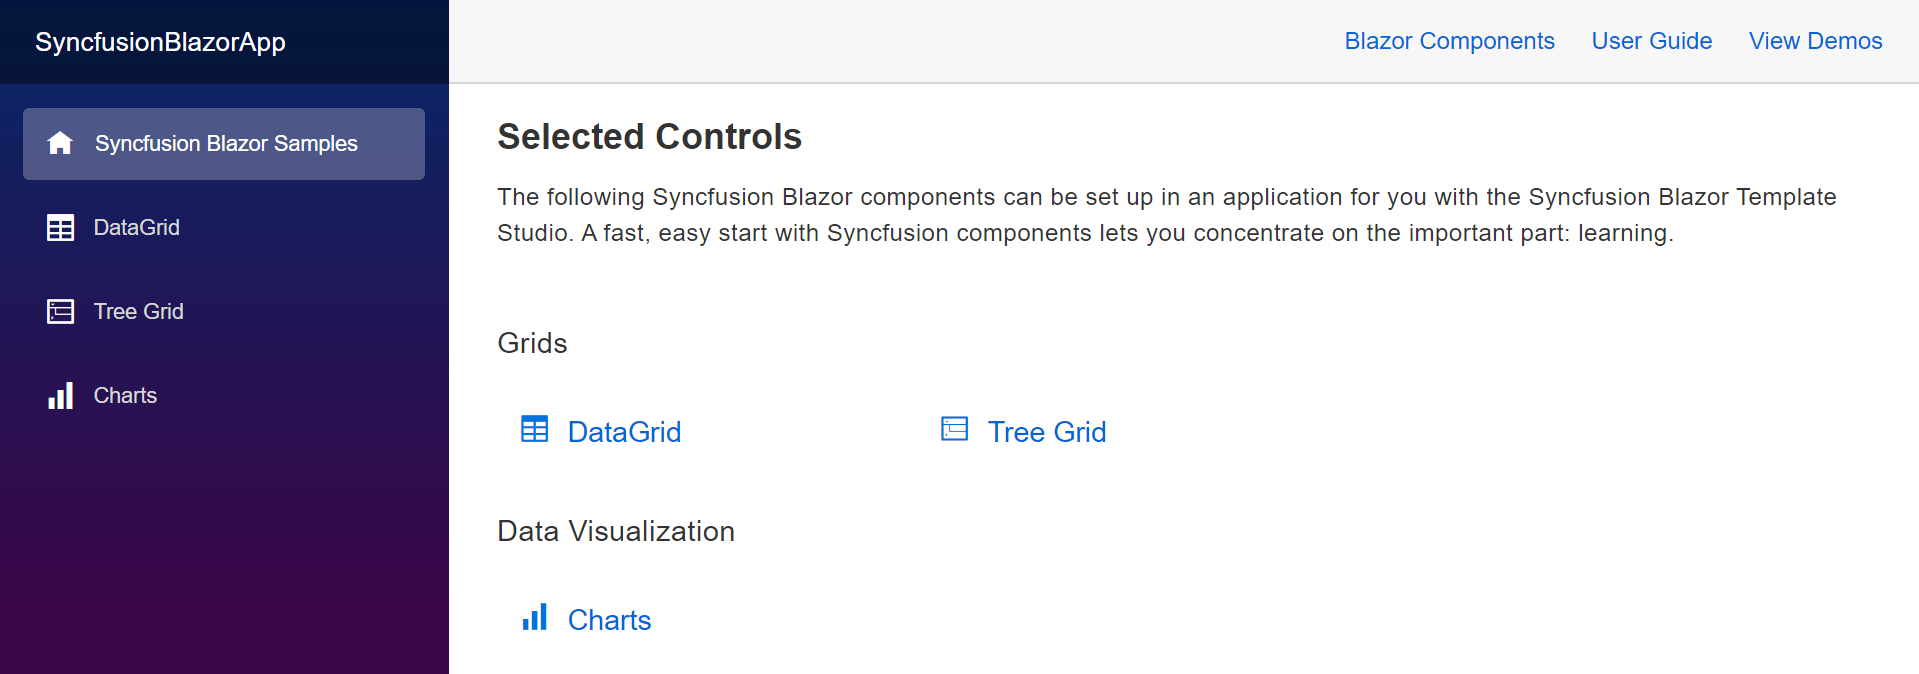
The Blazor app will be created with the required NuGet packages for the Syncfusion components, and sample code for the selected features of the controls will be added as separate Razor files.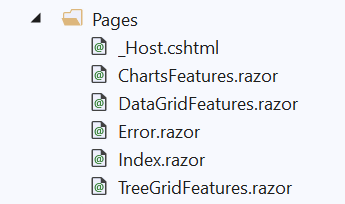
- Build and run the app to view the selected Syncfusion components.
Conclusion
In this blog, we learned about creating a Blazor project using the Syncfusion Blazor Template Studio available with our 2020 Volume 1 release. This will help you create attractive web applications in less time. You can checkout our other Visual Studio extensions from this blog.
Now it’s your turn to try out our Syncfusion Blazor Template Studio to create versatile web applications.
If you have any questions about our products, please let us know in the comments below. You can also contact us through our support forum, Direct-Trac, or feedback portal. We are always happy to assist you!


 No spam, just valuable updates.
Comments (4)
Is this available for Visual Studio for Mac too?
Hi Leszek,
No. At present, we support only Visual Studio for Windows. We have a feature request to extend the development for Visual Studio for Mac. You can track the implementation of this feature using the below feedback link.
https://www.syncfusion.com/feedback/13494/syncfusion-blazor-template-studio-support-to-visual-studio-for-mac
Regards,
Kannan
The main reason of this ticket is a fact, that Blazor is ASP.NET Core, and ASP.NET Core is ready on Windows, MacOS and Linux platform…
Yes we understand. We will plan the Syncfusion Blazor Template Studio Extensions support for MacOS and Linux OS in the upcoming release in the future.