

To help our customers enjoy a smooth experience, Syncfusion is producing simple how-to videos on getting started. This blog accompanies the newly released video, Welcome to Direct-Trac: Syncfusion’s Customer Support System, for those who prefer to read instructions. It will familiarize you with the process of using Direct-Trac, Syncfusion’s internally built customer support and incident management system.
Getting Started
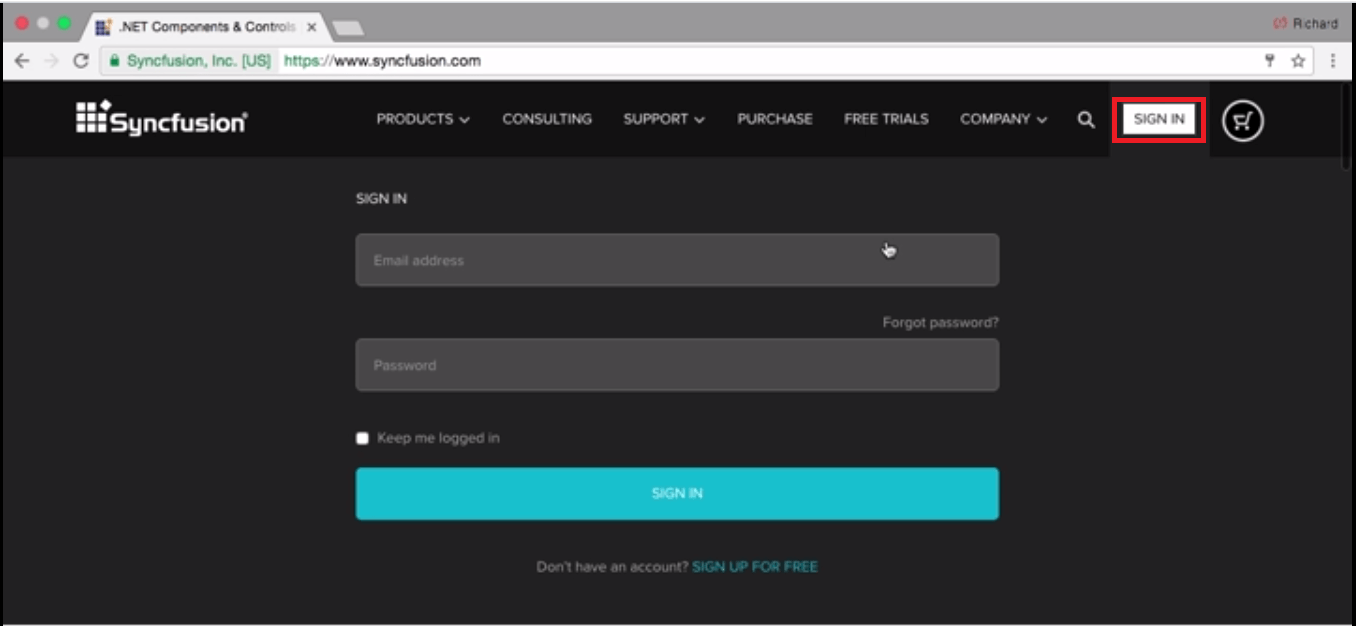
If you have downloaded an evaluation copy of our software, or if you are a customer, you will receive a confirmation email that will contain your login information. Use the password in this email to log in to your Direct-Trac account.
On your home screen, you will have access to many different portals.
Use the Profile portal to update your personal information, account details, portal details, and your password.
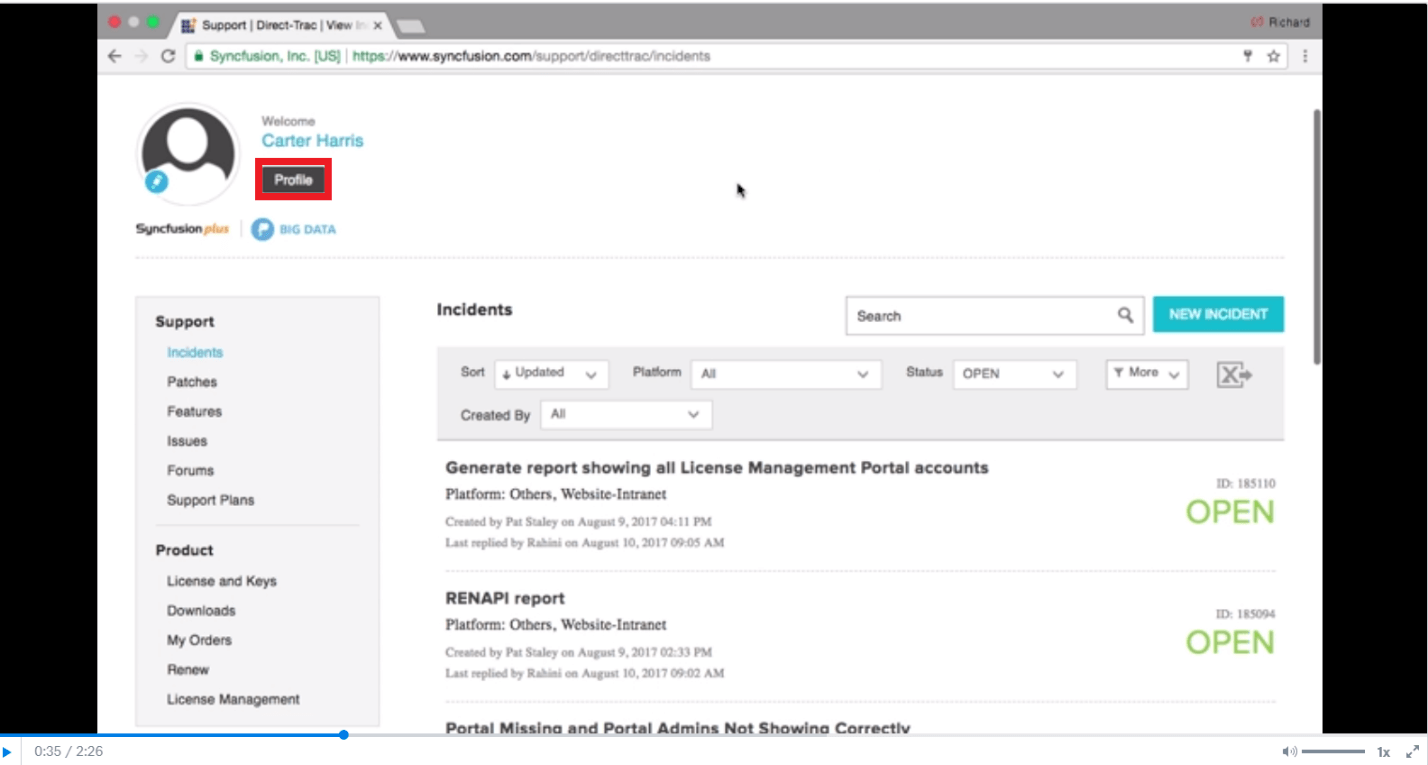 Home screen with Profile portal highlighted.
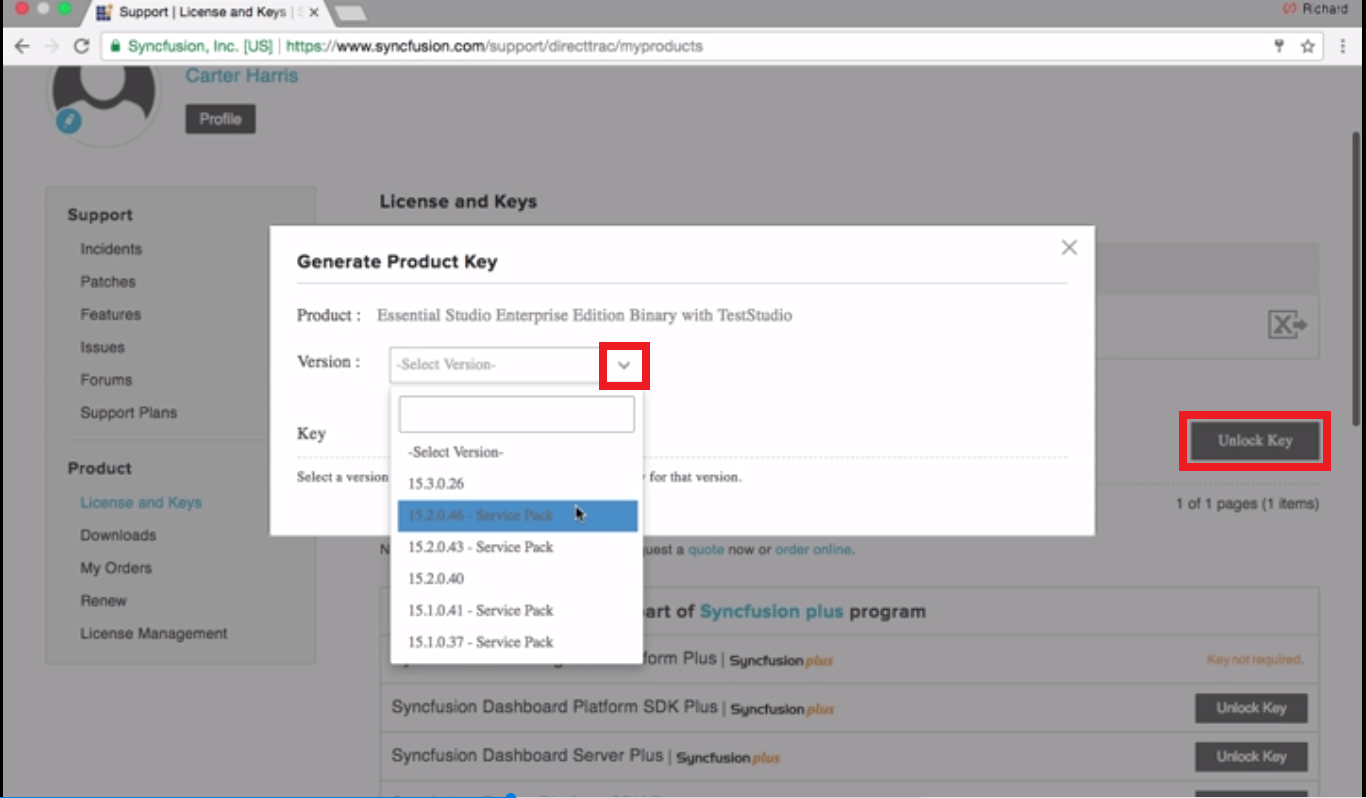
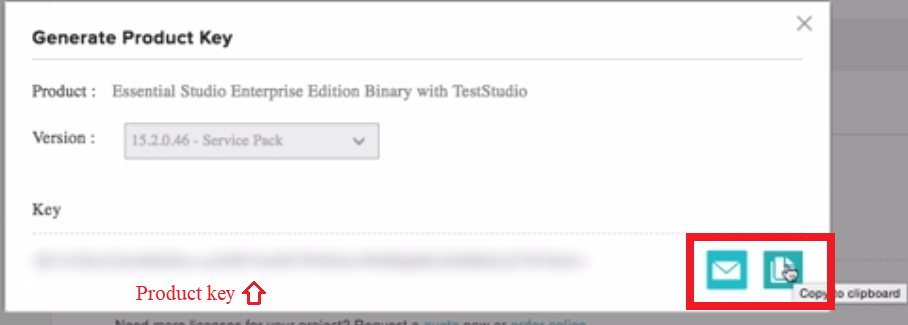
Get an unlock key for your license in the License and Keys portal under Product on the sidebar. Click Unlock Key, select the version you want from the drop-down, and your key will appear at the bottom of the pop-up screen.
Click one of the icons to the right to copy your key or send it to your email account.
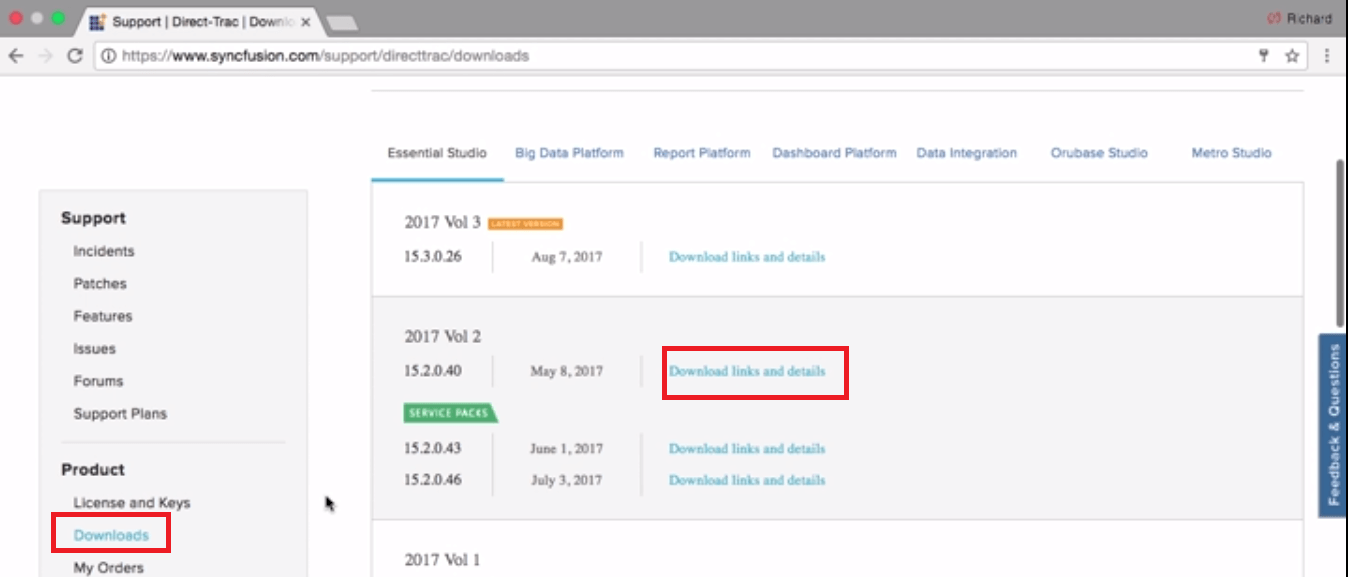
You can use your key in the Downloads portal, also under Product on the home screen’s sidebar. In the portal, find what you want to download, and make your selection by clicking Download links and details.
Incidents
In the Incidents portal, under Support on the home screen’s sidebar, you will see a list of any support incident that is open, closed, or pending. This is your hub for managing your support incidents.

The Incident Portal.
When creating a new incident (by clicking New Incident), you can edit your incident settings via our drop-down lists. That way we can tailor the samples we make to your preferences.
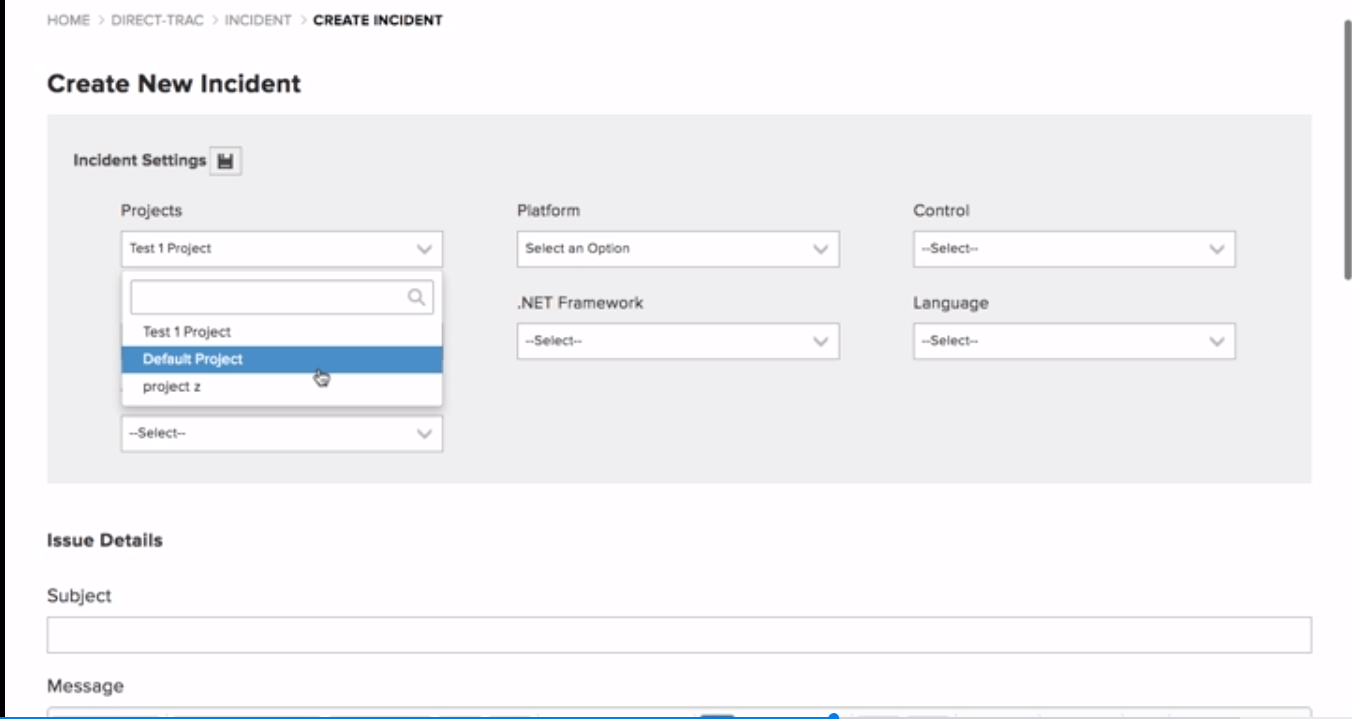
Use the drop-down lists in the Incident Portal.
After filling out your incident settings, you can describe your issue in the Subject and Message text boxes.
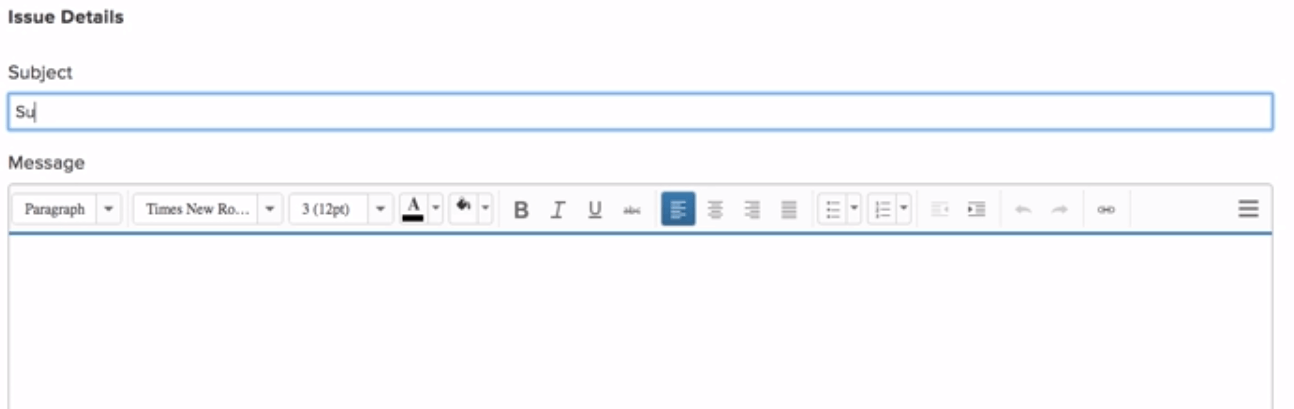
If you have any images, videos, or documents, you can attach them as well.

Once you’ve input all your information, just click Create Incident.
You’ll receive an email confirming that the incident has been created, which will include the incident ID number.
Within your newly created incident, you’ll be able to review your incident information, as well as have a direct means of contact with our support team throughout the problem-solving process.

Created incident. Click drop-down for details.
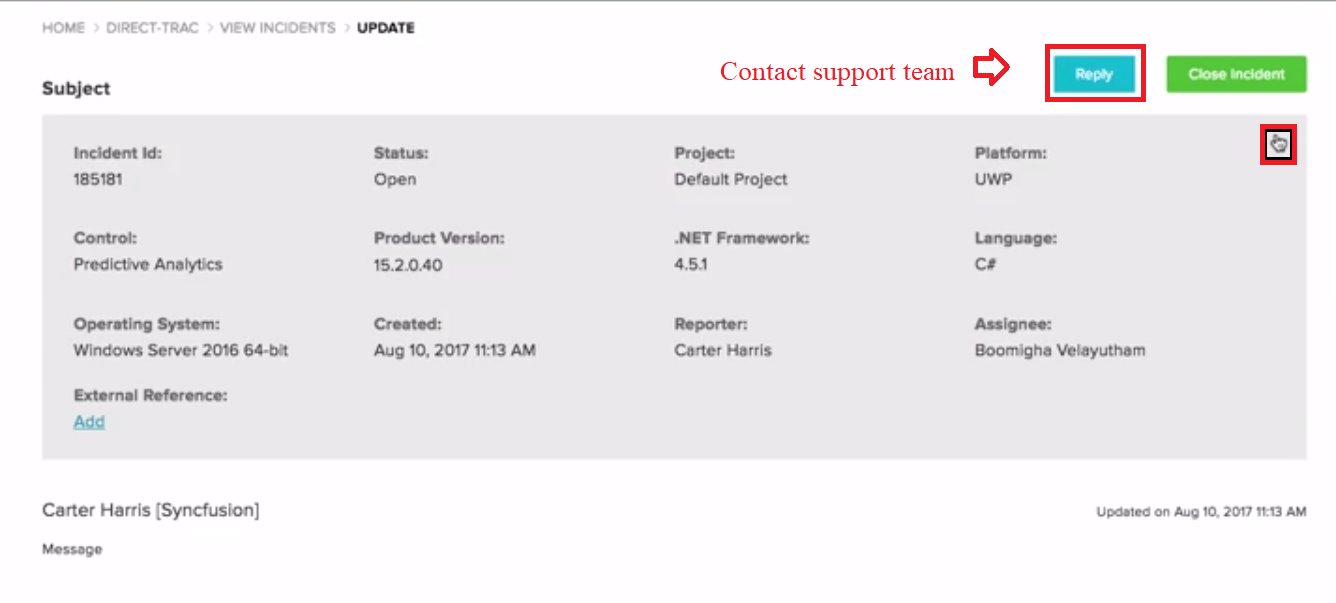
Showing details opened by the drop-down. Click Reply to contact support.
Feedback:
When your problem has been solved, close the incident, and a support feedback page will open.
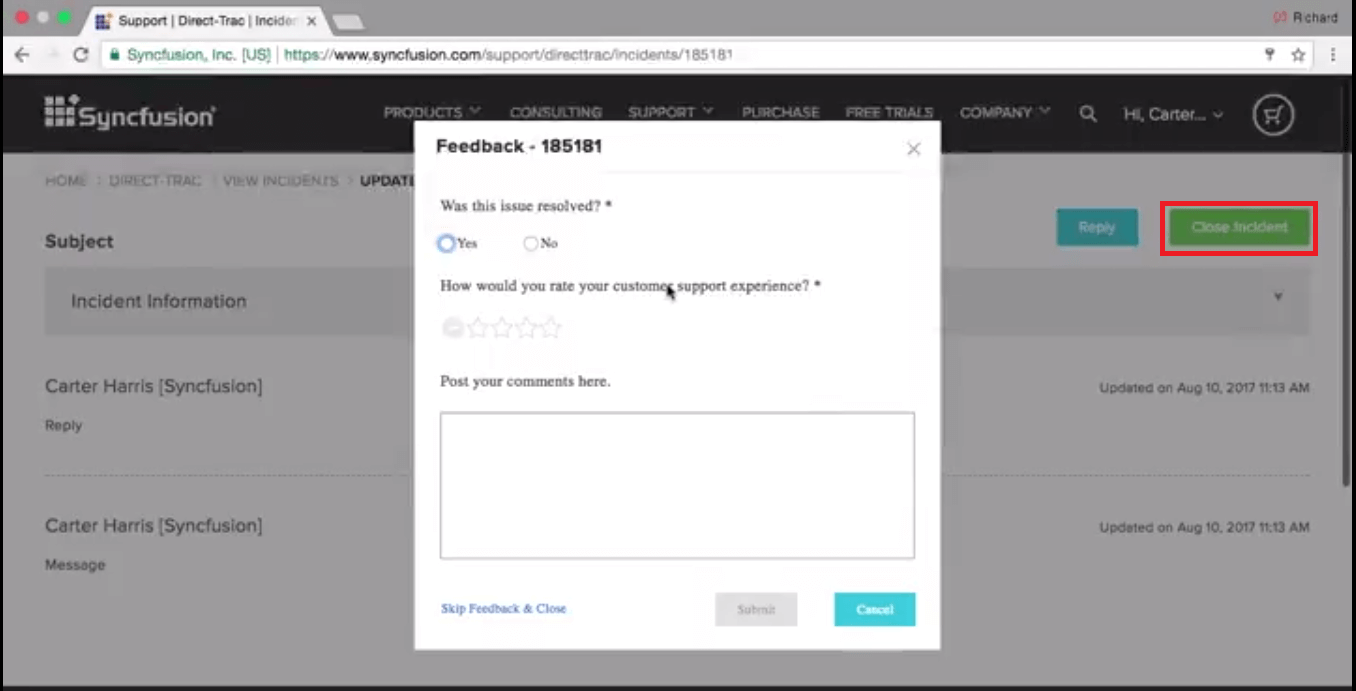
We always welcome feedback, so please be sure to answer the questions and post your comments.
Thank you for your support, and welcome to Direct-Trac!
If you’re experienced and have any tips for beginners, please post them in the comments, or on Facebook or Twitter.
 No spam, just valuable updates.
Comments (5)
I have a PDF form with fields in it that I will be outputting to. They are just text boxes that I want to keep as single line. I would like to word-wrap to another field when the text overflows. Is there any easy way that Essential PDF handles situations like this where I won’t have to create an algorithm myself?
Hi Allen,
Greetings from Syncfusion.
At present we do not have direct support for populate all the text box fields based on text overflow from a single string. Although we can achieve this requirement by a workaround in sample level and we have created a simple sample for the same. Which can be downloaded from below link:
http://www.syncfusion.com/downloads/support/directtrac/general/ze/Form_sample_PDF-22426879
Please refer our UG documentation to know more about Essential PDF:
https://help.syncfusion.com/file-formats/pdf/getting-started
Regards,
Surya Kumar
Hello,
Please tell me how to use syncfusion toolkit for existing project asp.net webform 3.5 framework.
Hi Shivanand,
Greetings from Syncfusion Support.
We have already discussed the framework add-ons in the below help documentation link,
https://help.syncfusion.com/common/essential-studio/installation/essential-studio-platform-framework-add-ons
And also, in the below help documentation link we have discussed about how to integrate the Syncfusion ASP.NET controls manually into the newly created/existing ASP.NET Web Forms application.
https://help.syncfusion.com/aspnet/getting-started/manual-integration-of-syncfusion-aspnet-controls
Kindly get back to us, if you need further assistance.
Regards,
Manivannan Padmanaban.
Hi,
can you please advise. I am trying to use sfbutton, which I got working, but the image alignment only give option start or end, while documentation state top is also an option?
I am on 17.2.0.51
Regards
Gert Cloete