---
title: "How to Preview Videos Before Uploading Files in Angular File Upload"
published_at: "2026-01-13T12:02:05+00:00"
modified_at: "2026-01-14T14:10:37+00:00"
url: "https://www.syncfusion.com/blogs/post/video-preview-in-angular-file-upload"
excerpt: "Learn how to implement video preview in Angular File Upload for better UX. Step-by-step guide with clean code and manual upload control."
taxonomy_category:
  - "Angular"
  - "File Upload"
  - "UI components"
  - "Video Preview"
  - "Web Development"
taxonomy_post_tag:
  - "Angular"
  - "file upload"
  - "FrontEnd Development"
  - "UX Enhancement"
  - "Video preview"
---

# How to Preview Videos Before Uploading Files in Angular File Upload

[UdhayaKumar Duraisamy](https://www.syncfusion.com/blogs/author/udhayakumar-duraisamy)
![How to Implement Video Preview in the Angular File Upload Component](https://www.syncfusion.com/blogs/wp-content/uploads/2026/01/How-to-Implement-Video-Preview-in-the-Angular-File-Upload-Component.jpg)


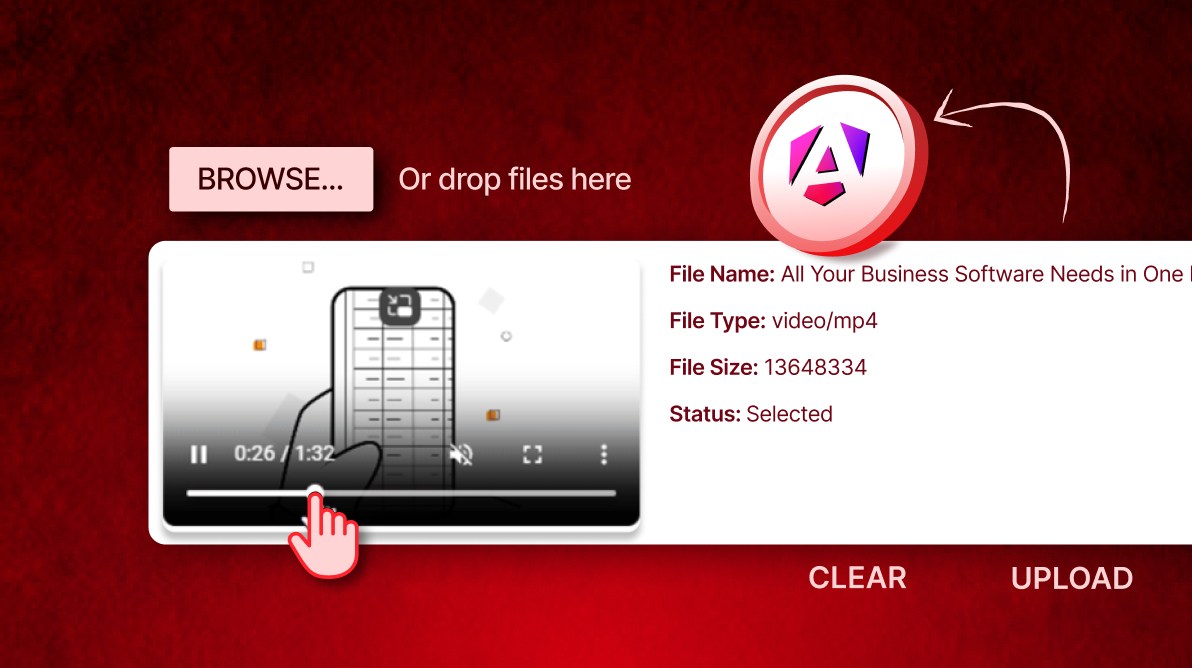
**TL;DR:** Want to boost your Angular file upload UX? Add video preview before upload to validate files, show instant playback, and track progress with Angular events.

Building a video-sharing platform or media dashboard? If you’re creating a video-sharing platform or a media management dashboard, adding a video preview before upload can significantly enhance the user experience. This feature allows users to confirm they’ve selected the correct file, reduces upload errors, and boosts confidence all with minimal effort.

In this guide, you’ll discover how to implement video preview functionality in Angular using the [Syncfusion® Angular Uploader](https://www.syncfusion.com/angular-components/angular-file-upload)
 component. We’ll walk through the essential components, events, and clean Angular code needed for a seamless integration.

## Why video preview matters

Video preview is a must-have for platforms such as:

- Video content platforms (e.g., YouTube-like apps).
- Admin dashboards for media management.
- Educational portals for lecture upload.
- Marketing tools for promotional videos.

This feature lets users verify the file type, content, and quality before uploading. It helps prevent mistakes and saves time for both users and administrators.

## Prerequisites

Before you begin, ensure the following requirements are met:

- Review the [System requirements](https://ej2.syncfusion.com/angular/documentation/system-requirement) for Syncfusion Angular components.
- Complete the [Angular](https://angular.dev/installation) installation guide.
- Install the [Angular Uploader](https://ej2.syncfusion.com/angular/documentation/uploader/getting-started) component following it’s setup guide.

## Key concepts

To implement video preview functionality, we’ll use the following:

- [Syncfusion EJ2 Angular Uploader](https://ej2.syncfusion.com/angular/demos/#/tailwind3/uploader/default) for file selection and upload.
- Event binding for [selected](https://ej2.syncfusion.com/angular/documentation/api/uploader/index-default#selected) , [beforeUpload](https://ej2.syncfusion.com/angular/documentation/api/uploader/index-default#beforeupload) , [progress](https://ej2.syncfusion.com/angular/documentation/api/uploader/index-default#progress) , [success](https://ej2.syncfusion.com/angular/documentation/api/uploader/index-default#success) , and [failure](https://ej2.syncfusion.com/angular/documentation/api/uploader/index-default#failure) events.
- **Blob URL** via [URL.createObjectURL()](https://developer.mozilla.org/en-US/docs/Web/API/URL/createObjectURL_static) to generate video previews.
- Status handling for real-time upload feedback
- Memory cleanup using [URL.revokeObjectURL()](https://developer.mozilla.org/en-US/docs/Web/API/URL/revokeObjectURL_static) to release resources efficiently.

## Step-by-step implementation

Follow these steps to implement video preview before upload in Angular while maintaining manual control and a simple workflow.

### Step 1: Configure the Uploader

The first step is to initialize the [Syncfusion Angular Uploader component](https://ej2.syncfusion.com/angular/documentation/uploader/getting-started)
 in your Angular template. To ensure proper functionality, apply the following settings:

- Restrict file types to video formats (**.mp4**, **.avi**, **.mov**, etc.) using an [allowedExtensions](https://ej2.syncfusion.com/angular/documentation/api/uploader/index-default#allowedextensions) property.
- Set [autoUpload](https://ej2.syncfusion.com/angular/documentation/api/uploader/index-default#autoupload) property to false for manual control over uploads.
- Disable the [multiple](https://ej2.syncfusion.com/angular/documentation/api/uploader/index-default#multiple) property to allow only one file at a time.
- Define [asyncSettings](https://ej2.syncfusion.com/angular/documentation/api/uploader/index-default#asyncsettings) property for API endpoints to handle save and remove operations.

Here is the code example for the template:

```
<ejs-uploader
    id="videoUploader"
    #videoUploader
    [autoUpload]='false'
    dropArea="#container"
    multiple='false'
    allowedExtensions='.mp4,.avi,.mov,.wmv,.flv,.mkv,.webm,.mpeg'
    [asyncSettings]='path'>
</ejs-uploader>
```

**Component setup**

Next, configure the component logic in **`app.component.ts.`**

```
import { Component, ElementRef, ViewChild } from '@angular/core';
import { CommonModule } from '@angular/common';
import { UploaderModule, SelectedEventArgs, UploaderComponent } from '@syncfusion/ej2-angular-inputs'

@Component({
    selector: 'app-root',
    imports: [CommonModule, UploaderModule],
    templateUrl: './app.component.html',
    styleUrl: './app.component.css'
})
export class AppComponent {
    title = 'VideoPreviewforAngularUploader';

    @ViewChild('videoUploader') uploadObj!: UploaderComponent;

    public path: Object = {
        saveUrl: 'https://services.syncfusion.com/angular/production/api/FileUploader/Save',
        removeUrl: 'https://services.syncfusion.com/angular/production/api/FileUploader/Remove'
    };
}
```

### Step 2: Handle file selection

Ones the uploader is configures, the next step is to handle file selection. Use the [selected](https://ej2.syncfusion.com/angular/documentation/api/uploader/index-default#selected)
 event to trigger the `onFileSelected()` method, which extracts the selected file’s details. Here’s what you need to do:

- Validate the file type to ensure it’s a video.
- Store metadata such as name, size, type, and status.
- Generate a **Blob URL** for preview using `URL.createObjectURL()`.

Add the event binding in your template:

```
<ejs-uploader
    id="videoUploader"
    #videoUploader
    [autoUpload]='false'
    dropArea="#container"
    multiple='false'
    allowedExtensions='.mp4,.avi,.mov,.wmv,.flv,.mkv,.webm,.mpeg'
    [asyncSettings]='path'
    (selected)="onFileSelected($event)">
</ejs-uploader>
```

**Component setup**

Next, configure the component to store and manage file information. Define an object to hold the file details.

```
// Object to store file information
public fileInfo: {
    name: string;
    size: number;
    type: string;
    status: string;
    StatusClass: string;
    blobUrl: string;
} = {
    name: '',
    size: 0,
    type: '',
    status: '',
    StatusClass: '',
    blobUrl: ''
};
```

### Step 3: Generate video preview

After handling file selection, the next step is to generate a video preview. To do this, create a temporary **Blob URL** using [URL.createObjectURL()](https://developer.mozilla.org/en-US/docs/Web/API/URL/createObjectURL_static)
 and bind it to a [<video>](https://developer.mozilla.org/en-US/docs/Web/HTML/Reference/Elements/video)
 element in your template.

Refer to the code snippet.

```
export class AppComponent {

    @ViewChild('videoPlayer') videoPlayer!: ElementRef;

    public onFileSelected(args: SelectedEventArgs) {
        const file = args.filesData[0].rawFile as File;

        // Validate if the selected file is a video file
        if (file instanceof File && file.type.startsWith('video/')) {
            const blobUrl = URL.createObjectURL(file);
            this.fileInfo = {
                name: file.name,
                size: file.size,
                type: file.type,
                status: 'Selected',
                StatusClass: 'text-muted',
                blobUrl: blobUrl
            };
        } else {
            // Reset file info if not a video file
            this.fileInfo = {
                name: file.name,
                size: file.size,
                type: file.type,
                status: 'Invalid File Type. Please select a video file.',
                StatusClass: 'text-danger',
                blobUrl: ''
            };
        }
    }
}
```

**Note:** The `fileInfo.blobUrl` property is used to dynamically bind the video source.

### Step 4: Display preview and file details

Now display the video preview along with the file’s metadata (name, type, size, and status) using Angular template bindings and [*ngIf](https://angular.dev/api/common/NgIf)
. Apply dynamic CSS classes for status-based styling.

Add this to your project:

```
<ejs-uploader
    id="videoUploader"
    #videoUploader
    [autoUpload]='false'
    dropArea="#container"
    multiple='false'
    allowedExtensions='.mp4,.avi,.mov,.wmv,.flv,.mkv,.webm,.mpeg'
    [asyncSettings]='path'
    (selected)="onFileSelected($event)">
    <ng-template #template>
        <div *ngIf="fileInfo.name" style="display: flex; align-items: flex-start; margin: 0 auto; padding: 10px; gap: 20px; width: 100%; flex-wrap: wrap;">

            <!-- Video Preview Section -->
            <div style="flex: 0 0 320px; max-width: 100%;">
                <div *ngIf="fileInfo.blobUrl; else noVideoSelected" style="width: 100%; height: auto; border-radius: 8px; box-shadow: 0 4px 8px rgba(0, 0, 0, 0.2);">
                    <video controls autoplay [muted]="true" style="width: 100%; height: auto; border-radius: 8px;">
                        <source [src]="fileInfo.blobUrl" />
                        Your browser does not support the video tag.
                    </video>
                </div>
                <ng-template #noVideoSelected>
                    <div style="width: 100%; height: 200px; display: flex; align-items: center; justify-content: center; background-color: #f8f9fa; border: 2px dashed #dee2e6; border-radius: 8px;">
                        <p style="color: #6c757d; font-size: 16px; margin: 0;">Select a Valid File</p>
                    </div>
                </ng-template>
            </div>

            <!-- File Information Panel -->
            <div class="{{ fileInfo.StatusClass }}" style="flex: 1; padding: 10px; max-width: 100%;">
                <div class="mt-3"><strong>File Name:</strong> {{ fileInfo.name }}</div>
                <div class="mt-3"><strong>File Type:</strong> {{ fileInfo.type }}</div>
                <div class="mt-3"><strong>File Size:</strong> {{ fileInfo.size }}</div>
                <div class="mt-3"><strong>Status:</strong> {{ fileInfo.status }}</div>
            </div>
        </div>
    </ng-template>
</ejs-uploader>
```

### Step 5: Track file upload status

To provide real-time feedback during the upload process, use the [beforeUpload](https://ej2.syncfusion.com/angular/documentation/api/uploader/index-default#beforeupload)
, [progress](https://ej2.syncfusion.com/angular/documentation/api/uploader/index-default#progress)
, [success](https://ej2.syncfusion.com/angular/documentation/api/uploader/index-default#success)
, and [failure](https://ej2.syncfusion.com/angular/documentation/api/uploader/index-default#failure)
 events. These events update the `fileInfo.status` and `fileInfo.StatusClass` dynamically:

- **beforeUpload:** Indicates upload start.
- **progress:** Displays upload percentage.
- **success:** Confirms successful upload.
- **failure:** Shows error message.

Below is the code you need:

```
<ejs-uploader
    id="videoUploader"
    #videoUploader
    [autoUpload]='false'
    dropArea="#container"
    multiple='false'
    allowedExtensions='.mp4,.avi,.mov,.wmv,.flv,.mkv,.webm,.mpeg'
    [asyncSettings]='path'
    (selected)="onFileSelected($event)"
    (beforeUpload)="onBeforeUpload($event)" 
    (progress)="onProgress($event)"
    (success)="onSuccess($event)"
    (failure)="onFailure($event)">
    <ng-template #template>
        ...
        ...
    </ng-template>
</ejs-uploader>
```

**Component methods:**

```
public onBeforeUpload(args: any) {
    // Update status when upload starts
    this.fileInfo.status = 'Uploading...';
    this.fileInfo.StatusClass = 'text-info';
}

public onProgress(args: any) {
    // Update status with upload progress percentage
    const progressPercentage = Math.round((args.e.loaded / args.e.total) * 100);
    this.fileInfo.status = `Uploading... ${progressPercentage}%`;
    this.fileInfo.StatusClass = 'text-primary';
}

public onSuccess(args: any) {
    // Update status when upload is successful
    this.fileInfo.status = 'File uploaded successfully';
    this.fileInfo.StatusClass = 'text-success';
}

public onFailure(args: any) {
    // Update status when upload fails
    this.fileInfo.status = 'Upload failed. Please try again.';
    this.fileInfo.StatusClass = 'text-danger';
}
```

### Step 6: Remove files

Finally allow users to remove a selected or uploaded file and reset the UI. To achieve this, display a remove button that appears based on the upload status. When the button is clicked, call the `deleteFile()` method to:

- Revoke the **Blob URL** using [URL.revokeObjectURL](https://developer.mozilla.org/en-US/docs/Web/API/URL/revokeObjectURL_static) (), to free memory.
- Reset the uploader using Syncfusion’s `remove()` or **`clearAll()`** methods.
- Clear the **`fileInfo object`** to refresh the UI.

Add this to your project:

```
<ng-template #template>
    <div
        *ngIf="fileInfo.name"
        style="display: flex; align-items: flex-start; margin: 0 auto; padding: 10px; gap: 20px; width: 100%; flex-wrap: wrap;">

        <!-- Video Preview Section -->
        ...
        ...

        <!-- File Information Panel -->
        ...
        ...

        <!-- Delete/Remove Button -->
        <div style="flex: 0 0 auto; padding: 10px;">
            <span
                *ngIf="fileInfo.status === 'File uploaded successfully'; else removeButton"
                class="e-icons e-file-delete-btn"
                id="deleteIcon"
                title="Delete"
                (click)="deleteFile('Delete')"
                style="cursor: pointer;">
            </span>
            <ng-template #removeButton>
                <span
                    class="e-icons e-file-remove-btn"
                    id="remove_btn"
                    title="Remove"
                    (click)="deleteFile('Remove')"
                    style="cursor: pointer;">
                </span>
            </ng-template>
        </div>
    </div>
</ng-template>
```

**Component method:**

```
public deleteFile(operation: string) {
    // Clean up the blob URL to free memory
    if (this.fileInfo.blobUrl) {
        URL.revokeObjectURL(this.fileInfo.blobUrl);
    }

    // Reset the file information
    this.fileInfo = {
        name: '',
        size: 0,
        type: '',
        status: '',
        StatusClass: '',
        blobUrl: ''
    };
    if (operation == "Delete") {
        this.uploadObj.remove(this.uploadObj.getFilesData());
    }else {
        this.uploadObj.clearAll();
    }
}
```

## How it works

To help you understand the process, here’s a quick breakdown of how the feature works:

- **File selection**: The user selects a video file via the Syncfusion Uploader.
- **Validation and preview**: The onFileSelected method validates the file and generates a ** Blob URL** for preview.
- **UI rendering**: The template displays the video and file metadata, updating dynamically based on fileInfo.
- **Upload tracking**: Syncfusion events monitor the upload process, updating the status in real time.
- **Error handling**: Non-video files trigger an error message, and upload failures are reported.
- **File removal**: The remove/delete button clears the file, resets the UI, and frees memory.

Here’s a quick demo of the feature in action.


Angular video preview using uploader

## GitHub reference

Check out the [GitHub](https://github.com/SyncfusionExamples/Angular-Video-Preview-Before-Upload)
 demo for Angular video preview implementation using the Uploader component.

## FAQs

**Q1: What is the best way to handle very large video files (e.g., over 1GB) to prevent browser crashes?**

**A:** For files larger than a few hundred megabytes, implement Chunk Uploading. This technique splits the large file into smaller binary pieces and uploads them sequentially, reducing memory usage and allowing pause/resume if the network fails.

**Q2: How do I send authentication tokens (like JWT) along with the video upload request?**

**A:** Intercept the upload request using the Uploader’s uploading event. Modify the underlying XMLHttpRequest (AJAX) object to inject custom Authorization headers required by your backend security configuration.

**Q3: Can I allow users to upload an entire directory of video files at once instead of selecting them individually?**

**A:** Yes. Enable the directoryUpload property to true. This switches the file dialog to directory selection mode, allowing upload of all compatible files within the chosen folder.


## Conclusion

Thanks for reading! This guide showed you how to combine [Angular](https://www.syncfusion.com/angular-components)
, **Blob URLs**, and event handling to build a powerful video upload component with preview support. By validating files, generating instant previews, tracking upload progress, and managing cleanup, you deliver a smooth and reliable user experience.

Want to take it further? Add **multi-file uploads**, ** server-side validation**, or even ** custom progress indicators** to make your uploader more advanced.

Ready to upgrade your Angular app? Implement this feature today and share your results! For more ideas and advanced techniques, explore Angular [documentation](https://ej2.syncfusion.com/angular/documentation/introduction)
 or check out community samples. Drop your feedback or questions in the comments, we’d love to hear how this improves your app’s UX!

If you’re a Syncfusion user, you can download the setup from the [license and downloads](https://www.syncfusion.com/account/downloads)
 page. Otherwise, you can download a free [30-day trial](https://www.syncfusion.com/downloads/)
.

You can also contact us through our [support forum](https://www.syncfusion.com/forums)
, [support portal](https://support.syncfusion.com/)
, or [feedback portal](https://www.syncfusion.com/feedback/)
 for queries. We are always happy to assist you!

## Related Blogs


[Angular Block Editor Now Supports Table Blocks in 2025 Volume 4](https://www.syncfusion.com/blogs/post/table-block-angular-block-editor)


[Angular 21 Is Here: How Syncfusion Delivers Compatibility Support](https://www.syncfusion.com/blogs/post/angular-21-updates-syncfusion-support)


[How to Build an AI-Powered Writing Assistant in Angular Using Google Gemini API (Part 1)](https://www.syncfusion.com/blogs/post/ai-writing-assistant-angular-gemini)


[How to Build an AI-Powered Writing Assistant in Angular Using Google Gemini API (Part 2)](https://www.syncfusion.com/blogs/post/ai-writing-assistant-angular-gemini-2)
