---
title: "Design a Temperature Monitor Like a Pro Using WinUI Radial Gauge"
published_at: "2022-11-24T11:04:57+00:00"
modified_at: "2025-11-06T11:23:21+00:00"
url: "https://www.syncfusion.com/blogs/post/temperature-monitor-winui-radial-gauge"
excerpt: "The Syncfusion WinUI Radial Gauge is used to display numerical values on a circular scale. It is a multipurpose data visualization control with a rich feature set. In a previous blog, we saw how to design a sleep tracker using..."
taxonomy_category:
- "Desktop"
- "Development"
- "Gauge"
- "Syncfusion"
- "UI"
- "WinUI"
taxonomy_post_tag:
- "desktop"
- "Radial Gauge"
- "Syncfusion"
- "Temperature monitor"
- "WinUI"
---
# Design a Temperature Monitor Like a Pro Using WinUI Radial Gauge
[Vignesh Ramesh](https://www.syncfusion.com/blogs/author/vignesh-ramesh)
The Syncfusion [WinUI Radial Gauge](https://www.syncfusion.com/winui-controls/radial-gauge)
is used to display numerical values on a circular scale. It is a multipurpose data visualization control with a rich feature set.
In a previous blog, we saw how to [design a sleep tracker](https://www.syncfusion.com/blogs/post/design-a-sleep-tracker-using-winui-radial-gauge.aspx)
using the WinUI Radial Gauge control. This time, we are going to design a temperature monitor using it.
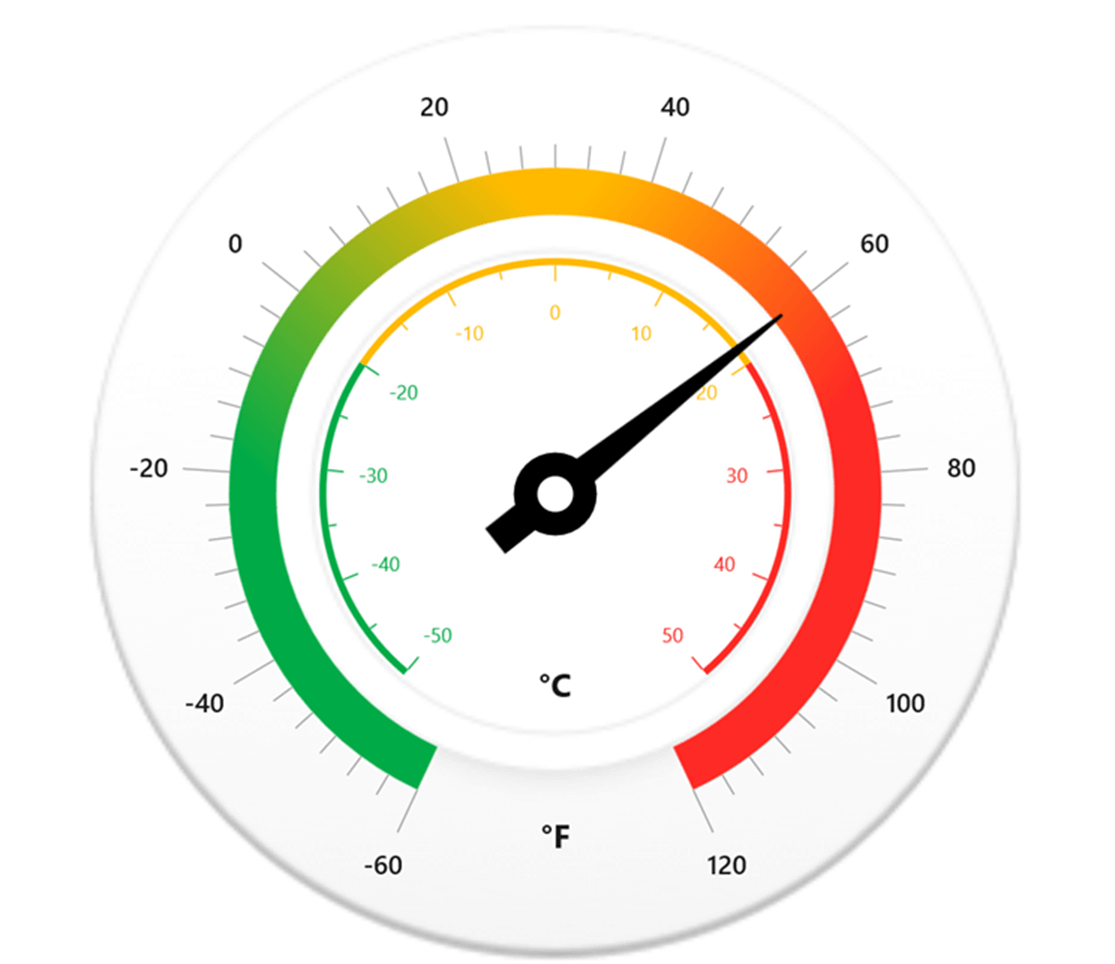
Designing a Temperature Monitor Using WinUI Radial Gauge
## Features of Radial Gauge
To create a temperature monitor, we are going to use the following features of the WinUI Radial Gauge control:
- [Axes](https://help.syncfusion.com/winui/radial-gauge/axes) to display the temperature from [minimum](https://help.syncfusion.com/cr/winui/Syncfusion.UI.Xaml.Gauges.GaugeAxis.html#Syncfusion_UI_Xaml_Gauges_GaugeAxis_Minimum) to [maximum](https://help.syncfusion.com/cr/winui/Syncfusion.UI.Xaml.Gauges.GaugeAxis.html#Syncfusion_UI_Xaml_Gauges_GaugeAxis_Maximum) values with specific [intervals](https://help.syncfusion.com/cr/winui/Syncfusion.UI.Xaml.Gauges.GaugeAxis.html#Syncfusion_UI_Xaml_Gauges_GaugeAxis_Interval) on the radial scale along with [labels](https://help.syncfusion.com/winui/radial-gauge/axes#axis-label-customization) and [ticks](https://help.syncfusion.com/winui/radial-gauge/axes#tick-customization) .
- [Range](https://help.syncfusion.com/winui/radial-gauge/ranges) to indicate the temperature range. We can also add multiple ranges to indicate satisfactory and dangerous temperature levels. The range appearance is customizable with [gradient colors](https://help.syncfusion.com/cr/winui/Syncfusion.UI.Xaml.Gauges.GaugeRange.html#Syncfusion_UI_Xaml_Gauges_GaugeRange_GradientStops) .
- [Pointer](https://help.syncfusion.com/winui/radial-gauge/pointers) to point to the current value in the temperature scale.
- [Annotation](https://help.syncfusion.com/winui/radial-gauge/annotation) to represent the unit of temperature provided in the radial scale.
## Steps to design a temperature monitor using WinUI Radial Gauge
### Step 1: Create a simple radial gauge
First, refer to the [WinUI Radial Gauge control documentation](https://help.syncfusion.com/winui/radial-gauge/overview)
to create a new WinUI application and include the Radial Gauge control in it.
```
```
The gauge elements, such as axes, ranges, pointers, and annotations, are arranged relatively using the custom position option to make the gauge responsive in all window sizes.
### Step 2: Design a temperature scale
Let’s design a temperature scale to display the temperature range. To achieve this, initialize a [radial axis](https://help.syncfusion.com/cr/winui/Syncfusion.UI.Xaml.Gauges.RadialAxis.html)
and add it to the [Axes](https://help.syncfusion.com/cr/winui/Syncfusion.UI.Xaml.Gauges.SfRadialGauge.html#Syncfusion_UI_Xaml_Gauges_SfRadialGauge_Axes)
collection.
The radial axis helps us display a scale that represents the temperature values in axis labels from minimum to maximum values with a predefined interval.
Use the radial axis’s [Minimum](https://help.syncfusion.com/cr/winui/Syncfusion.UI.Xaml.Gauges.GaugeAxis.html#Syncfusion_UI_Xaml_Gauges_GaugeAxis_Minimum)
and [Maximum](https://help.syncfusion.com/cr/winui/Syncfusion.UI.Xaml.Gauges.GaugeAxis.html#Syncfusion_UI_Xaml_Gauges_GaugeAxis_Maximum)
properties to define the minimum and maximum values of the temperature scale. Then, use the radial axis’s [Interval](https://help.syncfusion.com/cr/winui/Syncfusion.UI.Xaml.Gauges.GaugeAxis.html#Syncfusion_UI_Xaml_Gauges_GaugeAxis_Interval)
property to control the scale interval.
To customize the temperature scale’s start and end positions, use the [StartAngle](https://help.syncfusion.com/cr/winui/Syncfusion.UI.Xaml.Gauges.RadialAxis.html#Syncfusion_UI_Xaml_Gauges_RadialAxis_StartAngle)
and [EndAngle](https://help.syncfusion.com/cr/winui/Syncfusion.UI.Xaml.Gauges.RadialAxis.html#Syncfusion_UI_Xaml_Gauges_RadialAxis_EndAngle)
properties of the radial axis.
Refer to the following code example.
```
```
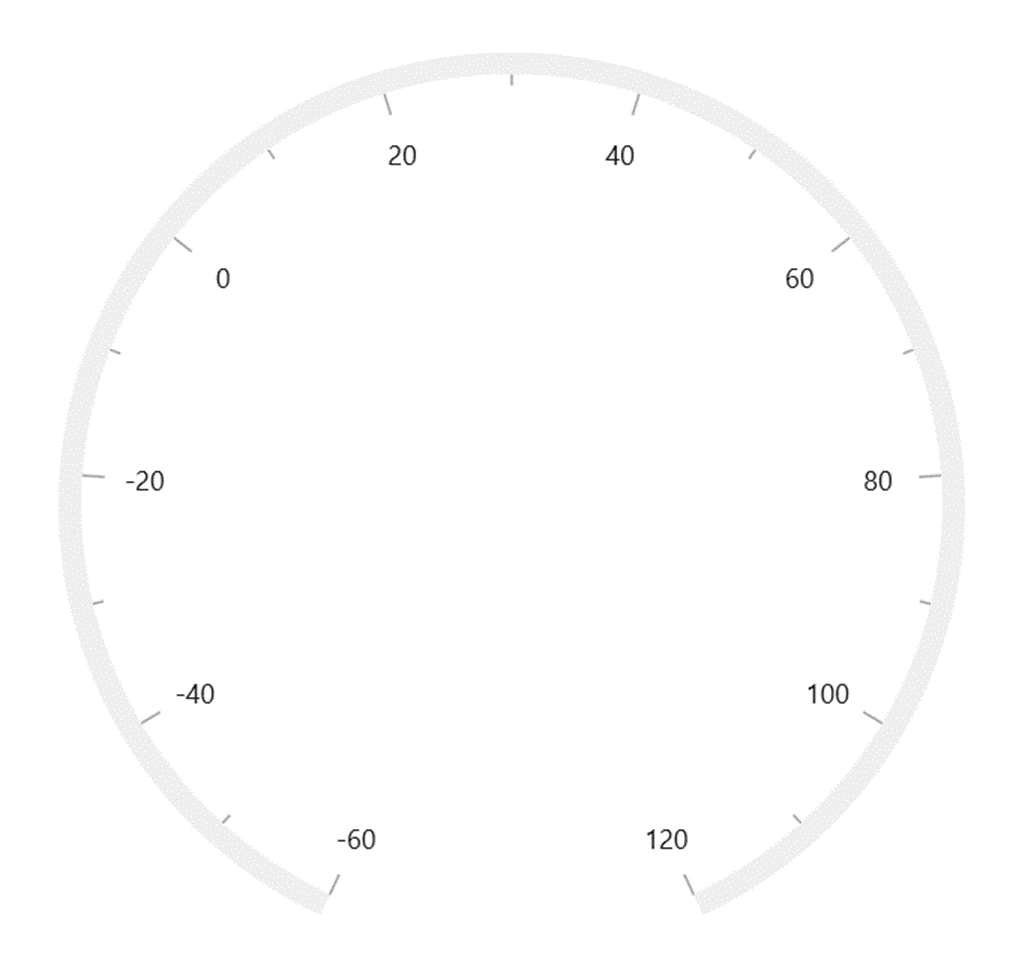
Designing the temperature monitor scale using the WinUI Radial Gauge
The major elements present in the temperature scale are labels, an axis line, and major and minor ticks.
In this demo, the following properties of the radial axis are used to design the temperature scale:
- [MinorTicksPerInterval](https://help.syncfusion.com/cr/winui/Syncfusion.UI.Xaml.Gauges.GaugeAxis.html#Syncfusion_UI_Xaml_Gauges_GaugeAxis_MinorTicksPerInterval) : To specify the number of minor ticks per interval.
- [MajorTickStyle](https://help.syncfusion.com/cr/winui/Syncfusion.UI.Xaml.Gauges.GaugeAxis.html#Syncfusion_UI_Xaml_Gauges_GaugeAxis_MajorTickStyle) : To customize the appearance of major ticks corresponding to the temperature scale labels.
- [MinorTickStyle](https://help.syncfusion.com/cr/winui/Syncfusion.UI.Xaml.Gauges.GaugeAxis.html#Syncfusion_UI_Xaml_Gauges_GaugeAxis_MinorTickStyle) : To customize the appearance of minor ticks that occur between the axis labels.
- [TickPosition](https://help.syncfusion.com/cr/winui/Syncfusion.UI.Xaml.Gauges.GaugeAxis.html#Syncfusion_UI_Xaml_Gauges_GaugeAxis_TickPosition) : To place the major and minor ticks either inside or outside the axis line.
- [LabelPosition](https://help.syncfusion.com/cr/winui/Syncfusion.UI.Xaml.Gauges.GaugeAxis.html#Syncfusion_UI_Xaml_Gauges_GaugeAxis_LabelPosition) : To place the axis labels either inside or outside the axis line.
- [RadiusFactor](https://help.syncfusion.com/cr/winui/Syncfusion.UI.Xaml.Gauges.RadialAxis.html#Syncfusion_UI_Xaml_Gauges_RadialAxis_RadiusFactor) : To customize the size of the radial axis.
Refer to the following code example.
```
```
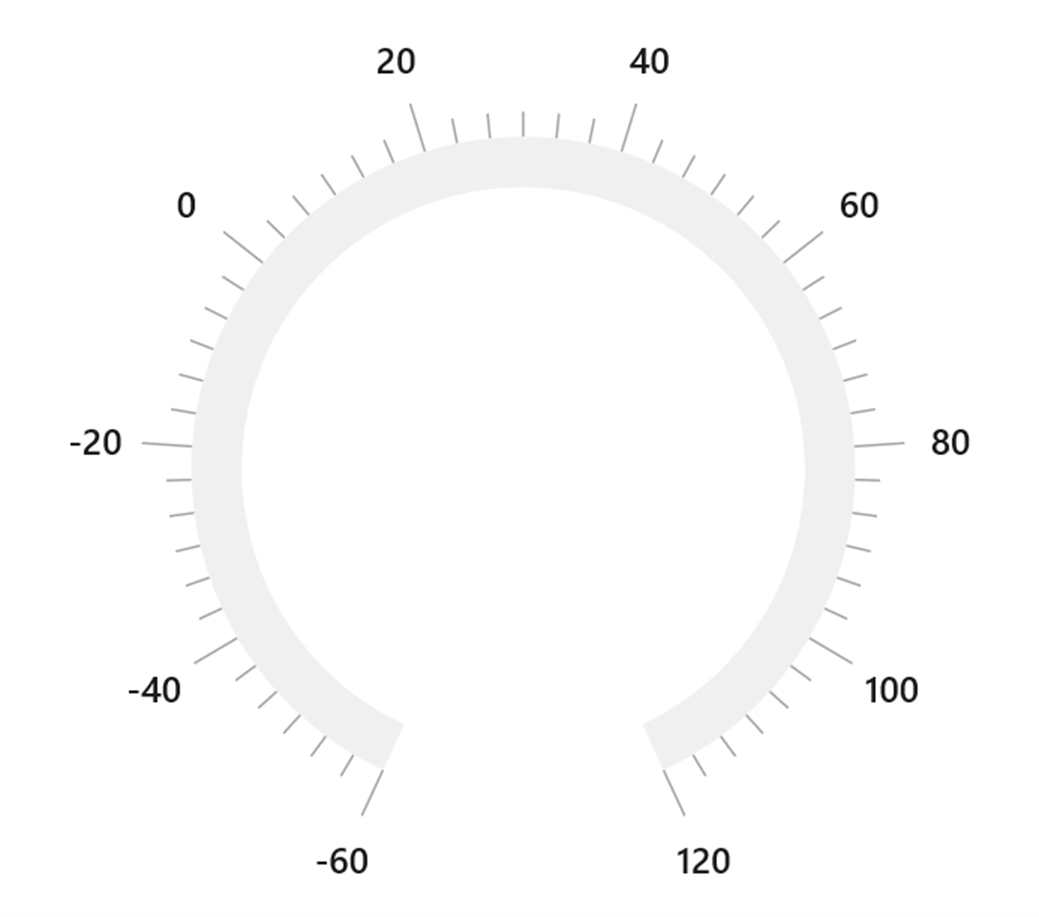
Ticks and Labels Placed Outside the Axis Line in the Temperature Monitor Scale
**Note:** For more details, refer to the [axis support in WinUI Radial Gauge](https://help.syncfusion.com/winui/radial-gauge/axes)
documentation.
### Step 3: Add temperature range indicator
Now, add the temperature range indicator to indicate the severity of the temperature.
We can achieve this either by adding a single range with gradient colors or by adding multiple ranges to the [Ranges](https://help.syncfusion.com/cr/winui/Syncfusion.UI.Xaml.Gauges.GaugeAxis.html#Syncfusion_UI_Xaml_Gauges_GaugeAxis_Ranges)
collection property of the radial axis.
In this demo, we are going to add a single [Range](https://help.syncfusion.com/cr/winui/Syncfusion.UI.Xaml.Gauges.GaugeRange.html)
using the [GradientStops](https://help.syncfusion.com/cr/winui/Syncfusion.UI.Xaml.Gauges.GaugeRange.html#Syncfusion_UI_Xaml_Gauges_GaugeRange_GradientStops)
property to indicate the severity of the temperature. In our gauge:
- Green indicates the low temperature range.
- Yellow indicates the moderate temperature range.
- Red indicates the high temperature range.
You can control the start and the end values of the range using the [StartValue](https://help.syncfusion.com/cr/winui/Syncfusion.UI.Xaml.Gauges.GaugeRange.html#Syncfusion_UI_Xaml_Gauges_GaugeRange_StartValue)
and [EndValue](https://help.syncfusion.com/cr/winui/Syncfusion.UI.Xaml.Gauges.GaugeRange.html#Syncfusion_UI_Xaml_Gauges_GaugeRange_EndValue)
properties, respectively. To customize the range width and color, use the [width](https://help.syncfusion.com/cr/winui/Syncfusion.UI.Xaml.Gauges.GaugeRange.html#Syncfusion_UI_Xaml_Gauges_GaugeRange_WidthUnit)
and [GradientStops](https://help.syncfusion.com/cr/winui/Syncfusion.UI.Xaml.Gauges.GaugeRange.html#Syncfusion_UI_Xaml_Gauges_GaugeRange_GradientStops)
properties, respectively.
```
```
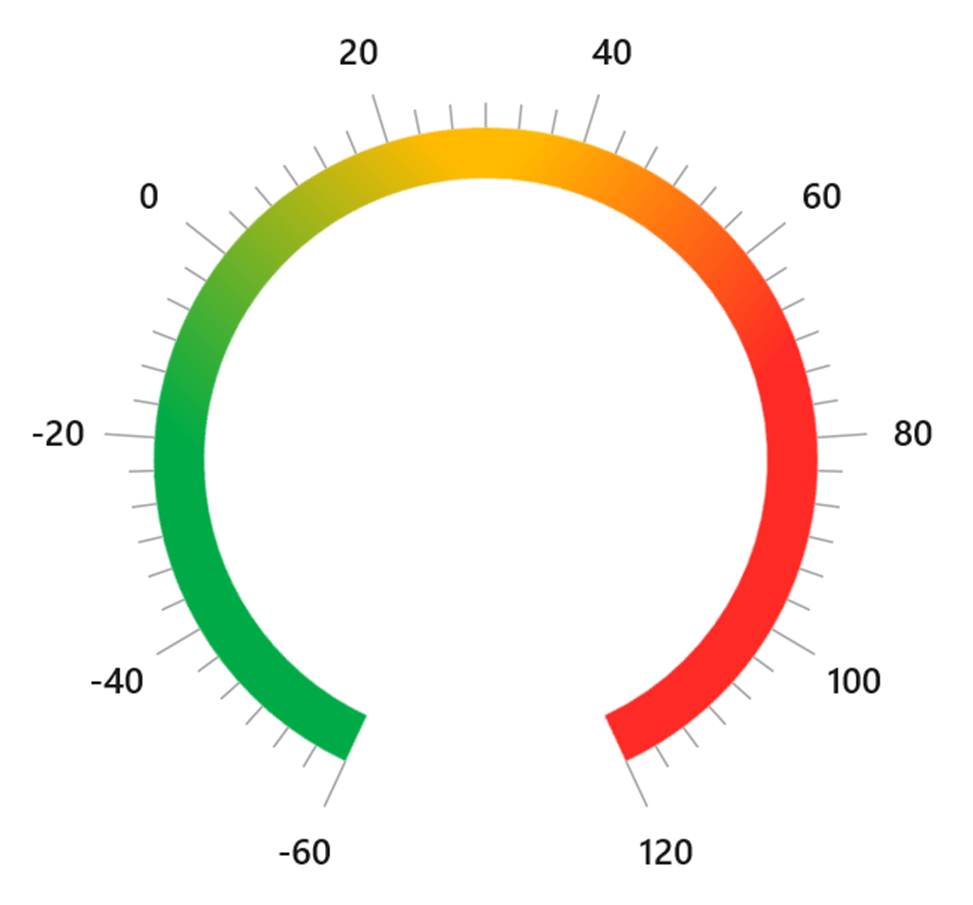
Gradient Colors Added to the Temperature Monitor
**Note:** For more details, refer to the [range support in WinUI Radial Gauge](https://help.syncfusion.com/winui/radial-gauge/ranges)
documentation.
### Step 4: Add a needle pointer to indicate the current temperature value
Now, add a [NeedlePointer](https://help.syncfusion.com/cr/winui/Syncfusion.UI.Xaml.Gauges.NeedlePointer.html)
to the [Pointers](https://help.syncfusion.com/cr/winui/Syncfusion.UI.Xaml.Gauges.GaugeAxis.html#Syncfusion_UI_Xaml_Gauges_GaugeAxis_Pointers)
collection of the radial axis to indicate the current temperature value.
Also, we are going to customize the appearance of the needle pointer with the following properties:
- [NeedleFill](https://help.syncfusion.com/cr/winui/Syncfusion.UI.Xaml.Gauges.NeedlePointer.html#Syncfusion_UI_Xaml_Gauges_NeedlePointer_NeedleFill) : Customizes the needle color.
- [TailFill,](https://help.syncfusion.com/cr/winui/Syncfusion.UI.Xaml.Gauges.NeedlePointer.html#Syncfusion_UI_Xaml_Gauges_NeedlePointer_TailFill) [TailLength](https://help.syncfusion.com/cr/winui/Syncfusion.UI.Xaml.Gauges.NeedlePointer.html#Syncfusion_UI_Xaml_Gauges_NeedlePointer_TailLength) , and [TailWidth](https://help.syncfusion.com/cr/winui/Syncfusion.UI.Xaml.Gauges.NeedlePointer.html#Syncfusion_UI_Xaml_Gauges_NeedlePointer_TailWidth) : Customize the appearance of the needle tail.
- [KnobRadius,](https://help.syncfusion.com/cr/winui/Syncfusion.UI.Xaml.Gauges.NeedlePointer.html#Syncfusion_UI_Xaml_Gauges_NeedlePointer_KnobRadius) [KnobFill](https://help.syncfusion.com/cr/winui/Syncfusion.UI.Xaml.Gauges.NeedlePointer.html#Syncfusion_UI_Xaml_Gauges_NeedlePointer_KnobFill) , [KnobStroke](https://help.syncfusion.com/cr/winui/Syncfusion.UI.Xaml.Gauges.NeedlePointer.html#Syncfusion_UI_Xaml_Gauges_NeedlePointer_KnobStroke) , and [KnobStrokeThickness](https://help.syncfusion.com/cr/winui/Syncfusion.UI.Xaml.Gauges.NeedlePointer.html#Syncfusion_UI_Xaml_Gauges_NeedlePointer_KnobStrokeThickness) : Customize the knob appearance.
- [NeedleLength](https://help.syncfusion.com/cr/winui/Syncfusion.UI.Xaml.Gauges.NeedlePointer.html#Syncfusion_UI_Xaml_Gauges_NeedlePointer_NeedleLength) : Customizes the needle length.
- [NeedleStartWidth](https://help.syncfusion.com/cr/winui/Syncfusion.UI.Xaml.Gauges.NeedlePointer.html#Syncfusion_UI_Xaml_Gauges_NeedlePointer_NeedleStartWidth) : Customizes the start width of the needle.
- [NeedleEndWidth](https://help.syncfusion.com/cr/winui/Syncfusion.UI.Xaml.Gauges.NeedlePointer.html#Syncfusion_UI_Xaml_Gauges_NeedlePointer_NeedleEndWidth) : Customizes the end width of the needle
Refer to the following code example.
```
```
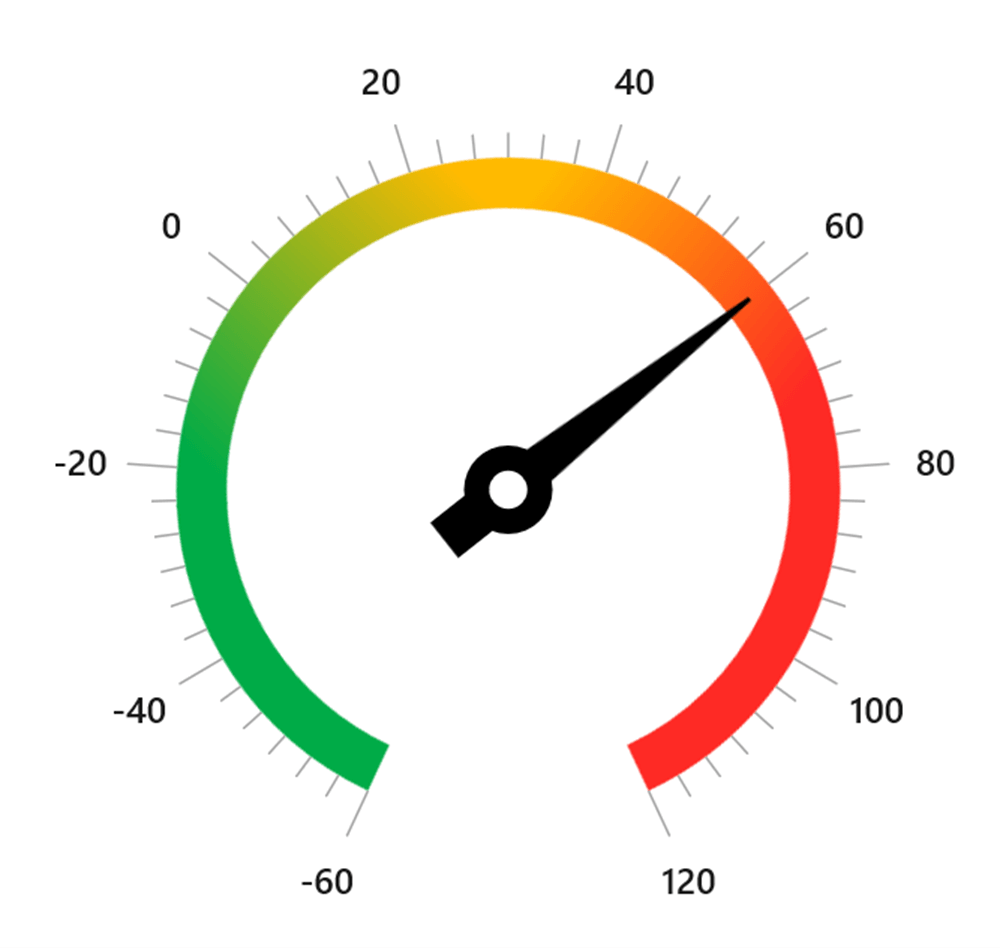
Added a Needle Pointer to the WinUI Temperature Monitor
**Note:** For more details, refer to the [pointers in WinUI Radial Gauge](https://help.syncfusion.com/winui/radial-gauge/pointers)
documentation.
### Step 5: Annotate the temperature unit
You can use the [annotation](https://help.syncfusion.com/cr/winui/Syncfusion.UI.Xaml.Gauges.GaugeAnnotation.html)
feature in the WinUI Radial Gauge to indicate whether the temperature unit is Fahrenheit (°F) or Celsius (°C).
#### Adding a Fahrenheit scale
Refer to the following code example. In our example, we are going to show the temperature unit in Fahrenheit (°F) . The text block will display the current unit. This text is set to the text block’s **Text** property and placed in the desired location using the [PositionFactor](https://help.syncfusion.com/cr/winui/Syncfusion.UI.Xaml.Gauges.GaugeAnnotation.html#Syncfusion_UI_Xaml_Gauges_GaugeAnnotation_PositionFactor)
, [DirectionUnit](https://help.syncfusion.com/cr/winui/Syncfusion.UI.Xaml.Gauges.GaugeAnnotation.html#Syncfusion_UI_Xaml_Gauges_GaugeAnnotation_DirectionUnit)
, and [DirectionValue](https://help.syncfusion.com/cr/winui/Syncfusion.UI.Xaml.Gauges.GaugeAnnotation.html#Syncfusion_UI_Xaml_Gauges_GaugeAnnotation_DirectionValue)
properties of the gauge annotation.
```
```

Annotating Temperature Unit in Fahrenheit °F
**Note:** For more details, refer to the [annotation in WinUI Radial Gauge](https://help.syncfusion.com/winui/radial-gauge/annotation)
documentation.
#### Add a Celsius scale
In the above example, we designed the scale to display the temperature value in Fahrenheit. Now let’s see how to add a temperature scale in Celsius (°C).
First, initialize a [radial axis](https://help.syncfusion.com/cr/winui/Syncfusion.UI.Xaml.Gauges.RadialAxis.html)
and insert it at the zero index of the [Axes](https://help.syncfusion.com/cr/winui/Syncfusion.UI.Xaml.Gauges.SfRadialGauge.html#Syncfusion_UI_Xaml_Gauges_SfRadialGauge_Axes)
collection so that the [needle pointer](https://help.syncfusion.com/cr/winui/Syncfusion.UI.Xaml.Gauges.NeedlePointer.html)
of the previous axis will be rendered on the top of this axis.
For the Celsius scale, we are going to use the [BackgroundContent](https://help.syncfusion.com/cr/winui/Syncfusion.UI.Xaml.Gauges.RadialAxis.html#Syncfusion_UI_Xaml_Gauges_RadialAxis_BackgroundContent)
property to [add an image as the background of the radial axis](https://www.syncfusion.com/kb/13603/how-to-add-an-image-as-a-background-of-winui-radial-gauge-control-sfradialgauge)
. Refer to the following code example.
```
```
You can also customize the appearance of the temperature scale (°C) by using the various properties of the [radial axis](https://help.syncfusion.com/cr/winui/Syncfusion.UI.Xaml.Gauges.RadialAxis.html)
as shown in the following code example.
```
```
Refer to the following image.
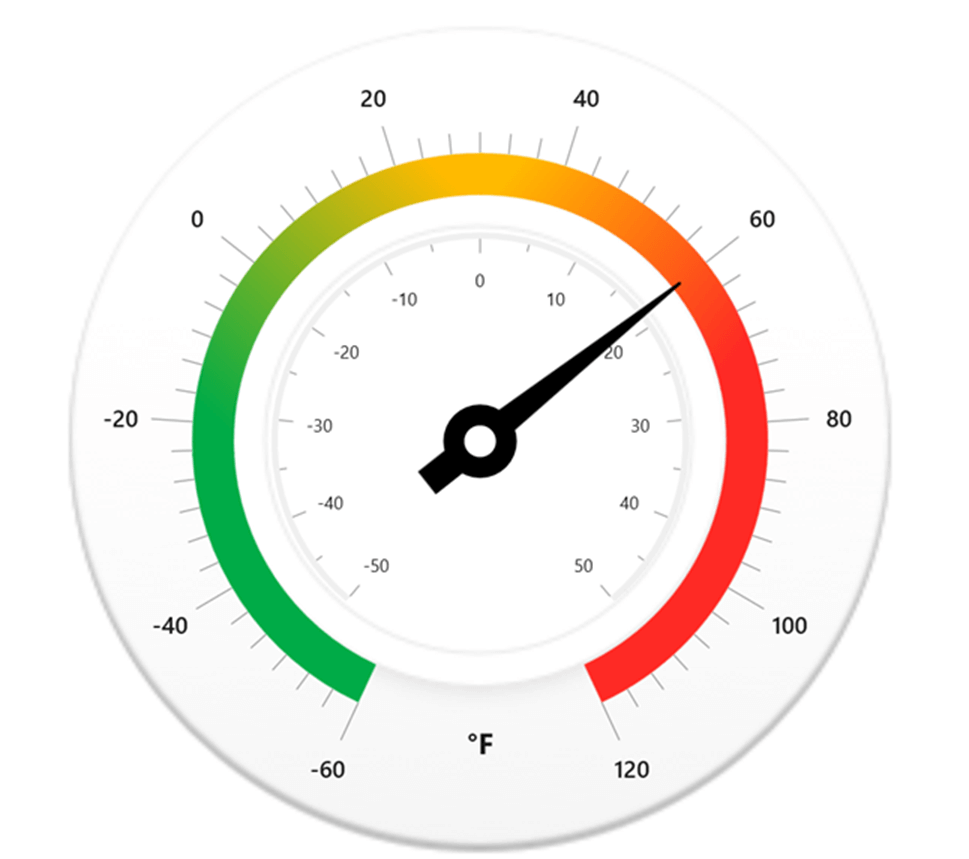
Customizing the Celsius Scale in the Temperature Monitor
As in the temperature scale in Fahrenheit, we are going to add [ranges](https://help.syncfusion.com/winui/radial-gauge/ranges)
in the Celsius axis, too, to indicate the severity of the measured temperature.
In this axis, set the individual range color to the corresponding ticks and axis labels using the [UseRangeColorForAxis](https://help.syncfusion.com/cr/winui/Syncfusion.UI.Xaml.Gauges.GaugeAxis.html#Syncfusion_UI_Xaml_Gauges_GaugeAxis_UseRangeColorForAxis)
property of the radial axis.
```
```
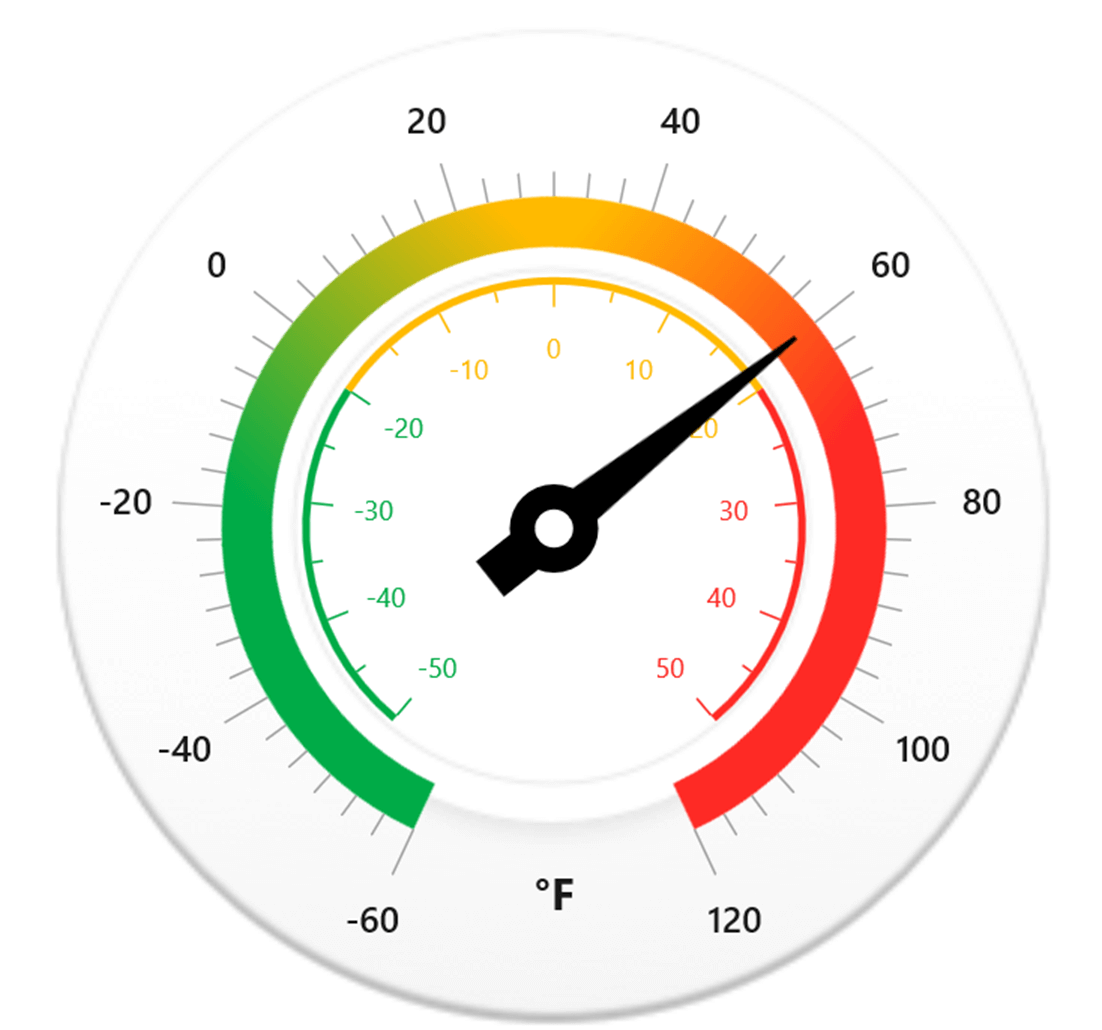
Setting Individual Range Colors to the Corresponding Ticks and Axis Labels to the Celsius Scale (°C)
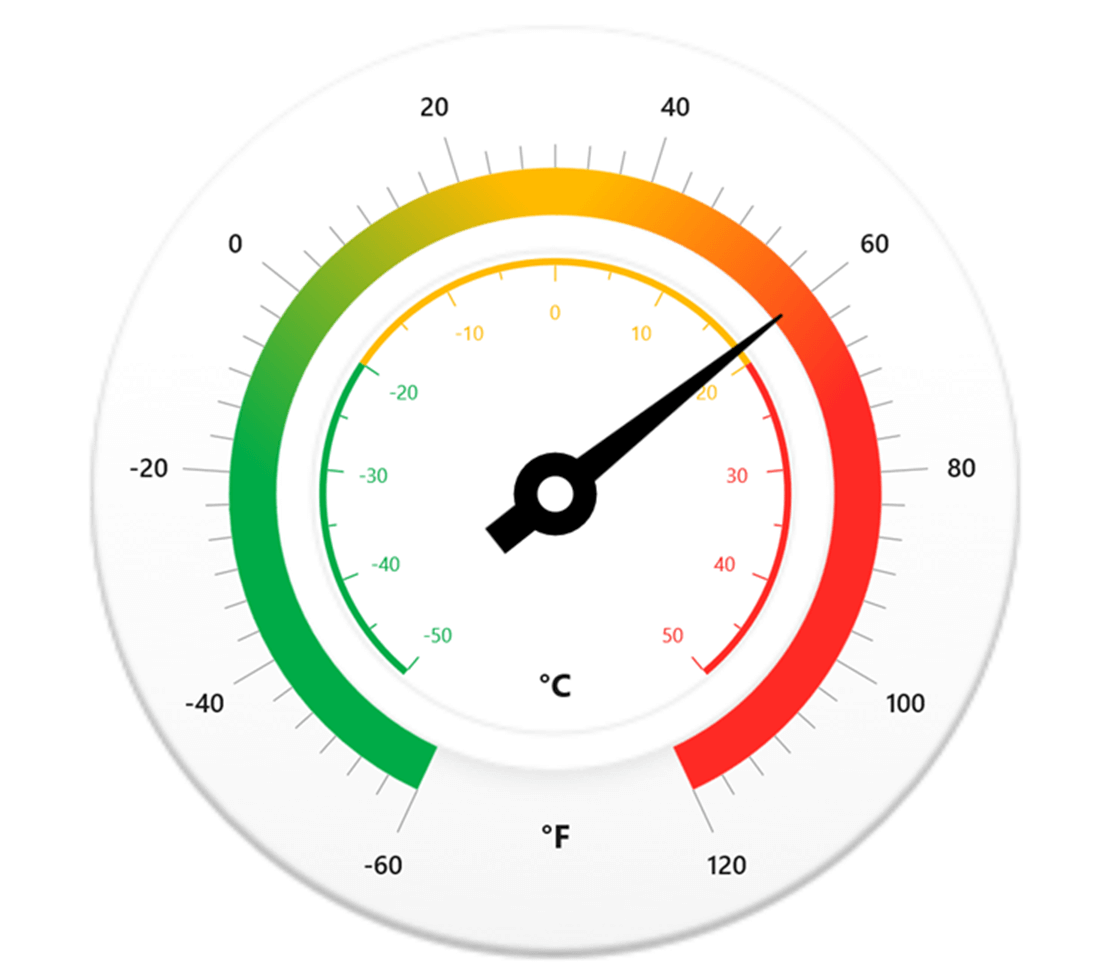
As with the previous axis, add an [annotation](https://help.syncfusion.com/cr/winui/Syncfusion.UI.Xaml.Gauges.GaugeAnnotation.html)
to display the temperature unit in °C on the inside axis. Refer to the following image.
Temperature Monitor Displaying Both Fahrenheit and Celsius Scales in WinUI
Now our temperature monitor design is done!
## GitHub reference
For more details, refer to the code repository for [designing a temperature monitor using WinUI Radial Gauge on GitHub](https://github.com/SyncfusionExamples/How-to-design-a-temperature-monitor-using-WinUI-Radial-Gauge)
.
## Conclusion
Thanks for reading! In this blog, we have learned how easy it is to design a temperature monitor using the Syncfusion [WinUI Radial Gauge](https://www.syncfusion.com/winui-controls/radial-gauge)
control. So, try out the instructions provided in this blog and tell us about your experience in the comments section below.
Check out the complete [user guide](https://help.syncfusion.com/winui/radial-gauge/overview)
of our Radial Gauge control and see our other WinUI samples in this [GitHub location](https://github.com/syncfusion/winui-demos/tree/master/radialgauge)
. Additionally, you can check out our [demo app in the App Center](https://install.appcenter.ms/orgs/syncfusion-demos/apps/winui-demos/distribution_groups/release)
.
The Syncfusion Radial Gauge control is also available for the [Blazor](https://www.syncfusion.com/blazor-components/blazor-circular-gauge)
, ASP.NET ([Core](https://www.syncfusion.com/aspnet-core-ui-controls/circular-gauge)
, [MVC](https://www.syncfusion.com/aspnet-mvc-ui-controls/circular-gauge)
, [Web Forms](https://www.syncfusion.com/jquery/aspnet-web-forms-ui-controls/circular-gauge)
), [JavaScript](https://www.syncfusion.com/javascript-ui-controls/js-circular-gauge)
, [Angular](https://www.syncfusion.com/angular-ui-components/angular-circular-gauge)
, [React](https://www.syncfusion.com/react-ui-components/react-circular-gauge)
, [Vue](https://www.syncfusion.com/vue-ui-components/vue-circular-gauge)
,[.NET MAUI](https://www.syncfusion.com/maui-controls/maui-radial-gauge)
, [Xamarin](https://www.syncfusion.com/xamarin-ui-controls/xamarin-circular-gauge)
, [Flutter](https://www.syncfusion.com/flutter-widgets/flutter-radial-gauge)
, [UWP](https://www.syncfusion.com/uwp-ui-controls/radial-gauge)
, [WinForms](https://www.syncfusion.com/winforms-ui-controls/radial-gauge)
, and [WPF](https://www.syncfusion.com/wpf-controls/radial-gauge)
platforms.
If you aren’t a customer yet, you can try our 30-day [free trial](https://www.syncfusion.com/downloads)
to check out these features.
You can also contact us through our [support forums](https://www.syncfusion.com/forums)
, [support portal](https://support.syncfusion.com)
, or [feedback portal](https://www.syncfusion.com/feedback/winui)
. We are always happy to assist you!
## Related blogs
- [What’s New in 2022 Volume 3: WinUI and WPF](https://www.syncfusion.com/blogs/post/whats-new-in-2022-volume-3-winui-and-wpf.aspx)
- [Design a Car Dashboard Like a Pro Using the WinUI Radial Gauge](https://www.syncfusion.com/blogs/post/design-a-car-dashboard-like-a-pro-using-the-winui-radial-gauge.aspx)
- [Advantages of Using Syncfusion WinUI Controls over Framework Controls: Part 1](https://www.syncfusion.com/blogs/post/advantages-of-using-syncfusion-winui-controls-over-framework-controls-part-1.aspx)
- [Achieve Google-Like Autosuggestions with the WinUI AutoComplete Control](https://www.syncfusion.com/blogs/post/achieve-google-like-autosuggestions-with-the-winui-autocomplete-control.aspx)