---
title: "Effective Techniques to Share Angular Components Across Projects"
published_at: "2024-11-04T11:42:19+00:00"
modified_at: "2025-11-06T15:04:37+00:00"
url: "https://www.syncfusion.com/blogs/post/share-angular-components-across-projects"
excerpt: "Learn two ways to build and share reusable Angular components across multiple projects: Angular Workspaces and NPM Packages"
taxonomy_category:
- "Angular"
- "Development"
- "Web"
taxonomy_post_tag:
- "Angular"
- "development"
- "productivity"
- "Web"
---
# Effective Techniques to Share Angular Components Across Projects
[Lakindu Hewawasam](https://www.syncfusion.com/blogs/author/lakindy-hewawasam)
**TL;DR:** This article examines two ways to share reusable Angular components across multiple projects: Angular Workspaces and NPM Packages. Angular Workspaces enable you to maintain a single workspace containing multiple projects. This allows projects within the workspace to share components. Alternatively, you can leverage NPM packages to achieve global usability. This means publishing your Angular Library to NPM to make it accessible to anyone.
If you’re working with single-page apps, chances are you’re likely running on Angular. [Angular](https://angular.dev/)
is a powerful frontend framework that easily lets you build complex and dynamic single-page apps. When working on a small project, you will not encounter any issues, as you maintain a handful of components in one project.
But what if you were working on four to five different Angular projects that leveraged similar components?
For example, this could be the design system on which all your apps are based. You might have a set of defined components that showcase how certain layouts, text fields, buttons, and typography are structured, which are exposed through a design system as a set of reusable components.
**How do you build such shareable components in Angular?**
Well, that’s what this article is about. Let’s look at how you can build and share reusable Angular components across multiple projects.
## Sharing components between Angular projects
You can share code between multiple Angular projects in two key ways. Let’s look at them in order of recent announcements. So, in a nutshell, the two approaches are:
1. Angular workspaces
2. NPM packages
### Angular workspaces
[Angular Workspaces have been available since v17](https://angular.dev/tools/cli/setup-local#unix-permissions)
and are a container for one or more projects. An Angular project is a set of files that comprise a standalone app or a library.
This means you can maintain an Angular workspace on a[monorepo](https://monorepo.tools/)
and have several projects within your single workspace. Projects within a workspace can share components, allowing you to effectively manage reusable components within your Angular projects.
So, to get started, let’s bootstrap an Angular workspace. To do so, you’ll need to install[Node.js](https://nodejs.org/en/download/package-manager)
and[Angular CLI](https://angular.dev/tools/cli/setup-local#install-the-angular-cli)
. Afterward, run the following command:
```
ng new workspace --create-application=false
```
This will create the following output. 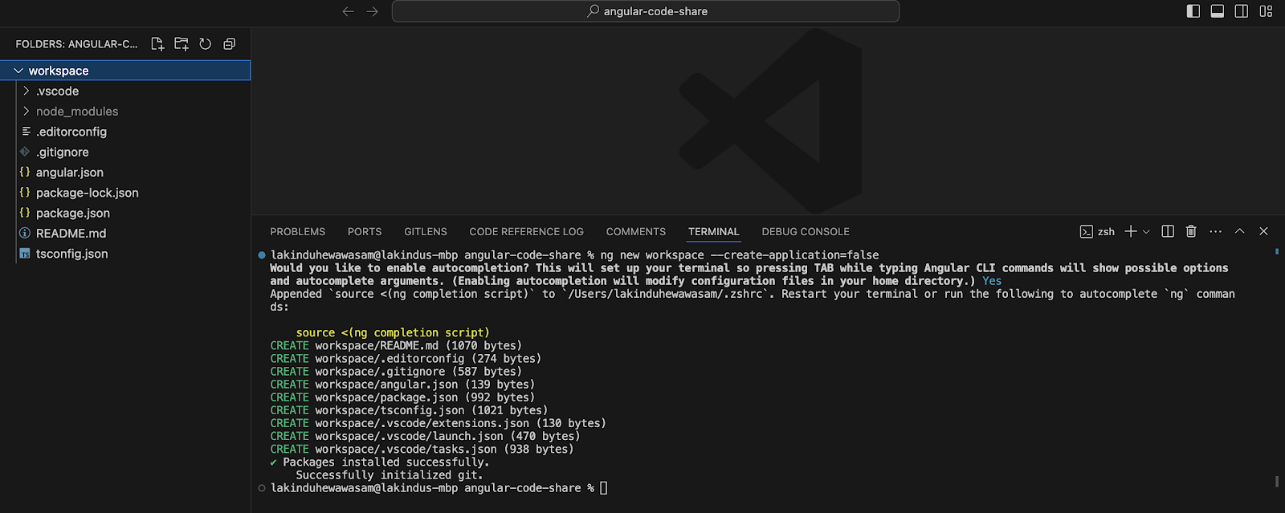
As you can see, this doesn’t create an application; rather, it creates boilerplate code that contains an **angular.json** and a ** package.json** file.
Next, you can [create an Angular Library](https://angular.dev/tools/libraries/creating-libraries)
that holds your reusable components. This can be done using the command:
```
ng generate library design-system
```
This generates a component library named – **design-system** and will display the following output:

As you can see, it created an empty library – **design-system**. Next, we can create a component that needs to be shared inside our library. This can be done using the command:
```
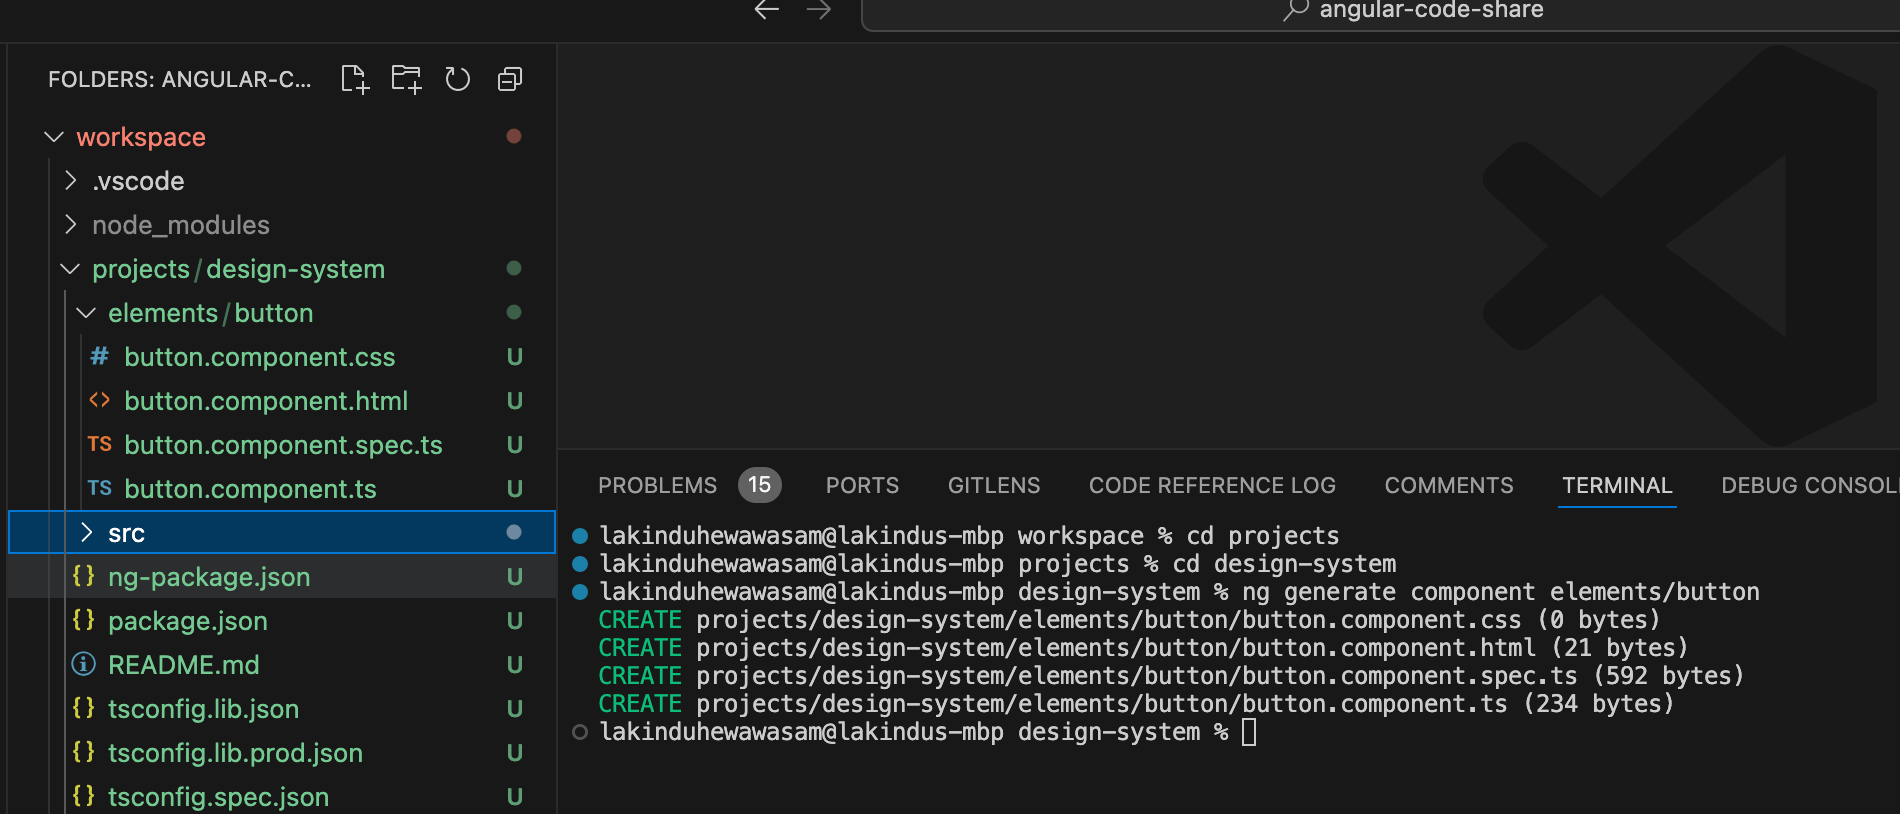
ng generate component elements/button
```
Note, ensure that you’re navigated to the design-system project before running the command.
Upon running the command, you’ll see the following output.
Next, let’s open the **button.component.html** and create a simple button that does three things:
1. Renders a custom title.
2. Binds an **onClick** event.
3. Accepts custom styling.
So, include the code:
```
```
Next, let’s make sure these can be passed into the Button component by updating the **button.component.ts** with the following code:
```
import { Component, Input, Output, EventEmitter } from '@angular/core';
@Component({
selector: 'lib-button',
standalone: true,
imports: [],
templateUrl: './button.component.html',
styleUrl: './button.component.css',
})
export class ButtonComponent {
@Input() label: string = 'Hello World';
@Output() onClick = new EventEmitter();
@Input() style = {
color: 'black',
backgroundColor: 'white',
padding: '10px 20px',
borderRadius: '5px',
border: '1px solid black',
cursor: 'pointer',
};
}
```
Next, let’s build the library using the command:
```
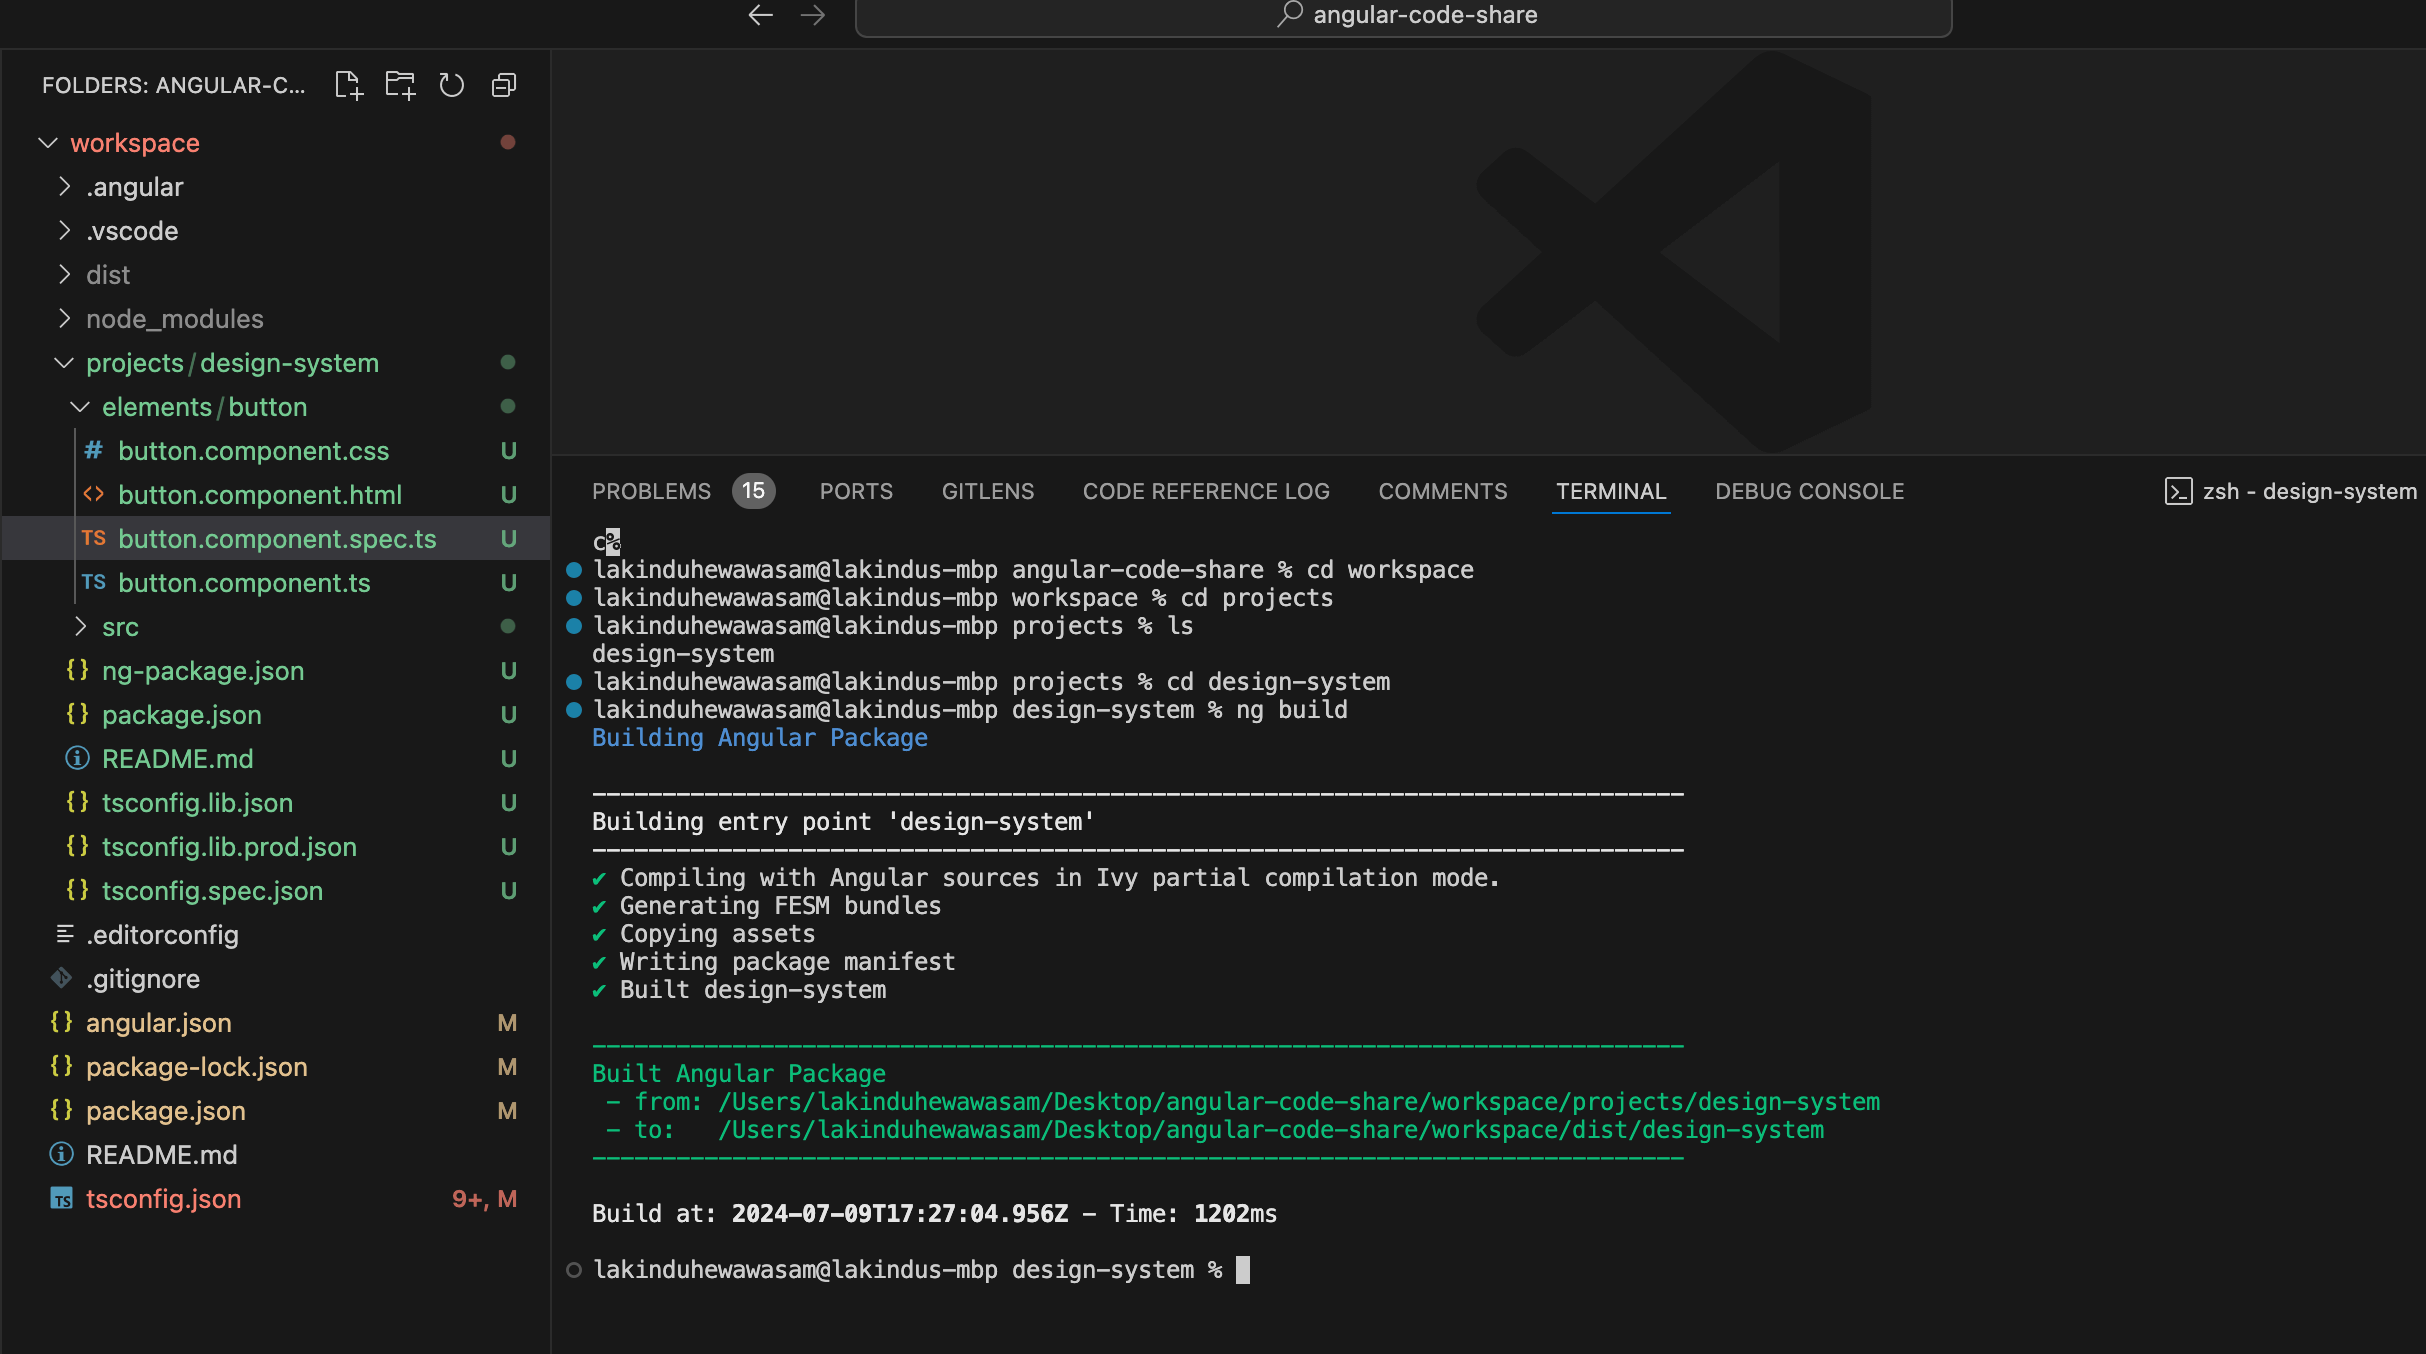
ng build
```
After you run the command, it will build the library and create an entry point to your library to make sure it’s usable within your workspace.
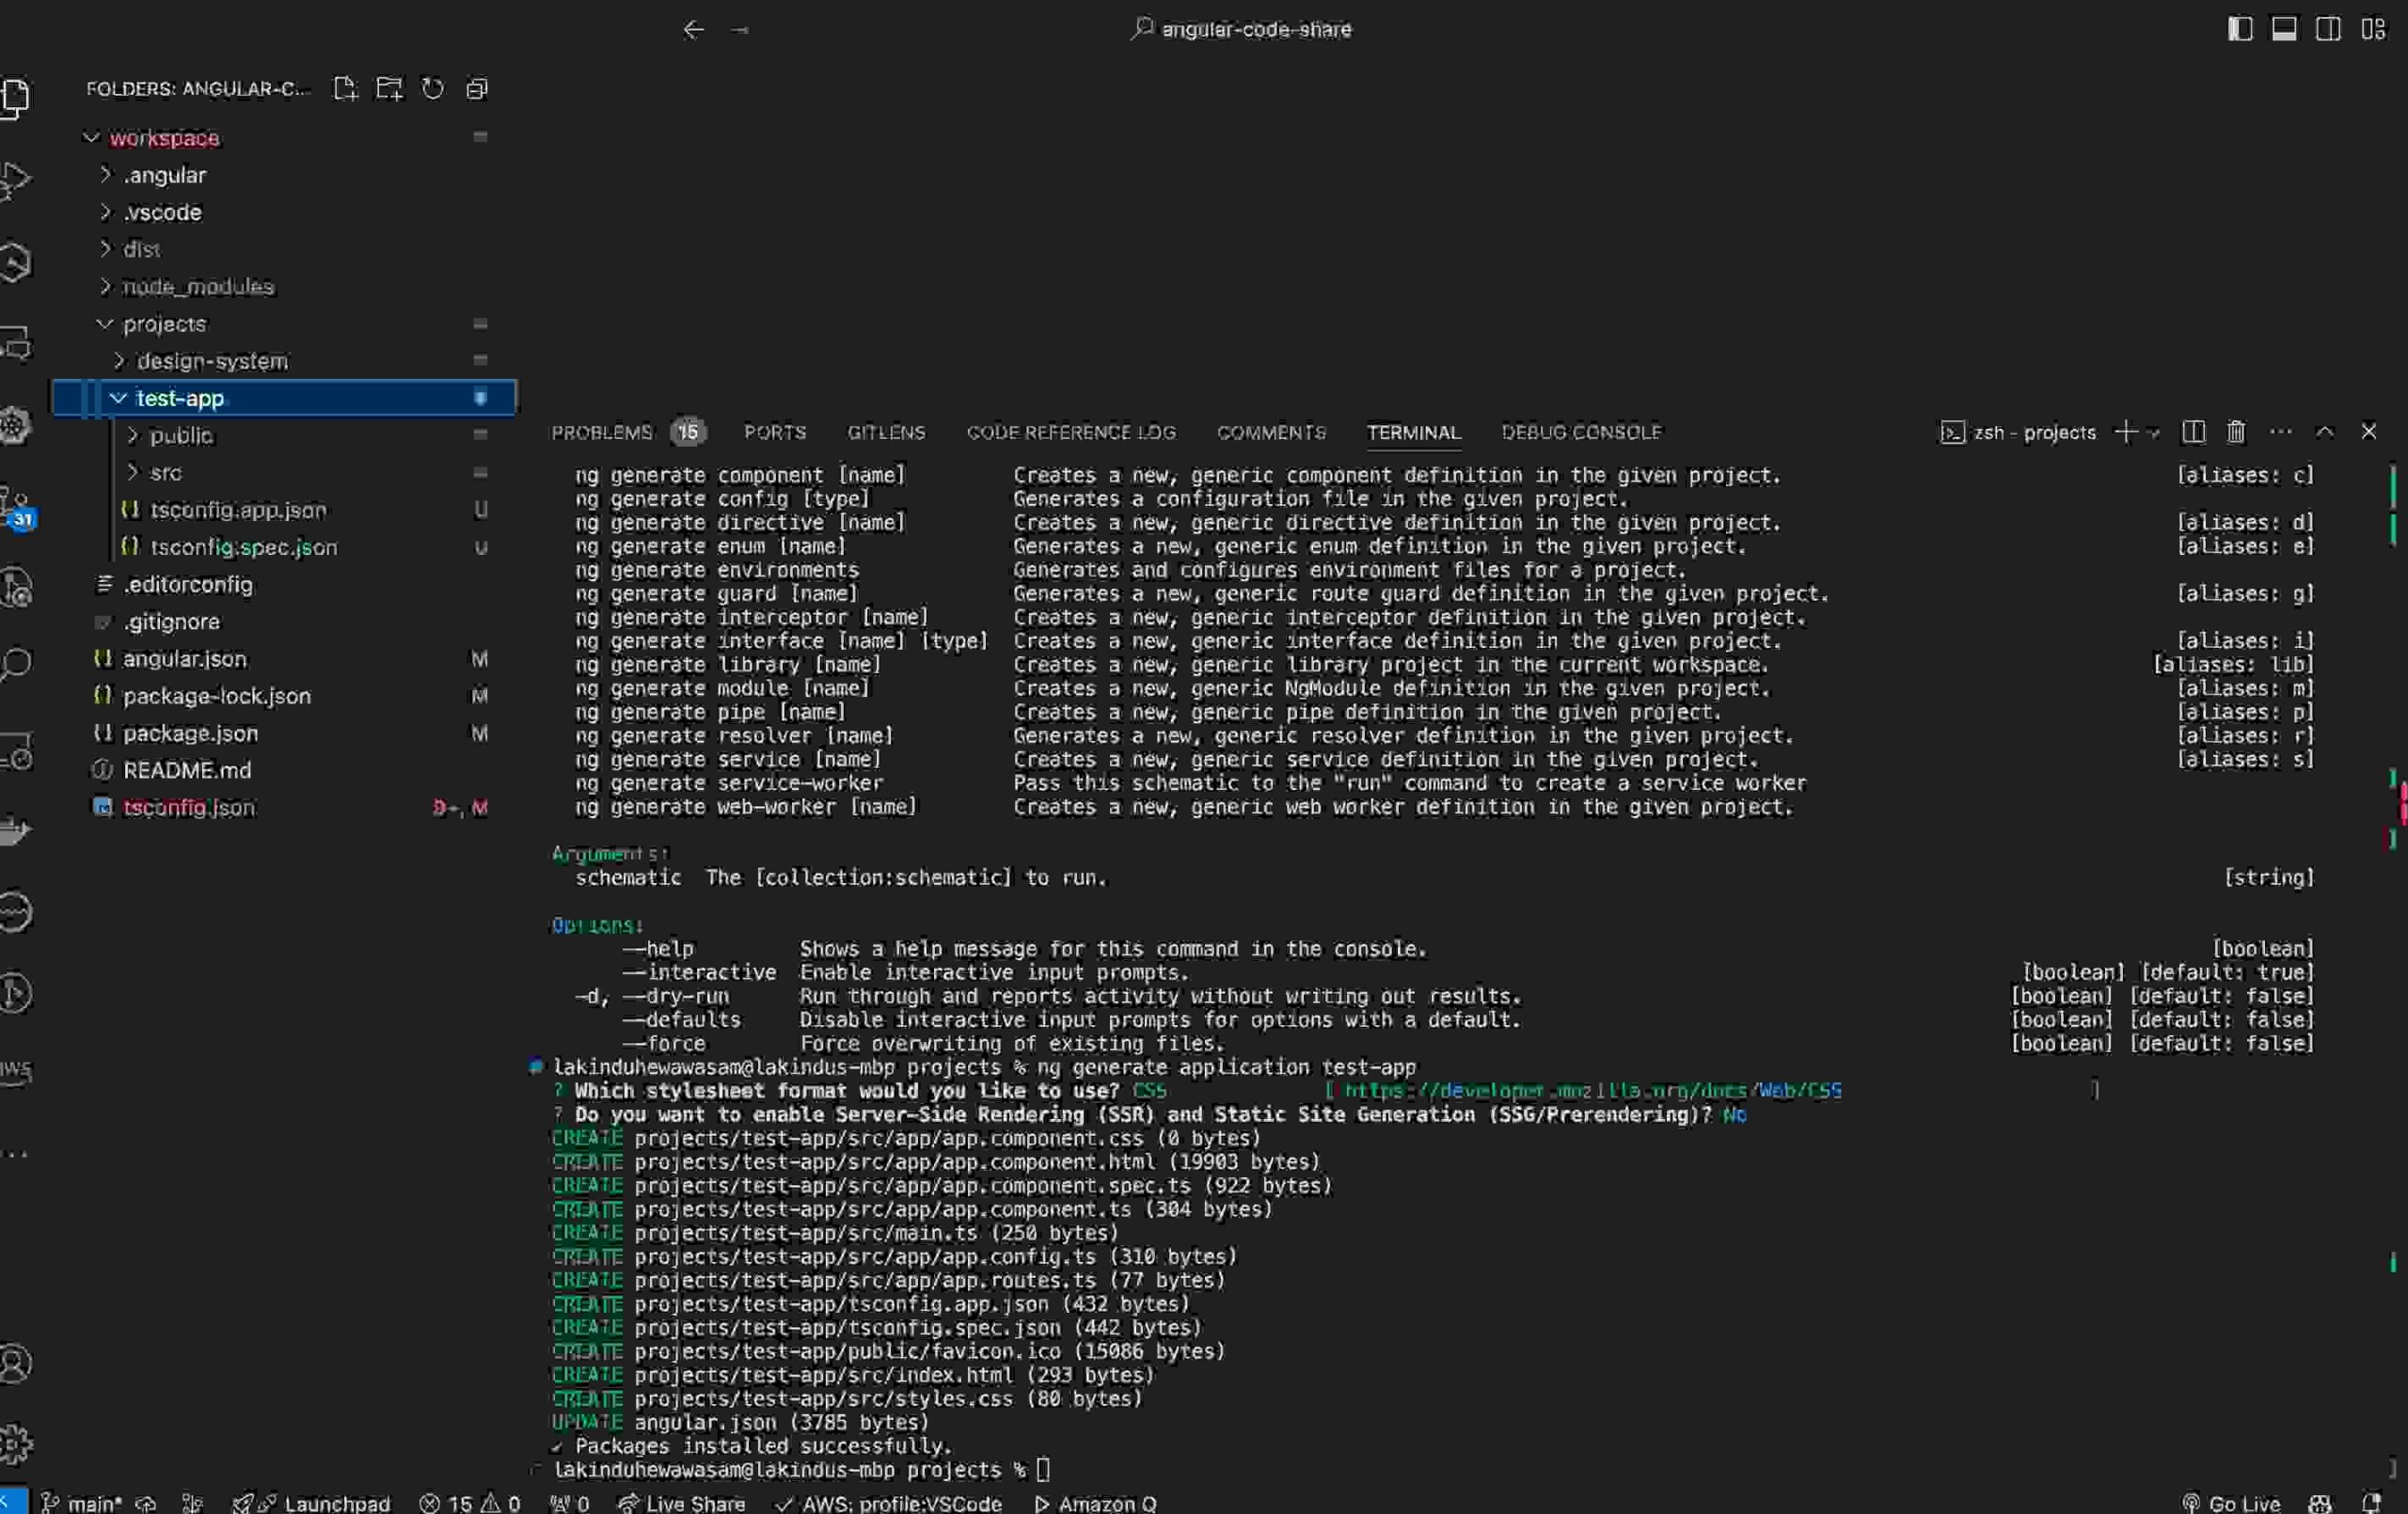
Next, let’s create an app that consumes the Button component. To do so, create an app using the command:
```
ng generate application test-app
```
Your app will be created within your workspace, as shown in the following image.
Let’s open the **app.component.html** and use the Button component:
```
```
Next, define the **onClick** handler in the ** app.component.ts** file.
```
import { Component } from '@angular/core';
import { RouterOutlet } from '@angular/router';
import { ButtonComponent } from "../../../design-system/elements/button/button.component";
@Component({
selector: 'app-root',
standalone: true,
imports: [RouterOutlet, ButtonComponent],
templateUrl: './app.component.html',
styleUrl: './app.component.css'
})
export class AppComponent {
title = 'test-app';
onButtonClick() {
alert('Hello World');
}
}
```
Next, launch the Angular app to see the cross-project usage in action. This can be done using the command:
```
ng serve
```
Next, launch localhost:4200 on your browser to view the project in action: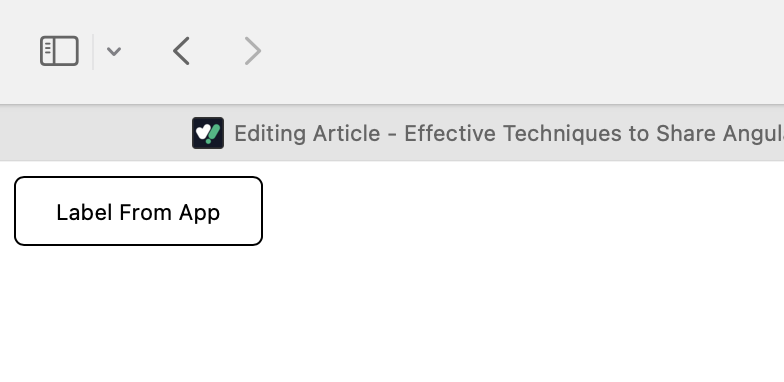
As you can see, the **Label** is now working, and upon clicking, you can see the event being handled: 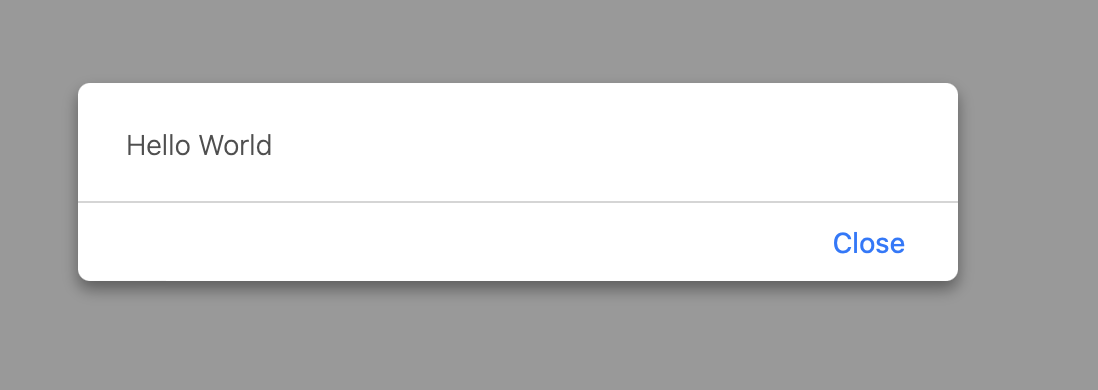
That’s a simple yet effective step for a native approach to share components within Angular projects.
### NPM packages
We looked at how to share an Angular component within the same workspace. But you might wonder, “What if my app lives in a different Angular workspace?”
Well, at those times, this solution won’t work. You need to go one step further and adopt global usability, which can be achieved by leveraging NPM packages.
All of us have used NPM packages, right? They are simple libraries that we install from NPM to assist with repetitive tasks. For instance, you’ve got **date-fns** to handle all date manipulation functions. Likewise, you can publish the Angular Library you developed earlier onto NPM to ensure it’s accessible to anyone.
This can be done in these simple steps:
1. Creating an Angular workspace.
2. Creating an Angular library.
3. Building UI components within your Angular library.
4. Building your Angular library using **ng build**.
We’ve already done steps 1 to 4. All that’s left is one final step. To publish the built library onto NPM, you need to run the following command:
```
npm publish
```
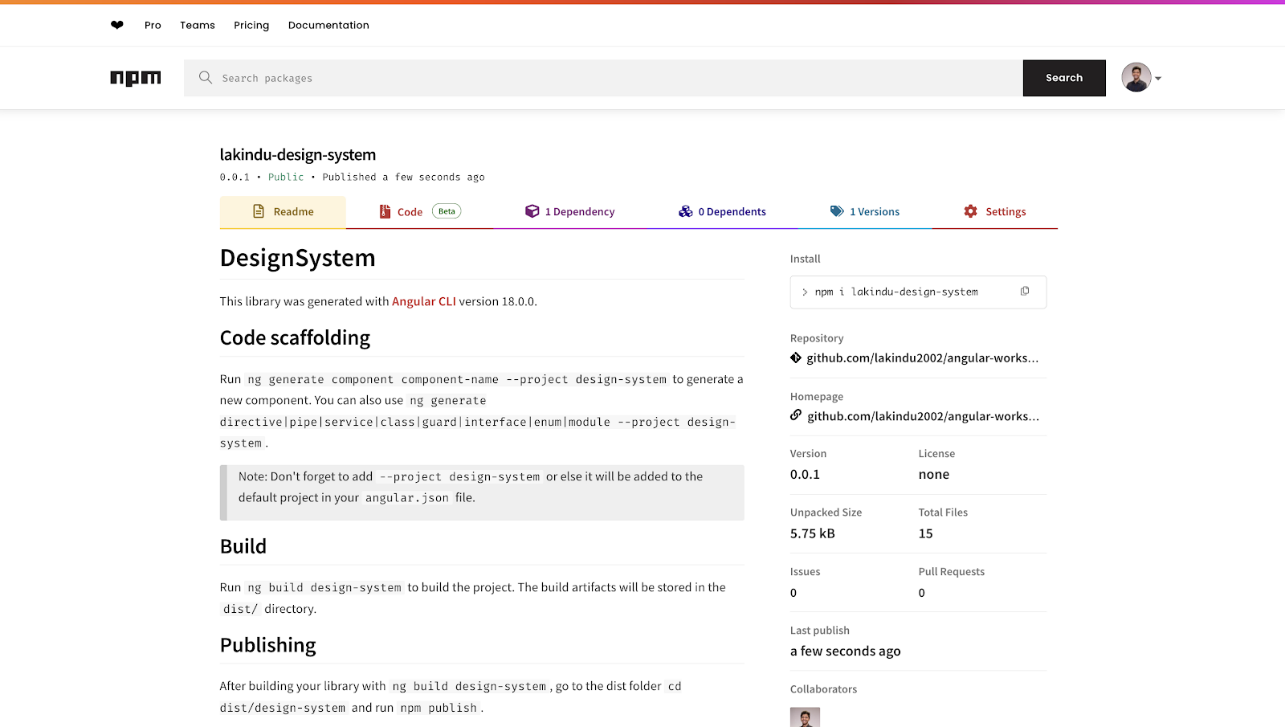
That’s pretty much it. This will publish your Angular Library onto NPM. You should see the output:
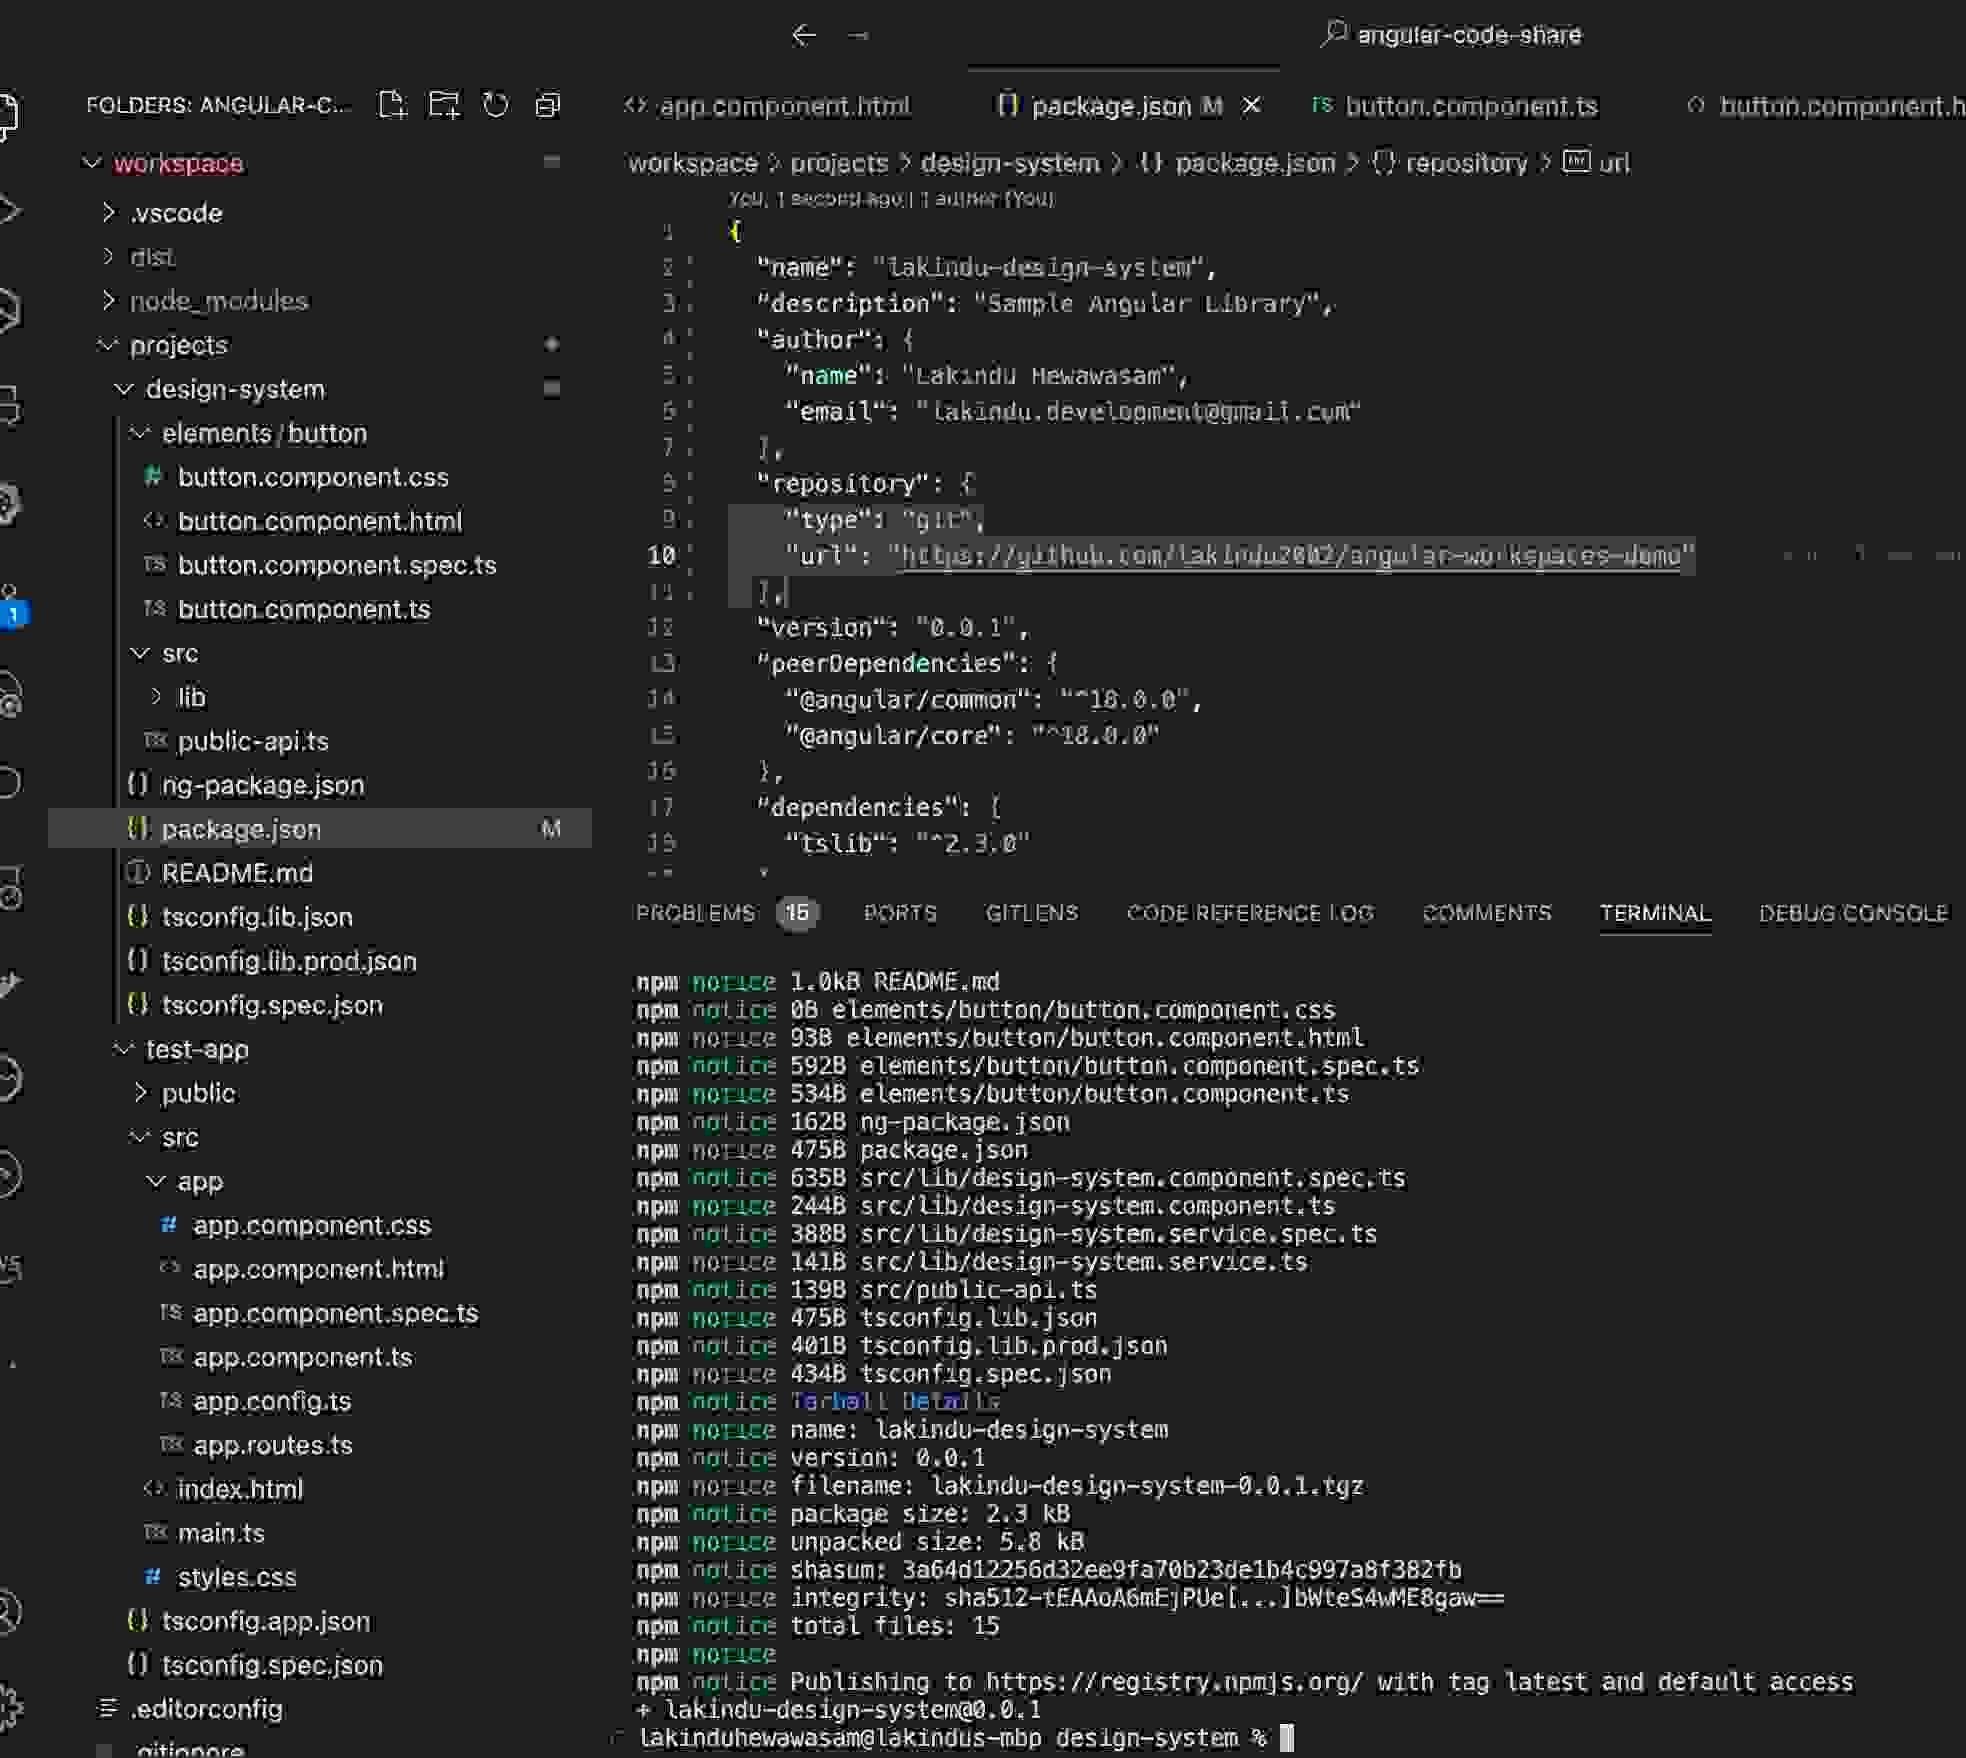
You can visit my library on [NPM](https://www.npmjs.com/package/lakindu-design-system)
.
Next, you can install the library using the following command:
```
npm i lakindu-design-system
```
By doing so, you can start using the library within your app.
To do so, let’s create a new app using the command:
```
ng new sample-app
```
You should see the following output.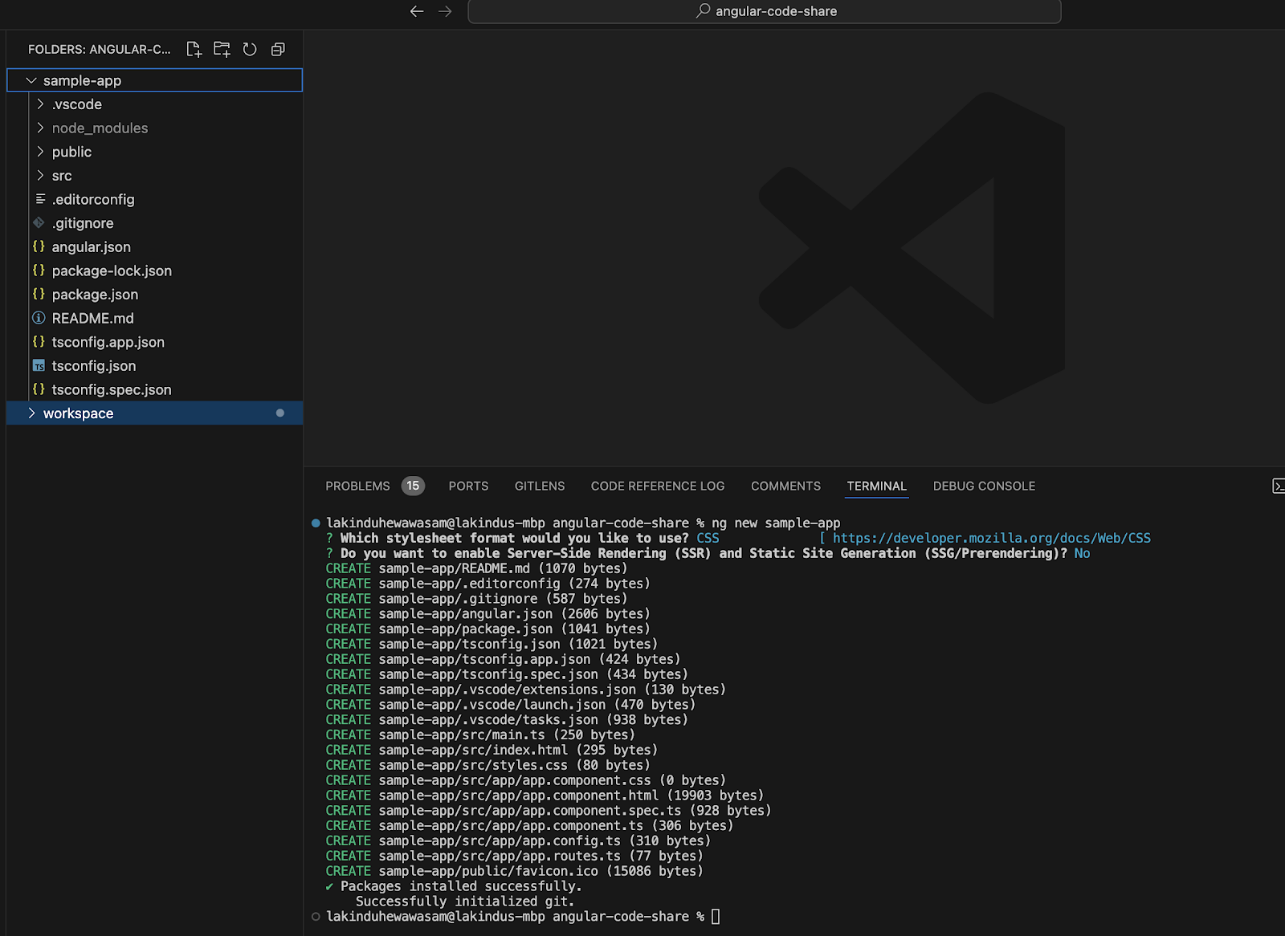
Afterward, install the library onto the app using the following command:
```
npm i lakindu-design-system
```
This will display the following output.
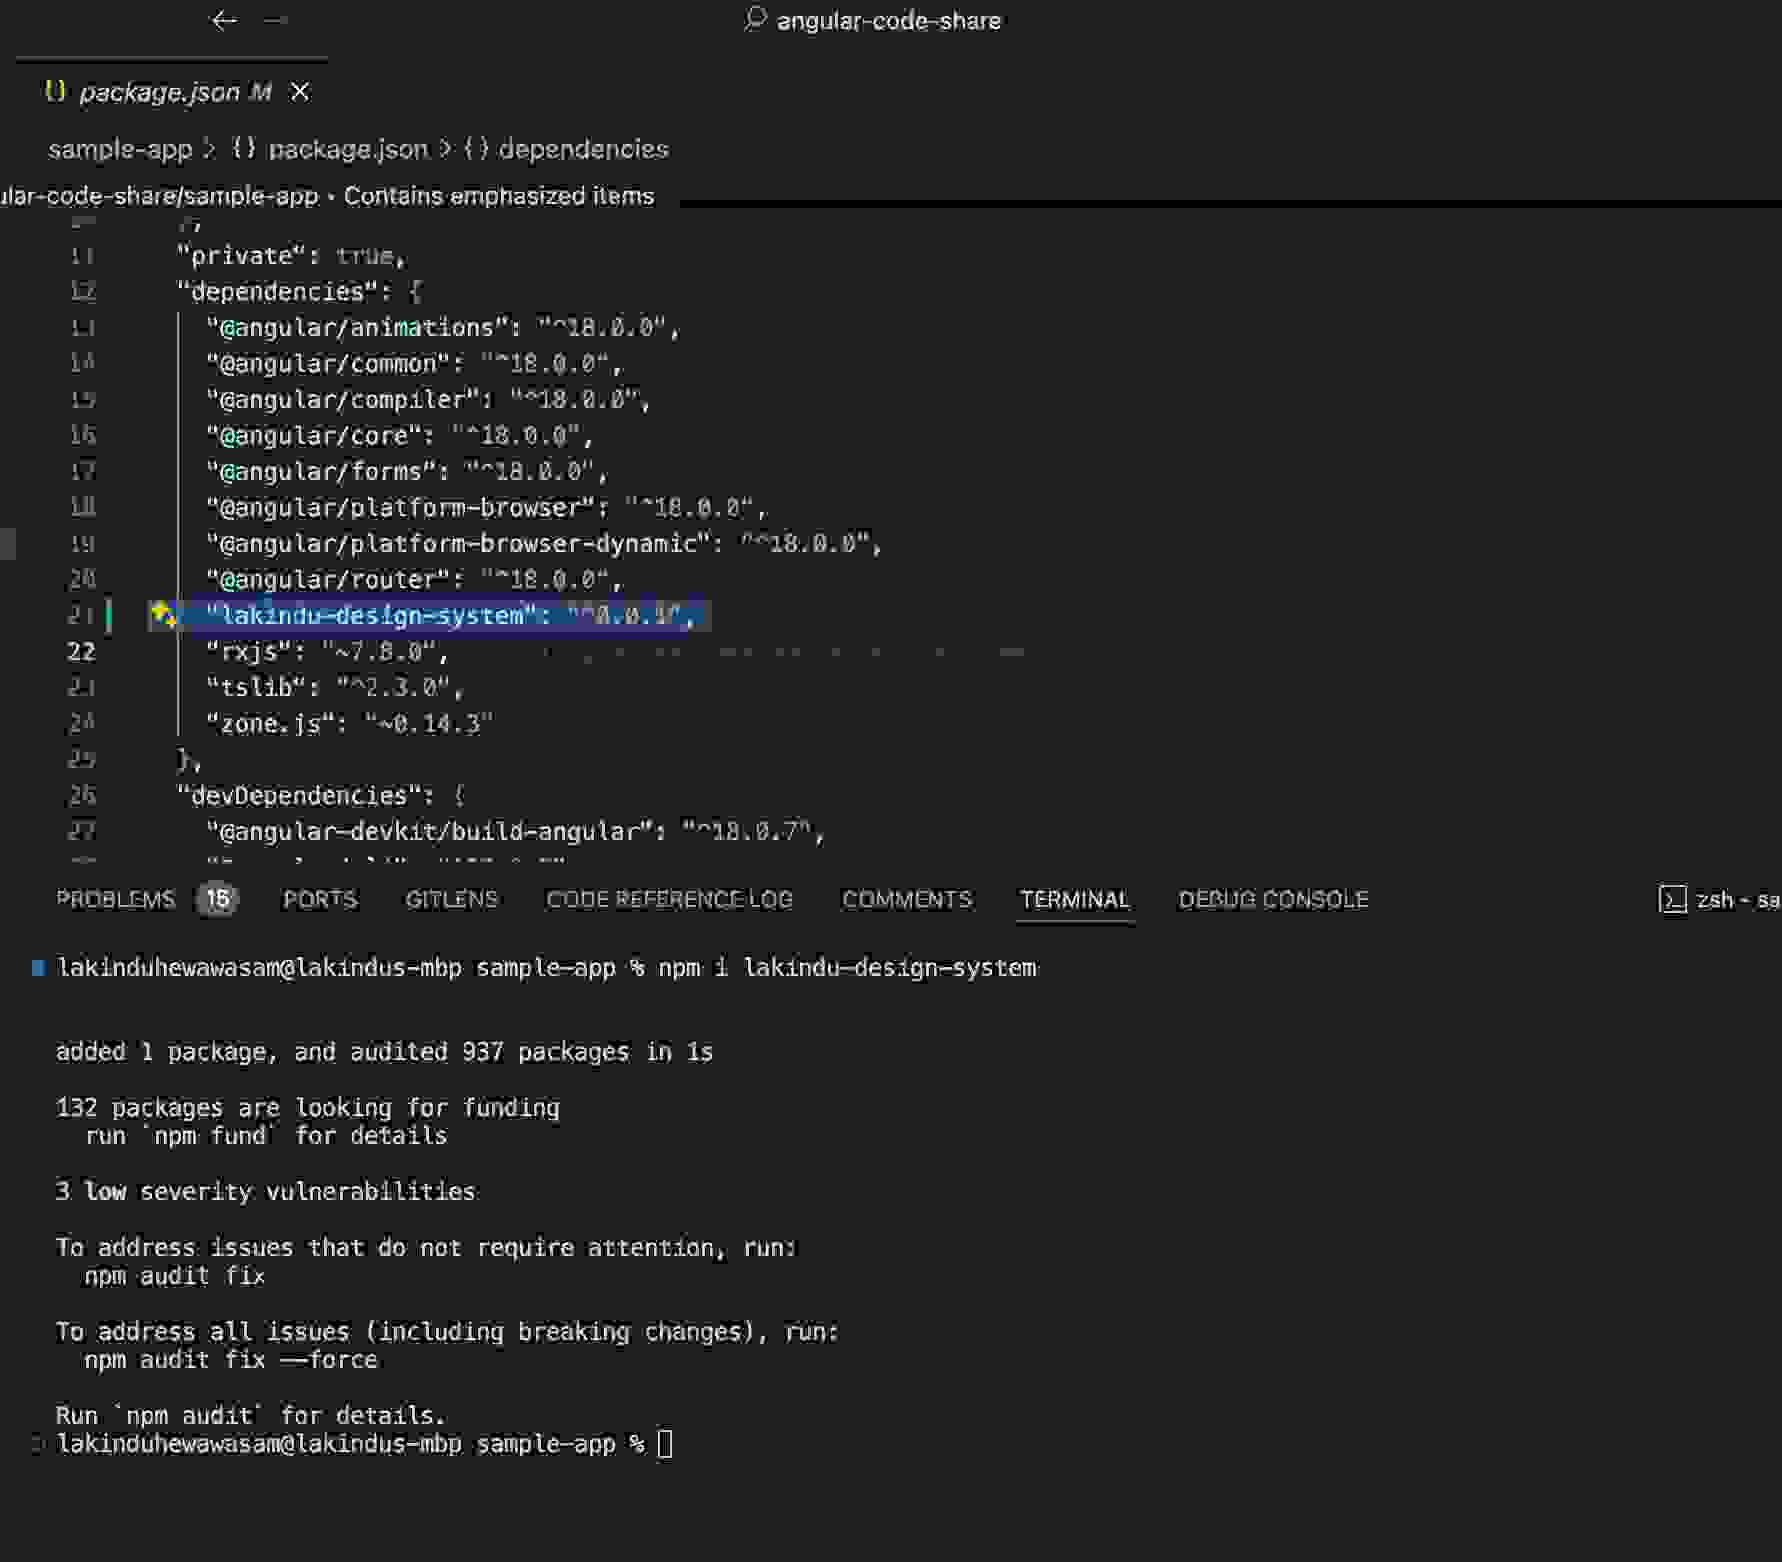
Next, update your **app.component.html** file to use the library.
```
```
Let’s update the **app.component.ts** file to define the event handlers of the Button component in the library.
```
import { Component } from '@angular/core';
import { RouterOutlet } from '@angular/router';
import { DesignSystemModule } from 'lakindu-design-system/src/lib/design-system.module';
@Component({
selector: 'app-root',
standalone: true,
imports: [RouterOutlet, DesignSystemModule],
templateUrl: './app.component.html',
styleUrl: './app.component.css',
})
export class AppComponent {
title = 'sample-app';
onClick(message: string) {
alert(message);
}
}
```
As you can see, you’ll have to import the **DesignSystemModule** to allow its components to be used. If you don’t know how to include the module, create a file ** design-system.module.ts** in your library and include the code below:
```
import { NgModule } from "@angular/core";
import { ButtonComponent } from "./elements/button/button.component";
@NgModule({
imports: [
ButtonComponent
],
declarations: [],
exports: [
ButtonComponent,
],
providers: []
})
export class DesignSystemModule {}
```
This will let you export your library components via the module and import them in a different context. So, in your library, you import the module and allow all its exports to be imported.
## GitHub reference
To check out the full code, explore my [GitHub repository](https://github.com/SyncfusionExamples/angular-workspaces-demo)
.
## Conclusion
And that’s pretty much it! There are two ways to share your Angular components across multiple projects with minimal hassle.
Angular Workspaces help you build libraries that bundle reusable Angular components and can be directly published onto NPM Repositories. This allows you to use the components across Angular apps and different workspaces!
I hope you found this article helpful. Thank you for reading!
## Related Blogs
[Easily Automate Flowchart Creation in Angular Diagram](https://www.syncfusion.com/blogs/post/flowchart-creation-in-angular-diagram)
[How to resolve CORS errors by using Angular Proxy?](https://www.syncfusion.com/blogs/post/resolve-cors-errors-angular-proxy)
[Streamline Data Management with Inline Editing in Angular Pivot Table](https://www.syncfusion.com/blogs/post/inline-editing-in-angular-pivot-table)
[Mastering Angular Query Builder: CEL and SpEL Integration](https://www.syncfusion.com/blogs/post/cel-and-spel-in-angular-query-builder)