---
title: "Secure Document Editing with Role-Based Toolbars in React Word Editor"
published_at: "2025-08-12T14:29:59+00:00"
modified_at: "2025-12-05T08:48:57+00:00"
url: "https://www.syncfusion.com/blogs/post/role-based-toolbar-react-word-editor"
excerpt: "Customize toolbars in Syncfusion React Word Editor based on user roles to enhance legal workflow security and usability."
taxonomy_category:
- "Document Editor"
- "Document Processing"
- "File Formats"
- "React"
- "Word"
- "Word Editor"
- "Word Processor"
taxonomy_post_tag:
- "Custom-toolbar"
- "document editor"
- "Document Editor API"
- "Document Processing"
- "File Formats"
- "Legal-Workflow"
- "React"
- "React DOCX Editor"
- "Role-Based Access Control (RBAC)"
- "Role-Based Toolbar Customization"
- "Role-Based UI"
- "toolbar"
- "Toolbar Configuration"
- "Word"
- "Word Editor"
- "Word Editor Customization"
---
# Secure Document Editing with Role-Based Toolbars in React Word Editor
[Ramkumar Ravy](https://www.syncfusion.com/blogs/author/ramkumarr)
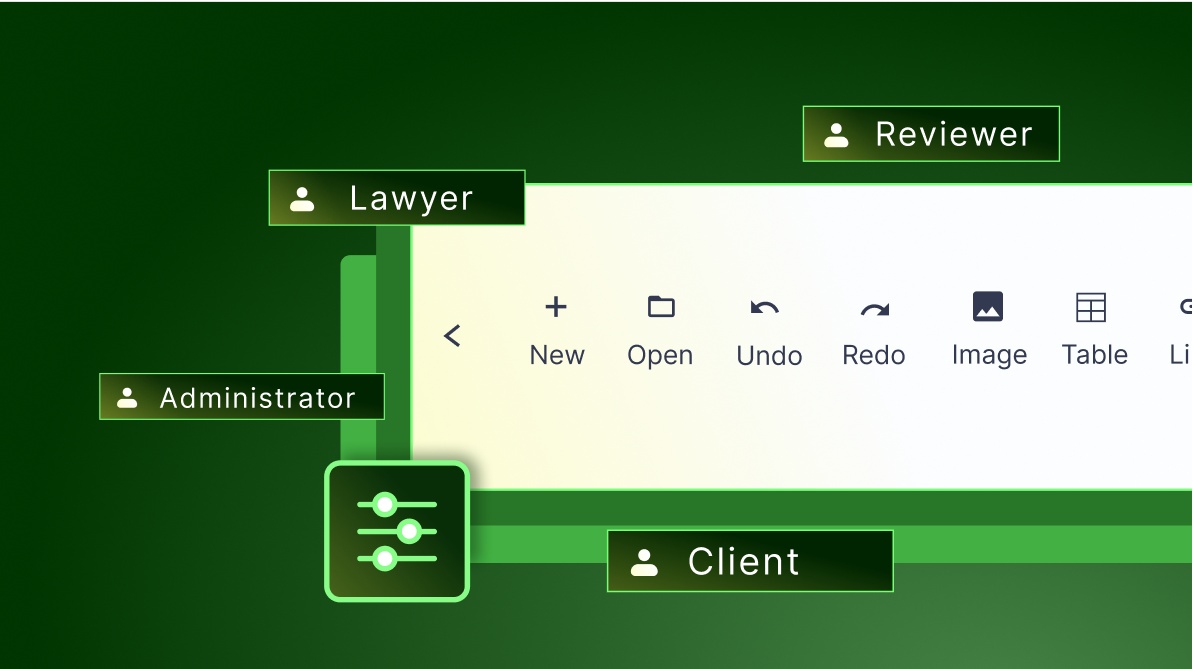
**TL;DR:** Legal workflows require secure, role-specific Word document editing. This guide shows how to use Syncfusion® React DOCX Editor to implement role-based toolbar customization using ASP.NET Core for backend role management and React for frontend integration, improving usability and access control.
## Introduction
Legal teams often struggle with cluttered document interfaces that expose unnecessary tools to every user, increasing the risk of accidental edits and slowing down workflows. In high-stakes environments like law firms, confidentiality and precision are critical; yet many document editors lack the flexibility to tailor the user experience based on roles. [Syncfusion® React Word Editor](https://www.syncfusion.com/react-components/react-docx-editor)
solves this challenge with dynamic, role-based toolbar customization.
## Why toolbar customization matters
It’s essential to tailor the user interface based on each user’s role to ensure efficiency and confidentiality. [Syncfusion® React DOCX Editor](https://www.syncfusion.com/react-components/react-docx-editor)
or**Word Editor** offers a powerful and flexible API that allows developers to customize the toolbar dynamically. This ensures that the user sees only the tools relevant to their responsibilities, reducing clutter and minimizing the risk of unauthorized actions.
In this blog post, we’ll discuss a practical example of implementing **role-based toolbar customization** using ** Syncfusion® React Word Editor**. You’ll learn how to configure the toolbar for different user roles and enhance usability and security in your Word documents.
## Role-based toolbar configuration
In a typical legal document workflow, different users interact with the document in distinct ways based on their responsibilities:
- **Lawyer**: Drafts and edits the legal notice.
- **Reviewer**: Adds comments and tracks changes.
- **Client**: Views the document and adds a digital signature.
- **Administrator**: Has full access to all tools for auditing and publishing.
To support this, the toolbar in the Syncfusion® Word Editor can be customized to show only the relevant tools for each role. Below is a breakdown of the toolbar items and content access for each user type:
| Role | Access Description | Accessible Toolbar Items |
| --- | --- | --- |
| Lawyer | Lawyers have access to the entire toolbar, allowing them to draft, edit, and format the document extensively, including inserting tables, links, and structured content. | New, Open, Undo, Redo, Image, Table, Link, Bookmark, Table of Contents, Header, Footer, Page Setup, Page Number, Break, Insert Footnote, Insert Endnote, Find, Comments, Track Changes, Local Clipboard, Restrict Editing, Form Fields, Update Fields, Content Control, XML Mapping Pane, Download, Print |
| Reviewer | Reviewers can access tools for commenting, tracking changes, and reviewing the document without editing core content. | Find, Comments, Track Changes, Download, Print |
| Client | Clients are provided with a minimal toolbar, allowing them to review the document, add comments, and download or print the file. | Find, Comments, Download, Print |
| Administrator | Administrators have full access to all toolbar items, enabling them to audit, edit, and finalize the document as needed. | New, Open, Undo, Redo, Image, Table, Link, Bookmark, Table of Contents, Header, Footer, Page Setup, Page Number, Break, Insert Footnote, Insert Endnote, Find, Comments, Track Changes, Local Clipboard, Restrict Editing, Form Fields, Update Fields, Content Control, XML Mapping Pane, Download, Print |
## Setting up ASP.NET Core backend
To manage user authentication and securely handle document access based on user roles, you’ll need a backend service. In this example, we’ll implement the necessary endpoints using ASP.NET Core Web API.
## Step 1: Create a new ASP.NET Core Web API project
Create an [ASP.NET Core Web API](https://learn.microsoft.com/en-us/aspnet/core/tutorials/first-web-api?view=aspnetcore-6.0&tabs=visual-studio)
project using [Visual Studio](https://visualstudio.microsoft.com/)
or the [.NET CLI](https://learn.microsoft.com/en-us/dotnet/core/tools/)
. This project will be the backend for managing user authentication and related operations.
## Step 2: Create API endpoints
Create a controller named **AuthenticationController.cs** with two key endpoints:
- **Register**: Allows new users to register by providing credentials such as a username, email ID, and password.
- **Login**: Authenticates existing users using their email ID and password.
These endpoints will internally handle the logic for securely storing and retrieving user data from a [users.json](https://github.com/SyncfusionExamples/Role-Based-Toolbar-Customization-in-Syncfusion-Document-Editor-for-Legal-Workflows/blob/master/Server-side/users.json)
file.
**AuthenticationController.cs**
```
// Register the new user with the credentials like Username, Email ID and Password
[HttpPost("register")]
public IActionResult Register([FromBody] User newUser)
{
var Users = LoadUsers();
if (Users.Any(u => u.Username == newUser.Username))
{
return BadRequest(new { message = "Username already exists" });
}
if (Users.Any(u => u.Email == newUser.Email))
{
return BadRequest(new { message = "Email already registered" });
}
newUser.Password = BCrypt.Net.BCrypt.HashPassword(newUser.Password);
Users.Add(newUser);
var json = JsonSerializer.Serialize(Users, new JsonSerializerOptions { WriteIndented = true });
System.IO.File.WriteAllText(_userFilePath, json);
return Ok(new { message = "User registered successfully" });
}
// Existing user can login using the credentials such as Email ID and password
[HttpPost("login")]
public IActionResult Login([FromBody] User login)
{
var Users = LoadUsers();
var user = Users.FirstOrDefault(u => u.Email == login.Email);
if (user == null || !BCrypt.Net.BCrypt.Verify(login.Password, user.Password))
{
return Unauthorized(new { message = "Invalid credentials" });
}
return Ok(new { username = user.Username, email = user. Email });
}
```
## Setting up React frontend
## Step 1: Create a React app and add a dependency
Create a new React application and integrate the Syncfusion® [Word Editor](https://ej2.syncfusion.com/react/documentation/document-editor/getting-started)
component. This integration enables role-based interactions, allowing the application to dynamically adjust available features based on the user’s assigned role.
## Step 2: Implement the authentication form
Create a new JavaScript file named **Authentication.jsx** to implement the user authentication form and its associated operations. This component will handle ** user registration**and ** login**, capturing credentials such as email and password, and communicating with the backend API for authentication.
**Authentication.jsx**
```
// Authenticating the users with credentials like Email ID and password. Registering new users.
function Authentication() {
// State hooks for managing authentication
const [user, setUser] = useState(null);
const [isRegister, setIsRegister] = useState(false);
const [message, setMessage] = useState("");
const [username, setUsername] = useState("");
// Effect to load user from localStorage on component mount
useEffect(() => {
const saved = localStorage.getItem("user");
if (saved) {
setUser(JSON.parse(saved));
}
}, []);
// Logout user and clear state
const handleLogout = () => {
localStorage.removeItem("user");
setUser(null);
};
// Validate email format using a regular expression
const validateEmail = (email) => /\S+@\S+\.\S+/.test(email);
// Handle login form submission
const handleLogin = async (event) => {
event.preventDefault();
setMessage("");
const form = event.currentTarget;
const email = form.elements.email.value.trim();
const password = form.elements.password.value.trim();
if (!validateEmail(email)) {
setMessage("❌ Please enter a valid email.");
return;
}
try {
// Make a POST request to the login API
const response = await fetch(`${hostURL}/login`, {
method: "POST",
headers: { "Content-Type": "application/json" },
body: JSON.stringify({ email, password }),
});
if (response.ok) {
const userData = await response.json();
localStorage.setItem("user", JSON.stringify(userData));
setUser(userData); // Update user state directly
} else {
setMessage("❌ Invalid email or password.");
}
} catch (error) {
setMessage("⚠️ Server error during login.");
}
};
// Handle registration form submission
const handleRegister = async (e) => {
e.preventDefault();
setMessage("");
const form = e.currentTarget;
const username = form.elements.username.value;
const email = form.elements.email.value;
const password = form.elements.password.value;
if (!validateEmail(email)) {
setMessage("❌ Please enter a valid email.");
return;
}
try {
// Make a POST request to the registration API
const register = await fetch(`${hostURL}/register`, {
method: "POST",
headers: { "Content-Type": "application/json" },
body: JSON.stringify({ username, email, password }),
});
const data = await register.json();
if (register.ok) {
setMessage("✅ Registration successful. You can now log in.");
setIsRegister(false);
setUsername("");
} else {
setMessage(`❌ ${data.message || "Registration failed"}`);
}
} catch {
setMessage("⚠️ Server error during registration.");
}
};
// Render authentication form if not logged in
const renderAuthForm = () => {
return (
{isRegister ? "Register" : "Login"}
{message &&
{message}
}
);
};
// Render DocumentEditorMain if user is authenticated, otherwise render auth form
return user ? (
) : (
renderAuthForm()
);
}
export default Authentication;
```
The authentication form will appear as follows:
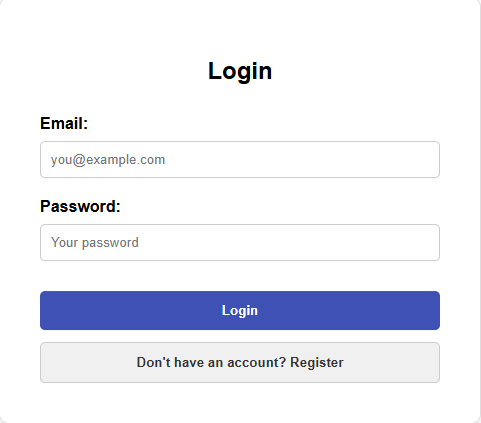
Authentication form on the client-side
**Note:** You can further customize this authentication flow by integrating it with your application’s user management system. This allows you to dynamically assign toolbar actions based on user roles after login.
## Step 3: Implement Word Editor operations
Create a new JavaScript file (**DocumentEditor.jsx**) to implement the ** React Word Editor** functionality. This includes displaying customized toolbar options based on user roles and enabling them to perform their permitted actions, as shown below.
**DocumentEditor.jsx**
```
import { useEffect, useRef } from 'react';
import { DocumentEditorContainerComponent } from '@syncfusion/ej2-react-documenteditor';
function DocumentEditor({ user, onLogout }) {
let defaultDocument = '';
// Configure toolbar items based on user role
const toolbarConfig = {
Lawyer: [
'New', 'Open', 'Separator', 'Undo', 'Redo', 'Separator', 'Image', 'Table',
'Hyperlink', 'Bookmark', 'TableOfContents', 'Separator', 'Header', 'Footer',
'PageSetup', 'PageNumber', 'Break', 'InsertFootnote', 'InsertEndnote',
'Separator', 'Find', 'Separator', 'Comments', 'TrackChanges', 'LocalClipboard',
'RestrictEditing', 'Separator', 'FormFields', 'UpdateFields', 'ContentControl',
'XML Mapping'
],
Paralegal: [
'New', 'Open', 'Separator', 'Undo', 'Redo', 'Separator', 'Image', 'Table',
'Hyperlink', 'Bookmark', 'TableOfContents', 'Separator', 'Header', 'Footer',
'PageSetup', 'PageNumber', 'Break', 'InsertFootnote', 'InsertEndnote',
'Separator', 'Find', 'Separator', 'Comments', 'TrackChanges', 'LocalClipboard',
'RestrictEditing', 'Separator', 'FormFields', 'UpdateFields', 'ContentControl',
'XML Mapping'
],
Client: ['Comments', 'Find'],
Reviewer: ['Comments', 'Find', 'TrackChanges'],
Admin: [
'New', 'Open', 'Separator', 'Undo', 'Redo', 'Separator', 'Image', 'Table',
'Hyperlink', 'Bookmark', 'TableOfContents', 'Separator', 'Header', 'Footer',
'PageSetup', 'PageNumber', 'Break', 'InsertFootnote', 'InsertEndnote',
'Separator', 'Find', 'Separator', 'Comments', 'TrackChanges', 'LocalClipboard',
'RestrictEditing', 'Separator', 'FormFields', 'UpdateFields', 'ContentControl',
'XML Mapping'
]
};
// Create references for title bar and container
const titleBarRef = useRef(null);
const containerRef = useRef(null);
// Effect to initialize or update the word editor when the user changes
useEffect(() => {
if (user && containerRef.current) {
convertDocxToSfdt();
containerRef.current.documentEditor.documentName = 'Document';
containerRef.current.documentEditor.currentUser = user.email;
// Update document title when changes are made
containerRef.current.documentChange = () => {
titleBarRef.current.updateDocumentTitle();
containerRef.current.documentEditor.focusIn();
};
if (!titleBarRef.current) {
titleBarRef.current = new TitleBar(
document.getElementById('documenteditor_titlebar'),
containerRef.current.documentEditor,
true
);
titleBarRef.current.updateDocumentTitle();
}
containerRef.current.toolbarItems = toolbarConfig[user.username];
}
}, [user]);
// Convert GitHub Raw document to SFDT and load in Editor
const convertDocxToSfdt = async () => {
try {
const docxResponse = await fetch(
'https://raw.githubusercontent.com/SyncfusionExamples/Role-Based-Toolbar-Customization-in-Syncfusion-Document-Editor-for-Legal-Workflows/master/Client-side/public/docs/Legal_Notice.docx'
);
const docxBlob = await docxResponse.blob();
const formData = new FormData();
formData.append('files', docxBlob, 'Legal_Notice.docx');
const importResponse = await fetch(
'https://ej2services.syncfusion.com/production/web-services/api/documenteditor/Import',
{
method: 'POST',
body: formData,
}
);
if (importResponse.ok) {
defaultDocument = await importResponse.text();
containerRef.current.documentEditor.open(defaultDocument);
} else {
console.error(`Failed to import document: ${importResponse.statusText}`);
}
} catch (error) {
console.error('Error converting document:', error);
}
};
return (
Welcome, {user.username || user.email}
);
}
export default DocumentEditor;
```
Below are visual examples of how the toolbar appears for each role:
**Lawyer:**
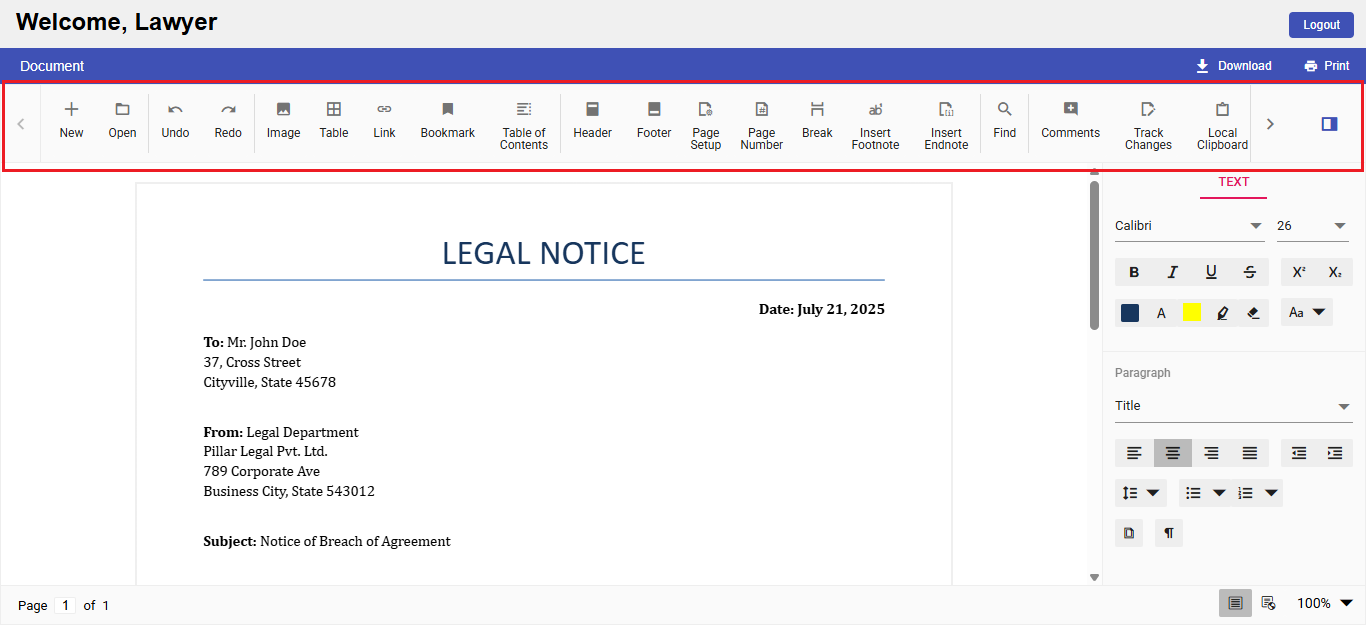
Toolbar appearance for Lawyers
**Reviewer**:
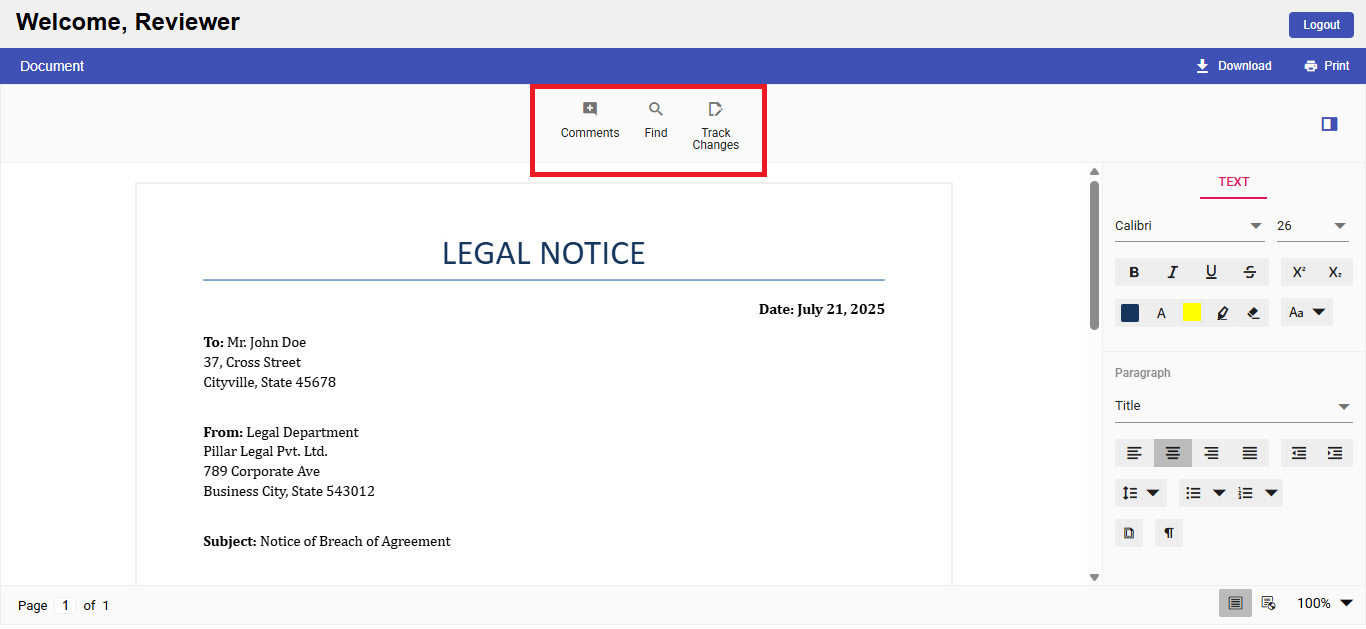
Toolbar appearance for Reviewers
**Client**:
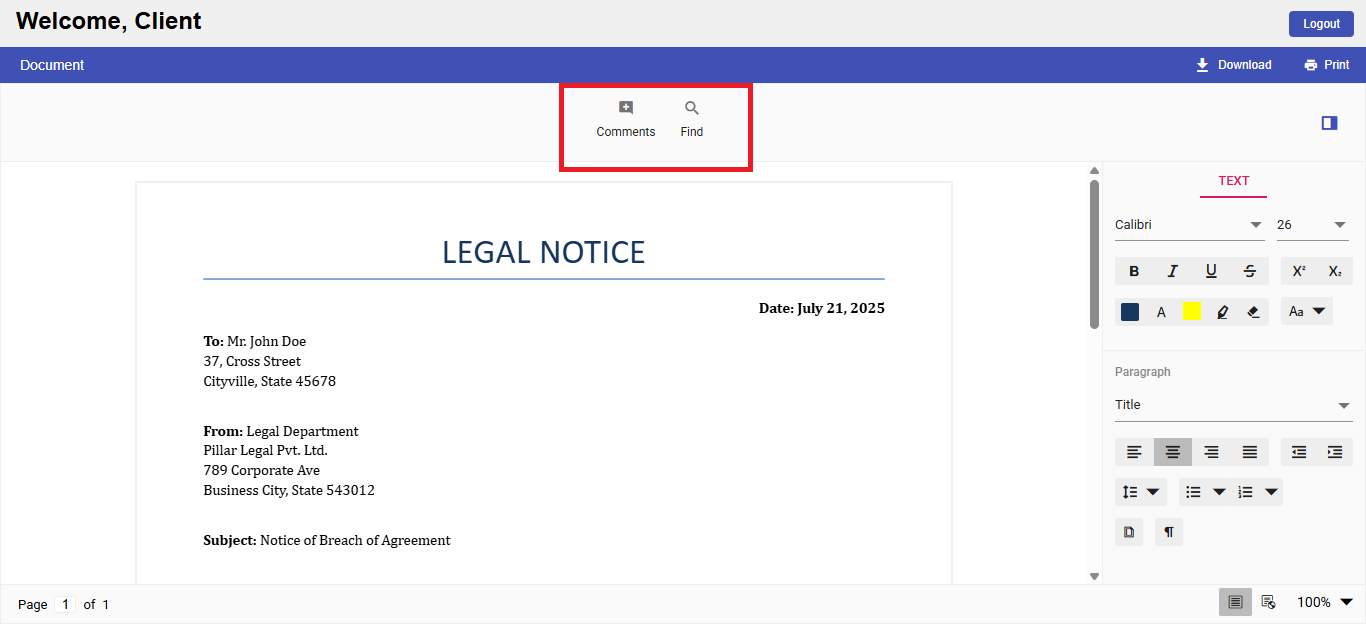
Toolbar appearance for Clients
**Administrator**:
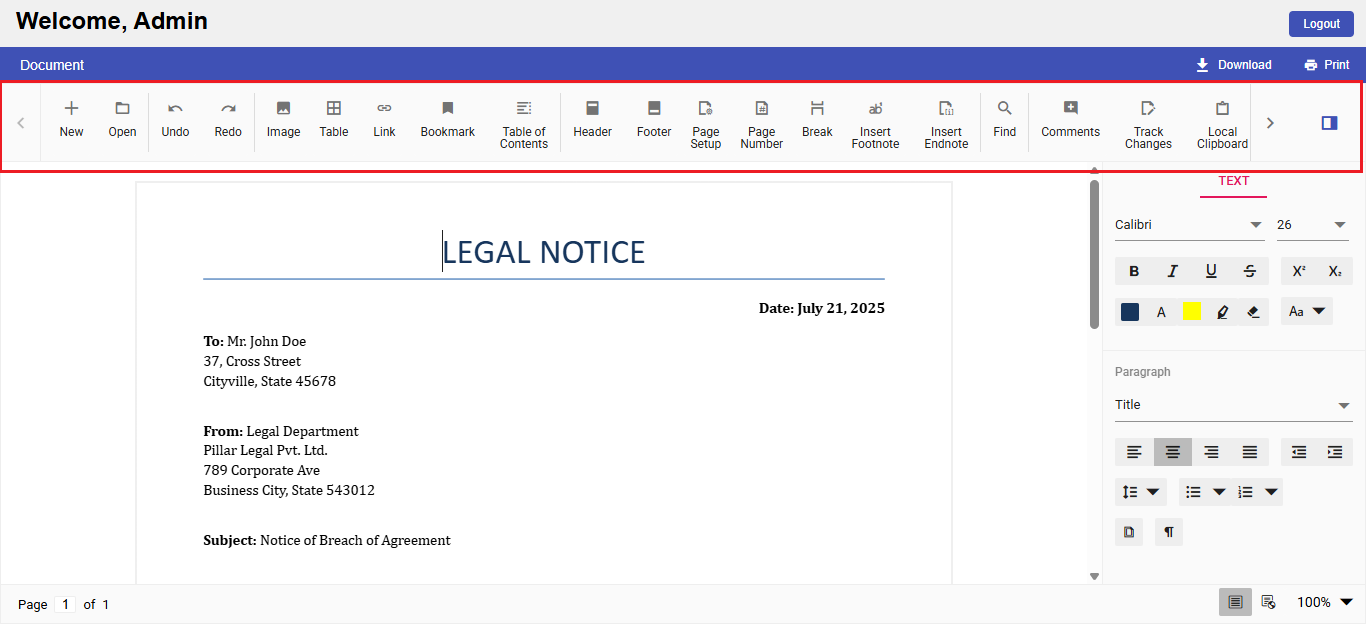
Toolbar appearance for Administrators
## Testing user roles
To test the application, run the **server-side (ASP.NET Core API)** first, followed by the ** client-side (React)** application. Use the following login credentials for each user role:
| Role | Email | Password |
| --- | --- | --- |
| Lawyer | [email protected] | 123456 |
| Reviewer | [email protected] | |
| Client | [email protected] | |
| Administrator | [email protected] | |
## GitHub reference
For the complete working projects, refer to the [GitHub](https://github.com/SyncfusionExamples/Role-Based-Toolbar-Customization-in-Syncfusion-Document-Editor-for-Legal-Workflows/tree/master)
demo.
## Conclusion
Customizing the toolbar in the [Syncfusion® React Word Editor](https://www.syncfusion.com/react-components/react-docx-editor)
based on user roles enhances usability and reinforces role-based access control, crucial for workflows involving sensitive content, such as legal documentation. This strategy ensures that each user enjoys a focused, secure editing experience, minimizing the risk of unauthorized changes and boosting overall productivity.
Whether you’re developing a legal platform, an educational solution, or a corporate document system, implementing role-based UI customization is a best practice that adds both refinement and security to your application.
The new version is available for current customers to download from the [license and downloads](https://www.syncfusion.com/account/downloads)
page. If you are not a Syncfusion**®** customer, you can try our [30-day free trial](https://www.syncfusion.com/downloads)
for our newest features.
You can also contact us through our [support forums](https://www.syncfusion.com/forums)
, [support portal](https://support.syncfusion.com/)
, or [feedback portal](https://www.syncfusion.com/feedback)
. We are always happy to assist you!
## Related Blogs
[How to Save Time with Reusable Forms in React Word Editor](https://www.syncfusion.com/blogs/post/reusable-forms-in-react-word-editor)
[Syncfusion® Document Viewer for VS Code Now Supports Word Documents](https://www.syncfusion.com/blogs/post/vs-code-document-viewer-extension)
[Build a Word Document Editor in React with Auto-Save to Amazon S3](https://www.syncfusion.com/blogs/post/react-aws-s3-document-editor-autosave)
[Effortlessly Open, Edit, and Auto-Save Word Documents in React with Azure Blob Storage](https://www.syncfusion.com/blogs/post/azure-blob-storage-in-react)