---
title: "Replicating a Social Profile UI in Xamarin.Forms"
published_at: "2021-10-06T10:00:21+00:00"
modified_at: "2025-03-20T07:50:59+00:00"
url: "https://www.syncfusion.com/blogs/post/replicating-a-social-profile-ui-in-xamarin-forms"
excerpt: "Howdy! In this blog post, we are going to replicate a social profile UI in Xamarin.Forms obtained from this Dribble design. Our design contains a single screen: a profile page. We are going to develop the UI by following the..."
taxonomy_category:
- "Desktop"
- "Mobile"
- "Tips and Tricks"
- "UI"
- "Xamarin"
taxonomy_post_tag:
- "Cross-Platform"
- "Mobile"
- "productivity"
- "UI Components"
- "Xamarin.Forms"
---
# Replicating a Social Profile UI in Xamarin.Forms
[Leomaris Reyes](https://www.syncfusion.com/blogs/author/lreyes)
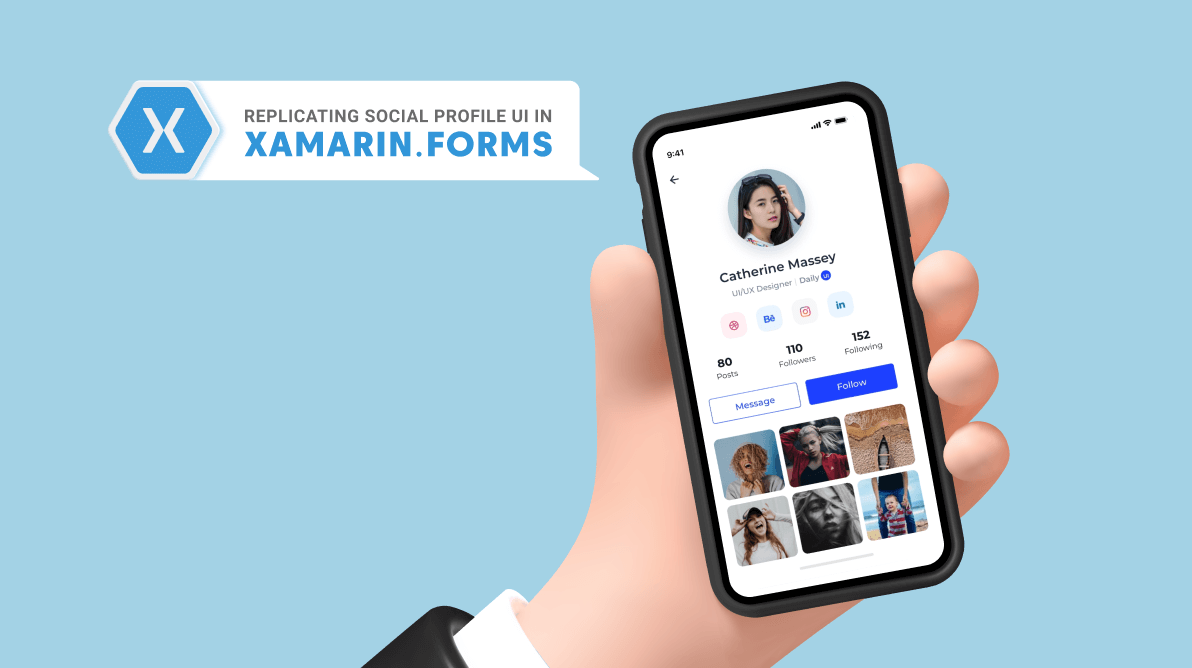
Howdy! In this blog post, we are going to replicate a social profile UI in Xamarin.Forms obtained from this [Dribble design](https://dribbble.com/shots/10840196-DailyUI-Challenge-06-Social-Profile)
.
Our design contains a single screen: a **profile page**. We are going to develop the UI by following the steps specified in this screenshot.
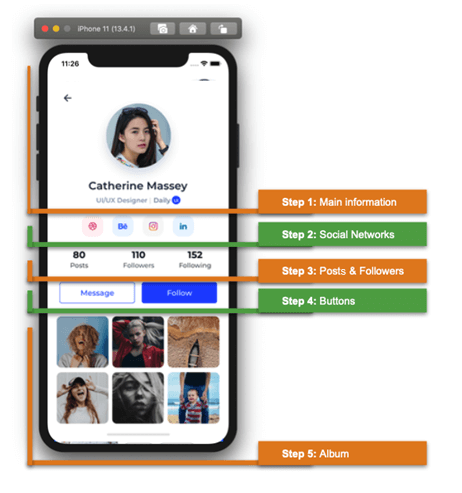
Social Profile UI in Xamarin.Forms
## Designing the profile page
First, some things that will help us to get our final design:
- We will name our UI screen as **ProfilePage**.
- To create the rounded profile image, I am going to use the [Syncfusion Xamarin.Forms Avatar View](https://www.syncfusion.com/xamarin-ui-controls/xamarin-avatar-view) control. You can read about the control’s implementation logic in this [getting started documentation](https://help.syncfusion.com/xamarin/avatar-view/getting-started) .
Let’s code!
### Main layout structure
It’s important to make a good selection of the layout. I have chosen [Xamarin.Forms DataGrid](https://www.syncfusion.com/xamarin-ui-controls/xamarin-datagrid)
. I like it because it helps me easily position the controls.
If you aren’t familiar with the DataGrid structure, refer to the following articles:
-
- [Working with Grid Layout in Xamarin.Forms](https://askxammy.com/working-with-gridlayout-in-xamarin-forms/)
- [5 Tips to Easily Use the DataGrid for Layouts in Xamarin.Forms](https://www.syncfusion.com/blogs/post/5-tips-to-easily-use-the-grid-for-layouts-in-xamarin-forms.aspx)
**Code implementation**
```
```
## Step 1: Main information
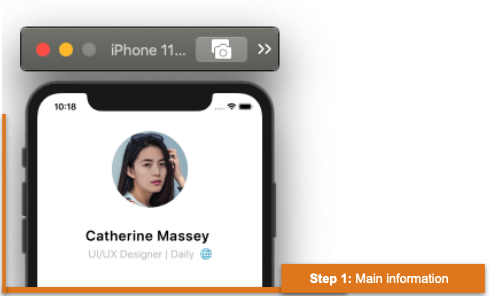
- Here, we are going to use the Syncfusion [Xamarin.Forms Avatar View](https://www.syncfusion.com/xamarin-ui-controls/xamarin-avatar-view) control to display the user’s profile image in a circular shape.
- Then, we will use a simple label to add the name and role description.
**Code implementation**
```
```
## Step 2: Social networks
To design the Social networks section, we require controls with the same, repetitive design. For this, we are going to use the **CollectionView**. It allows us to make this type of scalable design so that we can feed as many records as required in the future.
For more information, refer to the blog relating to [CollectionView](https://askxammy.com/make-your-life-simpler-with-the-collectionviews-layouts-%F0%9F%98%8E/)
.
**Code implementation**
```
```
## Step 3: Posts and followers
To add the posts and followers information, we’ll use one more DataGrid and divide the grid into three columns (Posts, Followers, and Following).
**Code implementation**
```
```
## Step 4: Buttons
Now, add the **Message** and ** Follow** buttons using the following code.
```
```
## Step 5: Album
Finally, let’s add the photos from an album to our profile using the **CollectionView**. The images will be automatically listed out in three columns after adding them to the user’s profile.
**Code implementation**
```
```
And our UI is done!
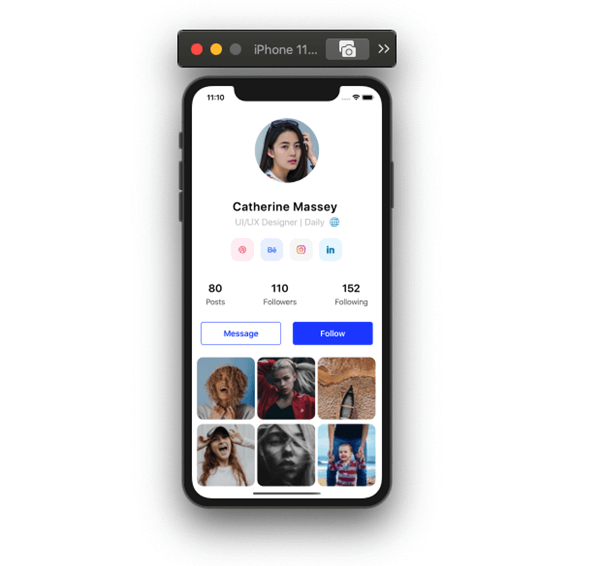
Replicating Social Profile UI in Xamarin.Forms
## Reference
To see the complete code structure of this project, refer to [Social Profile UI in Xamarin.Forms demo on GitHub](https://github.com/SyncfusionExamples/designing-social-profile-ui-in-xamarin)
.
## Conclusion
Thanks for reading! In this blog post, we have seen how to replicate a Social profile UI in Xamarin.Forms. You can use these steps as a starting point to build your UI.
Syncfusion’s [Xamarin](https://www.syncfusion.com/xamarin-ui-controls)
suite offers over 150 UI controls, from basic editors to powerful, advanced controls like [DataGrid](https://www.syncfusion.com/xamarin-ui-controls/xamarin-datagrid)
, [Charts](https://www.syncfusion.com/xamarin-ui-controls/xamarin-charts)
, [ListView](https://www.syncfusion.com/xamarin-ui-controls/xamarin-listview)
, and [Rich Text Editor](https://www.syncfusion.com/xamarin-ui-controls/xamarin-rich-text-editor)
. Try them out and leave your feedback in the comments section below!
You can also contact us through our [support forum](https://www.syncfusion.com/forums)
, [Direct-Trac](https://www.syncfusion.com/support/directtrac/incidents)
, or [feedback portal](https://www.syncfusion.com/feedback/xamarin-forms)
. We are always happy to assist you!
## Related blogs
- [Replicating a Facebook-Like UI in Xamarin](https://www.syncfusion.com/blogs/post/replicating-a-facebook-like-ui-in-xamarin.aspx)
- [Protecting Sensitive Data in the Background in Xamarin.Forms](https://www.syncfusion.com/blogs/post/protecting-sensitive-data-in-the-background-in-xamarin-forms.aspx)
- [Create a Wizard View in Xamarin.Forms: A Novice’s Guide](https://www.syncfusion.com/blogs/post/create-a-wizard-view-in-xamarin-forms.aspx)
- [Creating a Floating Label Layout in Xamarin.Forms DataForm](https://www.syncfusion.com/blogs/post/creating-a-floating-label-layout-in-xamarin-forms-dataform.aspx)