---
title: "Build AI-Powered Text-to-Flowchart Converter Using OpenAI and React Diagram Library"
published_at: "2025-02-13T11:20:24+00:00"
modified_at: "2025-11-26T08:55:46+00:00"
url: "https://www.syncfusion.com/blogs/post/react-text-to-flowchart-converter"
excerpt: "Learn how to create an AI-powered text-to-flowchart converter using OpenAI, Mermaid, and Syncfusion React Diagram to automate flowchart generation."
taxonomy_category:
- "Development"
- "React"
- "Smart AI components"
- "Web"
taxonomy_post_tag:
- "development"
- "diagram"
- "OpenAI"
- "React"
- "Web"
---
# Build AI-Powered Text-to-Flowchart Converter Using OpenAI and React Diagram Library
[Sarathkumar V](https://www.syncfusion.com/blogs/author/sarathkumarv)
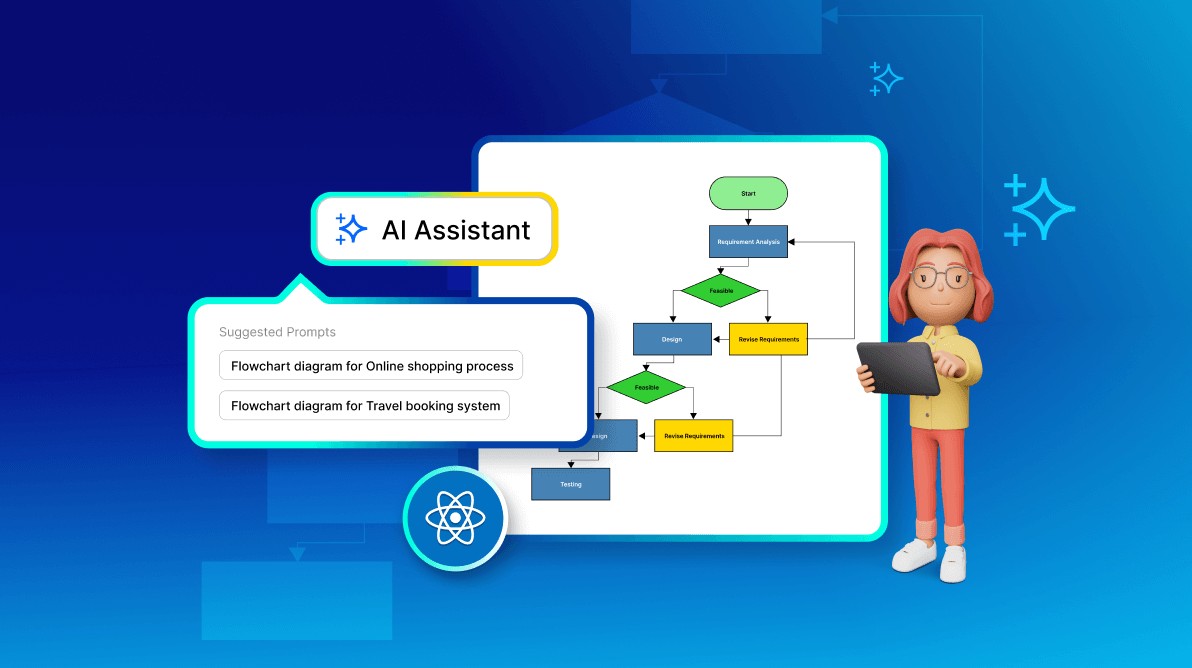
**TL;DR:** Learn to build an AI-powered text-to-flowchart converter using OpenAI and the Syncfusion React Diagram Library. Automate flowchart generation from text descriptions by converting them into Mermaid syntax and rendering interactive diagrams with intelligent AI and robust visualization tools.
[Flowcharts](https://en.wikipedia.org/wiki/Flowchart)
are essential for visualizing processes, defining workflows, and illustrating systems in development and business contexts. Manually creating these flowcharts, however, can be time-consuming and labor-intensive. This is where AI comes into play, providing intelligent automation to effortlessly convert textual descriptions into visual flowcharts.
In this blog, we’ll see how to create a smart flowchart app that leverages OpenAI, Mermaid and the Syncfusion [React Diagram](https://www.syncfusion.com/react-components/react-diagram)
library for seamless text-to-flowchart conversion, complete with automatic layout and interactive editing.
Let’s get started!
## Prerequisites
Before you begin, ensure your environment is ready with the following:
- [Node.js](https://nodejs.org/en) and [NPM](https://www.npmjs.com/) packages.
- Syncfusion [React Diagram Library](https://ej2.syncfusion.com/react/documentation/diagram/getting-started) and **AI SDKs**.
- A valid API key from [OpenAI](https://openai.com/) or an alternative AI provider such as [Azure OpenAI](https://azure.microsoft.com/en-us/products/ai-services/openai-service) .
## Workflow overview
- **User input**: Provide a text description of a process.
- **AI processing**: Sent the input text to OpenAI’s API for analysis.
- **Data generation**: OpenAI generates a structured [Mermaid](https://mermaid.js.org/syntax/flowchart.html) representation of the flowchart.
- **Data transformation**: The structured data is then converted into React Diagram component’s nodes and connectors.
- **Visualization**: The React Diagram component then renders a visual flowchart.
Follow along as we delve into the steps to bring this intelligent solution to life!
## Build AI-powered text-to-flowchart converter with OpenAI and React Diagram Library
### Step 1: Set up the React project
First, [create a React project](https://legacy.reactjs.org/docs/create-a-new-react-app.html)
using the following commands.
```
npx create-react-app smart-flowchart
cd smart-flowchart
```
Then, install the [React Diagram component](https://ej2.syncfusion.com/react/documentation/diagram/getting-started)
and OpenAI libraries.
```
npm install @syncfusion/ej2-react-diagrams --save
npm install openai --save
```
### Step 2: Configure the AI service
To integrate the AI capabilities, configure the [Azure OpenAI](https://azure.microsoft.com/en-in/products/ai-services/openai-service)
service by specifying the **resource name**, ** API key**, and the ** AI model**. The following code initializes the AI service and defines a utility function to handle requests.
```
import { generateText } from "ai"
import { createAzure } from '@ai-sdk/azure';
const azure = createAzure({
resourceName: 'RESOURCE_NAME',
apiKey: 'API_KEY',
});
const aiModel = azure('MODEL_NAME'); // Update the model here
export async function getAzureChatAIRequest(options: any) {
try {
const result = await generateText({
model: aiModel,
messages: options.messages,
topP: options.topP,
temperature: options.temperature,
maxTokens: options.maxTokens,
frequencyPenalty: options.frequencyPenalty,
presencePenalty: options.presencePenalty,
stopSequences: options.stopSequences
});
return result.text;
} catch (err) {
console.error("Error occurred:", err);
return null;
}
}
```
Replace the **RESOURCE_NAME**, ** API_KEY**, and ** MODEL_NAME** with your Azure AI service details.
### Step 3: Configure the React Diagram Library for visualization
The React Diagram is a feature-rich architecture diagram library for visualizing, creating, and editing interactive diagrams. Its intuitive API and rich feature set make it easy to create, style, and manage flowcharts.
In the **app.tsx** file, define and configure the React Diagram component to build our flowchart generator as shown below.
```
diagram = diagramObj as DiagramComponent}
id="diagram"
width="100%"
height="900px"
rulerSettings={{ showRulers: true }}
tool={DiagramTools.Default}
snapSettings={{ horizontalGridlines: gridlines, verticalGridlines: gridlines }}
scrollSettings={{ scrollLimit: 'Infinity' }}
layout={{
type: 'Flowchart',
orientation: 'TopToBottom',
flowchartLayoutSettings: {
yesBranchDirection: 'LeftInFlow',
noBranchDirection: 'RightInFlow',
yesBranchValues: ['Yes', 'True'],
noBranchValues: ['No', 'False']
},
verticalSpacing: 50,
horizontalSpacing: 50
} as any}
dataSourceSettings={{
id: 'id',
parentId: 'parentId',
dataManager: new DataManager(flowchartData)
}}
scrollChange={(args: IScrollChangeEventArgs) => {
if (args.panState !== 'Start') {
let zoomCurrentValue: any = (document.getElementById("btnZoomIncrement") as any).ej2_instances[0];
zoomCurrentValue.content = Math.round(diagram.scrollSettings.currentZoom! * 100) + ' %';
}
}}
getNodeDefaults={(node: NodeModel): NodeModel => {
if (node.width === undefined) {
node.width = 150;
node.height = 50;
}
if ((node.shape as FlowShapeModel).type === 'Flow' && (node.shape as FlowShapeModel).shape === 'Decision') {
node.width = 120;
node.height = 100;
}
return node;
}}
getConnectorDefaults={(connector: Connector): ConnectorModel => {
connector.type = 'Orthogonal';
if (connector.annotations && connector.annotations.length > 0) {
(connector.annotations as PathAnnotationModel[])[0]!.style!.fill = 'white';
}
return connector;
}}
dragEnter={dragEnter}
>
```
This setup creates a responsive diagram with a flowchart layout, customizable ruler, snap and scroll settings, and some event bindings.
### Step 4: Create an AI assist dialog for user input
Create a dialog interface that facilitates AI-assisted flowchart generation. The interface will offer suggested prompts, a textbox for user input, and a button to send input to the OpenAI for processing.
Refer to the following code example.
```
dialog = dialogObj as DialogComponent}
id='dialog'
header=' AI Assist'
showCloseIcon={true}
isModal={true}
content={dialogContent}
target={document.getElementById('control-section') as HTMLElement}
width='540px'
visible={false}
height='310px'
/>
const dialogContent = () => {
return (
<>
Suggested Prompts
msgBtn2 = btn2 as ButtonComponent}
id="btn2" style={{ flex: 1, overflow: 'visible', borderRadius: '8px', marginBottom: '10px' }}
onClick={() => {
dialog.hide();
convertTextToFlowchart((msgBtn2 as any).value, diagram);
}}
>Flowchart for online shopping
msgBtn1 = btn1 as ButtonComponent}
onClick={() => {
dialog.hide();
convertTextToFlowchart((msgBtn1 as any).value, diagram);
}}
id="btn1" style={{ flex: 1, overflow: 'visible', borderRadius: '8px', marginBottom: '10px' }}>Flowchart for Mobile banking registration
msgBtn3 = btn3 as ButtonComponent}
onClick={() => {
dialog.hide();
convertTextToFlowchart((msgBtn3 as any).value, diagram);
}}
id="btn3" style={{ flex: 1, overflow: 'visible', borderRadius: '8px', marginBottom: '10px' }}>Flowchart for Bus ticket booking
textBox = textboxObj as TextBoxComponent}
placeholder='Please enter your prompt here...' width={450} input={onTextBoxChange}
/>
sendButton = btn as ButtonComponent}
onClick={() => {
dialog.hide();
convertTextToFlowchart(textBox.value, diagram)
}}
iconCss='e-icons e-send' isPrimary={true} disabled={true}
style={{ marginLeft: '5px', height: '32px', width: '32px' }}>
);
}
```
This configuration in the **app.tsx** file sets up event listeners and handlers to manage user interactions, such as entering a prompt and triggering the conversion of text to a flowchart.
### Step 5: Integrating OpenAI for text-to-flowchart conversion
Finally, implement the**convertTextToFlowchart** function, which is the main driver for transforming AI-generated text into a flowchart using the React Diagram API.
Refer to the following code example.
```
import { DiagramComponent } from "@syncfusion/ej2-react-diagrams";
import { getAzureChatAIRequest } from '../../../ai-models';
export async function convertTextToFlowchart(inputText: string, diagram: DiagramComponent) {
showLoading();
const options = {
messages: [
{
role: 'system',
content: 'You are an assistant tasked with generating mermaid flow chart diagram data sources based on user queries'
},
{
role: 'user',
content: `
Generate only the Mermaid flowchart code for the process titled "${inputText}".
Use the format provided in the example below, but adjust the steps, conditions, and styles according to the new title:
**Example Title:** Bus Ticket Booking
**Example Steps and Mermaid Code:**
graph TD
A([Start]) --> B[Choose Destination]
B --> C{Already Registered?}
C -->|No| D[Sign Up]
D --> E[Enter Details]
E --> F[Search Buses]
C --> |Yes| F
F --> G{Buses Available?}
G -->|Yes| H[Select Bus]
H --> I[Enter Passenger Details]
I --> J[Make Payment]
J --> K[Booking Confirmed]
G -->|No| L[Set Reminder]
K --> M([End])
L --> M
style A fill:#90EE90,stroke:#333,stroke-width:2px;
style B fill:#4682B4,stroke:#333,stroke-width:2px;
style C fill:#32CD32,stroke:#333,stroke-width:2px;
style D fill:#FFD700,stroke:#333,stroke-width:2px;
style E fill:#4682B4,stroke:#333,stroke-width:2px;
style F fill:#4682B4,stroke:#333,stroke-width:2px;
style G fill:#32CD32,stroke:#333,stroke-width:2px;
style H fill:#4682B4,stroke:#333,stroke-width:2px;
style I fill:#4682B4,stroke:#333,stroke-width:2px;
style J fill:#4682B4,stroke:#333,stroke-width:2px;
style K fill:#FF6347,stroke:#333,stroke-width:2px;
style L fill:#FFD700,stroke:#333,stroke-width:2px;
style M fill:#FF6347,stroke:#333,stroke-width:2px;
Note: Please ensure the generated code matches the title "${inputText}" and follows the format given above. Provide only the Mermaid flowchart code, without any additional explanations, comments, or text.
`
}
],
}
try {
const jsonResponse = await getAzureChatAIRequest(options);
diagram.loadDiagramFromMermaid(jsonResponse as string);
diagram.dataBind();
hideLoading();
} catch (error) {
console.error('Error:', error);
convertTextToFlowchart(inputText, diagram);
}
};
```
The core function **convertTextToFlowchart** sends a request to the OpenAI API with a user-initiated prompt to generate Mermaid structured flowchart data from text descriptions. It then uses the React Diagram’s [loadDiagramFromMermaid](https://ej2.syncfusion.com/react/documentation/api/diagram/#loaddiagramfrommermaid)
method to render the flowchart.
After executing the above code examples, we’ll get the output that resembles the following image.
Creating an AI-powered text-to-flowchart converter using the React Diagram Library
## GitHub reference
For more details, refer to the [GitHub demo](https://github.com/syncfusion/smart-ai-samples/tree/master/react/src/ai-components/diagram/smart-flowchart)
.
## Conclusion
Thanks for reading! In this blog, we’ve explored how to build an AI-powered smart text-to-flowchart converter using the Syncfusion [React Diagram](https://www.syncfusion.com/react-components/react-diagram)
component. This approach eliminates the need for manual design, allowing users to generate structured, professional flowcharts in seconds. Whether you’re mapping business processes, software logic, or decision trees, this solution enhances efficiency and clarity.
The Diagram component is also available on other platforms such as [Angular](https://www.syncfusion.com/angular-components/angular-diagram)
, [Vue](https://www.syncfusion.com/vue-components/vue-diagram)
, [Blazor](https://www.syncfusion.com/blazor-components/blazor-diagram)
, and more, choose your stack and reuse the same modeling approach.
For layout options, explore the React Diagram flowchart [demos](https://ej2.syncfusion.com/react/demos/diagram/flowchart-layout/)
. You can also try the React Diagram live [demos](https://ej2.syncfusion.com/react/demos/#/bootstrap5/diagram/default-functionality)
.
Existing customers can download the latest version of Essential Studio from the [license and downloads](https://www.syncfusion.com/account)
page. If you are not a customer, try our 30-day [free trial](https://www.syncfusion.com/downloads)
to check out these features.
If you have questions, contact us through our [support forum](https://www.syncfusion.com/forums)
, [feedback portal](https://www.syncfusion.com/feedback)
, or [support portal](https://support.syncfusion.com/)
. We are always happy to assist you!
## Related Blogs
[Build Interactive UML Class Diagrams in React](https://www.syncfusion.com/blogs/post/create-uml-class-diagrams-in-react)
[Create AI-Assisted Mind Maps Using OpenAI and React Diagram Library](https://www.syncfusion.com/blogs/post/ai-assisted-mind-map-in-react-diagram)
[Easily Automate Flowchart Creation in React Diagram](https://www.syncfusion.com/blogs/post/automate-flowchart-creation-in-react)
[Seamlessly Create an Interactive BPMN Viewer and Editor Using the React Diagram Control](https://www.syncfusion.com/blogs/post/bpmn-viewer-editor-react-diagram-control)