---
title: "Building a Gated Multi-Step Wizard in .NET MAUI with Tab View"
published_at: "2026-01-19T17:42:26+00:00"
modified_at: "2026-02-19T06:47:04+00:00"
url: "https://www.syncfusion.com/blogs/post/multi-step-wizard-dotnet-maui-tab-view"
excerpt: "Learn how to build a multi-step wizard in .NET MAUI using Tab View with navigation, validation, and UI updates for mobile apps."
taxonomy_category:
- ".NET MAUI"
- "Desktop"
- "MAUI"
- "Mobile UI"
- "Tab View"
taxonomy_post_tag:
- ".NET MAUI"
- "desktop"
- "MAUI"
- "Mobile"
- "Tab View"
---
# Building a Gated Multi-Step Wizard in .NET MAUI with Tab View
[Sneha Kumar](https://www.syncfusion.com/blogs/author/sneha-kumar)
**TL;DR:** Large forms often fail because users feel overwhelmed. This guide shows how to build a gated multi-step wizard in .NET MAUI using the Tab View, where each step is unlocked only after validation succeeds. You’ll learn how to control tab visibility, manage state-driven navigation, and create a focused registration flow that feels intentional, not exhausting.
Long forms don’t usually fail because of validation errors or missing fields; they fail because users lose confidence midway. When everything appears at once, people hesitate, scroll endlessly, or abandon the process altogether.
A multi-step wizard changes that dynamic. By revealing only what’s needed at the right moment, it guides users forward with clarity and intent. But building this experience correctly in .NET MAUI requires more than just stacking pages or toggling visibility.
In this article, we will build a gated multi-step registration wizard using the [Syncfusion® .NET MAUI Tab View](https://www.syncfusion.com/maui-controls/maui-tab-view)
, where navigation is controlled, validation is enforced at each step, and the UI updates dynamically as the user progresses.
Rather than treating Tab View as simple tab navigation, we’ll use it as a state-driven workflow engine, unlocking steps only when conditions are met and keeping users focused from start to finish.
## Syncfusion .NET MAUI Tab View: Flexible navigation control
The Syncfusion **.NET MAUI Tab View (SfTabView)** is a highly flexible navigation component that helps developers organize application content into clear, accessible sections. By providing a clean and intutive tabbed interface, it enhances user engagement across both mobile and desktop platforms, making complex screens easier to navigate and understand.
To begin using the**Tab View** in your **.NET MAUI** project, follow the installation steps below.
1. Open the **NuGet Package Manager** and search for `Syncfusion.Maui.TabView`.
2. Install the package and register the **Syncfusion handler** in the `MauiProgram.cs` file.
3. Import the `Syncfusion.Maui.TabView` namespace into your **XAML** file so that you can access the control.
If you need advanced configurations or additional features, refer to the official [documentation](https://help.syncfusion.com/maui/tabview/getting-started)
.
## Key highlights of the .NET MAUI Tab View
The **SfTabView** provides a variety of customizable and productivity‑boosting features, including:
- **Customizable tab headers**, allowing you to use text, bold font styling, or meaningful icons to improve clarity.
- **Gated navigation**, enabling you to control user progression through pre-defined steps, ideal for guided workflows.
- **Dynamic visibility control** allows you to show or hide tabs programmatically based on user actions or business rules.
- **Smooth integration with other input controls**, such as ** ComboBox** or ** Text Input Layout**, for creating interactive and data‑driven UI experiences.
These capabilities make the **Tab View** especially useful when building structured flows such as onboarding steps, user setup screens, or multi-stage forms.
## Step 1: Initialize the Tab View
Start by defining the **SfTabView** in your ** XAML**. This structure forms the backbone of the workflow, with tabs representing each stage of the process ** Personal Info**, ** Event Selection**, ** Accommodation**, and ** Payment**. To enhance clarity and orientation, use `FontImageSource` to include icons in the tab header. This gives users visual cues that makes navigation feel intuitive and well organized.
Here’s how to set it up:
```
```
.NET MAUI Tab View UI
## Step 2: Handle tab visibility
To maintain focus and ensure a structured progression, set `IsVisible="False"` for all tabs except the first one. This approach guides users through the form step by step, revealing subsequent tabs only after the current stage is successfully completed.
Code snippet to achieve this:
```
```
This setup displays only the personal info tab initially, with other tabs progressively unlocked as the user advances.
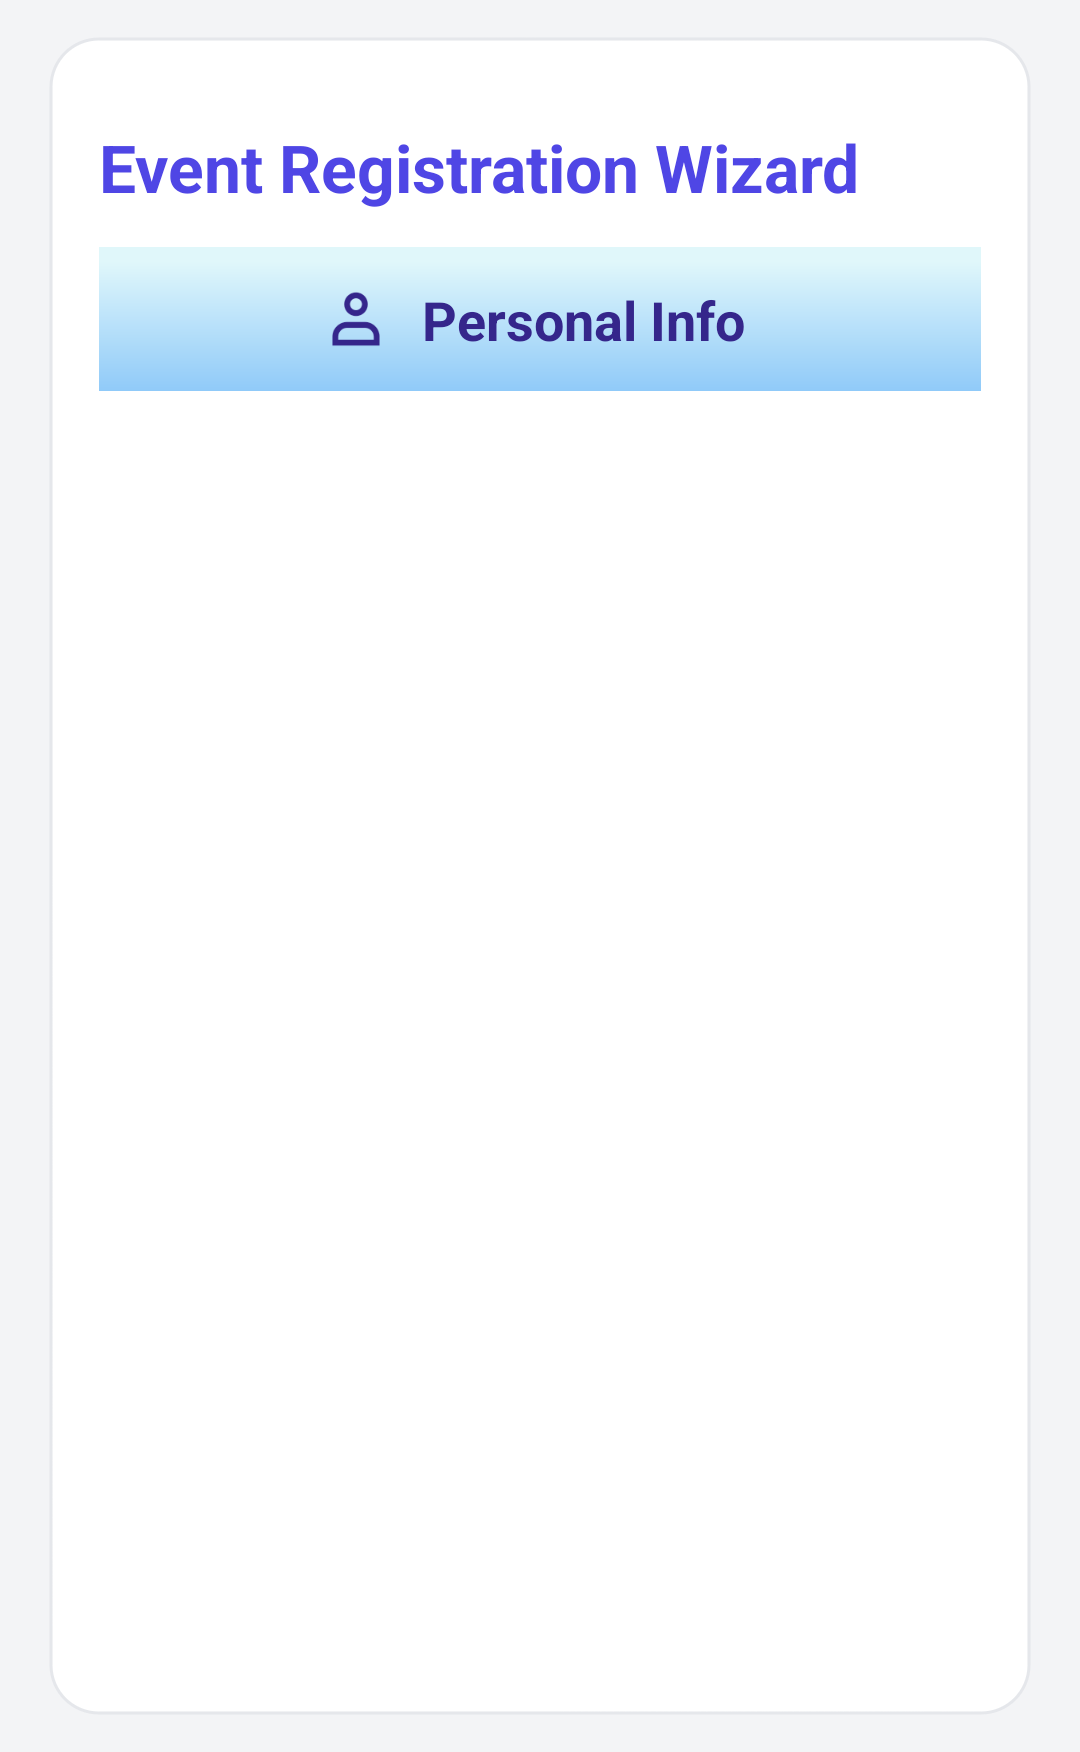
Displaying only the first tab initially in the .NET MAUI Tab View
## Step 3: Set up tab content
After configuring your **TabView** structure, you can start assigning content to each tab.
### Personal info tab
Begin by adding a dedicated [PersonalInfoView](https://github.com/SyncfusionExamples/Multi-Step-Wizard-with-the-MAUI-Tab-View/blob/master/MultiStepForm/MultiStepForm/Views/PersonalInfoView.xaml)
containing fields such as:
- Full name,
- Email,
- Mobile number,
- Organization,
- Designation.
Using a separate view helps maintain a clean architecture.
### Smart validation
Implement real-time validation with regular expressions to verify email and phone number formats. Only allow users to proceed if all required fields are completed correctly.
### Dynamic navigation
Each section should unlock the next tab only after validation is successful. This keeps users focused and ensures data accuracy.
Add the following code example to your `MainPage.xaml` page.
```
```
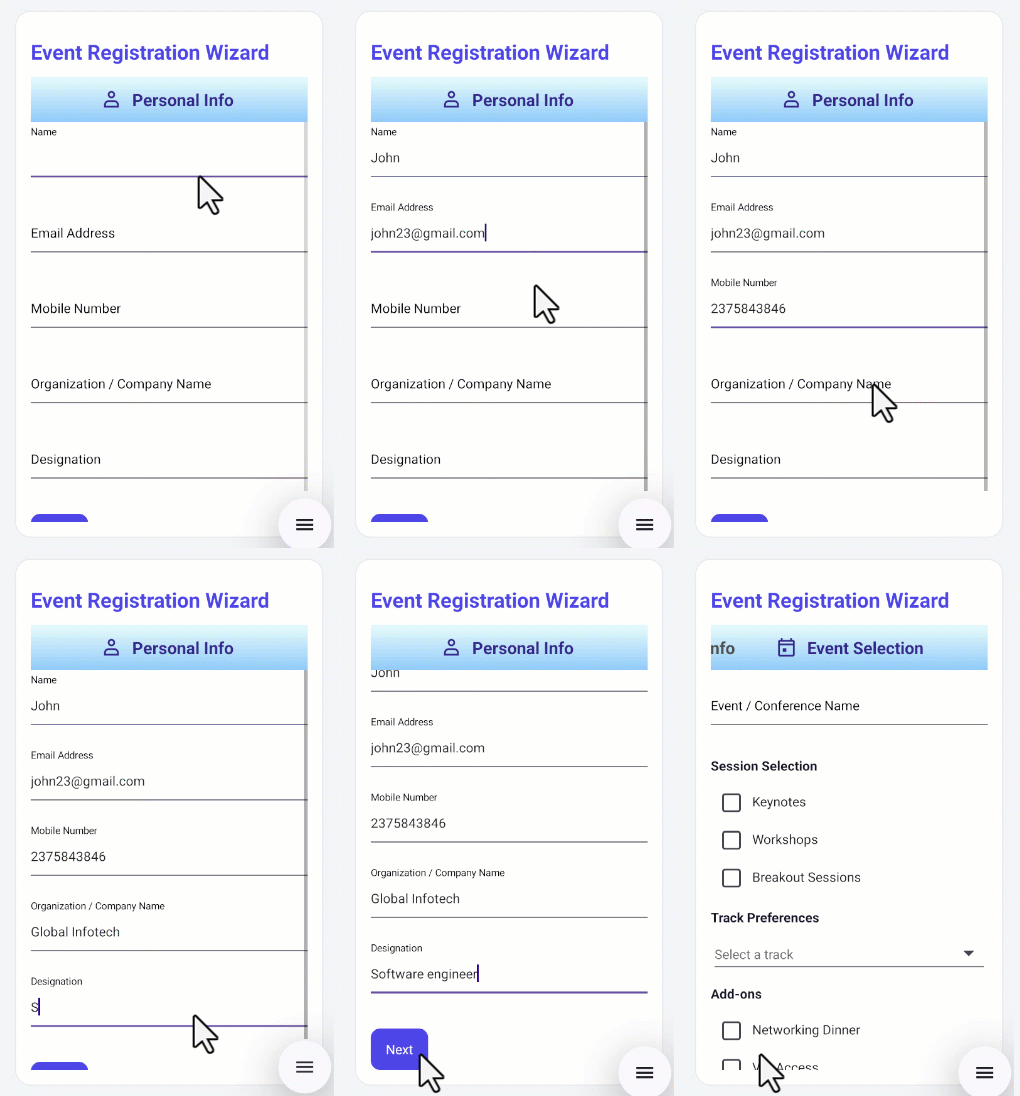
Registration wizard with tab content
## Step 4: Make event selection interactive and personalized
Next, the [EventSelectionView](https://github.com/SyncfusionExamples/Multi-Step-Wizard-with-the-MAUI-Tab-View/blob/master/MultiStepForm/MultiStepForm/Views/EventSelectionView.xaml)
enhances the registration experience by introducing dynamic, user‑driven options. This view allows attendees to customize their event journey with ease and clarity.
- **Enter the event name** to specify the session they will attend.
- **Choose session types**, such as ** Keynotes**, ** Workshops**, or ** Breakout Sessions**.
- **Select a track,** Tech, Business, Design, or Product, using a **ComboBox** populated by the [PickerData](https://github.com/SyncfusionExamples/Multi-Step-Wizard-with-the-MAUI-Tab-View/blob/master/MultiStepForm/MultiStepForm/ViewModel/PickerData.cs) class.
- **Add optional extras**, including Networking Dinner or VIP Access, for a tailored experience.
To further improve interaction, the **Numeric Entry** control lets users indicate the number of participants in real time. This offers a responsive and personalized feel while preventing manual input errors.
Once the required information is completed, the **Next** button reveals the Accommodation tab. All future steps remain hidden until unlocked, maintaining a smooth, focused, and stress‑free workflow.
Code snippet to achieve this:
```
```
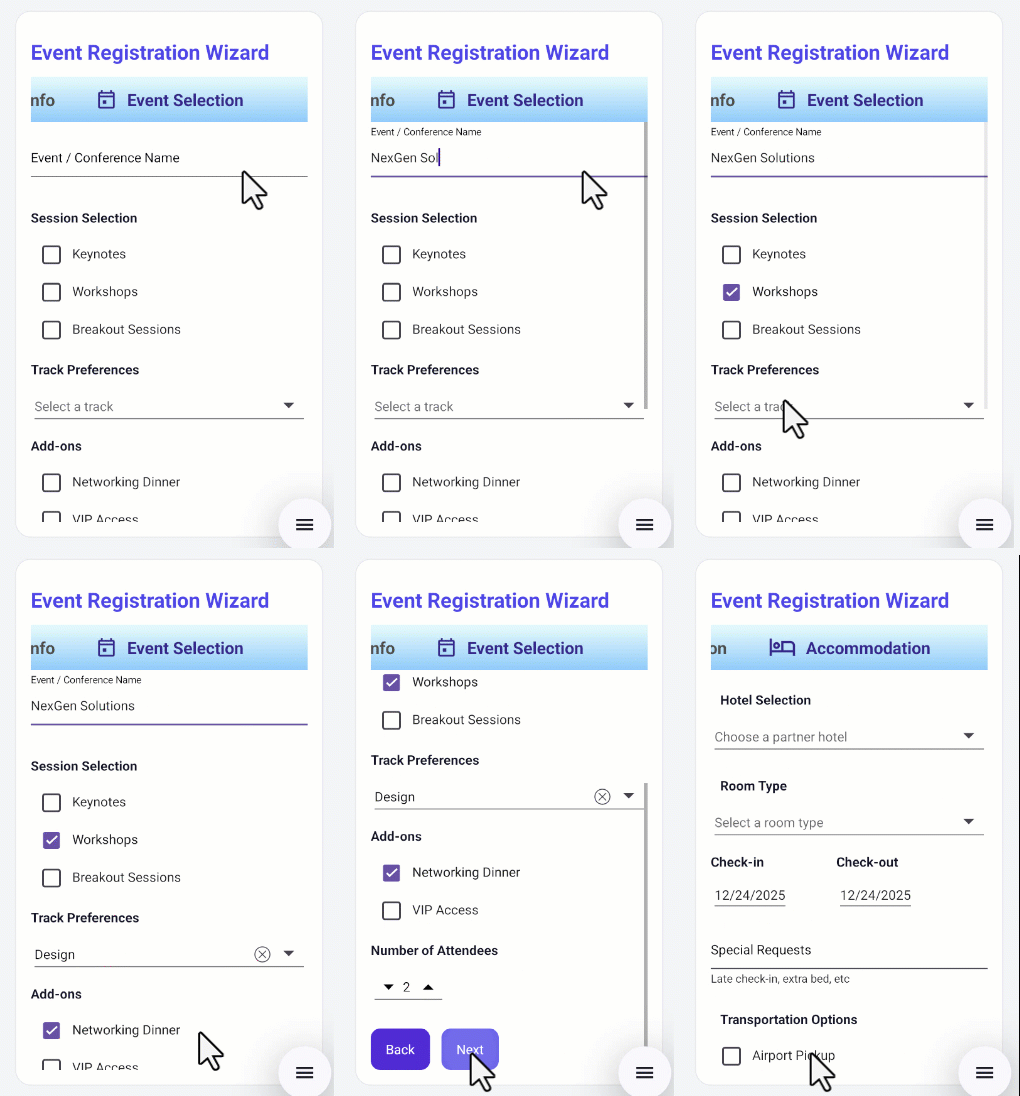
Event selection tab
## Step 5: Customize your stay with accommodation preferences
The [AccommodationView](https://github.com/SyncfusionExamples/Multi-Step-Wizard-with-the-MAUI-Tab-View/blob/master/MultiStepForm/MultiStepForm/Views/AccommodationView.xaml)
enables users to tailor their event stay by selecting from a variety of lodging and convenience options. This step enhances the overall registration experience by allowing attendees to specify their preferences with ease.
Within this view, users can:
- **Choose a preferred hotel and room type** based on availability and comfort level.
- **Select check‑in and check‑out dates** using intuitive date pickers.
- **Add special requests**, such as dietary needs or accessibility requirements.
- **Opt into transportation services**, including *Airport Pickup* or other shuttle options.
To maintain a clean and guided workflow, validation ensures that all required information is provided before the user can continue. Only after successful input does the **Payment** tab become visible, preserving a structured and user‑friendly navigation flow.
Below is the code you need:
```
```
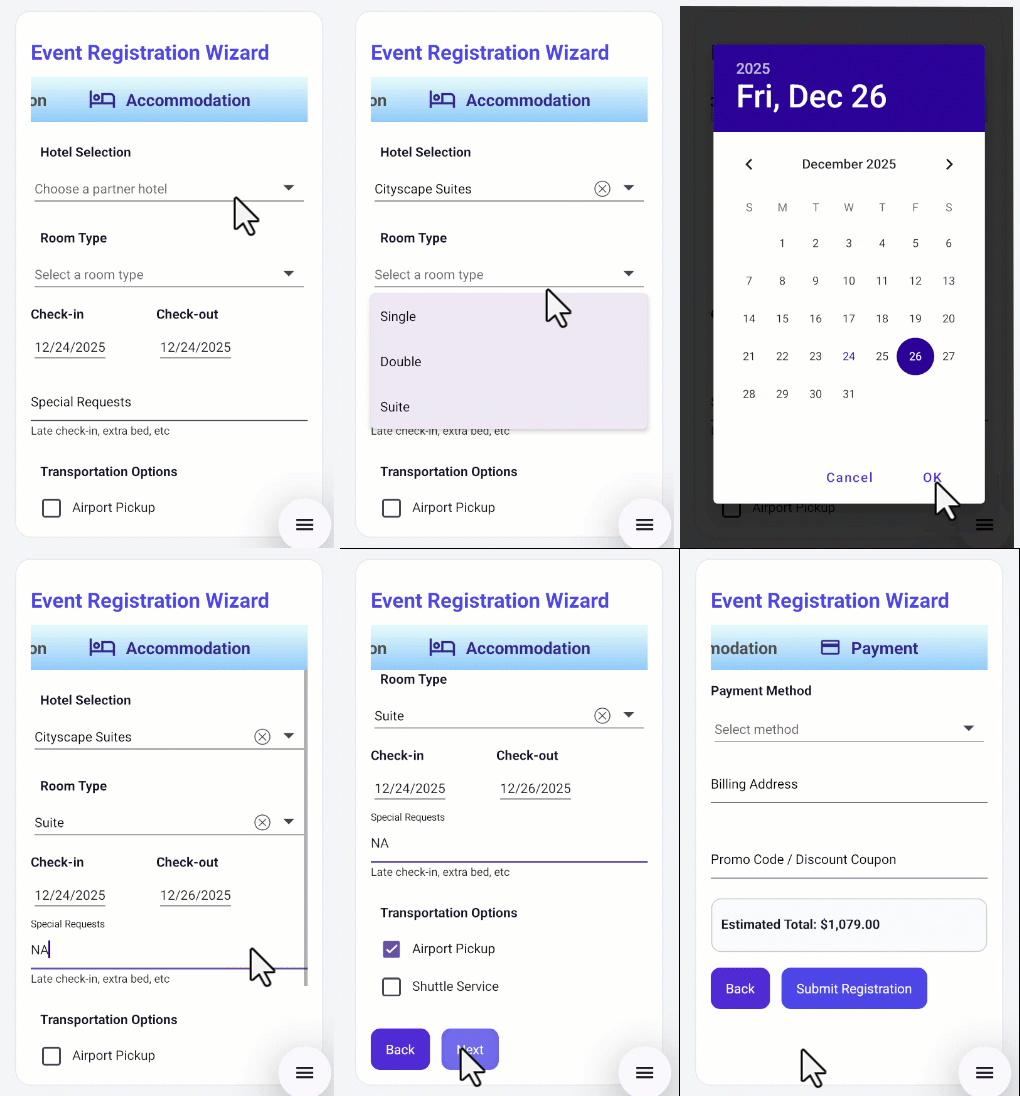
Accommodation tab
## Step 6: Secure your spot: Complete payment and confirm registration
The final step of the registration process is handled in the [PaymentView](https://github.com/SyncfusionExamples/Multi-Step-Wizard-with-the-MAUI-Tab-View/blob/master/MultiStepForm/MultiStepForm/Views/PaymentView.xaml)
. Here, users can securely finalize their payment and submit their event registration details.
The view provides a comprehensive and interactive payment experience. Users can:
- **Choose a payment method**: Select from ** Credit Card**, ** Debit Card**, ** UPI**, or ** PayPal** through a ComboBox.
- **Enter card details dynamically**: When a card-based option is selected, fields for ** Card Number**, ** Expiry (MM/YY)**, and ** CVV** are automatically displayed.
- **Provide billing information**: A dedicated text field captures the billing address for payment processing.
- **Review estimated total**: A summary panel displays the calculated total, allowing users to verify charges before proceeding.
- **Submit and complete registration**: The Submit Registration button validates all inputs, processes the payment, and transitions to a Success Panel that confirms the registration and offers an option to start a new one.
Here’s the code for the payment tab:
```
```
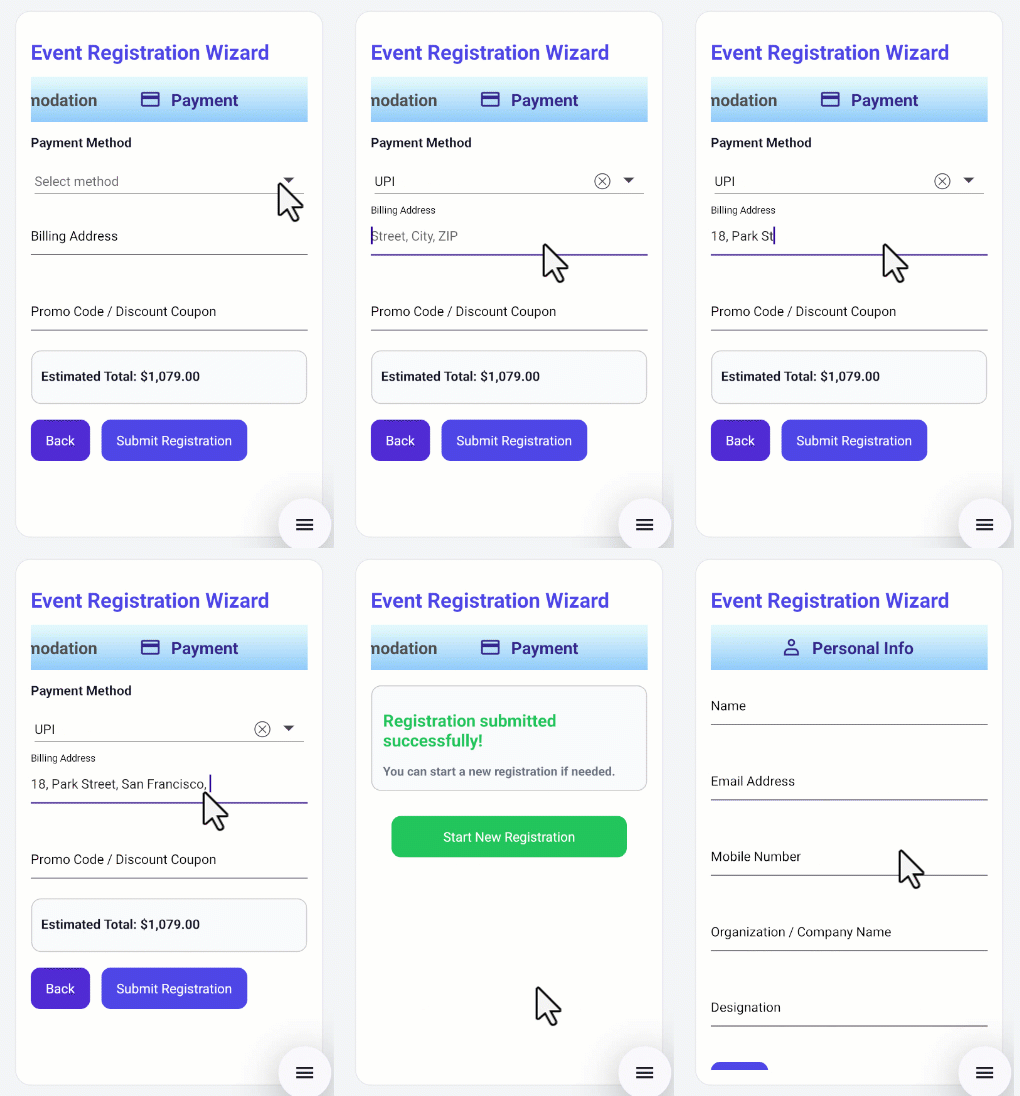
Payment tab
This GIF shows how to register using a multi-step form.
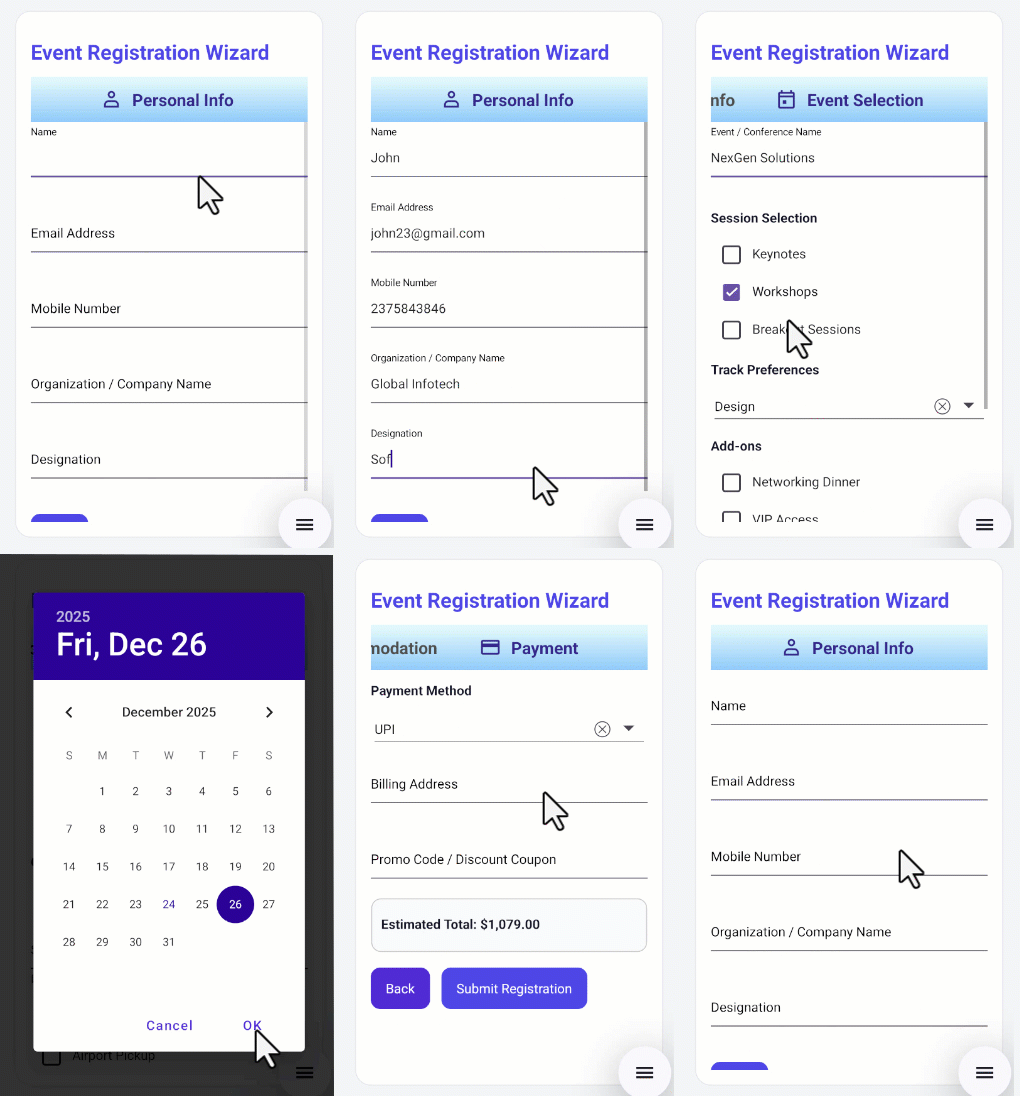
Multi‑step wizard in .NET MAUI Tab View
## GitHub references
For full source code, UI examples, and implementation details of the .NET MAUI multi-step wizard in **.NET MAUI TabView**, refer to the [GitHub](https://github.com/SyncfusionExamples/Multi-Step-Wizard-with-the-MAUI-Tab-View)
demo.
## Frequently Asked Questions
What is SfTabView, and why use it for a multi-step wizard?SfTabView is Syncfusion’s tab-based navigation control for .NET MAUI. It is well-suited for building multi-step wizards because it:
- Breaks large workflows or forms into manageable steps.
- Gives users a clear sense of progress.
- Supports gated navigation, ensuring that users complete steps in order.
- Reduces UI clutter by grouping related content into separate views.
These capabilities make Tab View ideal for onboarding flows, checkout processes, survey steps, and multi-page forms.
How do I install and get started with SfTabView in .NET MAUI?To get started with SfTabView in your .NET MAUI application:
- Install the NuGet package – Add [Syncfusion.Maui.TabView](https://www.nuget.org/packages/Syncfusion.Maui.TabView) package to your project from NuGet.
- Add the Syncfusion namespace to your page.
- Add the SfTabView control.
For complete setup instructions, feature details, and examples, refer to the Syncfusion .NET MAUI Tab View [User Guide](https://help.syncfusion.com/maui/tabview/getting-started)
.
How do I validate inputs and communicate errors clearly on each step?To validate inputs within each step of the wizard, you can use the Syncfusion MAUI Text Input Layout (SfTextInputLayout), which provides built-in support for helper text, error text, and validation visuals. You can apply custom validation logic (such as using regular expressions for email or phone number validation) and update the error state dynamically.
How do I design clear headers/icons and maintain consistent styling across tabs?To create clean, professional tab headers with icons and ensure consistent styling across the entire wizard, you can:
- **Use FontImageSource with glyph icons** for crisp, scalable vector icons. Bind the icon color to the tab’s active or inactive state by using properties such as TextColor or SelectedHeaderTextColor.
- **Place shared tab styles, text styles, padding, and margins in a ResourceDictionary** so that all steps of the wizard follow a consistent visual style.
- **Apply consistent styling to input controls** (such as SfTextInputLayout, Entry, Picker, and Button) so the entire wizard feels unified and visually cohesive.
Where can I find a complete working example (GitHub) to reference?The blog includes a link to a fully functional [GitHub](https://github.com/SyncfusionExamples/Multi-Step-Wizard-with-the-MAUI-Tab-View)
demo that showcases the complete workflow. This sample project contains the [PersonalInfoView](https://github.com/SyncfusionExamples/Multi-Step-Wizard-with-the-MAUI-Tab-View/blob/master/MultiStepForm/MultiStepForm/Views/PersonalInfoView.xaml)
, [EventSelectionView](https://github.com/SyncfusionExamples/Multi-Step-Wizard-with-the-MAUI-Tab-View/blob/master/MultiStepForm/MultiStepForm/Views/EventSelectionView.xaml)
, [AccommodationView](https://github.com/SyncfusionExamples/Multi-Step-Wizard-with-the-MAUI-Tab-View/blob/master/MultiStepForm/MultiStepForm/Views/AccommodationView.xaml)
, and [PaymentView](https://github.com/SyncfusionExamples/Multi-Step-Wizard-with-the-MAUI-Tab-View/blob/master/MultiStepForm/MultiStepForm/Views/PaymentView.xaml)
, along with full form validation, navigation logic, and UI wiring for each step. You can use this repository as a reference to understand the end-to-end implementation.
## Conclusion
Thanks for reading! The Syncfusion [.NET MAUI Tab View](https://www.syncfusion.com/maui-controls/maui-tab-view)
makes it easy to create a structured multi-step registration wizard with gated navigation and dynamic UI updates. This approach turns complex data entry into a clear, guided experience that users can complete with confidence.
Think of a multi-step form as a set of well-placed stepping stones, each one guiding users forward smoothly and ensuring they never feel overwhelmed.
If you’re a Syncfusion user, you can download the setup from the [license and downloads](https://www.syncfusion.com/account/downloads)
page. Otherwise, you can download a free [30-day tria](https://www.syncfusion.com/downloads)
[l](https://www.syncfusion.com/downloads/)
.
You can also contact us through our [support forum](https://www.syncfusion.com/forums/maui)
, [support portal](https://support.syncfusion.com/kb/cross-platforms/category/76)
, or [feedback portal](https://www.syncfusion.com/feedback/maui)
for queries. We are always happy to assist you!
## Related Blogs
[Create a Beautiful Photo Gallery Using .NET MAUI Tab View and ListView](https://www.syncfusion.com/blogs/post/dotnet-maui-photo-gallery)
[The All-New .NET MAUI Tabbed View Control Is Here](https://www.syncfusion.com/blogs/post/the-all-new-net-maui-tab-view-control-is-here)
[Automate Task Planning with an AI-Powered Kanban Board in .NET MAUI](https://www.syncfusion.com/blogs/post/ai-powered-kanban-dotnet-maui)
[Visualizing Geo-Spatial Data in .NET MAUI with Interactive Charts and Maps](https://www.syncfusion.com/blogs/post/geo-analytics-dashboard-dotnet-maui)