---
title: "Build Fast, Beautiful Apps with .NET MAUI Blazor Hybrid"
published_at: "2025-09-11T15:34:03+00:00"
modified_at: "2025-09-15T11:38:05+00:00"
url: "https://www.syncfusion.com/blogs/post/maui-blazor-hybrid-app-web-ui"
excerpt: "Create a MAUI Blazor Hybrid app with rich UI components and Blazor WebView. Learn how to build cross-platform desktop apps using .NET MAUI."
taxonomy_category:
- ".NET development"
- "Blazor"
- "Desktop Development"
- "MAUI"
- "UI components"
taxonomy_post_tag:
- ".NET MAUI"
- "Autocomplete"
- "Blazor Hybrid"
- "Blazor WebView"
- "Cross-Platform UI"
- "Desktop App"
- "Hybrid App Development"
- "MAUI"
- "rich text editor"
- "RichTextEditor"
- "WYSIWYG HTML Editor"
- "WYSIWYG Markdown Editor"
---
# Build Fast, Beautiful Apps with .NET MAUI Blazor Hybrid
[Naveenkumar Sanjeevirayan](https://www.syncfusion.com/blogs/author/naveenkumar-sanjeevirayan)
**TL;DR:** Have you ever wanted to build a desktop app that delivers a truly native experience, while still using your favorite web development tools? With .NET MAUI Blazor Hybrid, you get the best of both worlds: native performance and web flexibility, all in one powerful framework. This guide shows you how to integrate rich UI components like RichTextEditor and AutoComplete, giving your app a polished, modern look without sacrificing performance. It is perfect for developers diving into Blazor Hybrid App Development with real-world UI needs.
In the app development world, the combination of [.NET MAUI](https://dotnet.microsoft.com/en-us/apps/maui)
(**Multi-platform App UI**) and [Blazor Hybrid](https://learn.microsoft.com/en-us/shows/blazor-hybrid-for-beginners/what-is-blazor-hybrid-blazor-hybrid-for-beginners)
is a game-changer. By merging native performance with the flexibility of web technologies, this powerful duo enables developers to build efficient, cross-platform applications with ease.
With [.NET MAUI Blazor Hybrid](https://learn.microsoft.com/en-us/aspnet/core/blazor/hybrid/tutorials/maui?view=aspnetcore-9.0)
, you can build cross-platform desktop apps that combine the best of both worlds. In this guide, we’ll walk through setting up a hybrid app and enhancing it with rich UI components.
## Blazor Hybrid and .NET MAUI: Key benefits
Choosing Blazor Hybrid with .NET MAUI offers significant benefits, including:
- **Unified development experience:** Develop your entire app in **C#**, promoting consistency across the entire development process.
- **Efficient performance:** Native optimizations ensure that your apps run smoothly.
- **Rich ecosystem and community support:** Benefit from the strong ecosystems of both the **.NET** and ** JavaScript** communities.
- **Future-proofing applications:** As technology evolves, **Blazor Hybrid + .NET MAUI’s** flexibility ensures that your applications are adaptable to future devices and platforms.
- **Scalability:** Scale your apps as needed without making major codebase changes.
In this blog, we’ll see how to integrate the **Blazor Rich Text Editor** and **.NET MAUI AutoComplete** to create a simple email UI in a Blazor Hybrid app. Let’s dive into the steps to create a .NET MAUI Blazor Hybris app.
## Step 1: Create a Blazor Hybrid app
Follow these steps to create your first Blazor Hybrid app with .NET MAUI.
1. Open[Visual Studio](https://visualstudio.microsoft.com/) and click **Create a new project**.
2. In the project templates list, select **.NET MAUI Blazor Hybrid App**.
3. Enter a name for your project. Choose a folder location where the project files will be saved.
4. Confirm your project setup. Choose the appropriate .NET framework version, either[.NET 8.0](https://dotnet.microsoft.com/en-us/download/dotnet/8.0) or [.NET 9.0](https://dotnet.microsoft.com/en-us/download/dotnet/9.0) , depending on your target framework requirements.
## Step 2: Add a Blazor RichTextEditor
In the **NuGet Package Manager**, search for [Syncfusion.Blazor.RichTextEditor](https://www.nuget.org/packages/Syncfusion.Blazor.RichTextEditor/)
and install it.
## Step 3: Registering Syncfusion Blazor service
1. **Add the Syncfusion namespace:** Open your ** project’s Imports.razor.** Add the ** Syncfusion****.Blazor** namespace to ensure your application knows where to find the components: ** Imports.razor**``` @using Syncfusion.Blazor ```
2. **Register the Syncfusion Service:** Open the ** MauiProgram.cs**file. Register the Syncfusion® service so it integrates with your .NET MAUI and Blazor app: ** MauiProgram.cs**``` public static class MauiProgram { public static MauiApp CreateMauiApp() { . . . builder.Services.AddSyncfusionBlazor(); . . . } } ```
## Step 4: Adding stylesheet and script references
To ensure that your **RichTextEditor** component renders correctly, it’s crucial to add the necessary style sheet and script references to your project. Here’s how you can do this using [Static Web Assets](https://blazor.syncfusion.com/documentation/appearance/themes#static-web-assets)
in the <**head>** section of your ** wwwroot/index.html** file:
**index.html**
```
. . .
. . .
```
**Note:** Check out the [Blazor Themes](https://blazor.syncfusion.com/documentation/appearance/themes)
topic to discover various methods ([Static Web Assets](https://blazor.syncfusion.com/documentation/appearance/themes#static-web-assets)
, [CDN](https://blazor.syncfusion.com/documentation/appearance/themes#cdn-reference)
, and [CRG](https://blazor.syncfusion.com/documentation/common/custom-resource-generator)
) for referencing themes in your Blazor application. Also, check out the [Adding Script Reference](https://blazor.syncfusion.com/documentation/common/adding-script-references)
topic to learn different approaches for adding script references in your Blazor application.
## Step 5: Integrating the Rich Text Editor
To integrate the **Rich Text Editor** component into your application, you can embed it within any Razor file, such as ** Home.razor**. Here’s how you can do it:
- **Add the Syncfusion Namespace to your Razor file:** First, ensure your Razor file includes the **Syncfusion**.** Blazor.RichTextEditor** namespace. This is essential for using the ** Rich Text Editor** component.
- **Embed the Rich Text Editor Component:** Within the Razor file, you can now add the ** RichTextEditor** component to facilitate rich text input. Here is a simple example:
**Home.razor**
```
@using Syncfusion.Blazor.RichTextEditor
Rich Text Editor allows you to insert images from an online source and a local computer where you want to insert the image in your content.
Get started Quick Toolbar to click on the image
It is possible to add a custom style to the selected image inside the Rich Text Editor through the quick toolbar.
...
```
## Step 6: Launch the application
To launch the **Rich Text Editor** component, build and run the project.
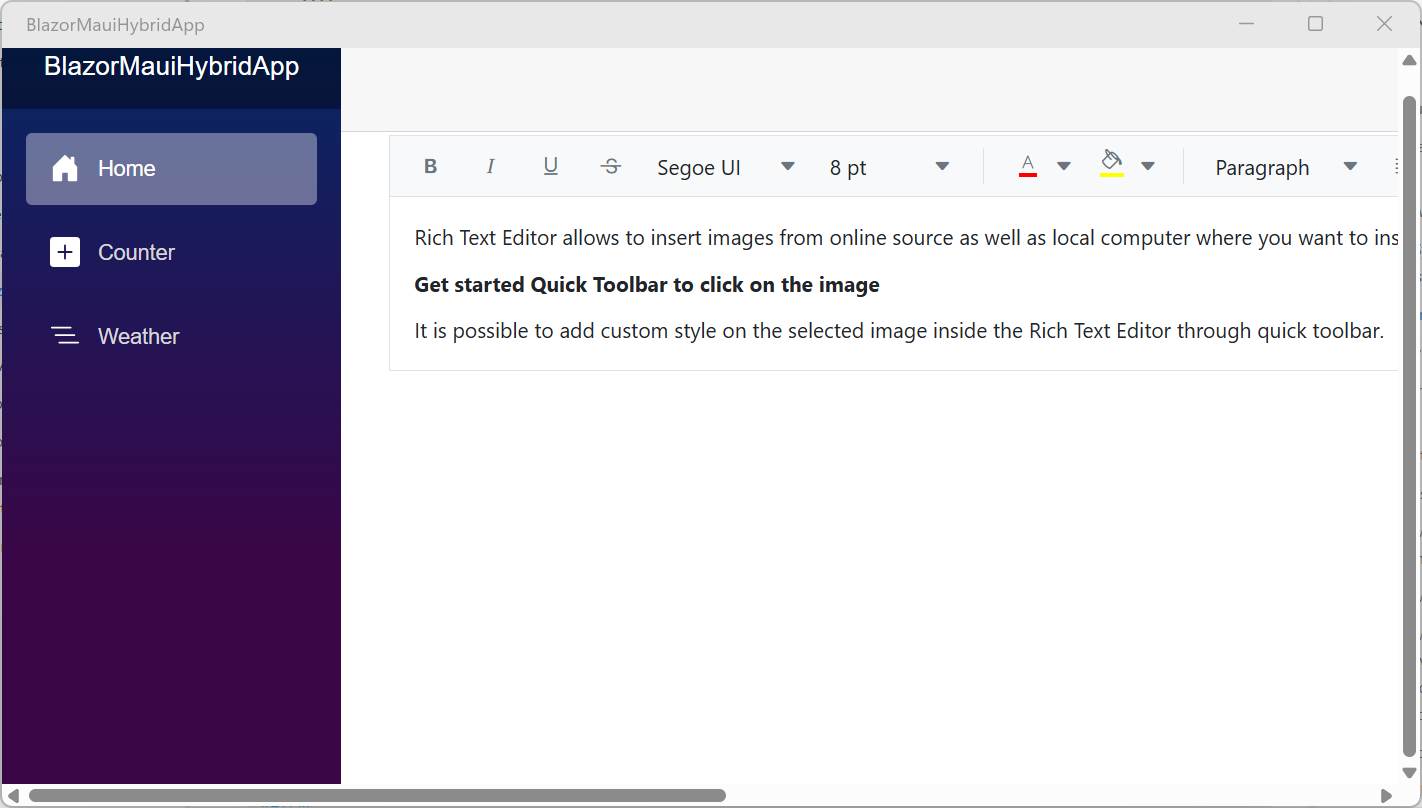
Blazor Rich Text Editor component
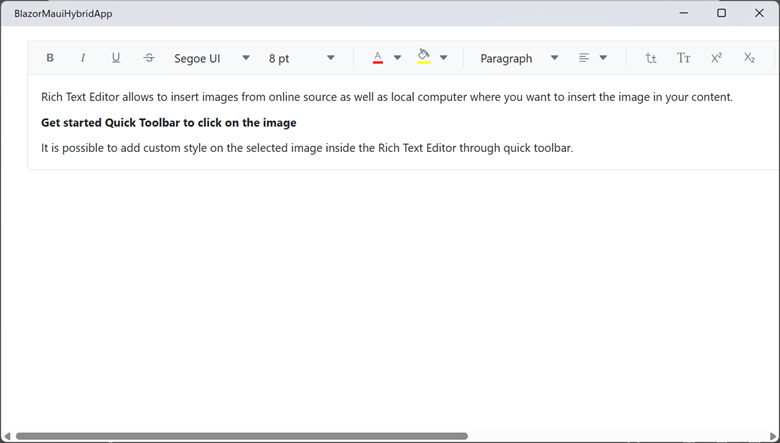
If you want the **Rich Text Editor** to display alone on your output screen, you must modify your ** MainLayout.razor** file. Simply remove any sidebar and top row elements that are currently there. This will ensure that the ** Rich Text Editor** takes up the whole display area, providing a focused user experience as shown in the below code example.
```
@inherits LayoutComponentBase
```
## Combining Blazor and .NET MAUI Components:
To create a basic email UI using **.NET MAUI’s** ** AutoComplete** alongside the ** Blazor** ** RichTextEditor**, you’ll need to follow these steps:
1. **Install the NuGet package:** Begin by installing the [Syncfusion.Maui.Inputs](https://www.nuget.org/packages/Syncfusion.Maui.Inputs/) NuGet package. This package is necessary to utilize **.NET MAUI’s AutoComplete** feature as part of your email user interface.
2. **Register the Handler:** You must register the handler for the Syncfusion Maui core within your **cs** file. This is essential for setting up the components correctly.** MauiProgram.cs**``` public static class MauiProgram { public static MauiApp CreateMauiApp() { . . . builder.ConfigureSyncfusionCore(); . . . } } ```
3. **Implement .NET MAUI AutoComplete in MainPage.Xaml:** You will use the .NET MAUI AutoComplete component to manage inputs for fields like ** To**, ** Cc**, ** Bcc**, and ** Subject**.
4. **Use the Blazor RichTextEditor:** For the email body, use the **Blazor RichTextEditor component**, which you can integrate into your Blazor WebView element.
Here’s an example of setting this up in **MainPage.xaml.**
```
```
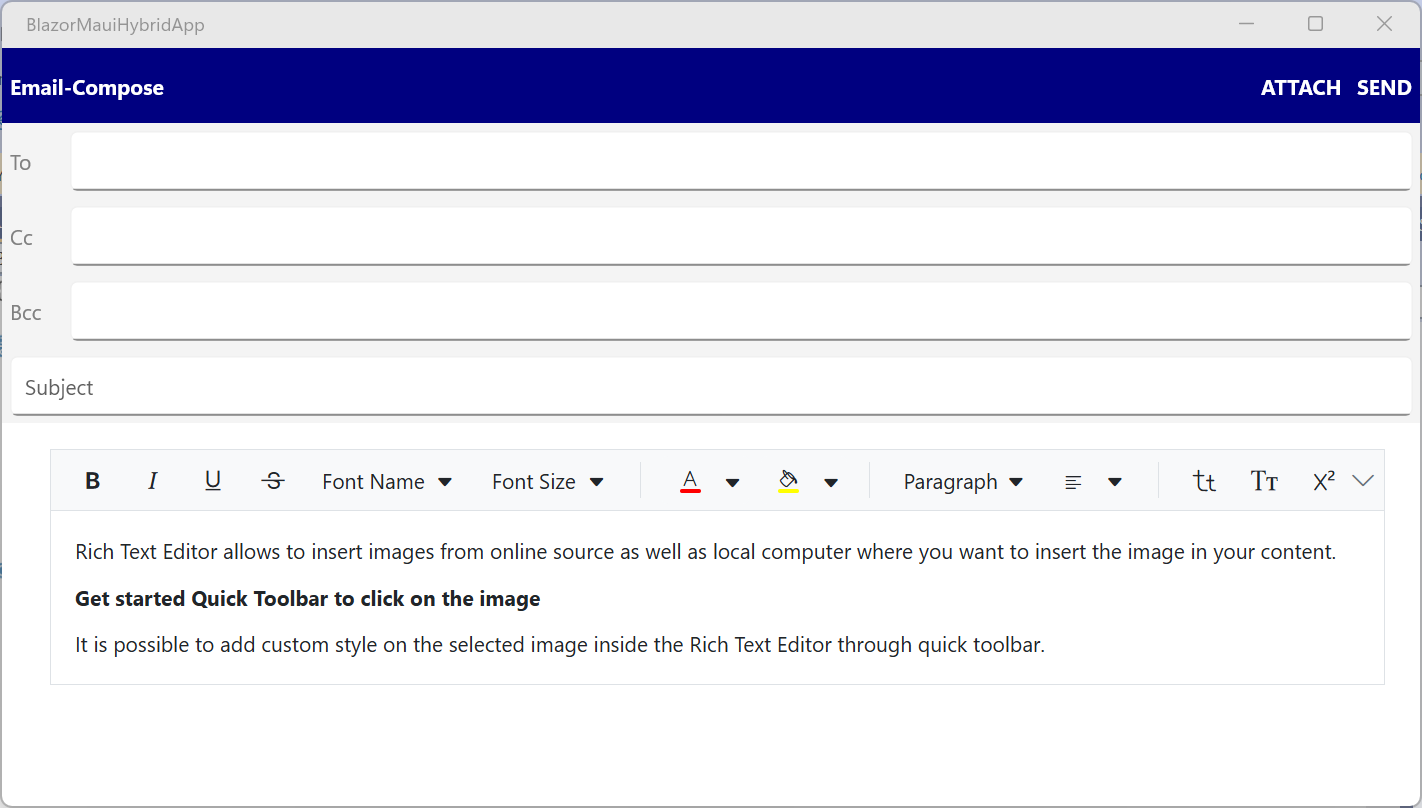
Basic email UI using .NET MAUI AutoComplete and Blazor Rich Text Editor
## GitHub reference
You can download the working example from the [GitHub](https://github.com/SyncfusionExamples/Create-basic-email-UI-using-Blazor-Maui-Hybrid)
repo.
## Conclusion
Thanks for reading! [.NET MAUI Blazor Hybrid](https://learn.microsoft.com/en-us/aspnet/core/blazor/hybrid/tutorials/maui?view=aspnetcore-9.0)
offers a powerful way to build modern desktop apps using familiar web technologies. By integrating rich UI components and leveraging Blazor WebView, developers can deliver seamless experiences across platforms. Try it out and explore how hybrid development can accelerate your next project.
The latest version of [Essential Studio®](https://help.syncfusion.com/common/essential-studio/release-notes/v31.1.18)
, along with the newly modular SDKs for the PDF Viewer, Word Editor, and Spreadsheet Editor, is now available on the [license and downloads](https://www.syncfusion.com/account/downloads)
page. We offer our new users a [30-day free trial](https://www.syncfusion.com/downloads/)
to explore all our components’ features and capabilities.
If you need further assistance, contact us via our [support forum](https://www.syncfusion.com/forums)
, [support portal](https://support.syncfusion.com/)
, or [feedback portal](https://www.syncfusion.com/feedback)
. We’re always here to help you!
## Related Blogs
[What’s New for .NET MAUI in .NET 9: HybridWebView](https://www.syncfusion.com/blogs/post/whats-new-maui-net9-hybridwebview)
[Seamlessly Add Blazor Native UI Components in Hybrid Apps](https://www.syncfusion.com/blogs/post/add-blazor-component-in-hybrid-apps)
[Creating Custom Forms and Validation in a Blazor Hybrid App](https://www.syncfusion.com/blogs/post/blazor-hybrid-app-custom-forms-validation)
[Exploring Blazor Hybrid Apps Using Mobile Blazor Bindings](https://www.syncfusion.com/blogs/post/blazor-hybrid-apps-using-mobile-blazor-bindings)