---
title: "Introducing Syncfusion’s New Angular Chips Component"
published_at: "2019-01-04T12:00:38+00:00"
modified_at: "2020-02-05T11:25:01+00:00"
url: "https://www.syncfusion.com/blogs/post/introducing-syncfusions-new-angular-chips-component"
excerpt: "The Syncfusion Angular UI suite is maturing every release with the addition of new components. We are excited to introduce the Angular Chips component, which is included in our 2018 Volume 4 release. These chips are used in various real-world..."
taxonomy_category:
- "Development"
- "Essential JS 2"
- "Essential Studio"
- "Syncfusion"
- "Uncategorized"
taxonomy_post_tag:
- "2018 Volume 4"
- "angular chips"
- "chips"
- "contact chips"
- "Essential JS 2"
- "input chips"
- "What's New"
---
# Introducing Syncfusion’s New Angular Chips Component
[Abinaya Subbiah](https://www.syncfusion.com/blogs/author/abinaya-subbiah)
The Syncfusion [Angular UI suite](https://www.syncfusion.com/angular-ui-components)
is maturing every release with the addition of new components. We are excited to introduce the [Angular Chips component](https://ej2.syncfusion.com/angular/documentation/api/chips/chipListComponent/)
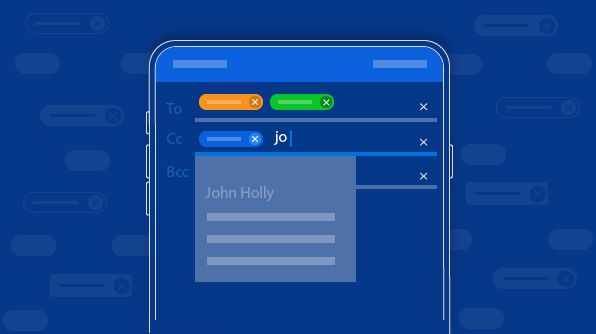
, which is included in our 2018 Volume 4 release. These chips are used in various real-world applications, like filter option tags and contact tags in email apps. They can be used to trigger simple actions.
In this post, we will integrate the Syncfusion [Angular Chips](https://www.syncfusion.com/angular-ui-components/angular-chips)
component into an [Angular CLI](https://cli.angular.io/)
application and define it in different use cases. We can customize its appearance using a variety of built-in options.
## **Creating simple Angular chips**
- Before starting on the Angular app, ensure your machine is configured with the prerequisites listed in [the Angular guide](https://angular.io/guide/quickstart#prerequisites) .
- Install Angular CLI using the following command.
| npm install -g @angular/cli |
| --- |
- Create and serve the default Angular CLI app using the following commands.
| ng new ngChip cd ngChip ng serve |
| --- |
### **Configuring the Angular Chips component**
- Run the following command to install the [Angular Chips](https://ej2.syncfusion.com/angular/documentation/api/chips/chipListComponent/#chiplistcomponent) component and its dependencies.
| npm install @syncfusion/ej2-angular-buttons –save |
| --- |
- After installing the Angular Chips component, import the chip module [ChipListAllModule](https://ej2.syncfusion.com/angular/documentation/api/chips/chipListModel/) into the *src/app/app.module.ts*file in the Angular CLI app.
> `import { BrowserModule } from '@angular/platform-browser';`
>
> `import { NgModule } from '@angular/core';`
>
> `import { AppRoutingModule } from './app-routing.module';`
>
> `import { AppComponent } from './app.component';`
>
> `import { ChipListAllModule } from '@syncfusion/ej2-angular-buttons';`
>
> `@NgModule({`
>
> `declarations: [`
>
> `AppComponent`
>
> `],`
>
> `imports: [`
>
> `BrowserModule,`
>
> `AppRoutingModule, ChipListAllModule`
>
> `],`
>
> `providers: [],`
>
> `bootstrap: [AppComponent]`
>
> `})`
>
> `export class AppModule { }`
- Import the Angular Chips style into the *src/style.css* file.
> `/* You can add global styles to this file, and also import other style files */`
>
> `@import "../node_modules/@syncfusion/ej2-base/styles/material.css";`
>
> `@import "../node_modules/@syncfusion/ej2-buttons/styles/material.css";`
- Add the Chips component to your application with the following code snippets. In the Angular CLI application, add Chips in the *src/app/app.component.html*file.
> ``
>
> ``
>
> ``
>
> ``
>
> ``
>
> ``
>
> ``
>
> ``
>
> ``
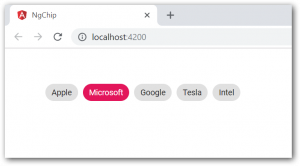
- After the previous steps are completed, serve the application to see the Angular Chips component in action.
## ****
## **Action chips**
We can use action chips if we want to perform specific actions. The action chip will trigger an action with the user selection of the chip.
The actions of chips are done by binding ***[click](https://ej2.syncfusion.com/angular/documentation/api/chips/chipListModel/#click)*** events. These events return the text of chips and chip elements.
> ``
>
> ``
>
> ``
>
> ``
>
> ``
>
> ``
>
> ``
>
> ``
>
> ``
> `export class AppComponent {`
>
> `title = "ngChip";`
>
> `onClick(args) {`
>
> `console.log(args);`
>
> `}`
>
> `}`
## **Choice chips**
Choice chips provide a set of options end users can select a single option from.
Enable the choice chips feature by setting the [selection](https://ej2.syncfusion.com/angular/documentation/api/chips/chipListModel/#selection)
API value as **single**.
> ``
>
> ``
>
> ``
>
> ``
>
> ``
>
> ``
>
> ``
>
> ``
>
> ``
## **Filter chips**
Filter chips have a collection of options. These types of chips allow users to select multiple options from a set of options. We can use filter chips if we want to showcase or filter user view items based on selections.
We can enable the filter option by setting the [selection](https://ej2.syncfusion.com/angular/documentation/api/chips/chipListModel/#selection)
API value as **multiple.**
> ``
>
> ``
>
> ``
>
> ``
>
> ``
>
> ``
>
> ``
>
> ``
>
> ``
## **Input chips**
The input chips have options for adding and removing chips. The chips can be created from user-entered text in an input box. You can delete the option chips from the input box chips collection if you don’t need them.
We can enable the input chips option by setting the value for the [enableDelete](https://ej2.syncfusion.com/angular/documentation/api/chips/chipListModel/#enabledelete)
API as true.
> ``
>
> ``
>
> ``
>
> ``
>
> ``
>
> ``
>
> ``
>
> ``
>
> ``
Chips have predefined classes to show the chip element states as follows:
- Primary
- Success
- Info
- Warning
- Danger
## **Theme**
Chips are viewable with different Essential JS 2 themes. The following themes are available for chips:
| Material | |
| --- | --- |
| Fabric | |
| Bootstrap | |
| High Contrast | |
We can customize the appearance of the chips by using the Syncfusion [Theme Studio application](https://ej2.syncfusion.com/themestudio/?theme=material)
.
## Other frameworks
The Angular Chips component is also available in React, Vue, ASP.NET Core, and MVC frameworks and is built from platform-specific TypeScript libraries.
- [TypeScript Chips features](https://www.syncfusion.com/javascript-ui-controls/chips)
- [React Chips features](https://www.syncfusion.com/react-ui-components/react-chips)
- [Vue Chips features](https://www.syncfusion.com/vue-ui-components/vue-chips)
- [ASP .NET Core Chips features](https://www.syncfusion.com/aspnet-core-ui-controls/chips)
- [ASP .NET MVC Chips features](https://www.syncfusion.com/aspnet-mvc-ui-controls/chips)
## **Summary**
In this blog, we learned how to integrate the Angular Chips component, different use cases of chips, and how to integrate chips in an Angular CLI application.
Feel free to check out the Chips source on [GitHub](https://github.com/syncfusion/ej2-javascript-ui-controls/tree/master/controls/buttons/src/chips)
, live demos in the [sample browser](https://ej2.syncfusion.com/angular/demos/#/material/chips/default)
, and the various customization features in the [documentation](https://ej2.syncfusion.com/documentation/chips/getting-started/?no-cache=1)
. Also, be sure to check out the readily runnable [Chips sample on GitHub](https://github.com/SyncfusionExamples/ej2-angular-chips-getting-started)
to see just how easy it is to create and configure chips.
If you have any questions or require clarification, please let us know in the comments section below. You can also contact us through our [support forum](https://www.syncfusion.com/forums)
or [Direct-Trac](https://www.syncfusion.com/support/directtrac/)
. We are happy to assist you!
*If you like this blog post, we think you’ll also like the following free resources:*
- [Ebook] [Angular 2 Succinctly](https://www.syncfusion.com/ebooks/angular2_succinctly)
- [Blog Post] [Introducing Syncfusion’s New Vue In-Place Editor Component for Web](https://blog.syncfusion.com/post/introducing-syncfusions-new-vue-in-place-editor-component-for-web.aspx)
- [Blog Post] [Introducing Syncfusion’s New Angular TreeGrid Component](https://blog.syncfusion.com/post/introducing-syncfusions-new-angular-treegrid-component.aspx)
- [Blog Post] [Create stock charts using Syncfusion Angular Charts](https://blog.syncfusion.com/post/create-stock-charts-using-syncfusion-angular-charts.aspx)
- [Ebook] [React.js Succinctly](https://www.syncfusion.com/ebooks/reactjs_succinctly)