
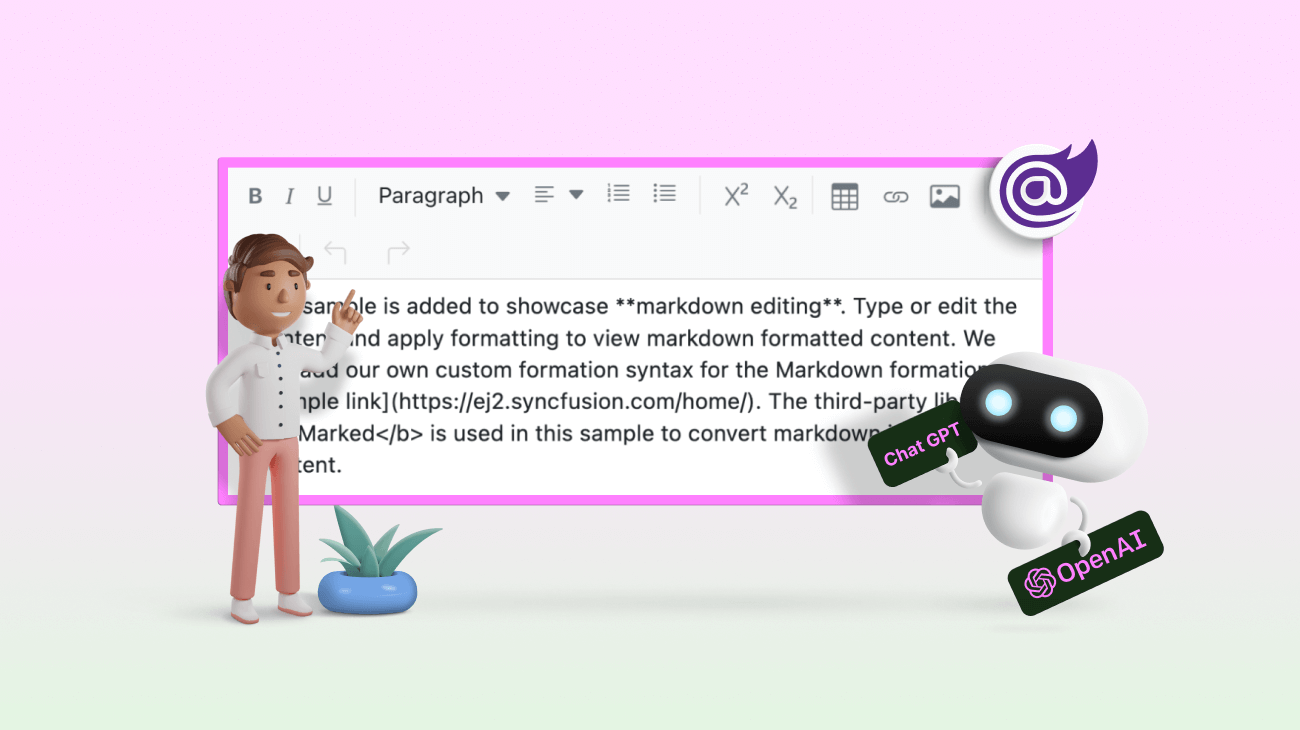
ChatGPT is an AI language model created by OpenAI. It can deliver human-like responses to a wide variety of prompts and questions. It can be used in chatbots, language translation, content creation, and more.
The Syncfusion Blazor Rich Text Editor is a feature-rich WYSIWYG HTML editor and WYSIWYG Markdown editor. It is used to create blogs, forum posts, note sections, support tickets (incidents), messaging applications, and more. It allows users to insert images, links, tables, and lists with modular architecture.
In this article, we’ll see how to integrate OpenAI with the Blazor Rich Text Editor component to enhance content generation and review.
Prerequisites
- Visual Studio 2022 with ASP.NET and web development environment
- .NET 6.0 SDK or above
- OpenAI API key: You can get one by signing up for an account.
Integrating ChatGPT with Blazor Rich Text Editor
Let’s see how to integrate ChatGPT with the Syncfusion Blazor Rich Text Editor component for better productivity!
Step 1: Creating the Blazor Rich Text Editor with toolbar and AI options.
- Follow the getting started guide to create a Blazor server app and add the Syncfusion Blazor Rich Text Editor component.
- After the sample creation, add the toolbar items to the Blazor Rich Text Editor.
- Add a custom toolbar item named AI and set a dropdown button (using the Syncfusion Blazor Dropdown Menu) as the custom toolbar item content.
- Customize the dropdown button pop-up to show AI menu items (using Blazor Context Menu), explained in the next step.
Refer to the following code example.
Pages/Index.razor
@page "/"
@using Syncfusion.Blazor.RichTextEditor
@using Syncfusion.Blazor.SplitButtons
@using Syncfusion.Blazor.Navigations
@using Syncfusion.Blazor.Spinner
@using BlazorRTEWithOpenAI.Data

<div class="control-section">
    <SfRichTextEditor @bind-Value="@Value">
        <RichTextEditorInlineMode Enable="false" ShowOnSelection="true" />
        <RichTextEditorToolbarSettings Items="@Tools">
            <RichTextEditorCustomToolbarItems>
                <RichTextEditorCustomToolbarItem Name="AI">
                    <Template>
                        <SfDropDownButton @ref="@dropDownButton" Content="AI">
                            <PopupContent>
                                <SfContextMenu @ref="@contextMenu" Items="AIMenuItems" TValue="ContextMenuItem" ShowItemOnClick="true">
                                    <MenuFieldSettings Text="Content"/>
                                    <MenuEvents TValue="ContextMenuItem" Created="OnMenuCreated" ItemSelected="ItemSelected" />
                                </SfContextMenu>
                            </PopupContent>
                        </SfDropDownButton>
                    </Template>
                </RichTextEditorCustomToolbarItem>
            </RichTextEditorCustomToolbarItems>
        </RichTextEditorToolbarSettings>
    </SfRichTextEditor>
    <SfSpinner @bind-Visible="@showSpinner"/>
</div>
Pages/Index.razor.cs
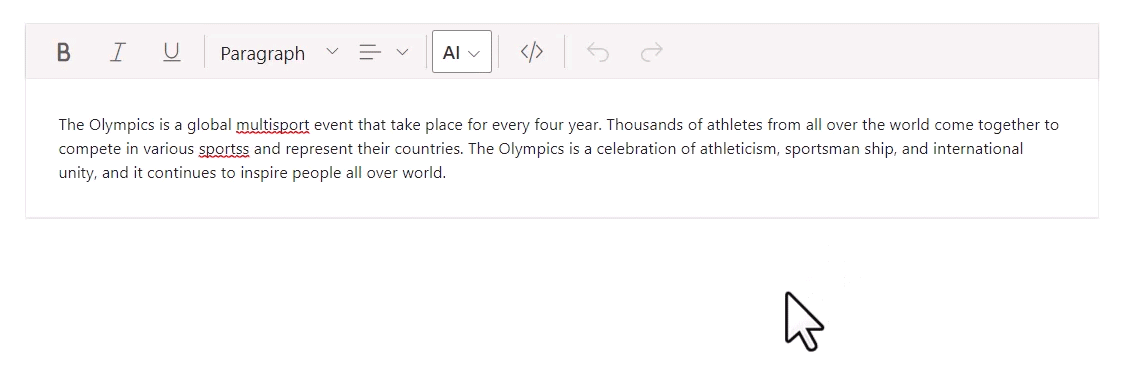
using BlazorRTEWithOpenAI.Data;
using System.Text;
using Microsoft.AspNetCore.Components;
using Syncfusion.Blazor.Navigations;
using Syncfusion.Blazor.RichTextEditor;
using Syncfusion.Blazor.SplitButtons;
using System.Net.Http.Headers;
using System.Text.Json;
using System.Text.RegularExpressions;

namespace BlazorRTEWithOpenAI.Pages
{
    public partial class Index
    {
        [Inject]
        private HttpClient httpClient { get; set; }

        private SfDropDownButton? dropDownButton;
        private SfContextMenu<ContextMenuItem>? contextMenu;
        private bool showSpinner = false;
        private string Value { get; set; } = "<p>The Olympics is a global multisport event that takes place every four years. Thousands of athletes from all over the world come together to compete in various sports and represent their countries. The Olympics is a celebration of athleticism, sportsmanship, and international unity, and it continues to inspire people all over the world.</p>";

        private List<ToolbarItemModel> Tools = new List<ToolbarItemModel>()
        {
            new ToolbarItemModel() { Command = ToolbarCommand.Bold },
            new ToolbarItemModel() { Command = ToolbarCommand.Italic },
            new ToolbarItemModel() { Command = ToolbarCommand.Underline },
            new ToolbarItemModel() { Command = ToolbarCommand.Separator },
            new ToolbarItemModel() { Command = ToolbarCommand.Formats },
            new ToolbarItemModel() { Command = ToolbarCommand.Alignments },
            new ToolbarItemModel() { Command = ToolbarCommand.Separator },
            new ToolbarItemModel() { Name = "AI", TooltipText = "Edit with AI" },
            new ToolbarItemModel() { Command = ToolbarCommand.Separator },
            new ToolbarItemModel() { Command = ToolbarCommand.SourceCode },
            new ToolbarItemModel() { Command = ToolbarCommand.Separator },
            new ToolbarItemModel() { Command = ToolbarCommand.Undo },
            new ToolbarItemModel() { Command = ToolbarCommand.Redo }
        };

        public void OnMenuCreated()
        {
            contextMenu?.Open();
        }
    }
}
- Now, create a model class for menu items and define the items with options to edit the Rich Text Editor’s content using OpenAI. This item collection will be bound to the context menu of the dropdown button pop-up created in the previous step.
In this demo, I have added rephrasing (standard, formal, expand, shorten), changed tone (professional, casual, straightforward, confident, friendly), fix spelling and grammar, and convert to article options to the context menu of the toolbar item for integrating ChatGPT into the Rich Text Editor component.Data/ ContextMenuItem.cs
namespace BlazorRTEWithOpenAI.Data
{
    public class ContextMenuItem
    {
        public List<ContextMenuItem> Items { get; set; }
        public string Content { get; set; }
        public string Id { get; set; }
        public string Prompt { get; set; }
        public bool Separator { get; set; }
    }
}
Pages/Index.razor.cs
namespace BlazorRTEWithOpenAI.Pages
{
    public partial class Index
    {
        . . .
        . . .

        private List<ContextMenuItem> AIMenuItems = new List<ContextMenuItem>{
            new ContextMenuItem { Id ="RephraseContent", Content = "Rephrase" , Items = new List<ContextMenuItem> {
                new ContextMenuItem { Content="Standard", Prompt = Constants.STANDARD },
                new ContextMenuItem { Content="Formal", Prompt = Constants.FORMAL },
                new ContextMenuItem { Content="Expand", Prompt = Constants.EXPAND },
                new ContextMenuItem { Content="Shorten", Prompt = Constants.SHORTEN}
            }},
            new ContextMenuItem { Id ="ChangeContentTone", Content = "Change tone", Items = new List<ContextMenuItem> {
                new ContextMenuItem { Content="Professional", Prompt = Constants.PROFESSIONAL },
                new ContextMenuItem { Content="Casual", Prompt = Constants.CASUAL },
                new ContextMenuItem { Content="Straightforward", Prompt = Constants.STRAIGHTFORWARD },
                new ContextMenuItem { Content="Confident", Prompt = Constants.CONFIDENT},
                new ContextMenuItem { Content="Friendly", Prompt = Constants.FRIENDLY },
            }},
            new ContextMenuItem { Separator = true },
            new ContextMenuItem { Id ="CheckGrammar", Content = "Fix spelling & grammar", Prompt = Constants.GRAMMARCHECK},
            new ContextMenuItem { Id ="Article", Content = "Convert to article", Prompt = Constants.CONVERTTOARTICLE }
        };
    }
Step 2: Defining model and prompts for OpenAI.
- Create a class named Constants.cs inside the Data folder of your Blazor server application.
- Inside the Constants.cs file, add the following constants:
- OpenAI model: The name of the OpenAI API model you want to use. Here, we are using text-davinci-003 as the OpenAI API model name.
- OpenAI key: You can get one by signing up for an account in OpenAI.
- API endpoint: The URL for the OpenAI API endpoint.
- The text prompts to instruct the OpenAI to generate the completion result.
Refer to the following code example.
Data/Constants.cs
namespace BlazorRTEWithOpenAI.Data
{
    internal static class Constants
    {
        // The OpenAI API model name.
        internal const string OPENAI_MODEL = "text-davinci-003";
        // The OpenAI API key.
        internal const string OPENAI_KEY = "";
        // The OpenAI API endpoint.
        internal const string API_ENDPOINT = "https://api.openai.com/v1/completions";
        internal const string STANDARD = "Rewrite the below text in a reliable manner to maintain meaning and provide the result as html content.\n\n";
        internal const string FORMAL = "Present the below text in a more sophisticated and professional way content and provide the result as html content.\n\n";
        internal const string EXPAND = "Adds more detail and depth to increase sentence length of the below html content and provide the result as html content.\n\n";
        internal const string SHORTEN = "Strips away extra words in the below html content and provide a clear message as html content.\n\n";
        internal const string PROFESSIONAL = "Change the below html content tone to professional content and provide the result as html content.\n\n";
        internal const string CASUAL = "Change the below html content tone to casual content and provide the result as html content.\n\n";
        internal const string STRAIGHTFORWARD = "Change the below html content tone to straightforward content and provide the result as html content.\n\n";
        internal const string CONFIDENT = "Change the below html content tone to confident content and provide the result as html content.\n\n";
        internal const string FRIENDLY = "Change the below html content tone to friendly content and provide the result as html content.\n\n";
        internal const string GRAMMARCHECK = "Check grammar and spelling in the below html content and provide the result as html content.\n\n";
        internal const string CONVERTTOARTICLE = "Convert to article using the below html content and provide the result as html content.\n\n";
    }
}
Step 3: Create an API endpoint and get a response from OpenAI.
Next, create an HTTP client to make a Completion API call to OpenAI with the user-selected toolbar prompt.
In OpenAI’s Completion API, the prompt is the input text we provide to the API, and the completion is the response generated based on the input prompt.
The Completion API is designed to generate natural-language text based on the input prompt using advanced machine-learning techniques. The provided prompt input text can be a partial sentence, a question, a keyword, or any other type of text you want the API to complete.
The Completion API returns a response with a suitable answer for the prompt. Then, we process the Completion API’s response and replace the given prompt with the completion result (answer for the given prompt) in the Rich Text Editor.
Refer to the following code example.
Pages/Index.razor.cs
namespace BlazorRTEWithOpenAI.Pages
{
    public partial class Index
    {

        . . .
        . . .

        private async Task ItemSelected(MenuEventArgs<ContextMenuItem> args)
        {
            if (string.IsNullOrEmpty(args.Item.Prompt))
                return;

            var prompt = args.Item.Prompt + Value;

            dropDownButton?.Toggle();
            this.showSpinner = true;
            Value = await createCompletion(prompt);
            this.showSpinner = false;
        }

        // Method to get the completion result from OpenAI.
        private async Task<string> createCompletion(string prompt)
        {
            httpClient.DefaultRequestHeaders.Authorization = new AuthenticationHeaderValue("Bearer", Constants.OPENAI_KEY);
            var openAIPrompt = new
            {
                model = Constants.OPENAI_MODEL,
                prompt,
                temperature = 0.5,
                max_tokens = 1500,
                top_p = 1,
                frequency_penalty = 0,
                presence_penalty = 0
            };

            var content = new StringContent(JsonSerializer.Serialize(openAIPrompt), Encoding.UTF8, "application/json");
            var response = await httpClient.PostAsync(Constants.API_ENDPOINT, content);
            var jsonContent = await response.Content.ReadAsStringAsync();
            var choices = JsonDocument.Parse(jsonContent).RootElement.GetProperty("choices").GetRawText();
            var result = JsonDocument.Parse(Regex.Replace(choices, @"[\[\]]", string.Empty)).RootElement;
            #pragma warning disable CS8603 // Possible null reference return.
            return result.GetProperty("text").GetString();
            #pragma warning restore CS8603 // Possible null reference return.
        }
    }
}
Step 4: Run the application.
You can see the demo of the runnable app in the following GIF image.
GitHub reference
You can download the complete source code for integrating OpenAI (ChatGPT) with Syncfusion’s Blazor Rich Text Editor on GitHub.

Conclusion
Thanks for reading! In this blog, we have learned how to integrate OpenAI (ChatGPT) with the Syncfusion Blazor Rich Text Editor to enhance content generation and review. In this way, you can customize your app using OpenAI with minimal lines of code. If you have any questions, please let us know in the comments section below.
Syncfusion provides over 65 high-performance, lightweight, modular, and responsive Blazor UI controls such as DataGrid, Charts, and Scheduler to ease the work of developers. Use them to build elite apps!
You can also contact us through our support forum, support portal, or feedback portal. We are always happy to assist you! Have a good day!
Disclaimer: You will need to use professional skill and judgment when doing any implementation. This provides only a sample. Syncfusion is not affiliated with ChatGPT and is not responsible for any results.
Related blogs
- Load on Demand: A Solution to Handling Large Data Sets Efficiently in Blazor Gantt Chart
- Interview with Blazor WebAssembly Succinctly Author Michael Washington
- Instantly Update a Real-Time Chart with SignalR in Blazor Server-Side App
- Easily Integrate Blazor Components into Any SPA Framework as Custom Elements


Comments (1)
WOW. This is great.
Comments are closed.