---
title: "How to Customize .NET MAUI Controls with Handler Architecture"
published_at: "2021-09-09T11:34:07+00:00"
modified_at: "2026-02-02T08:39:12+00:00"
url: "https://www.syncfusion.com/blogs/post/how-to-customize-net-maui-controls-with-handler-architecture"
excerpt: "Learn how to customize .NET MAUI controls using handler architecture. Extend functionality, modify properties, and build flexible cross-platform apps with ease."
taxonomy_category:
- ".NET MAUI"
- "Desktop"
- "Mobile"
- "Syncfusion"
taxonomy_post_tag:
- "Custom control"
- "Customization"
- "MAUI"
- "Microsoft"
- "Mobile App Development"
---
# How to Customize .NET MAUI Controls with Handler Architecture
[Selva Ganapathy Kathiresan](https://www.syncfusion.com/blogs/author/selva-ganapathy-k)
## .NET MAUI Handlers: Overview
We all know that [.NET MAUI](https://docs.microsoft.com/en-us/dotnet/maui/what-is-maui)
is the evolution of Xamarin.Forms. It uses handler architecture to design its UI controls. These handlers map their cross-platform controls to native controls.
For example, a .NET MAUI handler will map a .NET MAUI Entry control to TextView for the Android platform and UITextField for the iOS platform.
Similar to the renderers in Xamarin.Forms, handlers expose native controls via the **NativeView** property. You can use this property to access platform APIs such as properties, methods, and events. A control-specific interface is provided to access the handlers in .NET MAUI, like IEntry for the Entry control.
In this blog post, we are going to discuss how to customize your .NET MAUI controls using this marvelous handler architecture.
Let’s get started!
## Create a simple .NET MAUI application
Let’s create a simple .NET MAUI application with a single login page. It contains two entry controls (Username and Password) and two buttons (SIGN IN and SIGN UP).
Refer to the following code example.
```
```
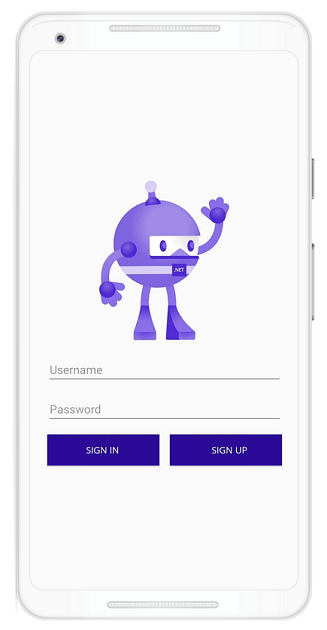
.NET MAUI App with Simple Login Page
Let’s see how to customize the button controls in this app by:
1. [Customizing all instances](#customizing-all-instances-of-a-control-app-level-customization) .
2. [Customizing a specific instance](#customizing-a-specific-instance-of-a-control) .
## Customizing all instances of a control: app-level customization
Customizing a control at the app level will apply that customization to each instance of the control. This customization can be done in the **App.cs** file. All .NET MAUI control handlers are available at the namespace ** Microsoft.Maui.Handlers**.
We are going to customize both buttons (SIGN IN and SIGN UP) using the namespace **Microsoft.Maui.Handlers.ButtonHandler**. Each handler has the ** Mapper** property to set the property of the control.
Here, the **ButtonHandler** has the ** ButtonMapper** property. Mapper is a kind of dictionary for the ** Button** and ** ButtonHandler**. It will have an index of the property that you want to customize. You can assign an action to it with a lambda or a method that will be executed whenever that property changes.
**Note:** Here, the platform specification can be done through the compiler directives.
Let’s change the background color for all instances of the button added in the application.
```
public partial class App : Application
{
public App()
{
InitializeComponent();MainPage = new MainPage();#if __ANDROID__
Microsoft.Maui.Handlers.ButtonHandler.ButtonMapper[nameof(IView.Background)] = (h, v) =>
{
(h.NativeView as Android.Views.View).SetBackgroundColor(Microsoft.Maui.Graphics.Colors.OrangeRed.ToNative());
};
#endif
}
}
```
Refer to the following screenshot where the background color for all the Button controls has been customized to **OrangeRed**.
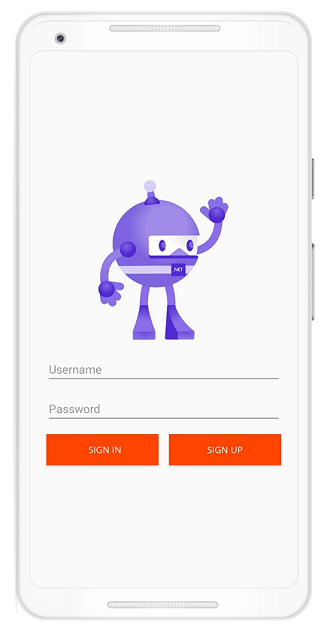
Customizing All Instances of a Control in .NET MAUI
### How to avoid compiler directives
If you want to avoid compiler directives to classify the platforms, just navigate to **Solution explorer > Project > Platforms folder**. In the Platforms folder, we have a folder for each platform to hold the platform-specific code.
For Android, we still need the **MainActivity.cs** file to use the same code without compiler directives checks.
Refer to the following example to customize the background color of each Button control in the Android app without compiler directives checks.
```
public class MainActivity : MauiAppCompatActivity
{
public MainActivity()
{
Microsoft.Maui.Handlers.ButtonHandler.ButtonMapper[nameof(IView.Background)] = (h, v) =>
{
(h.NativeView as Android.Views.View).SetBackgroundColor(Microsoft.Maui.Graphics.Colors.OrangeRed.ToNative());
};
}
}
```
## Customizing a specific instance of a control
By default, the handlers will be applied globally for all instances for the specified control. If you want to apply that handler to a specific instance of the control, create a custom class that is derived from the control and apply the handler to that custom class type.
For example, to customize a specific Button control on a page that contains multiple Button controls, you should first subclass the required Button control. Refer to the following code example.
```
using Microsoft.Maui.Controls;
namespace MyMauiApp
{
public class CustomButton : Button
{
}
}
```
Then, customize the Button handler to perform the desired modification to the CustomButton instances.
```
public partial class App : Application
{
public App()
{
InitializeComponent();MainPage = new MainPage();#if __ANDROID__
Microsoft.Maui.Handlers.ButtonHandler.ButtonMapper[nameof(IView.Background)] = (h, v) =>
{
if (h.NativeView is CustomButton)
{
(h.NativeView as Android.Views.View).SetBackgroundColor(Microsoft.Maui.Graphics.Colors.OrangeRed.ToNative());
}
};
#endif
}
}
```
Refer to the following code example to add the CustomButton to the XAML page.
```
```
Refer to the following screenshot where we have customized the background color for the SIGN UP button alone.
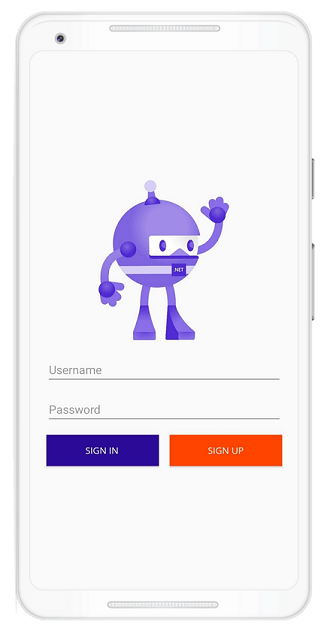
Customizing a Specific Instance of a Control in .NET MAUI
Using this approach, any CustomButton instances can be customized as per the handler modification.
## GitHub reference
For more details, refer to the [.NET MAUI Project with Custom Handlers demo](https://github.com/SyncfusionExamples/maui-samples-customizewithhandlers)
.
## Summary
Thanks for reading! In this blog post, we have seen how to customize .NET MAUI controls using handler architecture. Try out the steps provided in this blog post and leave your feedback in the comments section below!
We are planning to deliver .NET MAUI controls to replace our existing Syncfusion [Xamarin.Forms](https://www.syncfusion.com/xamarin-ui-controls)
controls. You can expect our .NET MAUI controls soon. Our first set of controls will be available with the .NET MAUI GA release.
If you have any special requirements or controls needed for Syncfusion’s upcoming .NET MAUI support, please mention them in our [support forum](https://www.syncfusion.com/forums)
, [Direct-Trac](https://www.syncfusion.com/support/directtrac/)
, or [feedback portal](https://www.syncfusion.com/feedback/xamarin-forms)
. We are always happy to assist you!
## Related blogs
- [Reuse Xamarin.Forms Custom Renderers in .NET MAUI](https://www.syncfusion.com/blogs/post/how-to-reuse-xamarin-forms-custom-renderers-in-net-maui.aspx)
- [Create Custom Renderers for a Control in Xamarin.Forms](https://www.syncfusion.com/blogs/post/how-to-create-custom-renderers-for-a-control-in-xamarin-forms.aspx)
- [5 Advantages of .NET MAUI Over Xamarin](https://www.syncfusion.com/blogs/post/advantages-net-maui-over-xamarin.aspx)
- [Goodbye Xamarin.Forms, Hello MAUI!](https://www.syncfusion.com/blogs/post/goodbye-xamarin-forms-hello-maui.aspx)