---
title: "Easy Steps to Host an Angular App in GitHub Pages"
published_at: "2022-02-24T11:30:27+00:00"
modified_at: "2026-01-09T13:37:21+00:00"
url: "https://www.syncfusion.com/blogs/post/host-angular-app-in-github-pages"
excerpt: "Let's see two easy procedures to host an Angular app in GitHub Pages. Hosting a web app in GitHub Pages is easy and free."
taxonomy_category:
- "Angular"
- "Development"
- "Tips and Tricks"
- "Web"
taxonomy_post_tag:
- "Angular"
- "development"
- "GitHub"
- "Web"
---
# Easy Steps to Host an Angular App in GitHub Pages
[Shajith Khan Afridi Jahirhussain](https://www.syncfusion.com/blogs/author/shajithkhanafridi-j)
**TL;DR:** Learn how to effortlessly host your Angular app on GitHub Pages with our step-by-step guide, covering setup, deployment methods, and error resolution. Optimize your development process and showcase your Angular projects to the world.
[GitHub Pages](https://pages.github.com/)
is a service provided by [GitHub](https://en.wikipedia.org/wiki/GitHub)
where people can host a website at no cost. This helps people host personal websites for their blogs, portfolio, business, and so on. We can host a simple website with only HTML, CSS, and JavaScript on GitHub Pages effortlessly, but a complex application requires some effort.
An [Angular](https://angular.io/)
app by itself has many things attached to it, like components, node modules, routing information, and other data. There are a few ways one can host an Angular app in GitHub Pages. In this blog post, we will see the easiest way to host an Angular app in GitHub Pages.
## Getting started
To get started, we must have an Angular app and a GitHub repository.
### Creating an Angular app
Let’s create a sample Angular app using the Angular CLI.
If the Angular CLI is not installed yet, install it using npm. Refer to the following command:
| npm install -g @angular/cli |
| --- |
We can verify the installation by checking the version using the following command:
| ng version |
| --- |
Now, we can use Angular CLI to set up a new project. Use the **ng new** command to create an Angular application.
| ng new sample |
| --- |
### Setting up Git
Git is software that tracks changes made to files. The main purpose of Git is to help developers collaborate within an organization or publicly on a single project.
Git is also free and open source. It considers files as snapshots of a file system. Every time a change occurs, Git takes a snapshot and stores it for reference.
If Git is already installed, you can skip this step. Otherwise, install it from the [Git downloads](https://git-scm.com/downloads)
page.
Once installed, we can ensure it is ready by checking its version:
| git --version |
| --- |
This will show us the version of Git installed.
### Running a sample Angular app
When the CLI is done creating an Angular app, navigate to the app’s folder.
| cd sample |
| --- |
Inside the project folder, use **ng serve** to run the application to check whether it works.
| ng serve |
| --- |
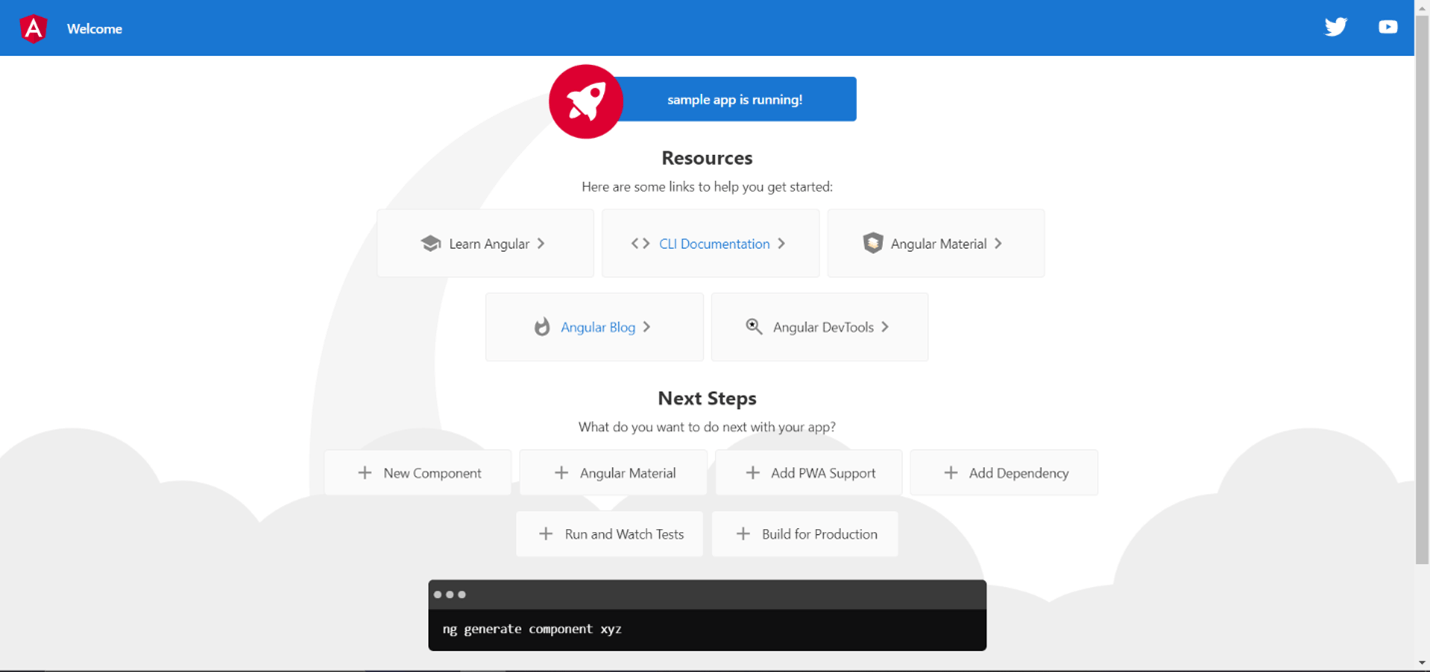
We have successfully created an Angular app and deployed it locally.
## How GitHub Pages work
GitHub Pages accept two different folder methods:
- Root
- Docs
We can use the**Root** method for simple HTML, CSS, and JavaScript files since GitHub Pages start looking for such files in the ** root** directory.
Use the **Docs** method in cases where we must build an app. This helps in hosting only the final output of the app, instead of hosting a complete app. GitHub Pages start looking for such files in the ** docs** directory.
## Methods of hosting GitHub Pages
There are many ways to host an Angular app in GitHub Pages.
We will look at two major methods to host an Angular app in GitHub Pages:
- Angular-cli-ghpages.
- Building and serving the app to GitHub.
### Using angular-cli-ghpages
Angular-cli-ghpages is a package that helps deploy an Angular app directly from the Angular CLI.
#### Setting up a GitHub repo
Before building the Angular app, let’s set up the GitHub repository.
Sign in to GitHub and then create a new repository by clicking the **New** button or using this [link](https://github.com/new)
. Give the repository a name and give it public accessibility.
Although Git initiates a repository, we must add a remote origin using the following command:
| git remote add origin /.git |
| --- |
Replace the tag with your GitHub account username.
Replace the tag with the name of the repository to be created.
#### Deploying using angular-cli-ghpages
Inside the sample folder, add the angular-cli-ghpages package using the following command:
| ng add angular-cli-ghpages |
| --- |
Now, we can proceed to deploy.
The deploy command is simple, and we must add a **base-href** argument with the name of the repository in it:
| ng deploy --base-href=/angular-app/ |
| --- |
Here, the **deploy** command does all the work. We don’t have to manually build or commit those files.
Once this command finishes running, check the files in the repository using:
| https://github.com// |
| --- |
We can see the hosted corresponding site at the following link:
| https://.github.io/ |
| --- |
The refers to our GitHub username and refers to the name of the repository created on GitHub.
Looking carefully at the files committed to the repository, we can say that only the output contents are committed to the repository instead of the whole application. So, this will use the **root** folder to get the files that can be hosted.
This is one way of hosting an Angular app in GitHub Pages. The next method is as follows.
### Building the Angular app and hosting it
Create a Git repository by following the steps in the [Setting up a GitHub repo](#setting-up-a-github-repo)
section.
Here, we will use the same application that we created in the [Creating an Angular app](#creating-an-angular-app)
section.
Since we have an Angular app ready, navigate to the app folder, which is inside the **sample** in our case. We have to navigate to the app folder because the ** ng build** command works only inside the Angular app folder.
It is advisable to create a new branch in our repo before building and create a pull request from that branch after building, but this is not mandatory.
Angular CLI has the **build** command, which builds the Angular app and saves the resultant files to a folder.
The following command helps us to build our Angular app:
| ng build --output-path docs --base-href /repository-name/ |
| --- |
Let’s break down this command and its options:
- **build** helps us to build the Angular app.
- **output-path** is used to output in a different folder rather than the default ** dist**
- **base-href** allows us to tell the application the base path.
In our case, the name of the repository I created is angular-app, so the command will be:
| ng build --output-path docs --base-href /angular-app/ |
| --- |
The output path is given as **docs** since we know GitHub Pages look for files in two folders, ** root** and ** docs**. In ** root** we have all other app data, so we can’t use it here. Instead, we have given a separate output folder named ** docs** that we are going to use to host in GitHub Pages.
The**base-href** is an important argument since we use it to set the base path for resolving relative URLs to stylesheets, scripts, and many other resources.
## Build output
Once the build completes, we will find a new folder named **docs** that have been created inside the ** sample** folder.
Exploring the **docs** folder can give us an idea of how the ** build** command delivers the output.
We can find an HTML file, a few JS files, and a few other files. This is the output of the build. The files in this folder are enough for running the Angular app.
If we host this folder on a server, it will show us our Angular app. Many servers allow hosting a folder as a web server. We can pass the folder to one such server and check our output. That’s what we’ll do in the next section.
We are going to cover how to host this folder on GitHub Pages.
## Committing the files to GitHub
We can now proceed with committing the changes to GitHub. Once committed, check the files in the repository.
| https://github.com// |
| --- |
The **** corresponds to your GitHub username and the **** corresponds to the name of the repository.
## Setting up GitHub Pages
Once inside the GitHub repository, switch to the **Settings** tab.

Under **Code and automation**, find ** Pages**to configure the GitHub Pages.
**Note:** The repository must be public. If it is not, change it to the public by clicking ** Settings** and scrolling down to the bottom of the page. Follow the instructions there for making a private repository public.
Fill the **Source** section with the following data:

Set **main** as the branch, choose **/docs** in the second dropdown, and click ** Save**.
We are using the main branch here, but you can use any branch. It is advisable to create a separate branch for hosting.
We can find **root** and ** docs** in the second dropdown. We are selecting ** docs** since we created a ** docs** folder and saved our build output there.
Once saved, the page will now provide the link to the hosted site.
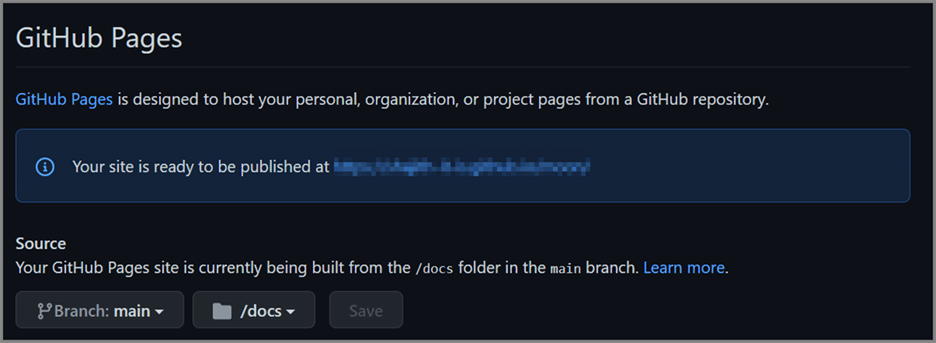
We have successfully hosted our Angular app in GitHub Pages.
After a few minutes, reload the page. You will find that the message is changed from “Your site is ready to be published at…” to “Your site is published at…”

Try opening the link provided and ensuring the app has been successfully hosted. Generally, the link has the following structure:
| https://.github.io/ |
| --- |
Where **** is the GitHub username and ** repositoryname** represents the name of the repository.
### Fixing errors
The version of Angular I used in this blog post is 13.0.4. I have encountered a few errors while building the Angular app or while deploying it.
The error I received during building can be found below:
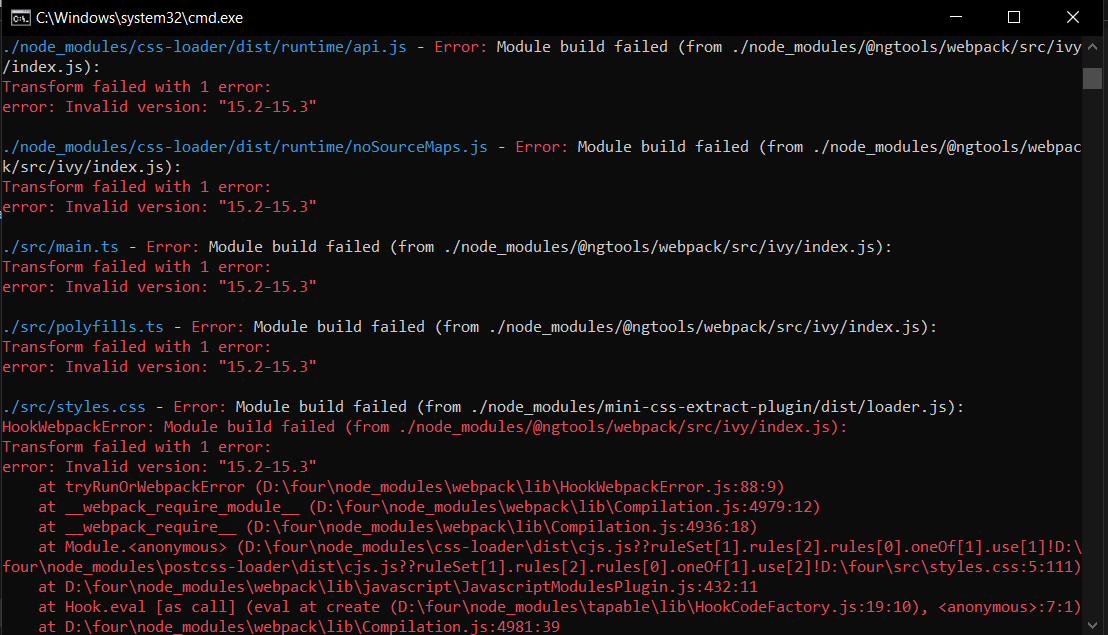
The above screenshot depicts a few of the errors faced, but all the errors were “Module build failed.”
We can fix this with a simple npm audit command:
| npm audit fix --force |
| --- |
This solved the problem I faced while building the Angular app.
[https://www.syncfusion.com/downloads/angular](https://www.syncfusion.com/downloads/angular)
## Conclusion
There are different methods to host an Angular app in GitHub Pages, allowing us to use anything that suits our requirements. In this blog post, the first method didn’t have all the files in the repository, and only the output files were present. In the second method, the whole application was set up, but only the **docs** output folder was used for hosting in GitHub Pages.
So, if we need the complete app data, we can use the latter method. If hosting is our only priority, then we can use the former method.
Syncfusion’s [Angular UI component](https://www.syncfusion.com/angular-ui-components)
library is the only suite that you will ever need to build an application, containing over 65 high-performance, lightweight, modular, and responsive UI components in a single package.
For existing customers, the newest Essential Studio® version is available for download from the [License and Downloads](https://www.syncfusion.com/account/downloads)
page. If you are not yet a Syncfusion customer, you can try our 30-day [free trial](https://www.syncfusion.com/downloads)
to check out the available features. Also, check out our demos on [GitHub](https://github.com/syncfusion)
.
You can contact us through our [support forums](https://www.syncfusion.com/forums)
, [support portal](https://support.syncfusion.com/)
, or [feedback portal](https://www.syncfusion.com/feedback/angular)
. We are always happy to assist you!
## Related blogs
- [Implementing SSO with Angular and AWS Cognito](https://www.syncfusion.com/blogs/post/implementing-sso-with-angular-and-aws-cognito.aspx)
- [Angular Dependency Injection: A Complete Guide](https://www.syncfusion.com/blogs/post/angular-dependency-injection-a-complete-guide.aspx)
- [Customize the Enter and Shift+Enter Keys in Angular Rich Text Editor for Better Productivity](https://www.syncfusion.com/blogs/post/customize-the-enter-and-shiftenter-keys-in-angular-rich-text-editor-for-better-productivity.aspx)
- [Top 10 Features in Angular 13 Every Developer Should Know](https://www.syncfusion.com/blogs/post/top-10-features-in-angular-13-every-developer-should-know.aspx)