---
title: "Handling Overlay Elements in .NET MAUI with ZIndex"
published_at: "2022-04-22T10:30:53+00:00"
modified_at: "2026-02-02T08:43:19+00:00"
url: "https://www.syncfusion.com/blogs/post/handling-overlay-elements-in-net-maui-with-zindex"
excerpt: "Learn how to handle overlay elements in .NET MAUI using ZIndex. Control element stacking, manage layouts, and build polished cross-platform apps with clear guidance."
taxonomy_category:
- ".NET MAUI"
- "Desktop"
- "Xamarin"
taxonomy_post_tag:
- ".NET MAUI"
- "Android"
- "Android App Development"
- "Mobile App Development"
- "Xamarin.Forms"
---
# Handling Overlay Elements in .NET MAUI with ZIndex
[Jayaleshwari N](https://www.syncfusion.com/blogs/author/jayaleshwarin)

If you’re working in [.NET MAUI](https://github.com/dotnet/maui/wiki)
, and you have two or more controls on top of each other that need to be revealed based on certain conditions, this article will undoubtedly assist you in handling that problem.
The order in which an element appears on the z-axis is represented by **ZIndex**, a property added in .NET MAUI Preview 12 to all the elements inherited from the ** IView** interface. A control with a higher ZIndex value will be placed above others. For instance, a control with ZIndex 0 will be on the bottom, and control with ZIndex 1 or higher will be on the top (displayed).
In this blog, we’ll explore the ZIndex behaviors with default rendering and the procedure to bring .NET MAUI views to the front.
## Rendering controls without handling ZIndex
The following code example defines view elements with a grid without defining **ZIndex**.
```
```
The following screenshot shows the result of the above XAML code.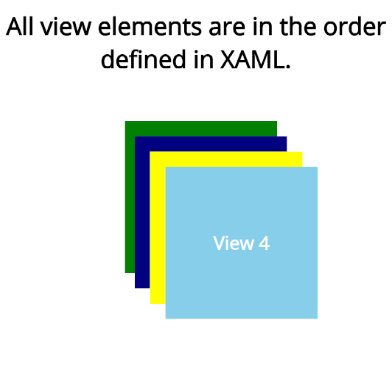
## Rendering controls with ZIndex
In the following code example, each view is defined with a **ZIndex** value. Here, the last view which was painted as the top layer in the previous example is set with a lower ** ZIndex** value compared to the other views.
```
```
The views are rendered based on the assigned ZIndex values. Here, View1 is painted on top of the other layers as it has a higher ZIndex value.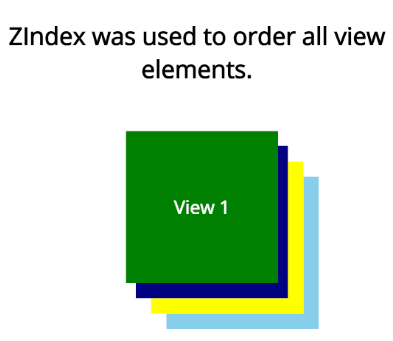
## Bring the .NET MAUI views to the front
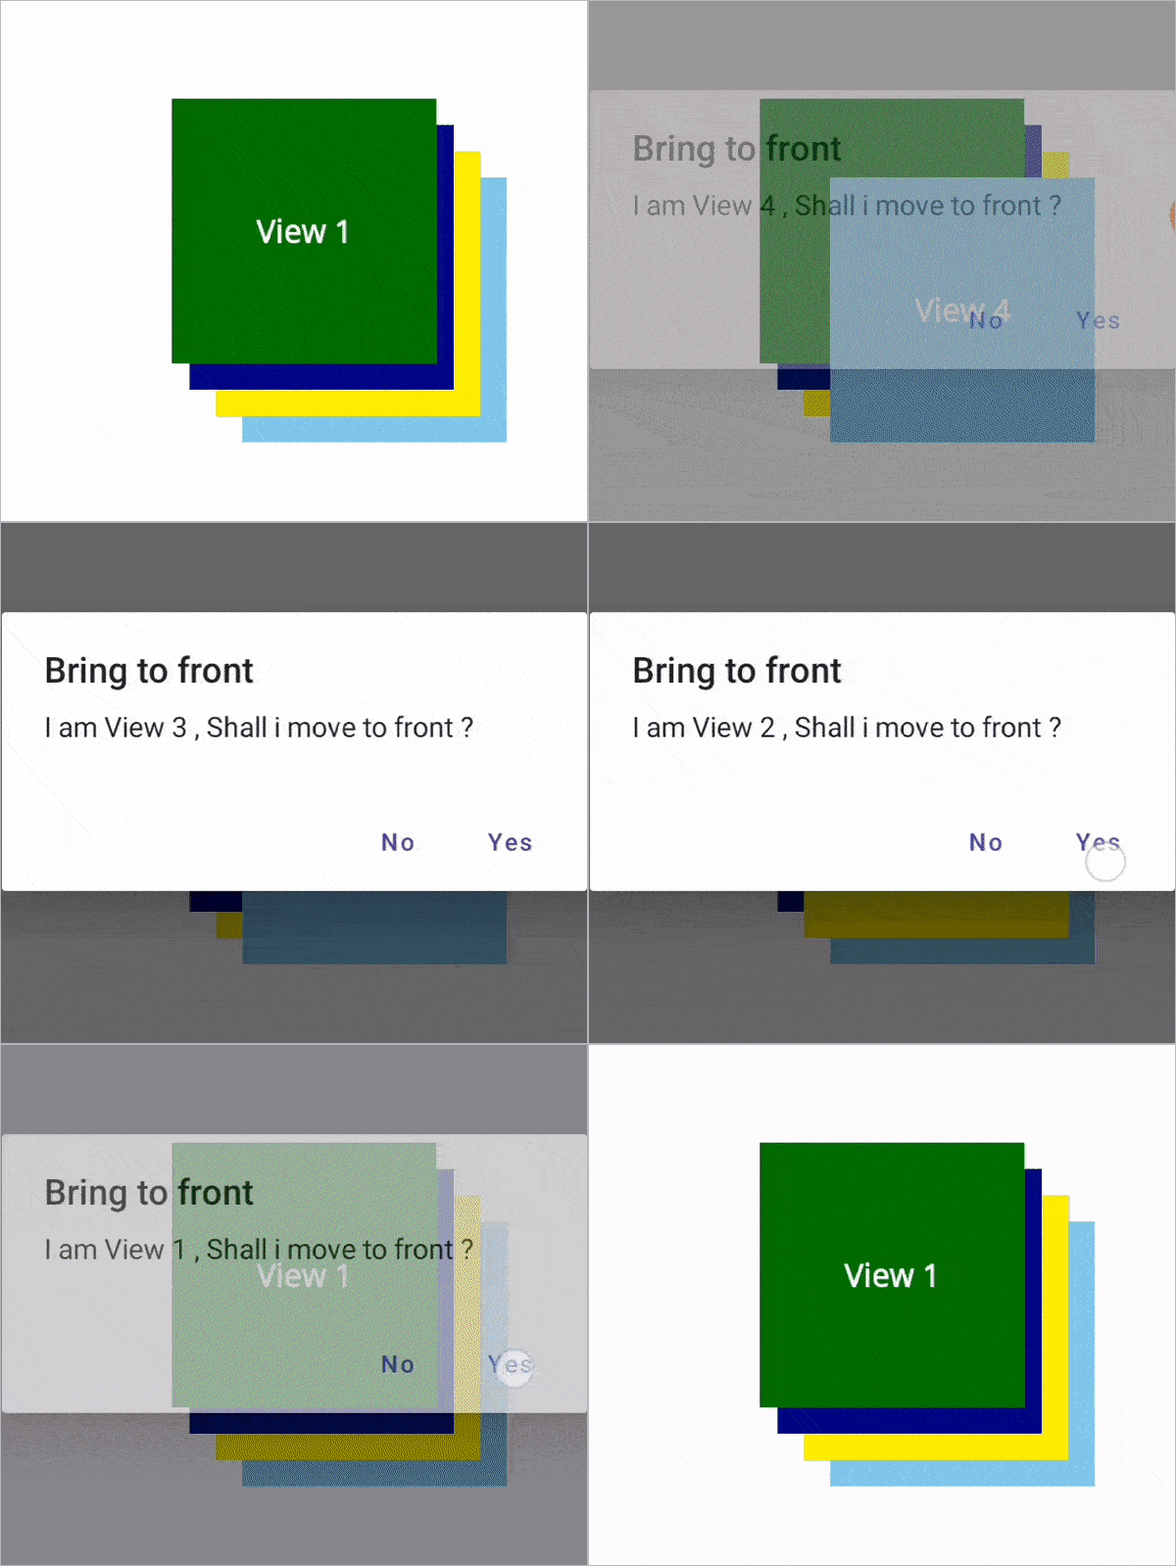
In the following code example, each view is defined with a ZIndex value during initial load.
```
```
Now, we are going to dynamically update the ZIndex value of the .NET MAUI views in the runtime. Here, we choose to bring the view to the front based on the click action. Refer to the following code example.
```
private async void OnBringToFrontAsync(object view)
{
var viewName = (view as Label).Text;
bool answer = await Application.Current.MainPage.DisplayAlert("Bring to front", "I am "+viewName + " , " + "Shall i move to front ?", "Yes", "No");
if (answer)
{
(view as Label).ZIndex = Zindex;
Zindex += 1;
}
}
```
## Resource
To play with ZIndex, you can use the [dynamically update ZIndex in .NET MAUI](https://github.com/SyncfusionExamples/net-maui-z-index)
project on GitHub.
## Conclusion
I hope you now have a clear idea about using ZIndex in .NET MAUI applications.
The Syncfusion [.NET MAUI suite](https://www.syncfusion.com/maui-controls)
offers more than 10 UI controls and libraries to build .NET MAUI applications. Try them out and share your feedback with us.
If you’re waiting a little longer before dipping your toes into MAUI, Syncfusion’s [Xamarin](https://www.syncfusion.com/xamarin-ui-controls)
suite offers over 150 UI controls, from basic editors to powerful, advanced controls like [DataGrid](https://www.syncfusion.com/xamarin-ui-controls/xamarin-datagrid)
, [Charts](https://www.syncfusion.com/xamarin-ui-controls/xamarin-charts)
, [ListView](https://www.syncfusion.com/xamarin-ui-controls/xamarin-listview)
, and [Rich Text Editor](https://www.syncfusion.com/xamarin-ui-controls/xamarin-rich-text-editor)
.
If you have any comments or questions, you can contact us through our [support forum](https://www.syncfusion.com/forums)
, [support tickets](https://support.syncfusion.com/)
, or [feedback portal](https://www.syncfusion.com/feedback/xamarin-forms)
. We are always happy to assist you!
Thanks for reading!
## Related Blog
- [Introducing the New .NET MAUI Range Selector](https://www.syncfusion.com/blogs/post/introducing-the-new-net-maui-range-selector.aspx)
- [Generating QR Codes and Other Barcodes is Now Easy in .NET MAUI](https://www.syncfusion.com/blogs/post/generating-qr-codes-and-other-barcodes-in-net-maui.aspx)
- [Introducing the New .NET MAUI Linear Gauge Control](https://www.syncfusion.com/blogs/post/introducing-the-new-net-maui-linear-gauge-control.aspx)
- [How to Add an Alert Notification UI to Your .NET MAUI App](https://www.syncfusion.com/blogs/post/how-to-add-an-alert-notification-ui-to-your-net-maui-app.aspx)