---
title: "Easily Deploy a Blazor WebAssembly App to Cloudflare"
published_at: "2022-03-01T11:34:11+00:00"
modified_at: "2026-02-10T11:43:05+00:00"
url: "https://www.syncfusion.com/blogs/post/easily-deploy-a-blazor-webassembly-app-to-cloudflare"
excerpt: "In this blog, we are going to see how to deploy a Blazor WebAssembly (WASM) app with Syncfusion Blazor components in Cloudflare Pages. Cloudflare is a global network that protects and accelerates websites, apps, and teams. Cloudflare Pages is one..."
taxonomy_category:
- "Blazor"
- "Development"
- "Web"
taxonomy_post_tag:
- "Blazor"
- "Cloud Service"
- "Cloudflare"
- "Web Development"
- "WebAssembly"
---
# Easily Deploy a Blazor WebAssembly App to Cloudflare
[Alan Sangeeth](https://www.syncfusion.com/blogs/author/alans)

In this blog, we are going to see how to deploy a Blazor WebAssembly (WASM) app with Syncfusion Blazor components in Cloudflare Pages.
[Cloudflare](https://en.wikipedia.org/wiki/Cloudflare)
is a global network that protects and accelerates websites, apps, and teams. Cloudflare Pages is one of its services. It is a JAMstack platform for developers to collaborate and deploy websites with static assets on.
The Syncfusion [Blazor](https://www.syncfusion.com/blazor-components)
suite is a native UI components library. It has over 70 high-performance and responsive UI components for creating Blazor applications.
We have chosen WebAssembly instead of the server app for this blog because Cloudflare Pages hosts websites with only static assets. Blazor WebAssembly is a single-page application (SPA) framework for building web apps with static assets.
## Prerequisites
- [.NET SDK](https://dotnet.microsoft.com/en-us/download/visual-studio-sdks) : To build the Blazor WebAssembly app.
- [Git](https://git-scm.com/) : To set up git in your local machine.
- GitHub repository: To push the local WebAssembly app to GitHub and pull from it.
- An account in [Cloudflare](https://dash.cloudflare.com/login) .
## Create a Blazor WebAssembly app
To create a new Blazor WASM app, run the following command in the command prompt (Windows), terminal (macOS), or command shell (Linux) based on your operating system.
| dotnet new blazorwasm -o Cloudflare |
| --- |
**Note:** If you have not installed .NET SDK, you can do so [here](https://dotnet.microsoft.com/en-us/download)
.
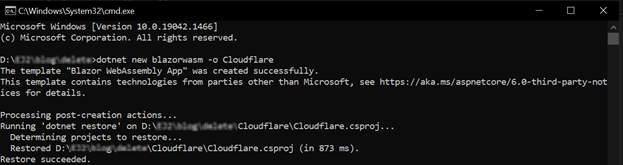For more details, refer to [Creating a Blazor WebAssembly project using .NET CLI documentation](https://blazor.syncfusion.com/documentation/getting-started/blazor-webassembly-dotnet-cli#create-a-blazor-webassembly-project-using-net-cli)
.
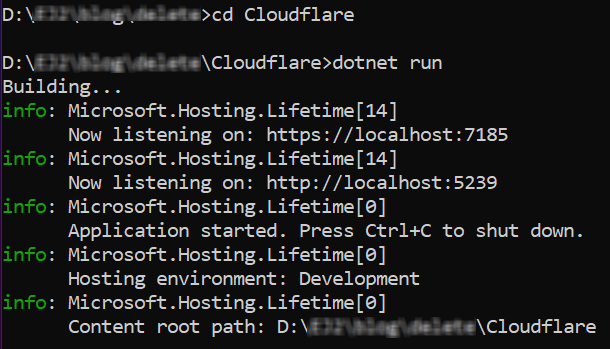
We have created a basic Blazor WASM app. Now, run the WASM app in the browser using the following command.
| cd Cloudflare dotnet run |
| --- |
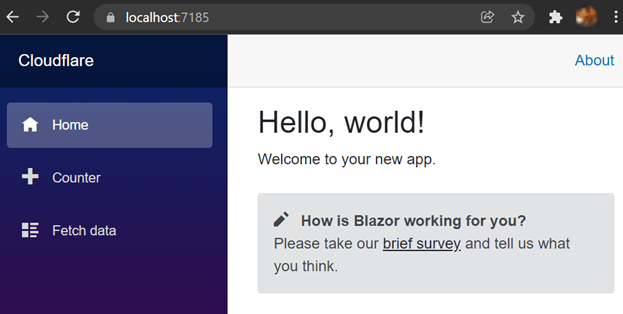
Creating a Blazor WebAssembly App
## Integrate Syncfusion Blazor components into app
Integrate Syncfusion Blazor components into your Blazor WASM app:
1. To use Syncfusion Blazor components, [install their NuGet packages](https://blazor.syncfusion.com/documentation/getting-started/blazor-webassembly-dotnet-cli#install-syncfusion-blazor-packages-in-the-app) . We’ll use the DataGrid component. Install the [Syncfusion.Blazor.Grid](https://www.nuget.org/packages/Syncfusion.Blazor.Grid/) and [Syncfusion.Blazor.Themes](https://www.nuget.org/packages/Syncfusion.Blazor.Themes/) (to reference Syncfusion component themes or stylesheets in the app) NuGet packages using the following command. | dotnet add package Syncfusion.Blazor.Grid dotnet add package Syncfusion.Blazor.Themes dotnet restore | | --- | **Note:** Check out the list of available [NuGet packages for Syncfusion Blazor UI components](https://blazor.syncfusion.com/documentation/nuget-packages) .
2. Now, register the Syncfusion Blazor service and import the Syncfusion namespaces.Open the **_Imports.razor** file and import the ** Syncfusion.Blazor** and ** Syncfusion.Blazor.Grids** namespaces.``` _Imports.razor @using System.Net.Http @using System.Net.Http.Json … @using Syncfusion.Blazor @using Syncfusion.Blazor.Grids ``` Then, in the ** Program.cs**file, register the Syncfusion Blazor service. ``` Program.cs using Cloudflare; using Microsoft.AspNetCore.Components.Web; using Microsoft.AspNetCore.Components.WebAssembly.Hosting; using Syncfusion.Blazor; var builder = WebAssemblyHostBuilder.CreateDefault(args); builder.RootComponents.Add("#app"); … builder.Services.AddSyncfusionBlazor(options => { options.IgnoreScriptIsolation = true; }); await builder.Build().RunAsync(); ```
3. Now, add the Syncfusion CSS and script references in your app and add the following code in the **wwwroot/index.html** file.``` Index.html ... … ```
4. Finally, add the Syncfusion Blazor DataGrid component in the **Pages/index.razor** page.``` Pages/Index.razor @page "/" @code{ public List Orders { get; set; } protected override void OnInitialized() { Orders = Enumerable.Range(1, 75).Select(x => new Order() { OrderID = 1000 + x, CustomerID = (new string[] { "ALFKI", "ANANTR", "ANTON", "BLONP", "BOLID" })[new Random().Next(5)], Freight = 2.1 * x, OrderDate = DateTime.Now.AddDays(-x), }).ToList(); } public class Order { public int? OrderID { get; set; } public string CustomerID { get; set; } public DateTime? OrderDate { get; set; } public double? Freight { get; set; } } } ```
Now, run the application and you will get output like in the following image.
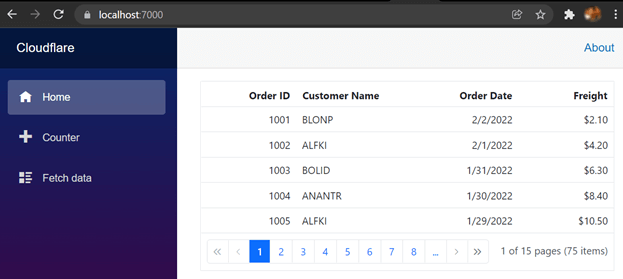
Integrating Syncfusion Blazor DataGrid Component in the WebAssembly App
## Push the Blazor WebAssembly app to a GitHub repository
Let’s see how to push our Blazor WebAssembly app to the GitHub repository and then deploy it in Cloudflare Pages.
I hope you have a fundamental understanding of git. If you are new to git, you can refer to this [handbook](https://docs.github.com/en/get-started/using-git/about-git)
.
Even if you are not well-versed in git, you can simply follow these steps:
1. Create an account on [GitHub](https://github.com/) .
2. Then, install [Git](https://git-scm.com/downloads) on your local machine.
3. Finally, run the following commands in the location of the web app on your local machine. | dotnet new gitignore git init git add -A git commit -m "Initial commit" git remote add origin https://github.com/yourgithubusername/githubrepo.git git branch -M main git push -u origin main | | --- |
**Note:** For more details, check out the [GitHub repository created with the Blazor WASM app demo](https://github.com/SyncfusionExamples/datagrid-in-wasm-app-for-cloudflare-hosting)
.
## Deploy the Blazor WebAssembly app in Cloudflare using the GitHub repository
Now, we have everything ready to deploy. Let’s go ahead and see the actual deploying process:
1. Create an account in [Cloudflare](https://www.cloudflare.com/) (a free account is enough).
2. Log into the [dashboard](https://dash.cloudflare.com/) of Cloudflare and click on the **Create Project** button in the ** Pages section.** Refer to the following image.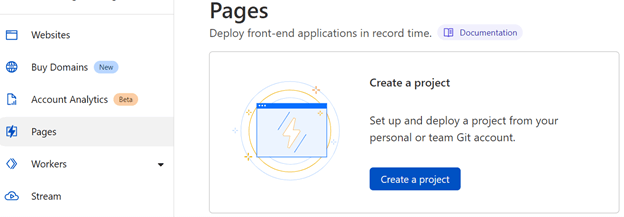
3. On the next page, add your GitHub account and select your repository. Then, click **Begin Setup**.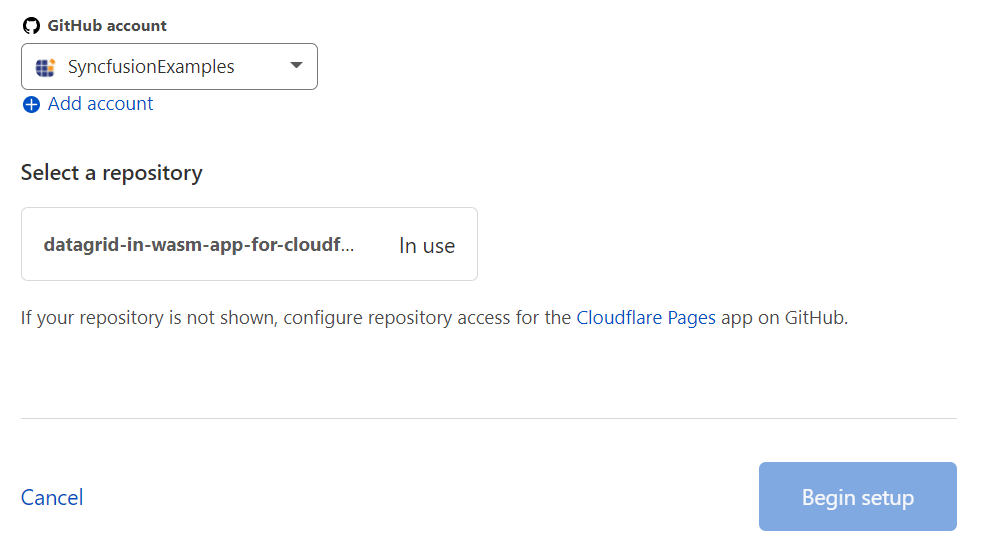
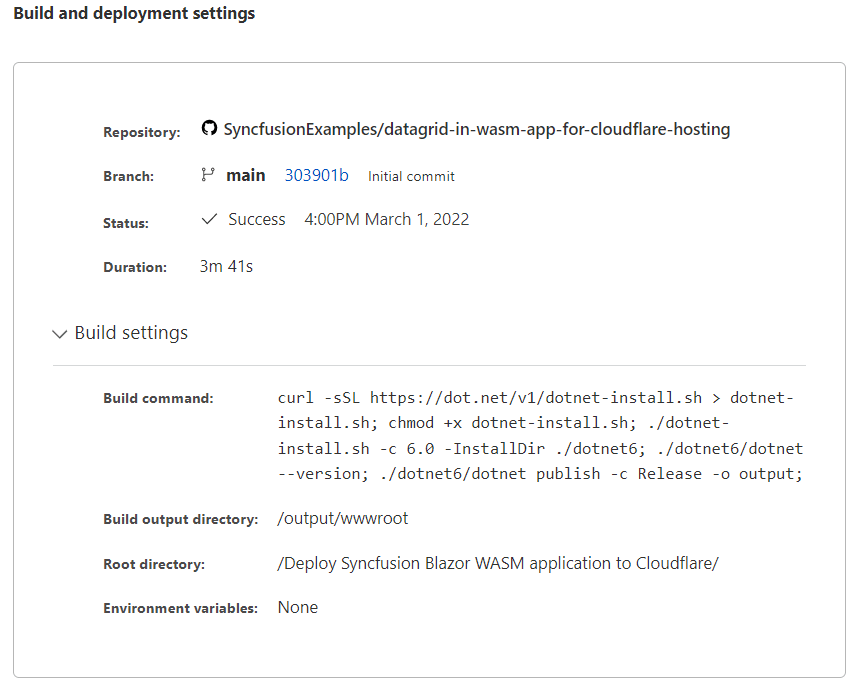
4. On the next page, fill in the **Project name** text box. The project name will be the name for your hosted link. Then, under the ** Build Settings**, fill in the ** Build Command** text box with the following commands and the ** Build output directory** text box with ** output/wwwroot**. Click ** Save and Deploy**. | curl -sSL https://dot.net/v1/dotnet-install.sh > dotnet-install.sh; chmod +x dotnet-install.sh; ./dotnet-install.sh -c 6.0 -InstallDir ./dotnet6; ./dotnet6/dotnet --version; ./dotnet6/dotnet publish -c Release -o output; | | --- | Refer to the following images. 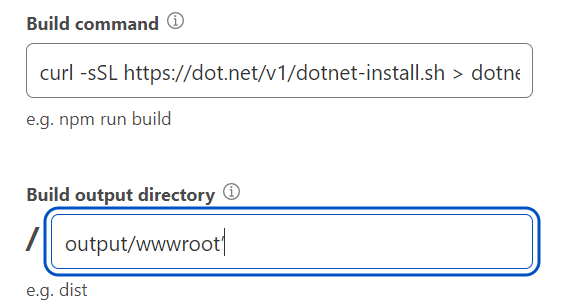
**Note:** Give the WASM app’s root directory location in the ** Path** text box if the GitHub repository’s root directory is not the same as the app’s root directory. For example, I have given the path ** Deploy Syncfusion Blazor WASM application to Cloudflare/Cloudflare/** for my [GitHub repository](https://github.com/SyncfusionExamples/datagrid-in-wasm-app-for-cloudflare-hosting)
.
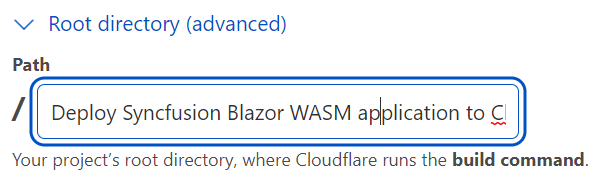That’s all the steps you need. Now, you can see deployment is initializing on your screen. Once it is completed, you will be provided with the hosted link.
Refer to the following images.
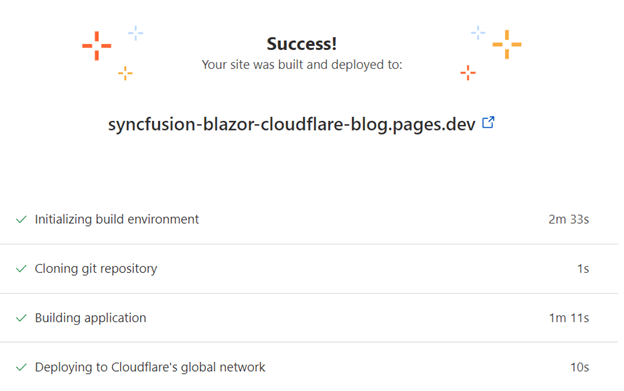
Deploying Blazor WebAssembly App in Cloudflare
## GitHub reference
Check out the demo to [Deploy a Blazor WebAssembly app in Cloudflare in GitHub](https://github.com/SyncfusionExamples/datagrid-in-wasm-app-for-cloudflare-hosting)
and on the [web](https://syncfusion-blazor-cloudflare-blog.pages.dev/)
.
## Conclusion
Thanks for reading! In this blog, we have seen how to deploy the Blazor WebAssembly app in Cloudflare. Since Cloudflare Pages is integrated with GitHub, deployment is much easier for developers. In fact, only the first deployment is a manual process. After that, every change to our repository will be automatically deployed by Cloudflare Pages. Try out the steps in this blog and leave your feedback in the comments section below!
If you would like to try Syncfusion’s Blazor components, you can download our [free trial](https://www.syncfusion.com/downloads/blazor/confirm)
. Also, check out our [Syncfusion Blazor components online demos](https://blazor.syncfusion.com/demos/datagrid/overview?theme=bootstrap5)
and [documentation](https://blazor.syncfusion.com/documentation/introduction)
for a detailed explanation and the facts you need to proceed further.
You can contact us through our [support forum](https://www.syncfusion.com/forums)
, [support portal](https://support.syncfusion.com/)
, or [feedback portal](https://www.syncfusion.com/feedback)
. We are always happy to assist you!
## Related blogs
- [A Full-Stack Web App Using Blazor WebAssembly and GraphQL: Part 1](https://www.syncfusion.com/blogs/post/a-full-stack-web-app-using-blazor-webassembly-and-graphql-part-1.aspx)
- [A Full-Stack Web App Using Blazor WebAssembly and GraphQL: Part 2](https://www.syncfusion.com/blogs/post/a-full-stack-web-app-using-blazor-webassembly-and-graphql-part-2.aspx)
- [Create an Org Chart to Elegantly Visualize Hierarchical Data in Blazor WebAssembly](https://www.syncfusion.com/blogs/post/create-an-org-chart-to-elegantly-visualize-hierarchical-data-in-blazor-webassembly.aspx)
- [Simple Steps to Upload Files to Azure Blob Storage in Blazor App](https://www.syncfusion.com/blogs/post/simple-steps-to-upload-files-to-azure-blob-storage-in-blazor-app.aspx)