---
title: "Dynamically Generate and Integrate GitHub-Like User Avatars"
published_at: "2018-08-16T11:30:00+00:00"
modified_at: "2024-11-21T12:31:41+00:00"
url: "https://www.syncfusion.com/blogs/post/dynamically-generate-and-integrate-github-like-default-user-avatar"
excerpt: "Avatars are icons, initials, or figures that represent a person. They are usually provided in popular media formats like images, SVG, font icons, letters, or words. In applications like Gmail, StackOverflow, GitHub, and others, users are represented using Identicons, which..."
taxonomy_category:
- "Development"
- "Essential JS 2"
- "Essential Studio"
- "Syncfusion"
- "TypeScript"
taxonomy_post_tag:
- "avatar"
- "badge"
- "Essential JS 2"
- "github profile"
- "gravatar"
- "gravatar image"
- "identicon"
- "profile-picture"
- "stackoverflow profile"
- "user profile"
- "user profile auto generation"
---
# Dynamically Generate and Integrate GitHub-Like User Avatars
[Karthick T](https://www.syncfusion.com/blogs/author/karthickt)

Avatars are icons, initials, or figures that represent a person. They are usually provided in popular media formats like images, SVG, font icons, letters, or words.
In applications like [Gmail](https://www.google.com/gmail/)
, [StackOverflow](https://stackoverflow.com/)
, [GitHub](https://github.com/)
, and others, users are represented using [Identicons](https://en.wikipedia.org/wiki/Identicon)
, which are generally visual representations of hash values of IP addresses, as avatars.
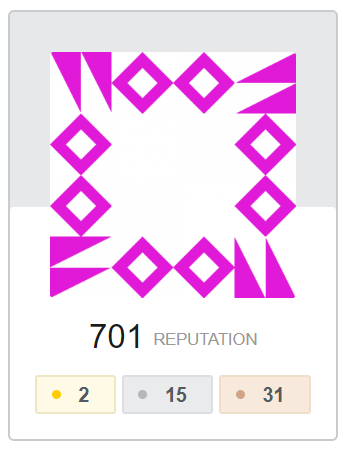 
*Identicon avatars*
In this blog, you will learn how to generate Identicons using [SparkMD5](https://www.npmjs.com/package/spark-md5)
and [Gravatar](https://gravatar.com/)
, and then integrate Identicons into our Essential JS 2 [avatar](https://ej2.syncfusion.com/angular/demos/#/material/avatar/default)
and [badge](https://ej2.syncfusion.com/angular/demos/#/material/badge/default)
components.
## How to generate and integrate Identicons with Essential JS 2 avatar and badge components
First, SparkMD5 applies the [MD5](https://en.wikipedia.org/wiki/MD5)
algorithm to a user’s email ID to generate a hash value. Next, the hash value is sent to [Gravatar](https://gravatar.com/)
to create an Identicon. After that, the Identicons are placed inside the Essential JS 2 avatar component along with notifications using the badge component.
### Set up development environment
You need to set up your development environment before generating avatars. Since the source is published on npm, you can get started with just a couple of commands.
##### Create an Angular application
To create an Angular application, we need to install the [Angular CLI](https://github.com/angular/angular-cli)
globally using the following command.
```
npm install -g @angular/cli
```
Create a new Angular application using the following command.
```
ng new my-app
```
This will download all the files we need and initialize the npm installation.
##### Install SparkMD5
Once you have created the Angular application, you need to install the SparkMD5 package using the following command.
```
npm install spark-md5 --save
```
The –save parameter will save the package in the dependencies of package.json.
##### Generate email hash
The configuration part for generating a hash value is complete. Now, we are going to generate a hash value based on the user’s email ID in the app.component file.
- Render a text box and add a focusout event to get the user’s email ID in the app.component.html file.
```
Email: Email Hash: {{hash}}
```
Here, the **{{hash}}** expression displays the generated hash value.
- Import SparkMD5 in the **app.component.ts** file.
```
import * as SparkMD5 from 'spark-md5';
```
- Generate a hash value using SparkMD5 in the **onFocusout** event of the email input.
```
export class AppComponent implements AfterViewInit {
public hash: string;
constructor() {
}
//Email input focusout event handler
onFocusOut(event: any) {
if (event.target.value) { // Get the textbox value
this.hash = SparkMD5.hash(event.target.value); // Generate hash value
}
}
}
```
#### 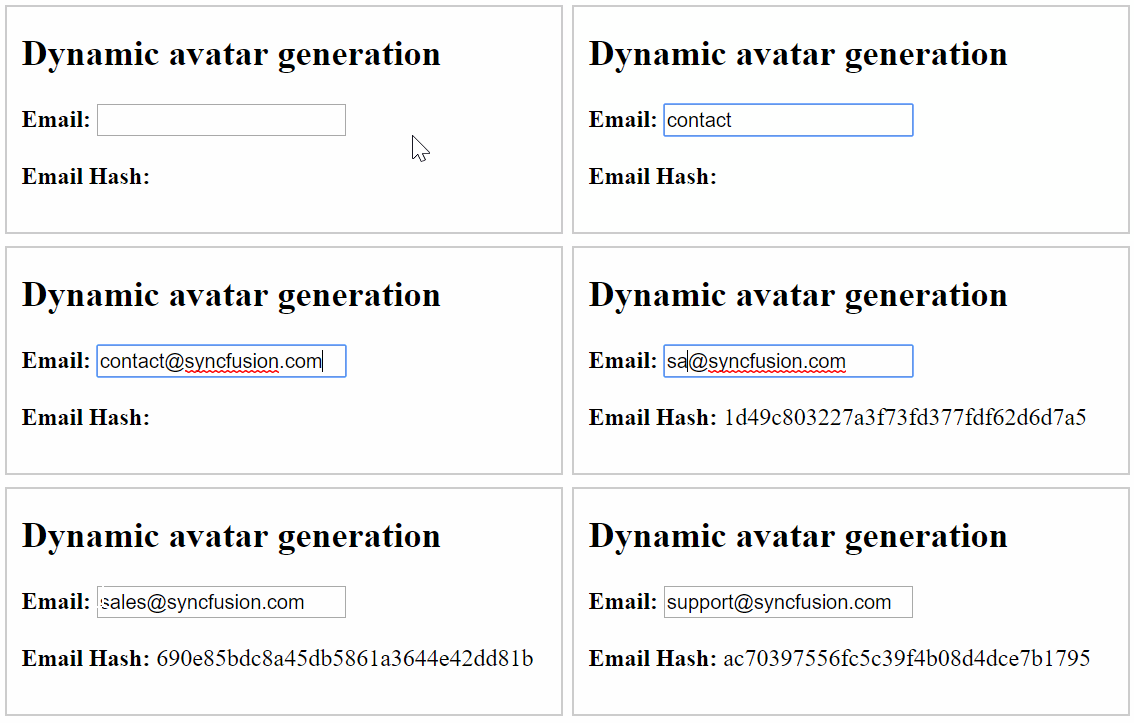
*Email address and generated hash*
#### Generate Identicon using email hash
With the email hash value generated, we now need to create the Identicon by requesting Gravatar along with the email hash. You can use the following code sample to create an Identicon.
```
createIdenticon(emailHash: string) {
this.avatar = 'https://www.gravatar.com/avatar/' + emailHash + '?d=identicon';
}
```
To learn more about avatar generation, refer to the [Gravatar documentation](https://en.gravatar.com/site/implement/images/)
.
If the email address is already registered with [Gravatar.com](https://gravatar.com/)
, then the profile picture for that email address will be returned.
Now, pass the generated email hash value to the above ***createIdenticon***() function to generate the Identicon dynamically.
```
// Email input focusout event handler
onFocusOut(event: any) {
if (event.target.value) { // Get the text box value
this.hash = SparkMD5.hash(event.target.value); // Generate hash value
this.createIdenticon(this.hash); // Create Identicons
}
}
```
#### Integrate avatar component
To integrate the Essential JS 2 avatar component, you need to install the [@syncfusion/ej2-layouts](https://www.npmjs.com/package/@syncfusion/ej2-layouts)
npm package. You can run the following command to install it.
```
npm install @syncfusion/ej2-layouts --save
```
The avatar component is a pure CSS component that doesn’t have any dependencies for rendering. Include the avatar component’s theme alone in the application to use the component.
[src/styles.css]
```
@import '../node_modules/@syncfusion/ej2-layouts/styles/material.css';
```
Place the generated Identicon in an image tag and wrap that inside the avatar component as shown in the following code example.
[src/app/app.component.html]
```
```
Here, the image tag **src** attribute holds the value of the generated Identicon from the previous section.
#### Serve the application
Go to the application directory and launch the server using the following command.
```
ng serve --open
```
Once all the files are compiled successfully, it will serve the site.
The avatar should look something like the following figure.
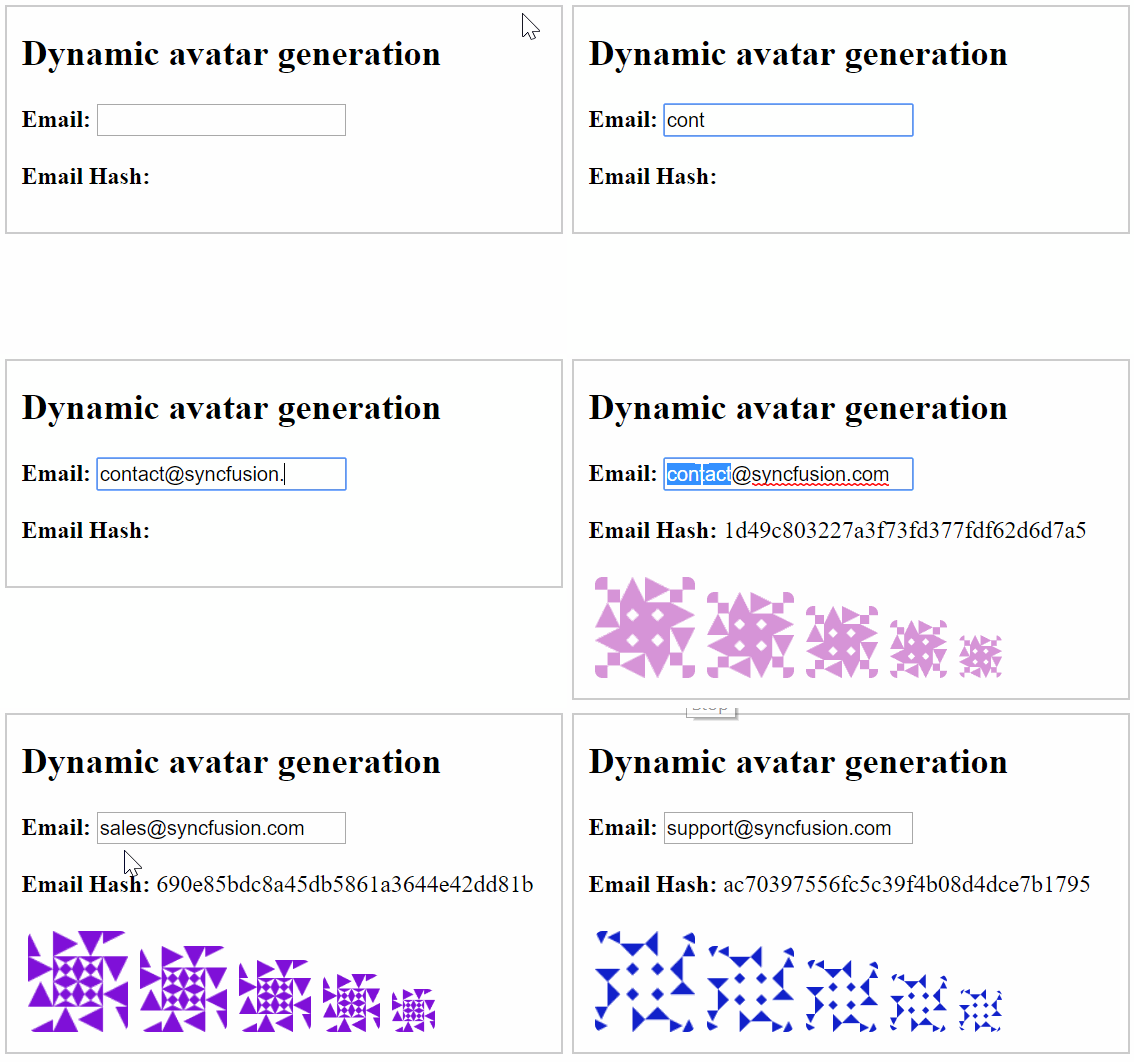
*Avatars generated from email hash*
Edit the entry in the text box to generate a dynamic avatar for the email ID.
In this application, we don’t validate the email input. If we need to, we can include client-side email validation as discussed in this [Angular documentation](https://angular.io/api/forms/EmailValidator)
.
Now we have successfully generated Identicons from [Gravatar.com](https://gravatar.com/)
based on the user’s email and integrated them into our avatar component.
In most applications, the profile picture also displays notification information. You can use our Essential JS 2 [badge](https://ej2.syncfusion.com/angular/documentation/badge/)
component to display such notifications.
#### Integrate badge component
To integrate the badge component, first, you need to install the [@syncfusion/ej2-notifications](https://www.npmjs.com/package/@syncfusion/ej2-notifications)
package. Run the following command to install the package.
```
npm install @syncfusion/ej2-notifications --save
```
Similar to the avatar component, the badge is also a pure CSS component that requires only the badge theme in the application to use the component.
[src/style.css]
```
@import '../node_modules/@syncfusion/ej2-notifications/styles/material.css';
```
You can integrate the badge by wrapping the avatar and the badge as in the following code example.
```
5
```
Next, the Angular CLI recompiles the application and reloads the browser window.
The avatar and badge should look something like this.
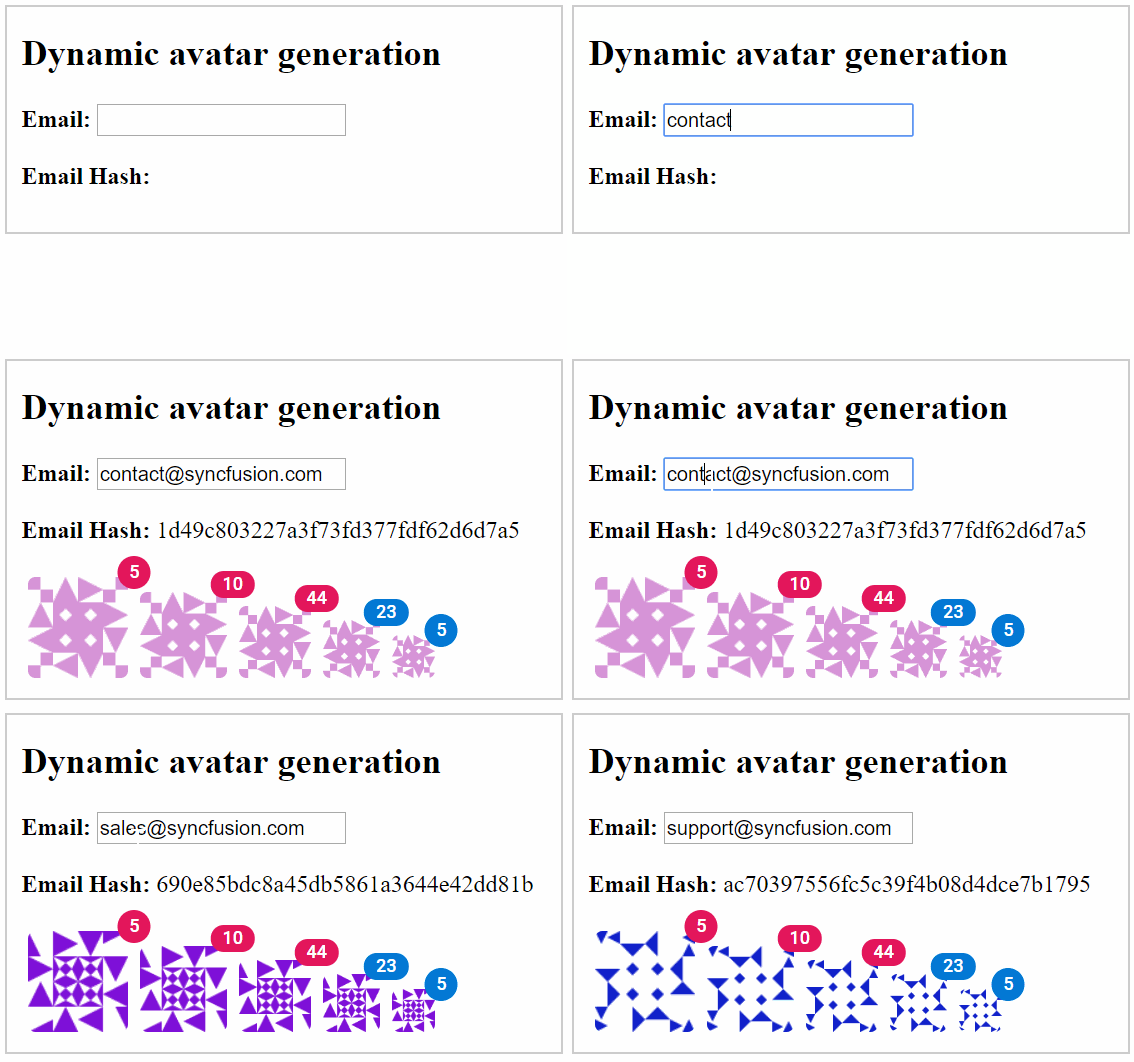
*Avatars with notification badges*
Here we integrated a secondary notification badge to display the notification count. The following badge types are available in the component:
- Primary
- Secondary
- Success
- Danger
- Warning
- Info
- Light
- Dark
Refer to our [documentation](https://ej2.syncfusion.com/angular/documentation/badge/types.html)
to learn more about rendering the different types of badge components.
#### Summary
In this blog, we learned how to generate Identicons dynamically based on a user’s email ID using SparkMD5 and Gravatar, and then integrated the Identicons with the avatar component and displayed a notification count using the badge component.
Feel free to check out the [layouts](https://github.com/syncfusion/ej2-javascript-ui-controls/tree/master/controls/layouts)
and [notification](https://github.com/syncfusion/ej2-javascript-ui-controls/tree/master/controls/notifications)
sources on GitHub, the [sample browser](https://ej2.syncfusion.com/angular/demos/#/material/avatar/default)
, and the [documentation](https://ej2.syncfusion.com/angular/documentation/avatar/)
to explore live demos of the components and their various customization features. Also, be sure to check out the readily runnable [dynamic avatar sample on GitHub](https://github.com/SyncfusionSamples/ej2-avatar-dynamic-generation)
to see just how easy it is to create and configure avatars.
If you have any questions or require clarifications, please let us know in the comments section below. You can also contact us through our [support forum](https://www.syncfusion.com/forums)
or [Direct-Trac](https://www.syncfusion.com/support/directtrac/)
. We are happy to assist you!
*If you like this blog post, we think you’ll also like the following free e-books:*
- [Angular 2 Succinctly](https://www.syncfusion.com/ebooks/angular2_succinctly)
- *[JavaScript Succinctly](https://www.syncfusion.com/ebooks/javascript)*
- *[TypeScript Succinctly](https://www.syncfusion.com/ebooks/typescript)*
- **[WPF Succinctly](https://www.syncfusion.com/ebooks/wpf_succinctly)**
- *[UWP Succinctly](https://www.syncfusion.com/ebooks/uwp_succinctly)*