---
title: "How to Deploy a Spreadsheet Server on Azure App Service Using Visual Studio and Docker"
published_at: "2025-12-11T17:06:25+00:00"
modified_at: "2026-05-18T13:16:51+00:00"
url: "https://www.syncfusion.com/blogs/post/deploy-a-spreadsheet-server-azure-app"
excerpt: "Learn how to deploy a spreadsheet server on Azure App Service using ASP.NET Core and Docker for scalable, cloud-based spreadsheet processing."
taxonomy_category:
- "ASP.NET Core"
- "Azure"
- "Cloud Deployment"
- "Docker image"
- "Excel"
- "React"
- "Spreadsheet"
taxonomy_post_tag:
- "ASP.NET Core"
- "Azure"
- "Cloud Deployment"
- "Docker"
- "Spreadsheet"
---
# How to Deploy a Spreadsheet Server on Azure App Service Using Visual Studio and Docker
[Parthasarathy Ranjan](https://www.syncfusion.com/blogs/author/parthasarathy-ranjan)

**TL;DR:** Deploy a Spreadsheet Server on Azure App Service using ASP.NET Core and Docker to enable secure, scalable Spreadsheet processing in the cloud. This guide covers setup, configuration, and integration steps for modern web applications.
Deploying [Syncfusion® Spreadsheet Server](https://www.syncfusion.com/spreadsheet-editor-sdk/react-spreadsheet-editor)
on [Azure App Service](https://learn.microsoft.com/en-us/azure/app-service/overview)
provides a secure and scalable solution for processing Excel files in the cloud. In this blog, we will explore two practical approaches to deploying a [Syncfusion Spreadsheet Server](https://github.com/SyncfusionExamples/EJ2-Spreadsheet-WebServices/tree/main/WebAPI)
on Azure:
1. **Visual Studio approach:** Directly publish your **ASP.NET Core Web API** project to Azure App Service.
2. **Azure CLI approach:** Deploy the official [Syncfusion Spreadsheet Docker image](https://hub.docker.com/r/syncfusion/spreadsheet-server) for containerized hosting in Azure App Service.
By integrating server-side features such as open or save operations with the client-side React Spreadsheet component, you can ensure seamless collaboration and high performance for modern web applications.
## Why deploy Syncfusion Spreadsheet Server on Azure App Service?
When building modern web applications that handle spreadsheet operations, hosting your server on Azure App Service offers several advantages:
- **Scalability**: Easily manage growing user demands without worrying about manual server scaling.
- **High availability**: Keep your Spreadsheet services running 24/7 with Azure’s robust infrastructure.
- **Security**: Protect sensitive Spreadsheet data using Azure’s built-in security features.
- **Global access**: Enable low-latency collaboration for users across different regions.
- **Simplified maintenance**: Combining Docker with Azure makes updates and patches effortless.
## Step-by-Step guide: Publish ASP.NET Core Spreadsheet Server to Azure App Service using Visual Studio
Deploying your Spreadsheet ASP.NET Core Web API to Azure App Service is easier than you think! Follow these simple steps to get your server live and ready for client-side integration.
### Prerequisites
Before you begin, make sure you have:
- **Visual Studio 2022** or later is installed.
- [.NET 8.0](https://dotnet.microsoft.com/en-us/download/dotnet/8.0) SDK or later installed.
- An active [Azure subscription](https://azure.microsoft.com/en-gb/) with App Services access.
- The [Spreadsheet Web API project](https://github.com/SyncfusionExamples/EJ2-Spreadsheet-WebServices/tree/main/WebAPI) repository cloned locally.
### Step 1: Build your project
First, open your [Web API](https://github.com/SyncfusionExamples/EJ2-Spreadsheet-WebServices/tree/main/WebAPI)
solution in **Visual Studio** and select Build → Build Solution to ensure the project compiles successfully without any errors. This step confirms that your application is ready for deployment.
### Step 2: Open the publish wizard
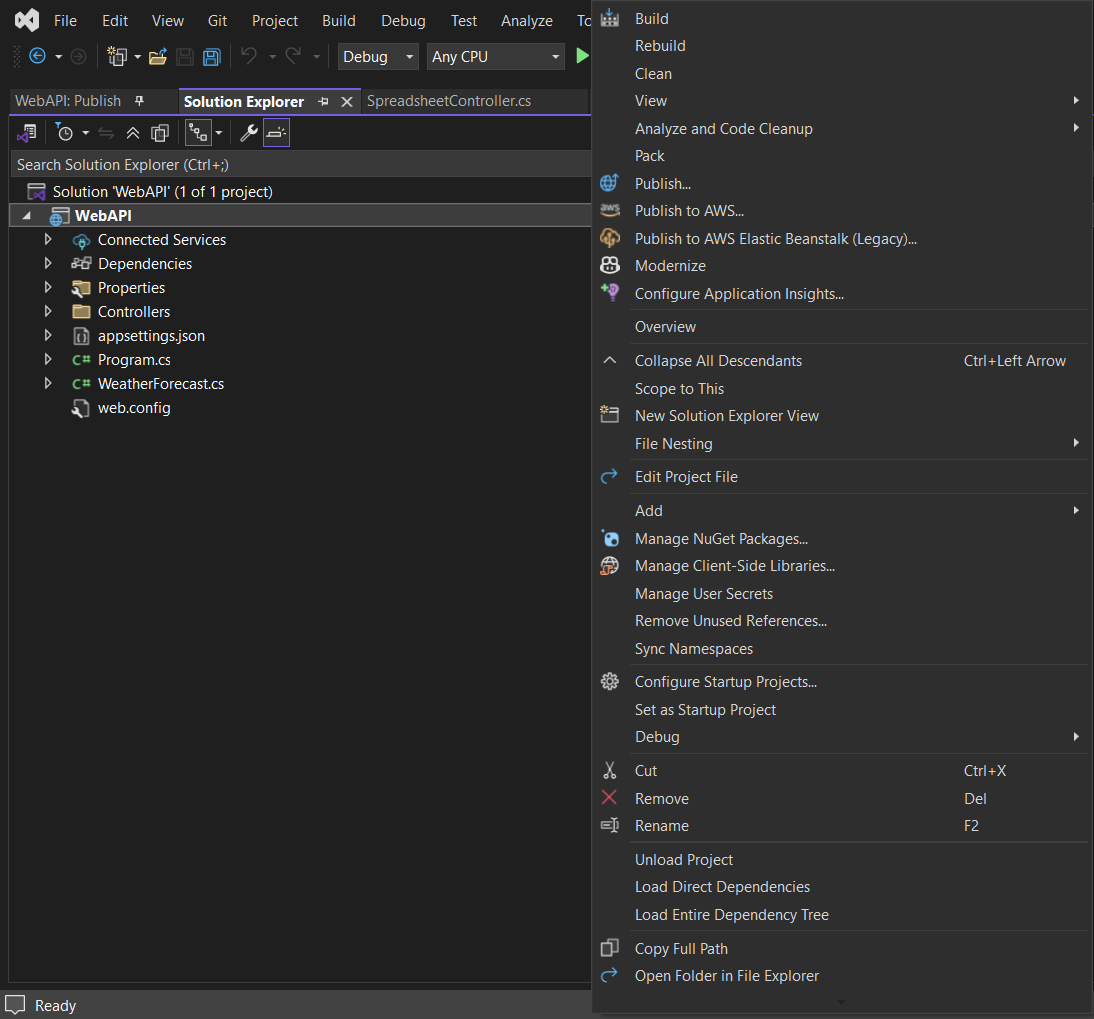
In **Solution Explorer**, right-click your project and choose Publish, as shown below.
### Step 3: Choose Azure as the target
In the **Pick a publish target** dialog, select**Azure** as your deployment target, as shown below.
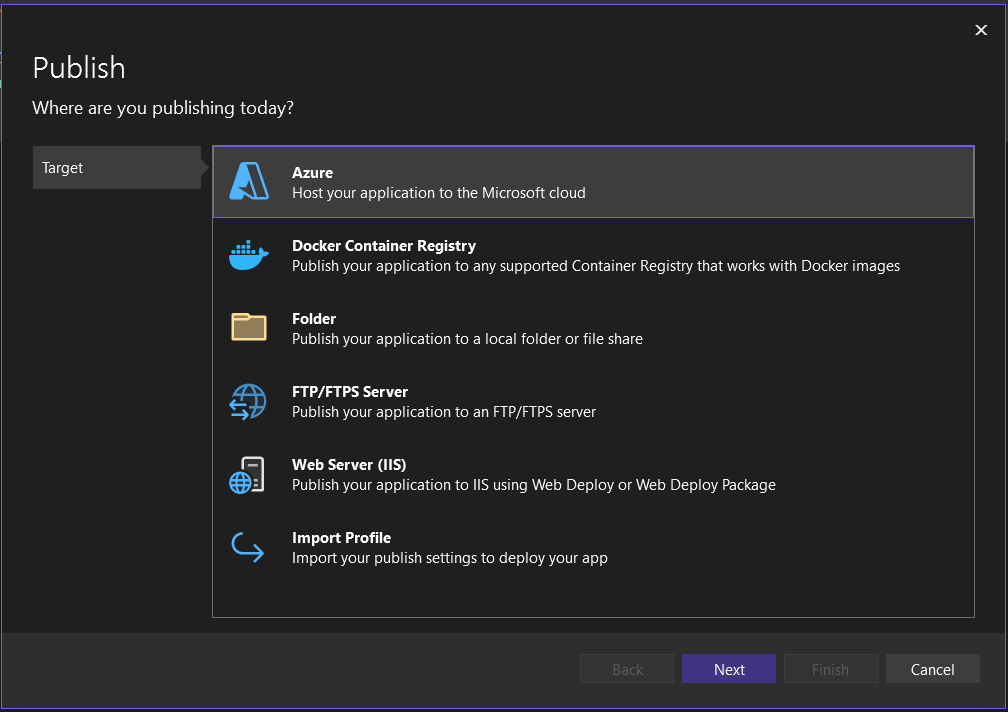
This ensures your application will be hosted on Microsoft’s cloud platform.
### Step 4: Select Azure App Service
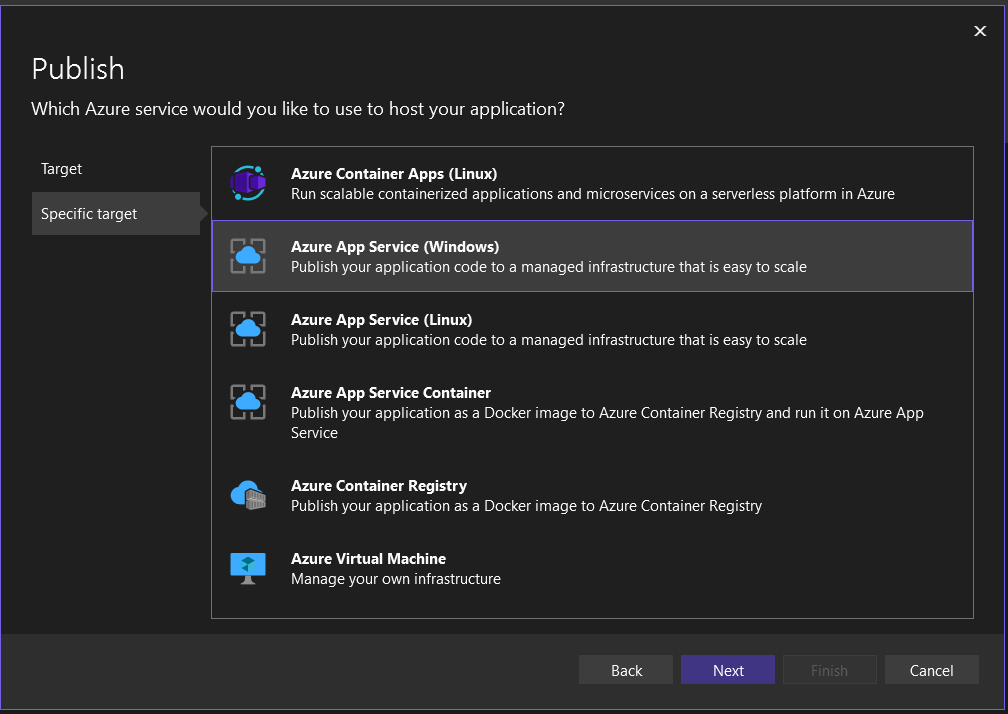
After selecting Azure, choose **Azure App Service** under the target options. This service provides a fully managed environment for hosting web applications.
### Step 5: Sign in and create app service
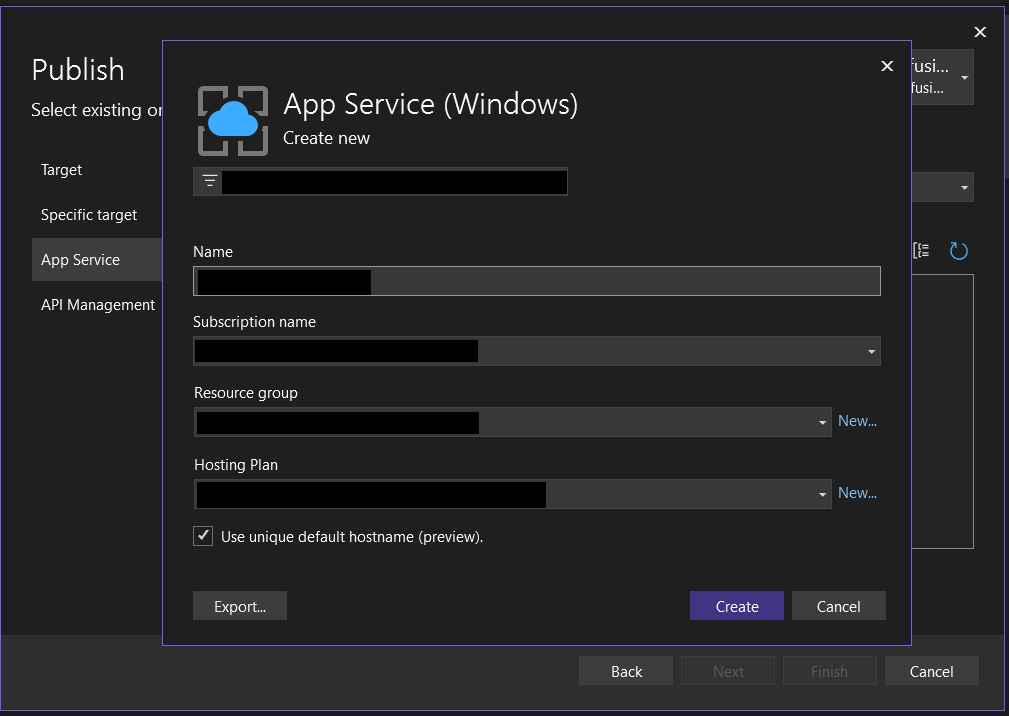
Now, log in using your **Azure credentials**. Once signed in, create a new App Service your credentials and configure essential settings such as the ** resource group** and ** app name**.
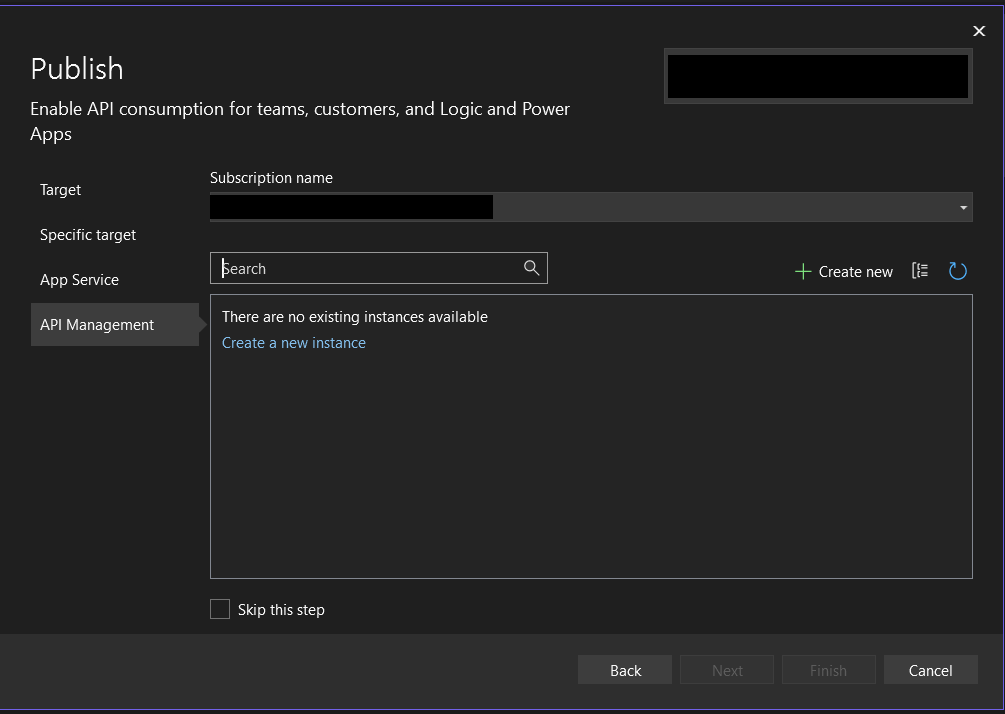
### Step 6: Skip API management (optional)
If API Management is not required, you can skip this step and proceed with publishing.
### Step 7: Deploy
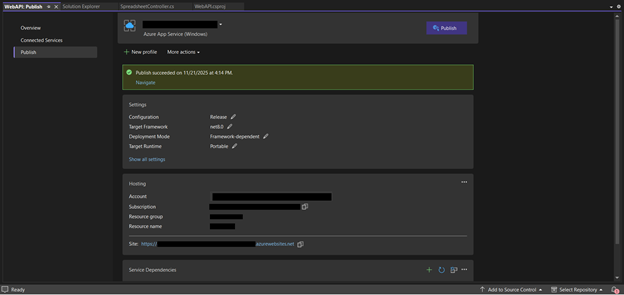
Finally, click **Publish**. Visual Studio will deploy your app to Azure App Service. Once the process completes, your API will be live at: ** https:// XXXXXXXXXX.azurewebsites.net**.
### Step 8: Connect client-side Spreadsheet
With your server running, verify that it supports import and export operations by testing these endpoints:
- **Open file:** https:// XXXXXXXXXX.azurewebsites.net/api/spreadsheet/open.
- **Save file:** https:// XXXXXXXXXX.azurewebsites.net/api/spreadsheet/save.
Next, use these service URLs into your React Spreadsheet component.
```
```
That’s it! Your Spreadsheet Web API is live on Azure App Service and ready to power your client-side editor. Want to explore more features? Check out our [documentation](https://help.syncfusion.com/document-processing/excel/spreadsheet/react/overview)
.
## Step-by-Step guide: Deploy Spreadsheet Server Docker image to Azure App Service with Azure CLI
If you’re not working with **.NET** or prefer a containerized approach, you can deploy a [Syncfusion Spreadsheet Docker image](https://hub.docker.com/r/syncfusion/spreadsheet-server)
directly to **Azure App Service** using ** Azure CLI**. This method allows you to host the server without writing any **.NET code**, making it ideal for developers who want a quick and scalable solution.
Before deploying to Azure, you can test and run the [Spreadsheet Server](https://hub.docker.com/r/syncfusion/spreadsheet-server)
Docker image locally. Check out our detailed [guide](https://www.syncfusion.com/blogs/post/spreadsheet-docker-image-deployment)
for local setup.
Now, let’s walk through the deployment process step by step.
### Prerequisites
Before you start, ensure you have:
- [Docker](https://docs.docker.com/desktop/) and [Azure CLI](https://learn.microsoft.com/en-us/cli/azure/install-azure-cli?view=azure-cli-latest) installed (based on your operating system).
- An active [Azure subscription](https://azure.microsoft.com/en-gb/) with permissions to create App Services.
### Step 1: Log in to Azure
First, open your terminal and log in to Azure using the command below.
```
az login
```
This step authenticates your Azure CLI session.
### Step 2: Create a resource group
Next, create a resource group with the following command in your preferred location.
```
az group create --name < your-app-name> --location
```
**Note:** Replace **``**, **`< your-selected-region >`**, ``, and `` with your actual application name, deployment region, resource group, and app service plan.
### Step 3: Create an app service plan
Define the hosting plan for your container using the command below.
```
az appservice plan create --name --resource-group < your-resource-group> --sku S1 --is-linux
```
This command creates an **App Service plan** in the ** standard pricing tier (S1)** and ensures it runs on ** Linux containers** with the `--is-linux` flag. Both settings are essential for deploying your Spreadsheet Server Docker image successfully.
### Step 4: Create the docker-compose.yml file
Next, define your container configuration in a `docker-compose.yml` file. This file specifies the container name, image, and environment variables for the Spreadsheet Server:
```
version: '3.4'
services:
spreadsheet-server:
image: syncfusion/spreadsheet-server
environment:
# Provide your license key for activation
SYNCFUSION_LICENSE_KEY: YOUR_LICENSE_KEY
ports:
- "6002:8080"
```
**Note:** Replace `YOUR_LICENSE_KEY` with your valid Syncfusion license key.
### Step 5: Create a Docker compose app
Now, deploy the containerized app to Azure App Service using the following command.
```
az webapp create --resource-group --plan < your-app-service-plan> --name --multicontainer-config-type compose --multicontainer-config-file docker-compose.yml
```
This command creates a web app that runs your Spreadsheet Server Docker container using the configuration defined in the `docker-compose.yml` file.
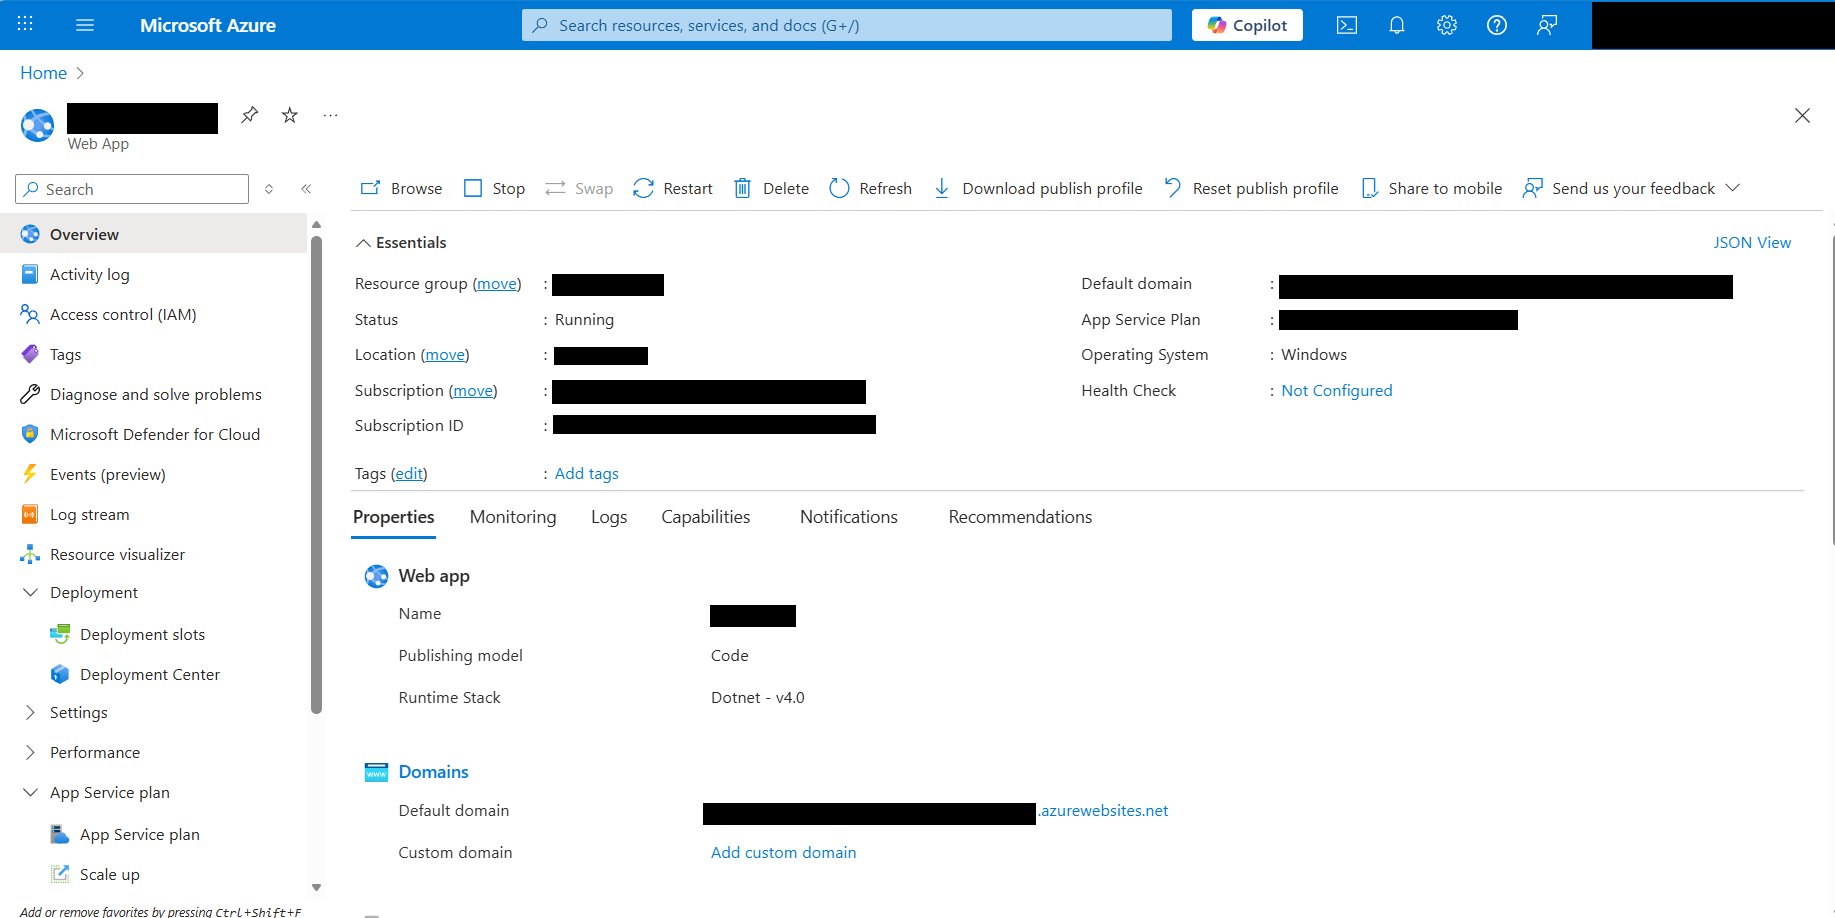
### Step 6: Browse your app
Once deployed, your app will be live at **https://XXXXXXXXXX.azurewebsites.net**.
### Step 7: Connect client-side Spreadsheet
Finally, verify that your server supports **import** or ** export** operations by testing these endpoints:
- **Open file:** https:// XXXXXXXXXX.azurewebsites.net/api/spreadsheet/open.
- **Save file:** https:// XXXXXXXXXX.azurewebsites.net/api/spreadsheet/save.
Use these URLs in your client-side React Spreadsheet component’s [openUrl](https://ej2.syncfusion.com/react/documentation/api/spreadsheet/index-default#openurl)
and [saveUrl](https://ej2.syncfusion.com/react/documentation/api/spreadsheet/index-default#saveurl)
properties as shown below:
```
```
That’s it! You’ve successfully deployed your Spreadsheet Docker image to Azure App Service using Azure CLI. Now, perform the import or export actions in the Spreadsheet component as shown in the GIF below. This demonstrates how the client-side integration works with the deployed server endpoints.
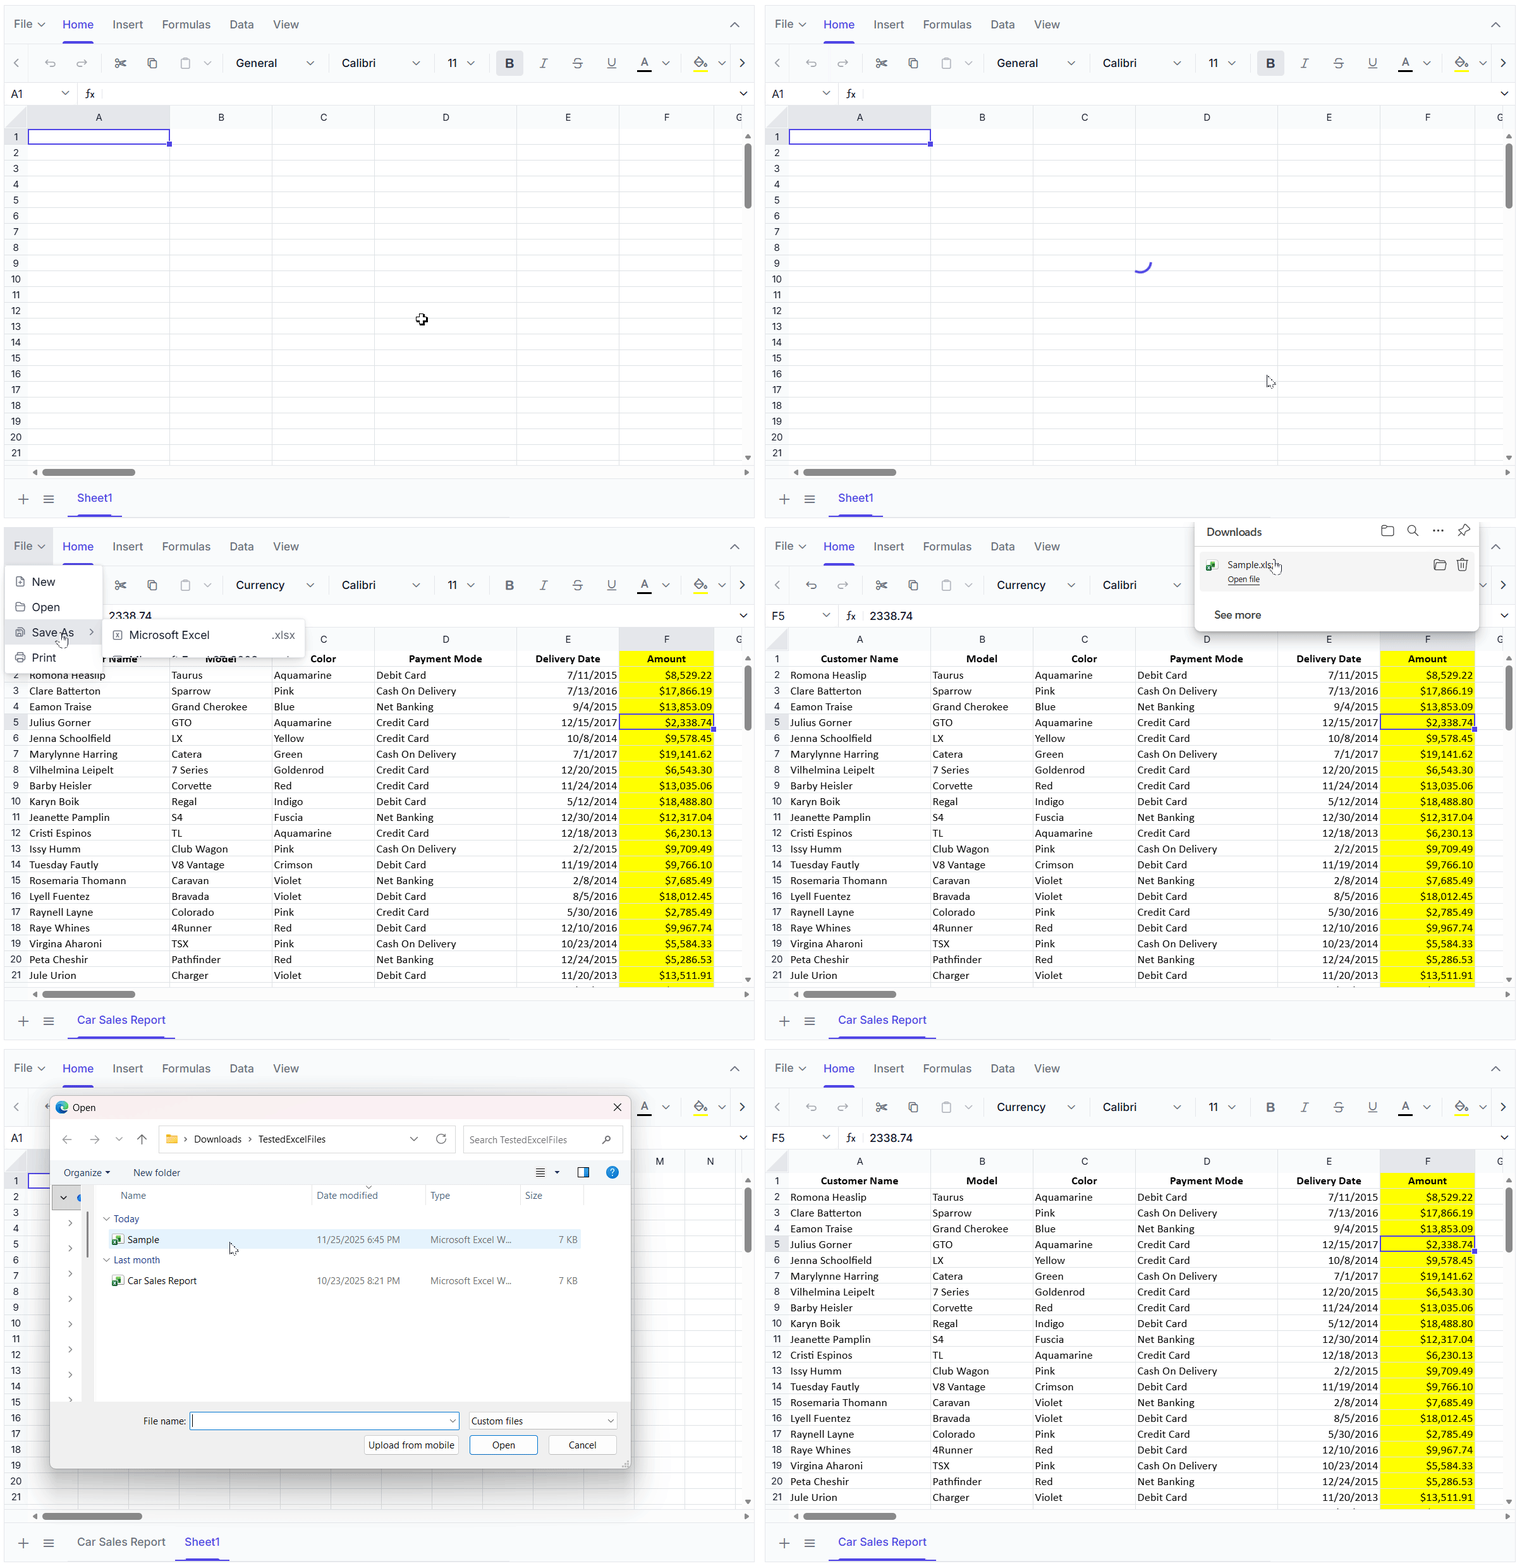
Open and save with the deployed Azure App Service URL
## Live demo
Run the demo on [StackBlitz](https://stackblitz.com/edit/react-2ynajmp1?file=index.js)
, no setup required.
## Conclusion
Thanks for reading! We’ve explored two practical ways to deploy a Spreadsheet Server on Azure App Service, publishing an **ASP.NET Core Web API** through**Visual Studio** and hosting a ** Docker image**using** Azure CLI**.
Both approaches enable seamless **open** or ** save operations** and integrate effortlessly with [Syncfusion React Spreadsheet](https://www.syncfusion.com/spreadsheet-editor-sdk/react-spreadsheet-editor)
, delivering advanced features such as **real-time editing**, ** formula calculations**, and ** smooth import**/** export.** These capabilities make ** Azure App Service**an excellent choice for enterprise-grade applications.
Additionally, Syncfusion’s **Spreadsheet Editor SDK** is available across multiple platforms, including [Blazor](https://www.syncfusion.com/spreadsheet-editor-sdk/blazor-spreadsheet-editor)
, [Angular](https://www.syncfusion.com/spreadsheet-editor-sdk/angular-spreadsheet-editor)
, [ASP.NET Core](https://www.syncfusion.com/spreadsheet-editor-sdk/asp-net-core-spreadsheet-editor)
**,**[JavaScript](https://www.syncfusion.com/pdf-viewer-sdk/asp-net-mvc-pdf-viewer)
, [ASP.NET MVC](https://www.syncfusion.com/spreadsheet-editor-sdk/asp-net-mvc-spreadsheet-editor)
, [Vue](https://www.syncfusion.com/spreadsheet-editor-sdk/vue-spreadsheet-editor)
, [WPF](https://www.syncfusion.com/spreadsheet-editor-sdk/wpf-spreadsheet-editor)
, [WinForms](https://www.syncfusion.com/spreadsheet-editor-sdk/winforms-spreadsheet-editor)
, and [UWP](https://www.syncfusion.com/spreadsheet-editor-sdk/uwp-spreadsheet-editor)
, and [Document SDK libraries](https://www.syncfusion.com/spreadsheet-editor-sdk)
.
If you are already a Syncfusion user, you can download the setup from the [license and downloads](https://www.syncfusion.com/account/downloads)
page. Otherwise, you can download a free [30-day trial](https://www.syncfusion.com/downloads/)
.
You can also contact us through our [support forum](https://www.syncfusion.com/forums)
, [support portal](https://support.syncfusion.com/)
, or [feedback portal](https://www.syncfusion.com/feedback)
for queries. We are always happy to assist you!
## Reference links
- [React Spreadsheet getting started with Next.js](https://help.syncfusion.com/document-processing/excel/spreadsheet/react/nextjs-getting-started)
- [Open and save in the React Spreadsheet component](https://help.syncfusion.com/document-processing/excel/spreadsheet/react/open-save)
- [Docker image deployment in the React Spreadsheet component](https://help.syncfusion.com/document-processing/excel/spreadsheet/react/docker-deployment)
- [Performance practices in the React Spreadsheet component](https://help.syncfusion.com/document-processing/excel/spreadsheet/react/performance-best-practices)
- [How to deploy ASP.NET Core Spreadsheet Web API Service to AWS Lambda](https://support.syncfusion.com/kb/article/17184/how-to-deploy-aspnet-core-spreadsheet-web-api-service-to-aws-lambda)
## Related Blogs
[How to Deploy Syncfusion Spreadsheet Docker Image with ASP.NET Core 8.0](https://www.syncfusion.com/blogs/post/spreadsheet-docker-image-deployment)
[Smooth Scrolling, Fast Saves: Boost React Spreadsheet Performance](https://www.syncfusion.com/blogs/post/boost-react-spreadsheet-performance)
[Custom Formulas in Spreadsheet: A Practical Guide for React Developers](https://www.syncfusion.com/blogs/post/custom-formulas-in-spreadsheet)
[How to Deploy Spreadsheet Server on AWS EKS with Docker for React](https://www.syncfusion.com/blogs/post/spreadsheet-server-eks-deployment)