---
title: "Create Visual Studio-like Docking Windows in WPF"
published_at: "2019-06-10T11:00:33+00:00"
modified_at: "2026-02-02T07:39:24+00:00"
url: "https://www.syncfusion.com/blogs/post/create-visual-studio-like-docking-windows-in-wpf"
excerpt: "Learn how to build Visual Studio‑style docking windows in WPF using Syncfusion’s Docking Manager. Create flexible, customizable layouts with drag, dock, and tabbed interfaces."
taxonomy_category:
- ".NET"
- "WPF"
taxonomy_post_tag:
- "DockingManager for WPF"
- "Visual Studio"
- "WPF"
---
# Create Visual Studio-like Docking Windows in WPF
[Jegan R](https://www.syncfusion.com/blogs/author/jeganr)

As .NET developers, we have all worked in [Visual Studio](https://visualstudio.microsoft.com/)
and at some point may have wondered about the docking windows that hold the Solution Explorer, Code Window, Toolbox, and others. Visual Studio-style docking windows allow you to resize, move, and change the behavior of windows to create a layout that suits various development models. The Syncfusion [docking manager](https://www.syncfusion.com/wpf-ui-controls/docking)
allows users to create their own layouts by just dragging and dropping windows to the desired positions. Users can persist the layout with built-in serialization options. Every part of the docking windows can be customized, and a variety of built-in themes are included for changing the window appearance.
In this blog post, we will demonstrate how to create Visual Studio-like docking windows in a WPF application and customize their layouts.
## Overview
The docking manager component lets you add Visual Studio-style docking windows and tabbed document interfaces to your application. It allows the interactive dragging of docking windows around the screen to make them float over any location. As in Visual Studio, the docking manager offers different kinds of windows:
- Dock
- Float
- Document
- Autohidden
## Getting Started with The Docking Manager
Configure the WPF application for the docking manager by following these steps:
1. In Visual Studio, create a new WPF project. For our demonstration, we are going to name it **VisualStudioLikeDockWindow**.
2. Install [Syncfusion.Tools.WPF](https://www.nuget.org/packages/Syncfusion.Tools.WPF/) NuGet package to the project.
3. Add the XML namespace with a prefix in XAML. Here we used **syncfusion** as a prefix for the namespace.``` ```
4. Add **DockingManager** to the window using the namespace prefix.``` ```
5. Add child controls to create your docking window. The child controls can be any **FrameworkElement**. In this example, shown in the next step, we have added four ** ContentControl** as children.
6. Set headers for the docking windows using the attached property **Header** of the docking manager.``` ```
7. Set the **VisualStyle** of the application to one of the visual styles. Here we set it to ** VS2010**. A complete list of the available styles can be found in [our documentation](https://help.syncfusion.com/wpf/docking/styling-and-templates) .``` ```
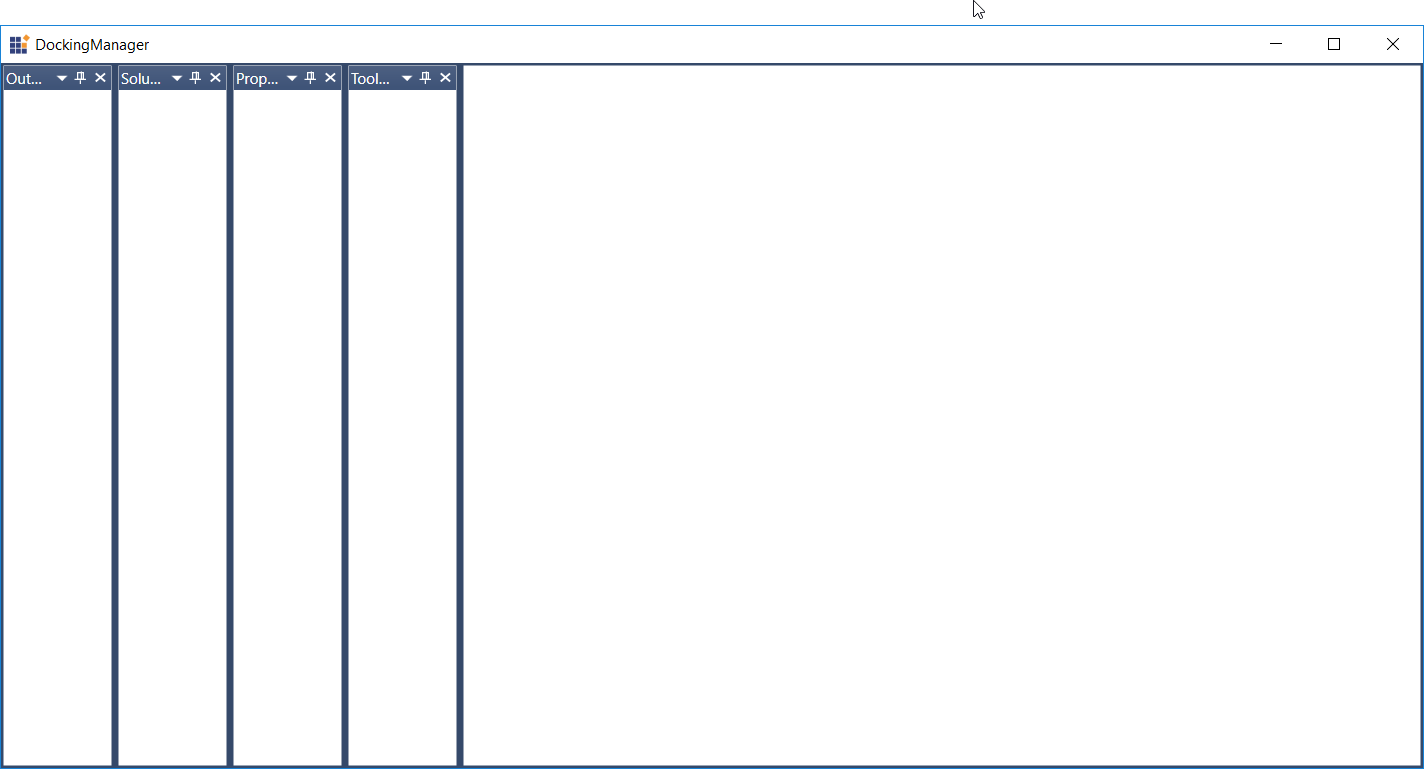
*Docking Windows before arranging*
## Arranging and Docking Windows
Like the Toolbox and Solution Explorer windows in Visual Studio, customers expect to dock windows at any side of a container. The docking manager allows users to dock the windows anywhere in the docking manager by setting the **SideInDockMode** attached property.
The docking manager also introduces the attached property **TargetNameInDockedMode** to decide whether a window is to be docked relative to the docking manager or another docking window. Arrange the child windows as tabbed windows, by using the tabbed option in SideInDockMode.
**DesiredHeightInDockedMode** and ** DesiredWidthInDockedMode** help control the size of the docking windows.
Here we are going to add tabs to the Solution Explorer and Output children of **DockingManager**.
```
```
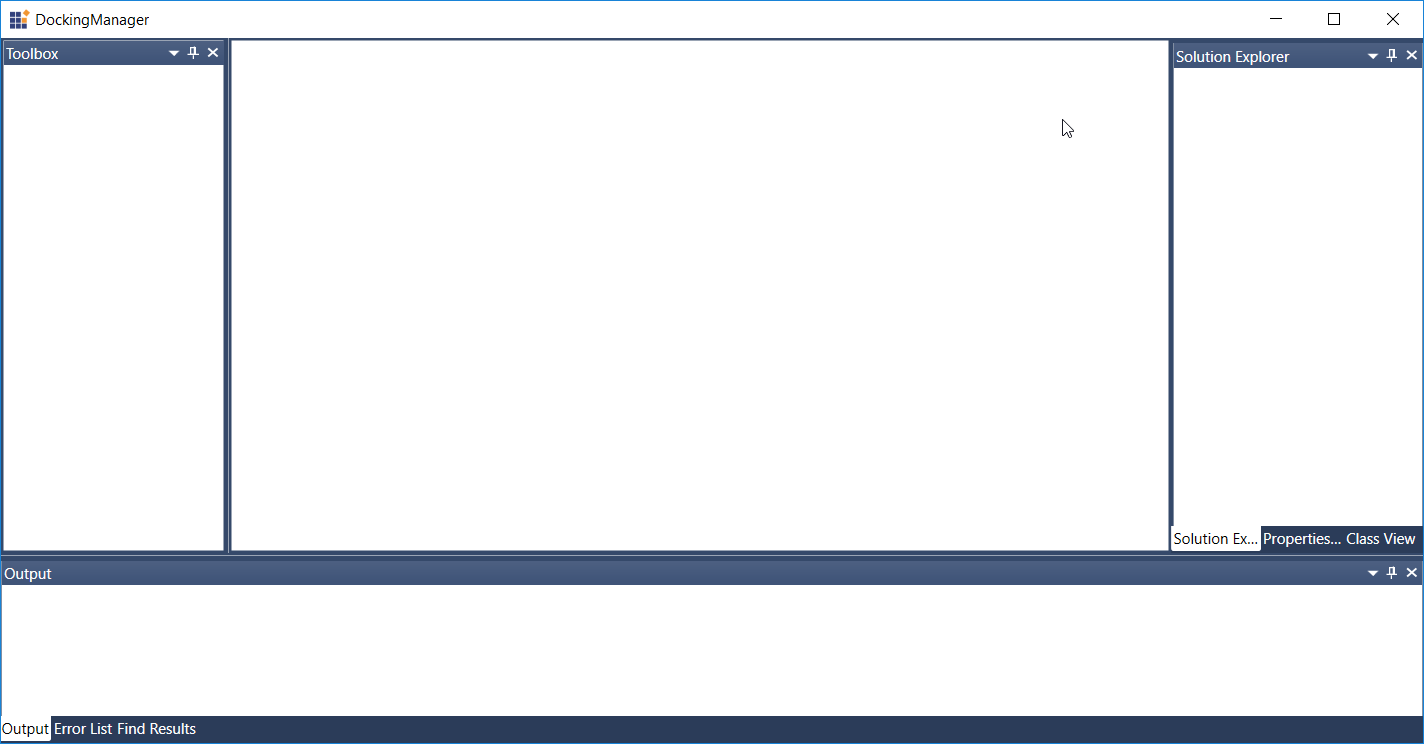
*Docking Windows after arranging*
## Configure Document Windows
Configure document states to build a Visual Studio-like tabbed document. Add document windows just as you would docking windows. Additionally, set the value of the **UseDocumentContainer** property as ** True** and set ** Document** as the value of the ** State** property of child windows.
```
```
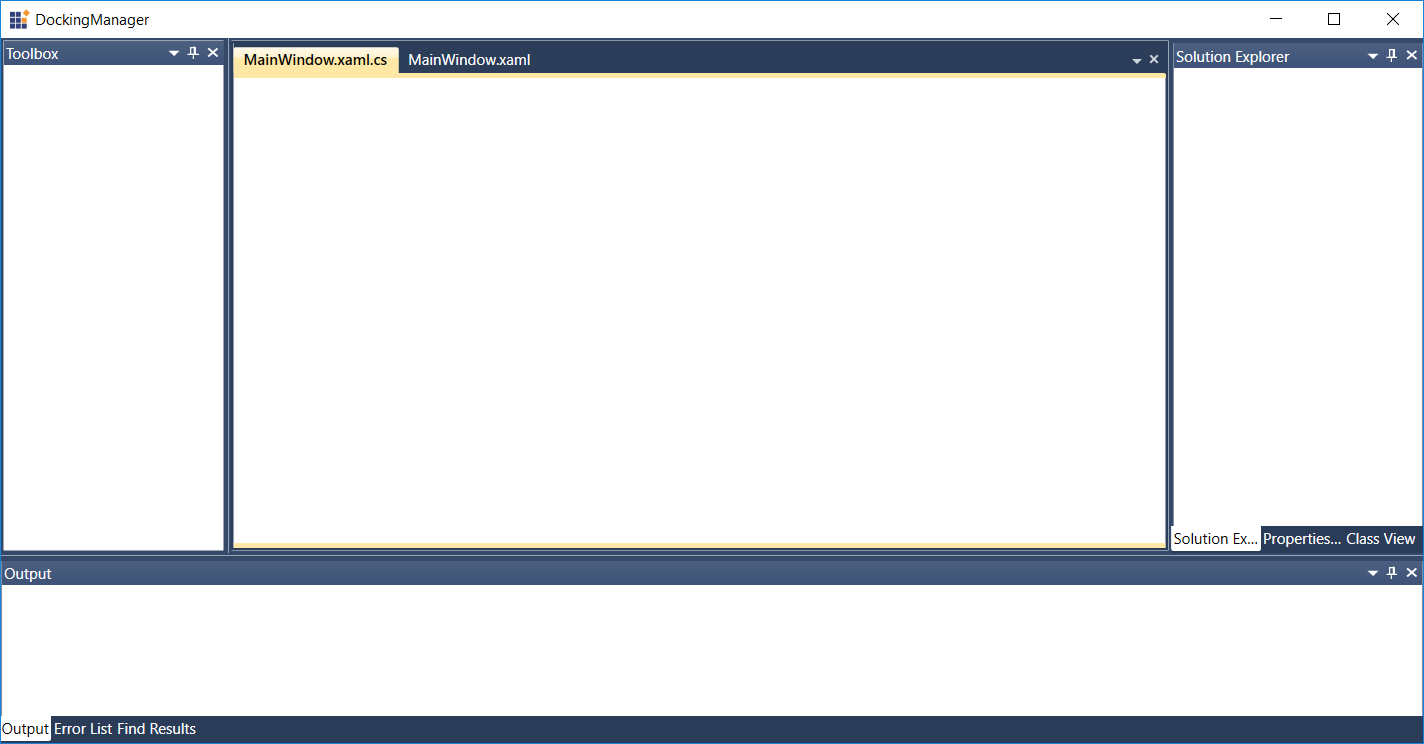
*Visual Studio-Like Docking Windows*
### Tab groups
The docking manager allows you to create a group of tabbed documents similar to Visual Studio. Tab groups split the workspace and allow users to work with two or more open documents. This can be created in horizontal and vertical directions and allow documents to be shuffled between them. **New Horizontal Tab Group** and ** New Vertical Tab Group** options are available in the context menu of every document and will be displayed when users right-click the tab header of a document.
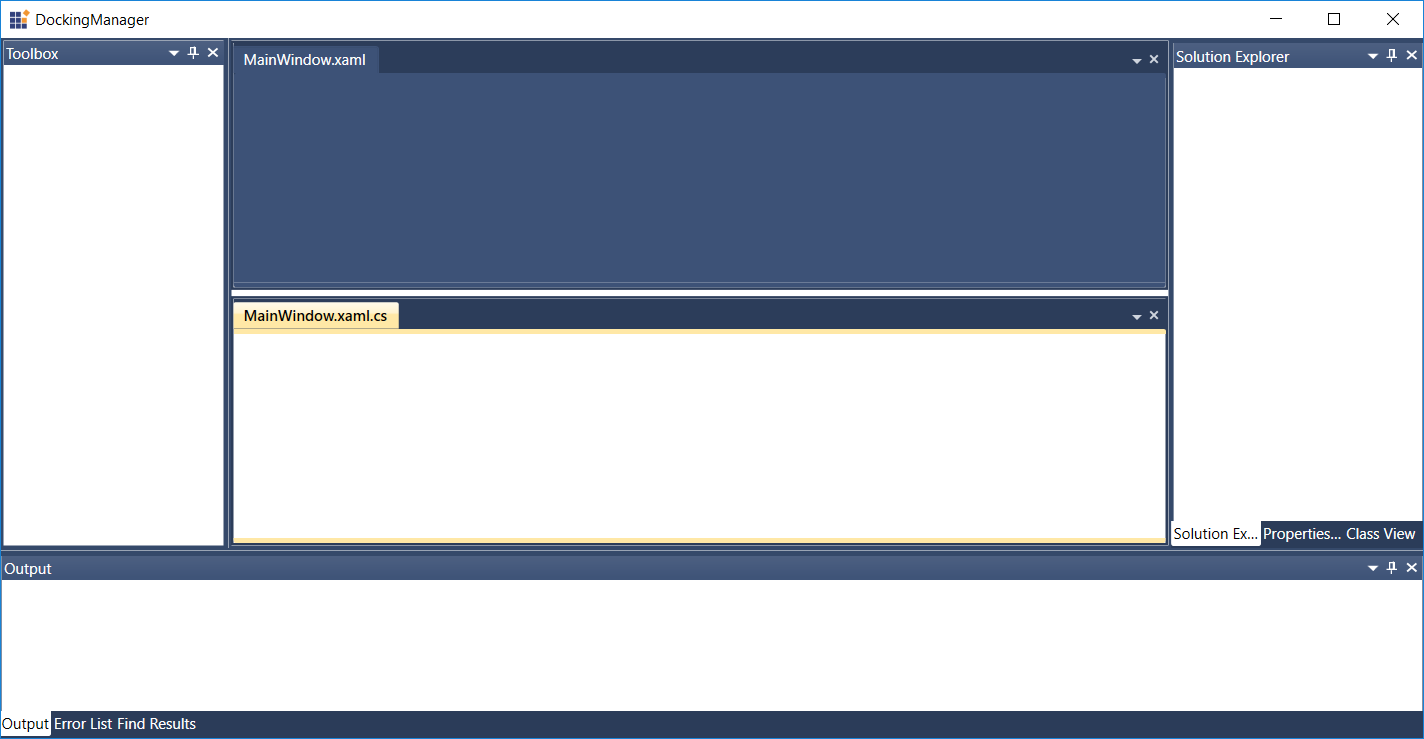
*Document Tab Group*
Create tab groups programmatically by passing the child window as an argument to the **CreateHorizontalTabGroup** or ** CreateVerticalTabGroup** methods.
```
DockingManager.CreateHorizontalTabGroup(MainWindowXAMLView);
DockingManager.CreateVerticalTabGroup(MainWindowXAMLView);
```
## Float Docking or Document Windows
We can drag and float the docking and document windows over any location on the screen. By default drag the docking windows by clicking and dragging the title of the window. But document windows can be dragged by clicking and dragging the tab header of the corresponding document once **IsVS2010DraggingEnabled** is enabled. Alternatively, docking and document windows can float by double-clicking on window captions. To enable this float functionality on double-clicking a document, set the ** EnableDocumentToFloatOnDoubleClick** property of the docking manager as ** True**.
Float windows in the docking manager are pop-ups with size restrictions. To overcome this limitation, you can configure the float window as a WPF window by enabling **UseNativeFloatWindow**.
```
```
The docking manager provides dock hints that indicate a valid drop location when users are dragging the float window. When a window is about to be docked, a dock preview will be displayed to show where the window will be placed.
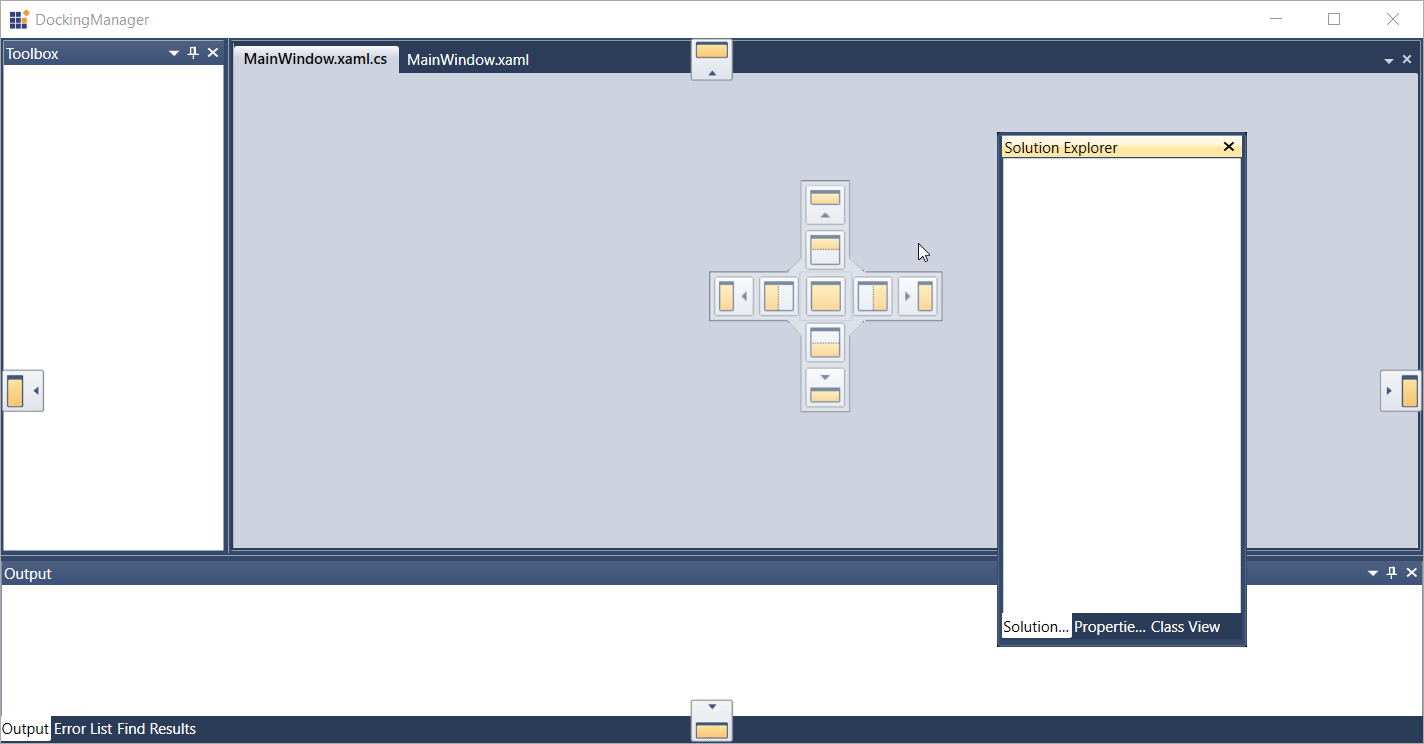
*Floating Window*
Whenever you’re in a situation to create non-floatable windows, you can use the **CanFloat** attached property of the docking manager to restrict the docking and document windows.
```
```
## Close and Pin Dock Windows
If you don’t want any more windows in your application, docking windows can be closed by clicking the **Close** button in their title bar. Close the document windows by selecting their corresponding tab and using the common ** Close** button at the right of the document container. Every document can have a separate ** Close** button in its corresponding tab by setting the ** DocumentCloseButtonType** property as ** Individual**.
```
DockingManager.DocumentCloseButtonType = CloseButtonType.Individual;
```
To restore a closed window to your application, pass the specific child window to **RestoreElement**.
```
DockingManager.RestoreElement(SolutionExplorer);
```
The docking manager also allows users to pin docking windows to the edges of the work area. Pinning docking windows automatically hides them to any side of the screen and their names appear on tabs at the edges of the container. To use the pinned windows again, just mouse over a tab and that window will slide back into view. The **Pin** button in the title bar lets you pin and re-dock the window to the view.
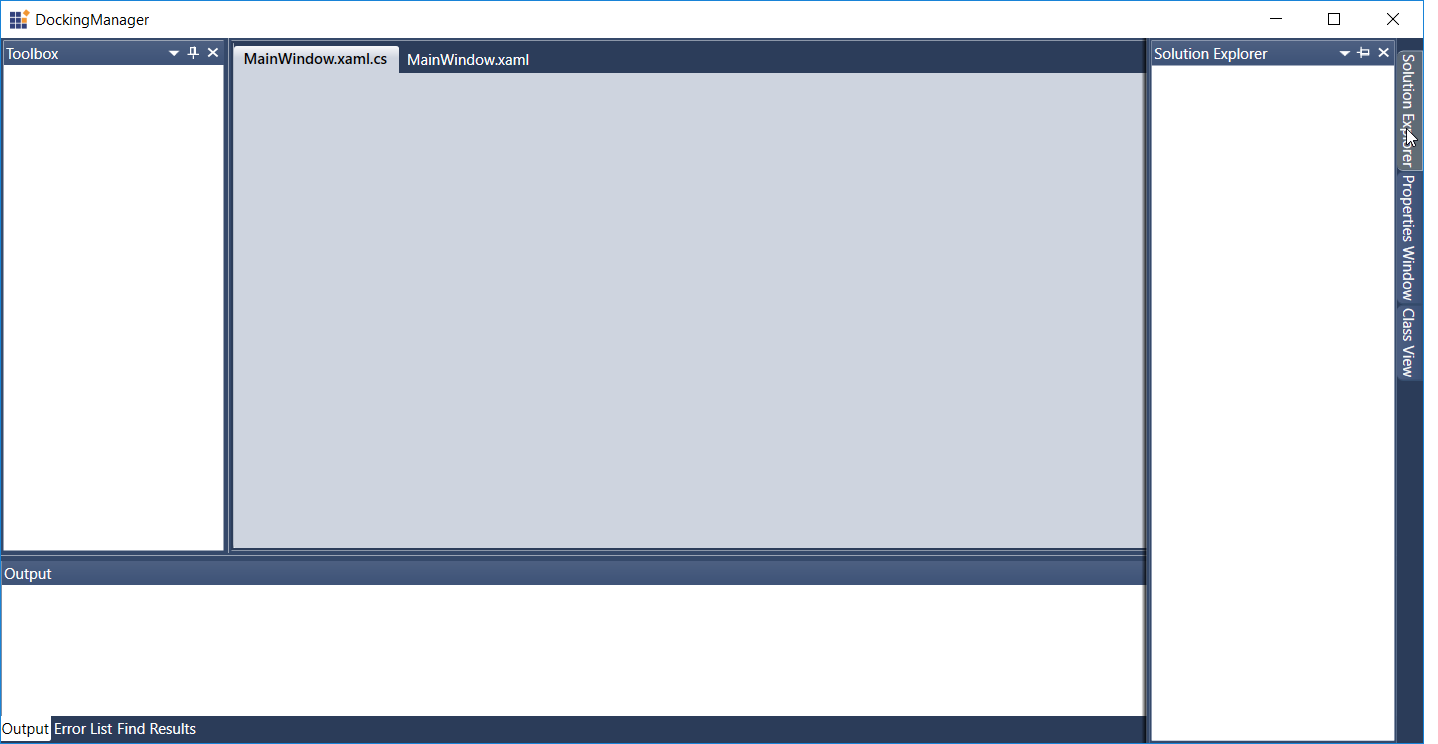
*Auto-hidden Window*
## Layout Persistence
The docking manager allows you to save the docked window arrangements automatically while closing the application by enabling **PersistState**. It also lets users save the current docking layout of the application with ** SaveDockState**. When you want to load the saved layout back into your application, it can be restored by using ** LoadDockState**.
```
DockingManager.PersistState = true;
// To save the current layout of DockingManager
DockingManager.SaveDockState();
// To load the last saved layout of DockingManager
DockingManager.LoadDockState();
```
## Conclusion
Now you can create Visual Studio-style layouts for your applications and customize your window layouts to best fit various development workflows.
In this blog, we covered just the basic features of the docking manager. For more information and details about other advanced topics, please refer to our [documentation](https://help.syncfusion.com/wpf/docking/overview)
, where you will see code samples for features not covered here. Other features you can learn about include handling window state changes, dockability, multiple document interfaces, and much more.
Feel free to share your feedback in the comments below. You can also contact us through our [support forum](https://www.syncfusion.com/forums)
or [Direct-Trac](https://www.syncfusion.com/support/directtrac/)
. We are happy to assist you!
The sample code for the features explained in this blog post can be downloaded from this [GitHub repository](https://github.com/SyncfusionExamples/wpf-visual-studio-docking-windows-demo)
.