---
title: "Build Micro Frontends with single-spa: A Guide"
published_at: "2024-12-12T12:36:38+00:00"
modified_at: "2026-01-14T08:40:18+00:00"
url: "https://www.syncfusion.com/blogs/post/build-micro-frontends-with-single-spa"
excerpt: "Learn how to build and deploy micro frontends using the single-spa framework. This step-by-step guide covers Angular and React integration."
taxonomy_category:
- "Development"
- "JavaScript"
- "Micro Frontends"
- "Web"
taxonomy_post_tag:
- "development"
- "JavaScript"
- "Micro Frontends"
- "productivity"
- "Web"
---
# Build Micro Frontends with single-spa: A Guide
[Thamodi Wickramasinghe](https://www.syncfusion.com/blogs/author/thamodi-wickramasinghe)

**TL;DR:** Using single-spa to build micro frontends makes it easier to split a large app into small, independent pieces so different teams can work on parts without affecting others. This blog shows how to create Angular and React micro frontends, connect them to a root config, and deploy them.
[Micro Frontends](https://micro-frontends.org/)
have become a popular architectural style for scaling frontend apps, particularly when multiple teams work on different parts of a user interface. By breaking down monolithic frontends into smaller, independent modules, teams can deploy, update, and scale parts of an app separately. This article will discuss how to create and connect micro frontends of different frameworks using single-spa.
## Introduction to single-spa
[Single-spa](https://single-spa.js.org/)
is a JavaScript-based framework designed for micro frontend architecture. It allows you to build micro frontends using frameworks like Angular, React, and Vue and serve them as a single app. It maintains a register of connected apps and uses routes to redirect users to different apps.

Using a single-SPA framework has many benefits, such as choosing different languages for different parts of the app, independent development and deployment of micro frontends, and scalability. So, let’s get started with creating a single-spa.
## Creating a single-spa
### Prerequisites
To implement a single-spa, it is important to have**Node.js** and ** npm** installed. To install them, go to the [Node.js website](https://nodejs.org/en)
and download the latest version for your operating system. Run the installer to complete the installation.
Then, verify the node.js and npm installation by executing the following commands in the command prompt.
```
npm - version
node - version
```
### Step 1: Setting up the project
In this example, two simple micro frontends will be created using Angular and React. A root-config will serve the two micro frontends.
#### Create an app
We can create a simple Angular micro frontend app by executing the following command.
```
ng new angular-spa-frontend
```
Once the project has been created, execute the next command to install the single-spa library.
```
ng add single-spa-angular
```
Once the library has been installed properly, a file named **main.single-spa.ts** will be created in the Angular project, which contains all the configurations related to single-spa.
Refer to the configuration code.
```
if (environment.production) {
enableProdMode();
}
const lifecycles = singleSpaAngular({
bootstrapFunction: (singleSpaProps) => {
singleSpaPropsSubject.next(singleSpaProps);
const extraProviders = [
...getSingleSpaExtraProviders(),
{ provide: APP_BASE_HREF, useValue: '/' }
];
return platformBrowserDynamic(extraProviders).bootstrapModule(AppModule);
},
template: '',
Router,
NavigationStart,
NgZone,
});
export const bootstrap = lifecycles.bootstrap;
export const mount = lifecycles.mount;
export const unmount = lifecycles.unmount;
```
It is required to provide an **APP_BASE_HREF** value to work as a single-spa.
Furthermore, upon adding the single-spa library, **package.json** will contain two additional scripts.
```
"scripts": {
"ng": "ng",
"start": "ng serve",
"build": "ng build",
"watch": "ng build --watch --configuration development",
"test": "ng test",
"build:single-spa:angular-spa-frontend": "ng build angular-spa-frontend --prod",
"serve:single-spa:angular-spa-frontend": "ng s --project angular-spa-frontend --disable-host-check --port 4200 --live-reload false"
}
```
The **angular.json** file will be modified using the following configurations.
```
"build": {
"builder": "@angular-builders/custom-webpack:browser",
"options": {
"outputPath": "dist/angular-spa-frontend",
"index": "src/index.html",
"main": "src/main.single-spa.ts",
"polyfills": "src/polyfills.ts",
"tsConfig": "tsconfig.app.json",
"inlineStyleLanguage": "scss",
"assets": [
"src/favicon.ico",
"src/assets"
],
"styles": [
"src/styles.scss"
],
"scripts": [],
"customWebpackConfig": {
"path": "extra-webpack.config.js",
"libraryName": "angular-spa-frontend",
"libraryTarget": "umd"
},
"deployUrl": "http://localhost:4200/"
},
}
```
**“main”: “src/main.ts”** will be replaced with **“main”: “src/main.single-spa.ts”**. A new build configuration will be added as a JavaScript module.
Once the configurations are completed and verified, we can serve the Angular app using the following command.
```
npm run serve:single-spa:angular-spa-frontend
```
Now that we have successfully created the micro frontend app, let’s look at how to implement the **root-config**.
### Root-config
Execute the following command to create the root-config.
```
npx create-single-spa
```
Upon entering this command, a series of configurations will be presented to create the root-config. 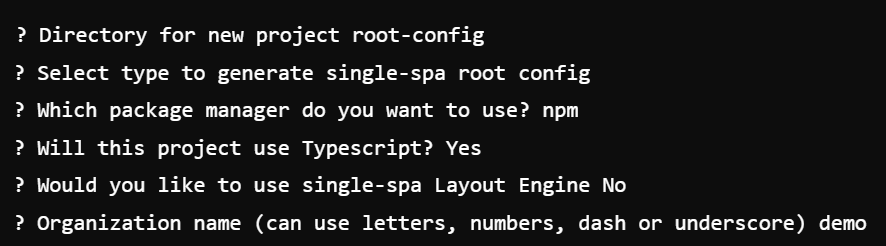
After selecting the previous configurations, the root config will be created to serve multiple frontends.
To connect the created micro frontend to the root-config, we need to modify the **root-config.ts** and ** index.ejs** files.
```
registerApplication({
name: "@org/angular-spa-frontend",
app: () =>
System.import("@org/angular-spa-frontend")
.then((module: LifeCycles<{}>) => ({
bootstrap: module.bootstrap,
mount: module.mount,
unmount: module.unmount,
}))
.catch((error) => {
console.error("Failed to load micro-frontend:", error);
return Promise.reject(error);
}),
activeWhen: ['/'],
});
start({
urlRerouteOnly: true,
});
```
As mentioned in the previous code block, the created micro frontend should be imported in the **root-config.ts** file.
```
name: "@org/angular-spa-frontend",
```
The following scripts should be added to the **index.ejs** file.
```
```
Created micro frontend (**@org/angular-spa-frontend**), along with the URL (** http://localhost:4200/main.js**) in which the micro frontend has been hosted, has to be added in the import map.
Then, execute the following command to run the app.
```
npm run start
```
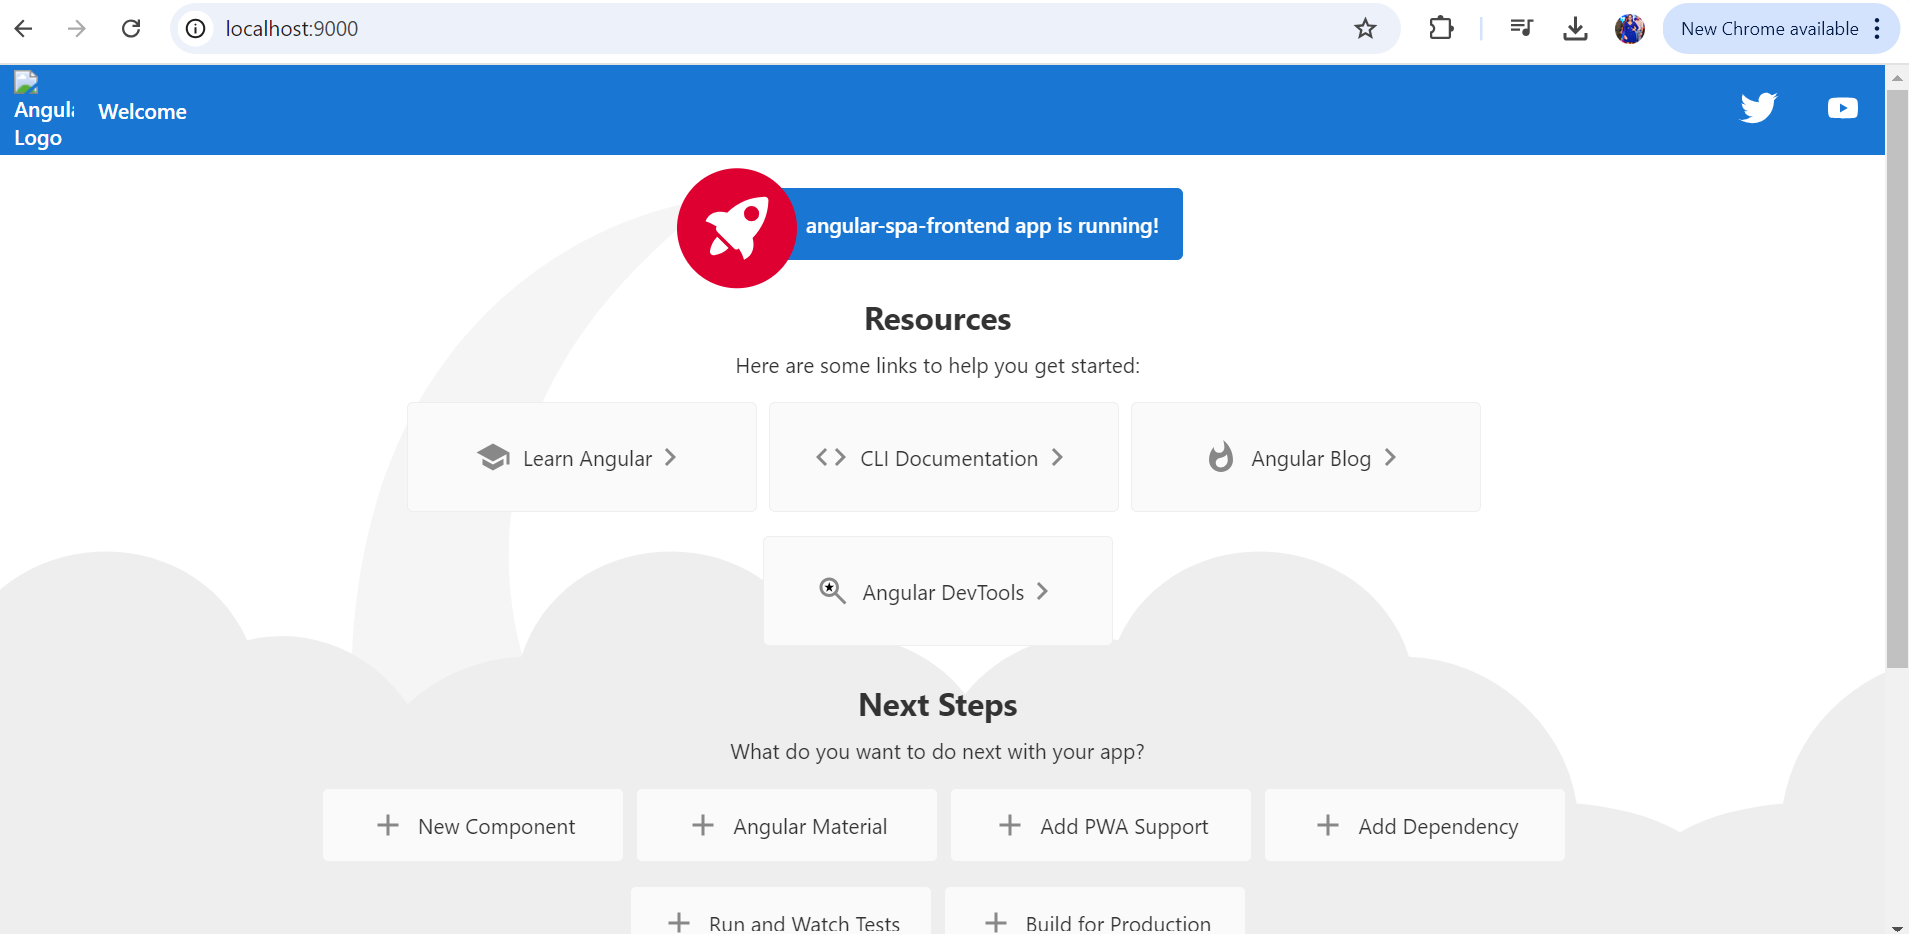
Assuming these steps are done correctly, we should be able to see the final single-spa in the view, similar to the following image.
### Step 2: Deployment in production
When deploying these micro frontends in production, it is recommended that each micro frontend app be deployed as an independent, standalone app. The root configuration will presumably load each app dynamically, depending on the app routes set in the **registerApplication**.
### Step 3: Adding more micro frontends
To add more micro frontends, repeat the previously mentioned steps. Let’s look at how to integrate a React micro frontend into the same root-config.
Create a new React micro frontend using the following command.
```
npx create-single-spa --module-type react
```
Then, navigate inside the created project and install [single-spa-react](https://single-spa.js.org/docs/ecosystem-react/)
.
```
npm install single-spa-react
```
Modify the entry file to export lifecycle methods to make the app compatible with single-spa.
```
import React from "react";
import ReactDOM from "react-dom";
import singleSpaReact from "single-spa-react";
import App from "./App";
const lifecycles = singleSpaReact({
React,
ReactDOM,
rootComponent: App,
errorBoundary(err, info, props) {
return Error loading React micro-frontend
;
},
});
export const { bootstrap, mount, unmount } = lifecycles;
```
Once the configurations are completed, we can serve the React micro frontend using the following command.
```
npm start
```
To integrate the created micro frontend with the existing **root-config**, implement the following modifications to the files in root-config.
```
import { registerApplication, start } from "single-spa";
registerApplication({
name: "@org/angular-spa-frontend",
app: () =>
System.import("@org/angular-spa-frontend")
.then((module) => ({
bootstrap: module.bootstrap,
mount: module.mount,
unmount: module.unmount,
}))
.catch((error) => {
console.error("Failed to load Angular micro-frontend:", error);
return Promise.reject(error);
}),
activeWhen: ["/"],
});
registerApplication({
name: "@org/react-spa-frontend",
app: () =>
System.import("@org/react-spa-frontend")
.then((module) => ({
bootstrap: module.bootstrap,
mount: module.mount,
unmount: module.unmount,
}))
.catch((error) => {
console.error("Failed to load React micro-frontend:", error);
return Promise.reject(error);
}),
activeWhen: ["/react"],
});
start({
urlRerouteOnly: true,
});
```
You also need to update the **index.ejs** file with the main bundle path of the React app.
```
```
## GitHub reference
Check out the complete code example of this single-spa application in this [GitHub demo](https://github.com/Thamodi/single-spa-demo)
.
## Conclusion
Using single-spa to build micro frontends makes it easier to split a large app into small, independent pieces. This way, different teams can work on their parts without affecting others and use the frameworks they prefer, like Angular or React. Following the steps in this guide, you can set up a single-spa project, connect multiple micro frontends, and give users a smooth experience. Single-spa makes it simple to grow your app over time and add new features as needed.
## Related Blogs
[Master Asynchronous JavaScript with RxJS](https://www.syncfusion.com/blogs/post/master-asynchronous-javascript-with-rxjs)
[Axios and Fetch API? Choosing the Right HTTP Client](https://www.syncfusion.com/blogs/post/axios-vs-fetch-choose-right-http-client)
[TypeScript Utility Types: A Complete Guide](https://www.syncfusion.com/blogs/post/master-typescript-utility-types)
[Secure JWT Storage: Best Practices](https://www.syncfusion.com/blogs/post/secure-jwt-storage-best-practices)