---
title: "From Scratch to Scale: Bootstrapping Your React App Without CRA"
published_at: "2025-02-20T11:02:07+00:00"
modified_at: "2025-11-25T11:13:57+00:00"
url: "https://www.syncfusion.com/blogs/post/bootstrap-a-react-app-without-cra"
excerpt: "Let's set up a React app without using the create-react-app tool. Customize configurations and optimize performance from a tailored development experience."
taxonomy_category:
- "Development"
- "React"
- "Tips and Tricks"
- "Web"
taxonomy_post_tag:
- "Bootstrap"
- "development"
- "productivity"
- "React"
- "Web"
---
# From Scratch to Scale: Bootstrapping Your React App Without CRA
[Prashant Yadav](https://www.syncfusion.com/blogs/author/prashant-yadav)

**TL;DR:** Learn to bootstrap a React app for custom configurations, better performance, and a deeper understanding of React’s inner workings.
Bootstrapping a [React](https://react.dev/learn)
app can be rewarding, whether you do it for learning purposes, custom configurations, or optimizing the app according to your use case.
The easiest way to get started with React programming is by using create-react-app (CRA), a convenient tool that provides the initial boilerplate for the developer. However, this tool was [recently deprecated](https://react.dev/blog/2025/02/14/sunsetting-create-react-app)
, and there are scenarios where you want more control over the app or project setup. In the long run, it’s better to know how to set up your React projects from scratch.
## Why avoid CRA?
While CRA provides a convenient starting point, it’s not suitable for every use case. Here are some reasons to avoid it:
- **CRA has been deprecated**: CRA was [recently deprecated](https://react.dev/blog/2025/02/14/sunsetting-create-react-app) by the React team. They recommend using a framework or build tool in its place.
- **No custom configurations**: CRA abstracts away most of the underlying configurations of Webpack and Babel, which restricts developers who want granular control over their projects. This prevents developers from adding custom rules, implementing specific optimizations, and integrating third-party tools that are not natively supported by CRA.
- **Unable to use specific build tools**: Another reason to avoid CRA is if you want to add support for alternative libraries or tools, like a different state management library. Any number of libraries can meet your requirements and serve as quality, lightweight alternatives to more popular ones that are natively configured by CRA. Avoiding CRA will provide a more tailored developer experience while still meeting your project requirements.
- **Difficult performance optimization**: A custom setup lets you configure your app with the minimum requirements, reducing unnecessary dependencies and scripts. By integrating only required items, you can fine-tune your build to meet the specific demands of your project. Doing this also minimizes the bundle sizes, leading to faster load times and better runtime performance.
- **Inadequate learning experience**: Setting up your React project from scratch gives you a comprehensive understanding of the inner workings of the app. Getting exposure to key tools like Webpack and Babel and seeing how dependencies interact helps you in debugging, customization, and performance optimization in larger projects.
If you want to check the configuration of an app created with CRA, you can do so by running the **eject** command, which unbundles the configuration files and scripts of the project and makes them visible to you.
```
npx create-react-app my-app
cd my-app
npm run eject
```
After running the **eject** command, you will see two new folders, ** config** and ** scripts**, in your app’s directory that will have all the configurations of your app.
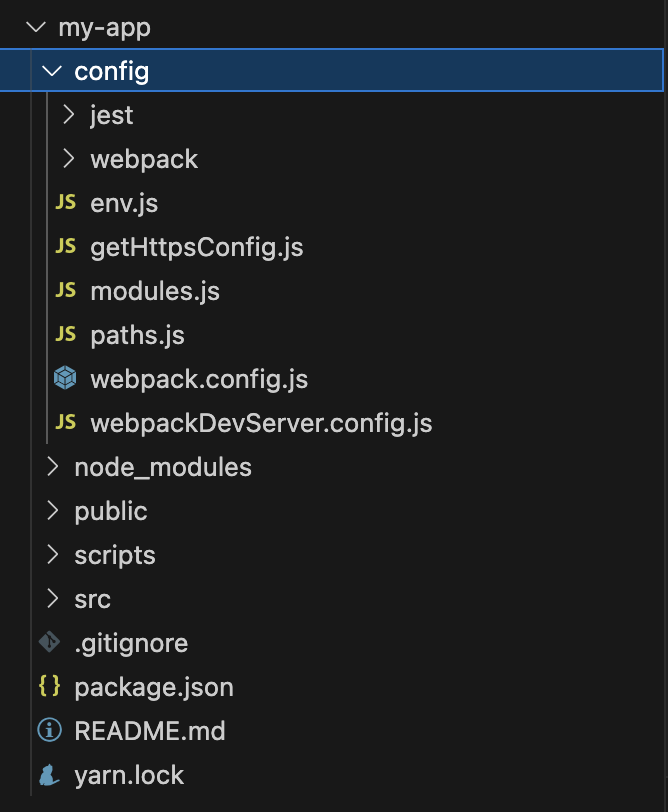To tweak these configurations, you will need a good understanding of their significant parts, like Babel, Webpack, and Webpack loaders. This deeper understanding is what we are going to acquire by configuring our own React app from scratch.
## Setting up a React app from scratch
### Prerequisites
Before beginning, make sure you have the following installed on your system:
- **Node.js**: Download and install the latest version of [Node.js](https://nodejs.org/en) .
- **npm** or ** Yarn**: Both are Node.js package managers that help manage dependencies in your project. NPM is the most popular, but either will work.
- **Code editor**: Any code editor with an integrated terminal, like [Visual Studio Code](https://code.visualstudio.com/) .
Next, let’s set up the React app.
### Step 1: Initializing the project
Create a new directory for the project and initialize it as an npm package by running the following commands:
```
mkdir my-react-app
cd my-react-app
npm init -y
```
Adding the **-y** flag to the ** npm init** command skips prompts like description, author, and others.
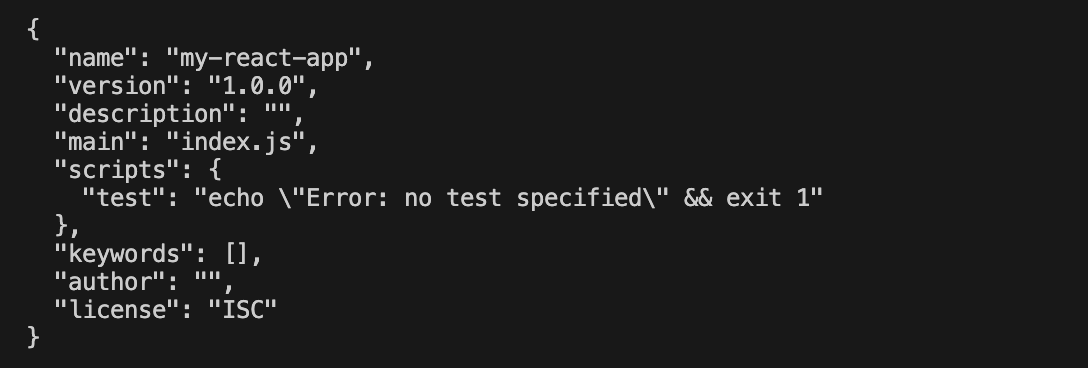
The **npm init** command creates a ** package.json** file that will list all your project dependencies, development-only dependencies (also known as dev dependencies), scripts, versions, and metadata like the project name and description. It is a vital component for managing and automating things in the development workflow. Later, you will use it to define a list of commands that will help you in building, running, and testing your app.
### Step 2: Set up Webpack and Babel
#### Install Webpack
Webpack is the most popular module bundler for JavaScript apps. It simplifies the process of managing and combining JavaScript files, stylesheets, images, fonts, and other assets for browsers. In a project built with a front-end library like React, you can have inline SVG files, font files, CSS, or CSS preprocessors like Sass or Less that need to be bundled so that they can be served.
Webpack builds and analyzes a dependency graph for the app to ensure all modules are properly bundled and optimized for production. When multiple modules share the same dependency, Webpack includes the dependency only once to avoid redundant data.
Additionally, Webpack supports features like code splitting, hot module replacement, and tree shaking, making it a versatile tool.
Use the following command to install Webpack, the Webpack CLI, and the Webpack development server as dev dependencies. They are specified as dev dependencies because they aren’t required in the production build.
```
npm install --save-dev webpack webpack-cli webpack-dev-server
```
#### Install Babel
Babel is a code transpiler that transforms modern JavaScript into browser-compatible code. For example, JSX is a React-specific file extension that has to be transpiled to normal JavaScript code so that it can be executed in the browser. Also, older browser versions may not support modern JavaScript features, so Babel also adds polyfills for the target version of the language for all browsers.
It enables developers to use modern JavaScript features and write code with the latest features without worrying about browser support. Additionally, Babel allows for customization through plugins and presets.
Run the following command to install Babel:
```
npm install --save-dev @babel/core @babel/preset-env @babel/preset-react babel-loader
```
#### Install the HTML Webpack plugin
Another important component that you need to render the app is **html-webpack-plugin**, which will include bundled scripts in the **** tag of the ** index.html** file.
Run the following command:
```
npm install --save-dev html-webpack-plugin
```
### Step 3: Configure Webpack and Babel
#### Configure Webpack
In your root directory, create a file named **webpack.config.js**, which will hold all the Webpack configurations for the app.
These configurations will define how the app’s files will be bundled, what the entry point to the app will be, how the module dependencies will be managed, the different loaders for the different file types (.js, .jsx, .css, .html, .svg, etc.), and sets up the development server with live reloading during development.
Add the following configurations in the **webpack.config.js** file.
```
const path = require("path");
const HtmlWebpackPlugin = require("html-webpack-plugin");
module.exports = {
entry: "./src/index.js",
output: {
path: path.resolve(__dirname, "dist"),
filename: "bundle.js",
},
module: {
rules: [
{
test: /\.jsx?$/,
exclude: /node_modules/,
use: {
loader: "babel-loader",
},
},
{
test: /\.css$/,
use: ["style-loader", "css-loader"],
},
],
},
plugins: [
new HtmlWebpackPlugin({
template: "./public/index.html",
filename: "./index.html",
}),
],
devServer: {
static: "./dist",
},
resolve: {
extensions: [".js", ".jsx"],
},
mode: "development",
};
```
These configurations specify:
- **The app entry point**(src/index.js): The main file of your React app, where core libraries like ** React** and ** ReactDOM** are imported, the React root is initialized, and the app is rendered into the DOM. This file connects the React code to the HTML file that is loaded in the browser specified in ** output/index.html**.
- **Output**: The directory that holds all the production builds and assets that act as the entry point for the browser. This directory also holds the ** index.html** file that will be loaded in the browser, which will then load all the JavaScript files, style sheets, and other static assets. In the current configuration, the production build will be created in the ** dist** folder.
- **Loaders**: The Webpack modules responsible for processing and transforming files into a format that is understandable by the browser. For example, JSX files will be transformed to JavaScript, SCSS files will be transformed to CSS and injected directly into the DOM, etc. Loaders allow Webpack to bundle various file types efficiently.
- **Plugins**: Plugins that help perform the final compile-time processing before the output is generated. This project uses ** html-webpack-plugin** to inject the bundled JavaScript and other static assets into the ** index.html** file.
- **Dev server**: The development server that helps serve the app locally along with the live reloading features that instantly reflect changes in the files without manually refreshing the page. Using this lets you expedite development and focus on the app logic. It also provides other features like proxy routes to different URLs (REST API or back end) and error overlays.
#### Configure Babel
Create a file named **.babelrc** in your root directory and add the following configuration to it:
```
{
"presets": [
"@babel/preset-env",
"@babel/preset-react"
]
}
```
This specifies which presets or plugins should be used to transform your code. The current configuration will enable transpilation of modern JavaScript (ES6+) and JSX syntax into browser-compatible JavaScript.
### Step 4: Set up the project structure
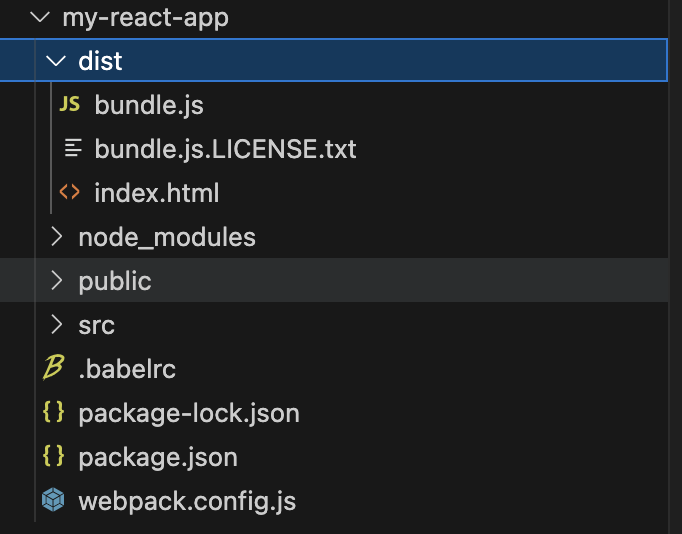
Your app’s root directory holds the configuration files **webpack.config.js**, ** package.json**, and **.babelrc**, along with the ** public** and ** src** directories.
The **public** folder contains the ** index.html** file, while the ** src** folder contains the ** App.js** and ** index.js** files. This structure provides a clear separation of concerns, making it easier to navigate through the project and scale it.
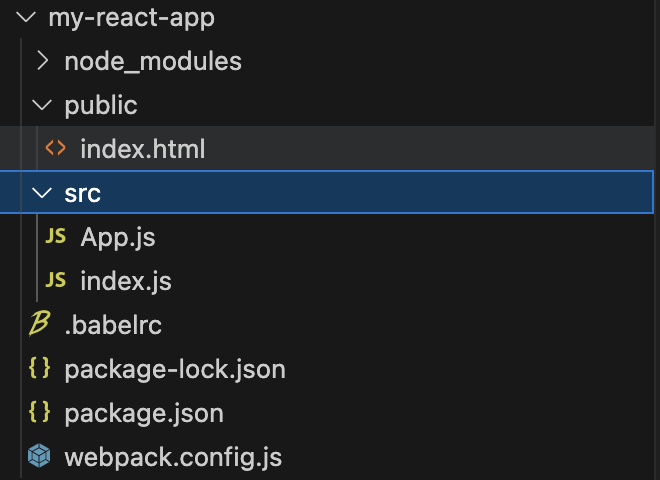Now that the project structure is ready, let’s configure React.
### Step 5: Configure React
Add the following React dependency to your project by running the following command:
```
npm install react react-dom
```
Add the following code in the **src/index.jsx** file. This will render React code in the HTML DOM.
```
import React from "react";
import ReactDOM from "react-dom/client";
import App from "./App";
const root = ReactDOM.createRoot(document.getElementById("root"));
root.render();
```
Notice that the **ReactDOM.createRoot()** method takes the ID of the DOM element in which it will inject the React code.
Also, it has loaded the App component from the **src/app.jsx** file that will hold the React code, as shown in the following code.
```
import React from "react";
const App = () => {
return (
Hello, Prashant!
);
};
export default App;
```
Finally, fill the **public/index.html** file with the following:
```
My React App
```
### Step 6: Add scripts to the package.json file
Now that the app configuration and setup are done, you just have to start the app. Update the scripts section in the **package.json** to the following:
```
"scripts": {
"start": "webpack serve",
"build": "webpack --mode production"
}
```
These scripts define a set of shortcuts to run the app in development and create the production build. Invoking these scripts internally invokes Webpack commands. These scripts do the following:
- **Start**: This will run the Webpack locally in dev mode, serving the files on your local browser.
- **Build**: This will create a production build of your app that you then host through a static file server.
### Step 7: Run the app
Run the command **npm start** to run your app locally. Your app will run on port 8080 locally; if this port is occupied, then it will run on another port.
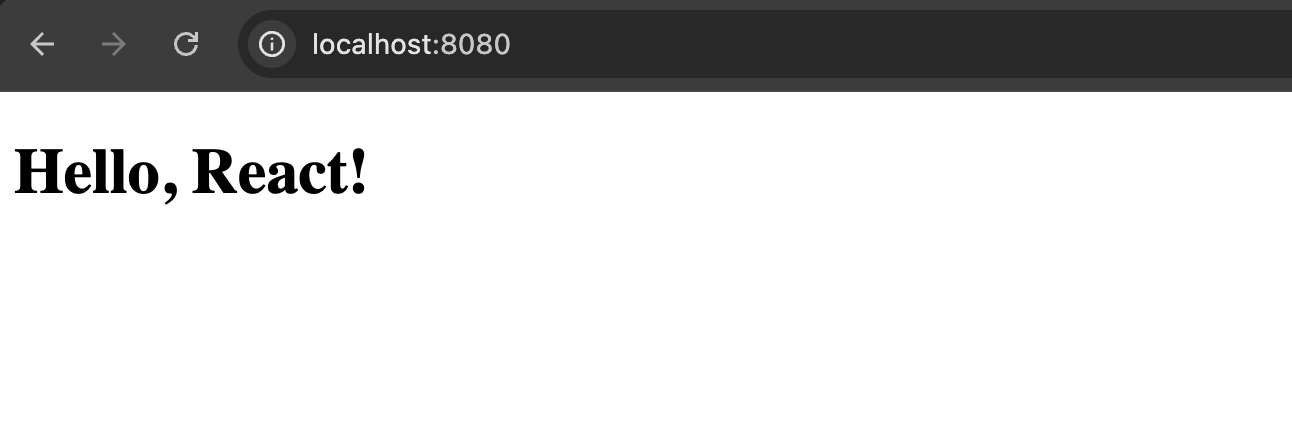You can also create a production build of your app to see the bundled file in the **dist** folder.
## 
## Conclusion
Thanks for reading! Setting up a React app from scratch gives you complete control over the project’s configuration. This may feel a little overwhelming initially, but it serves as a great learning experience and allows for greater flexibility and customization. You can experiment with different tools and play with lightweight alternatives for boosted performance. The possibilities are endless with your configuration.
Syncfusion [React UI components](https://www.syncfusion.com/react-components)
library is the only suite that you will ever need to build an app since it contains over 90 high-performance, lightweight, modular, and responsive UI components in a single package.
If you’re an existing customer, you can download the latest version of Essential Studio® from the [License and Downloads](https://www.syncfusion.com/account/downloads)
page. For those new to Syncfusion, try our 30-day [free trial](https://www.syncfusion.com/downloads)
to explore all our features.
If you have questions, contact us through our [support forum](https://www.syncfusion.com/forums)
, [support portal](https://support.syncfusion.com/)
, or [feedback portal](https://www.syncfusion.com/feedback)
. As always, we are happy to assist you!
## Related Blogs
[React UI Kit: Speed Up Development With Customizable UI Blocks](https://www.syncfusion.com/blogs/post/syncfusion-essential-ui-kit-for-react)
[Build AI-Powered Text-to-Flowchart Converter Using OpenAI and React Diagram Library](https://www.syncfusion.com/blogs/post/react-text-to-flowchart-converter)
[Build Interactive UML Class Diagrams in React](https://www.syncfusion.com/blogs/post/create-uml-class-diagrams-in-react)
[Webpack vs Vite: Choosing the Right Bundler for Modern Frontend Development](https://www.syncfusion.com/blogs/post/webpack-vs-vite-bundler-comparison)