
This post is part of our ongoing How-to series about using the Syncfusion Dashboard Platform. In this entry, we will demonstrate the unique features of multi-tabbed dashboards. To watch a full video on this topic, visit our YouTube page.
Before we dive into multi-tabbed dashboards, it’s important to know a few things about the Dashboards container on the upper-right side of the Dashboard Designer, highlighted in the following figure.
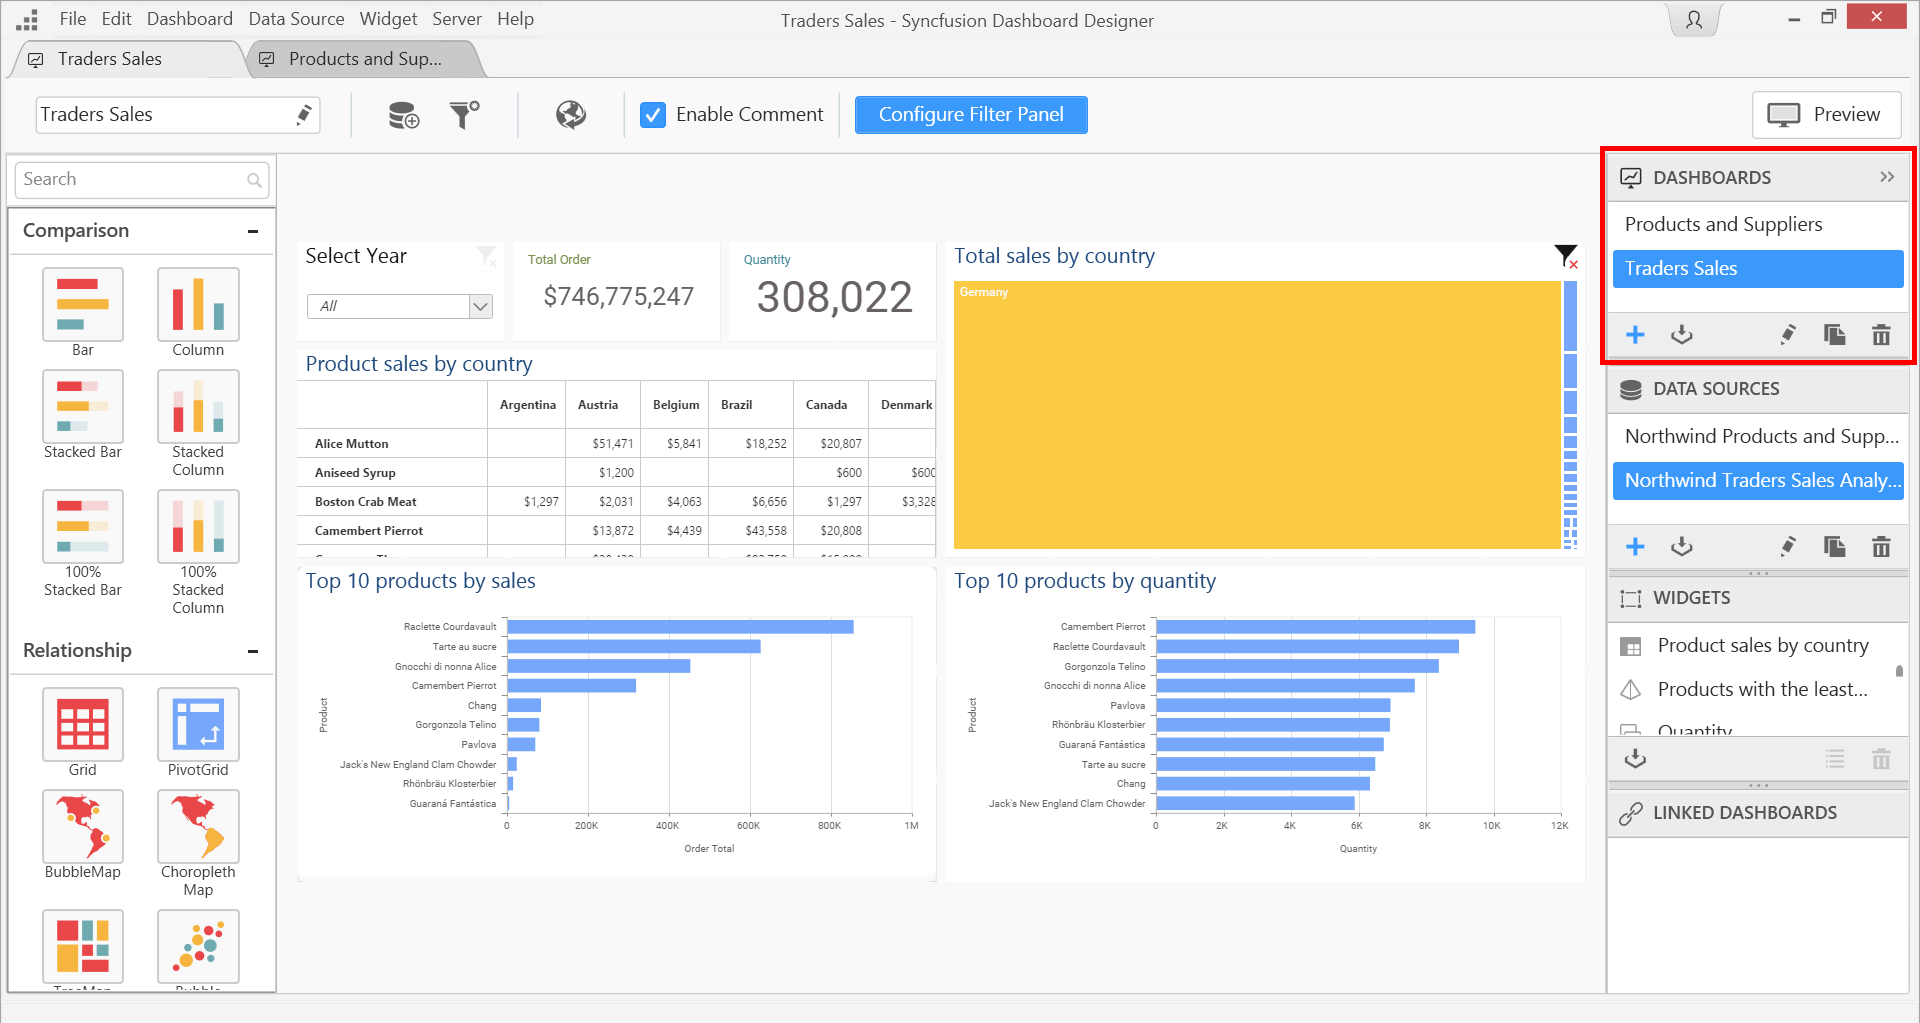
Dashboards Container
This container lists all the dashboards that are being used in the current dashboard design. When more than one dashboard is listed and a save is triggered, all the dashboards will be saved as a single multi-tabbed dashboard. Individual dashboards can be saved by using the export option. More dashboards can be added by creating a new one, importing an existing one from your dashboard server, or importing one from the list of recently used dashboards. Dashboards in the list can also be duplicated or deleted.
To play around with the features of a multi-tabbed dashboard, first import two existing dashboards into the Dashboard Designer. All the data sources used in the dashboards will be listed in the Data Sources container below the Dashboards container, and all the widgets used in the dashboards will be listed in the Widgets container listed below that.
Now let’s look at one of the unique features of a multi-tabbed dashboard: shared widgets. In one of your open dashboards, choose a widget that you want to share with the other dashboard. For example, let’s say it’s a card widget that displays a total sales figure. Navigate to your other open dashboard tab, and make space in the dashboard for the card widget to go.
Making Space for the Shared Widget
In the Widgets container, locate the Total Sales widget that you want to share. Click and drag the widget onto the designer canvas where you made space. The widget will appear in this second dashboard the same as it did in the first.
Placing the Shared Widget
One thing to note here is that this is a single instance of the widget, meaning that any property changes made to the widget will be reflected in every place this widget is shared.
Let’s check out how the dashboard appears in the dashboard viewer. Click the Preview button in the upper-right corner of the Designer, or press F8. The dashboard viewer will launch in your browser, and the tabs for navigating between your dashboards will be displayed at the top of the viewing area.
If you are using the latest version of most popular browsers, you can test the dashboards in a responsive mobile view, where the Dashboard Viewer will perform as if it is deployed on a mobile device. Switching between dashboard tabs in the mobile view is done through the hamburger menu in the upper-left corner of the view.
Selecting Tabs in the Mobile View
Another unique feature of multi-tabbed dashboards is dashboard linking, which allows us to create links to a widget and target dashboards within the same multi-tabbed report. Let’s say we have a grid widget that shows the top products by orders, and we want to add a link to this dashboard so that whenever we click on a product name, it opens the other dashboard and shows the details specific to that particular product.
Select the grid widget and click the Act as Master Widget text box in the top of the Designer to enable filtering. Let’s go ahead and add a link to this widget. In the Properties tab for our grid widget, scroll to the Link section and select the Enable Linking check box. Since we are going to make an internal link, select Internal in the Link To options. All the other dashboards that are available in our multi-tabbed dashboard will be listed in the Tab drop-down. Select the dashboard tab we want to link to.
Setting the Master Widget and Enabling Linking
Next, click the Set Parameters button. In the window that appears, select the appropriate target dashboard widget, source widget, and source column. Click OK. Back in our dashboard, the product names in the grid widget will appear as hyperlinks. When a product name is clicked, it will lead to the other dashboard tab and display the details related to that product.
With the linking properly set up, we can click Preview or press F8 to preview our dashboards in the Dashboard Viewer and try out our new internal dashboard links.
Using an Internal Dashboard Link
Since we’ve got internal dashboard links under our belt, let’s try out linking to external dashboards that are already published in a dashboard server. First we must retrieve the link for the published dashboard we want to link to by using the Get Link option available in the context menu for any dashboard listed in the server. Copy the link.
Getting the Link to a Published Dashboard
Back in the Dashboard Designer, we’re going to follow a similar procedure to the one we used for internal linking. This time, we need to select Dashboard in the Link To options. Then, we can paste the link we retrieved into the Dashboard field and select a target tab from the Tab drop-down. Click Set Parameters and choose the appropriate target and source information.
Finally, we can test this external link in the Dashboard Viewer by clicking the Preview button or pressing F8. When we click the new link in our dashboard, a new tab will open in our browser, and the target tab we specified will be displayed.
Using an External Dashboard Link
For more in-depth information about the Dashboard Platform features, see our documentation. If you aren’t a user of Syncfusion’s Dashboard Platform yet, jump right in with a free, 30-day trial. Happy dashboarding!
If you liked this post, we think you’ll love these free e-books:
BI Solutions Using SSAS Tabular Model Succinctly
MongoDB 3 Succinctly
Hadoop Succinctly
Power BI Succinctly
R Programming Succinctly


